Deploying a Multi-tiered application on Multi-cloud
Time to run through this this Tutorial Guide: ~30-45 minutes. Pre-requisite: at least 2 k8s clusters in one or more public clouds.
Deploying multi-tiered applications on multi-cloud can be challenging due to several reasons, including the following:
- Complexity: Multi-tiered applications consist of several layers of components such as databases, application servers, web servers, and load balancers, which all need to be integrated and configured correctly. This complexity is compounded when deploying across multiple clouds, each with its unique set of tools and services.
- Network and Security: In a multi-cloud environment, the application components may be distributed across different cloud providers, which makes it difficult to manage the network and security of the entire system. Ensuring that the communication between components is secure and that access controls are appropriately configured can be a significant challenge.
- Vendor Lock-In: Each cloud provider has its set of services and tools, making it challenging to migrate to a different provider if necessary. Additionally, the different providers' APIs may not be compatible, making it difficult to manage the application components seamlessly.
- Data Consistency: Multi-tiered applications often require a shared data store, which can be challenging to maintain when distributed across multiple clouds. Ensuring data consistency and synchronization is critical to ensure the application's reliability and performance.
Ori Global Cloud, addresses these challenges and simplifies the job of deploying Multi-tiered applications across multiple K8s clusters on Multi-cloud.
In this tutorial, we are going to show you how deploying Applications in Multi-cloud can be done in minutes with OGC, and how simple it is to do it.
The Demo Application Service
Our demonstration multi-tiered application service is composed of 2 different components. The Data-tier is composed of a mysql database. The Presentation and Logic tiers are implemented on a node.js server component. I am using the good work found on this github repository: https://github.com/fazt/nodejs-mysql-links and images available on docker-hub to make it simple to re-enact this demo on your own. The demo enables Links to be created and stored in the Database from multiple different Web Application Servers.
Part 1 - Configuring the Database Application
Step 1 - Preparing your Project Clusters
By now you will have signed up to Ori. If you do not have a Project yet, or you wish to use a new one, then just go ahead and create one. You now need to onboard some clusters to your Organisation. This is covered in this tutorial here. For this demo, I have 3 clusters running on 3 different clouds, which I have previously before. You can also enact this demo with just 2 different clusters on any cloud you would like.
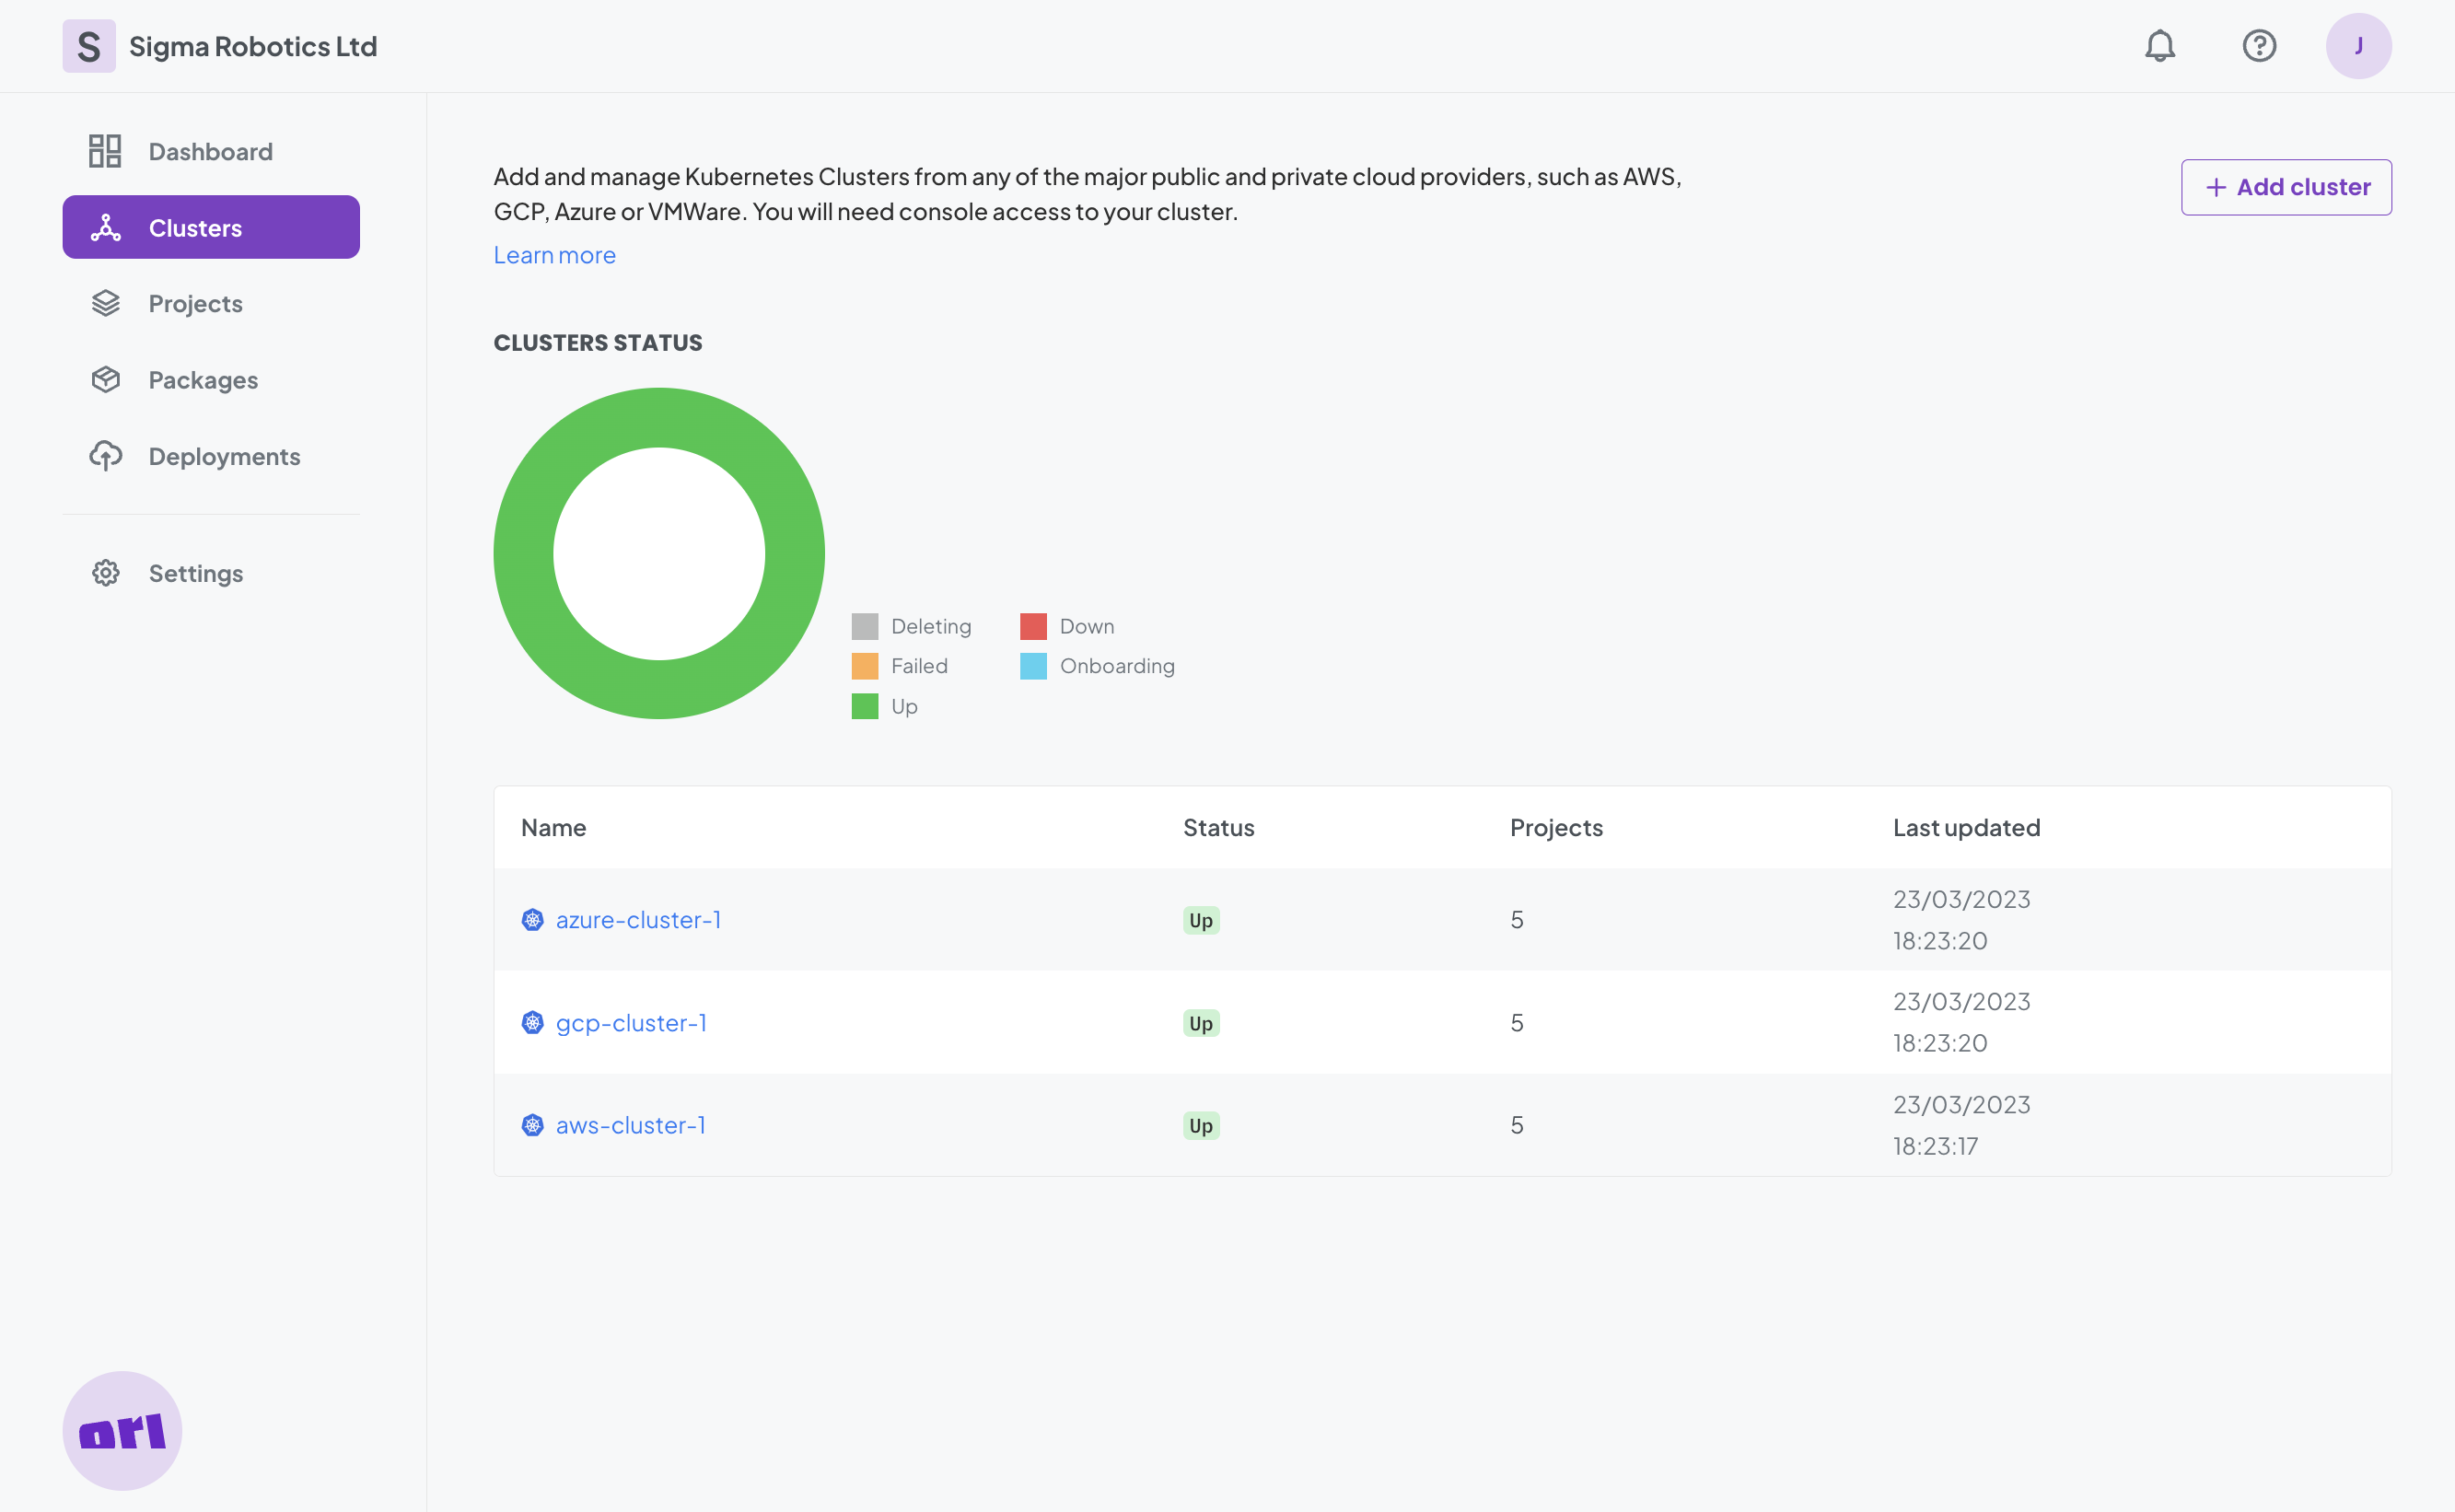
Make sure your Clusters are assigned to your project. See how to do that here.
Step 2 - Defining Your Secrets For Later Use
Now we navigate to our Project. We need to add some Secrets for later use.
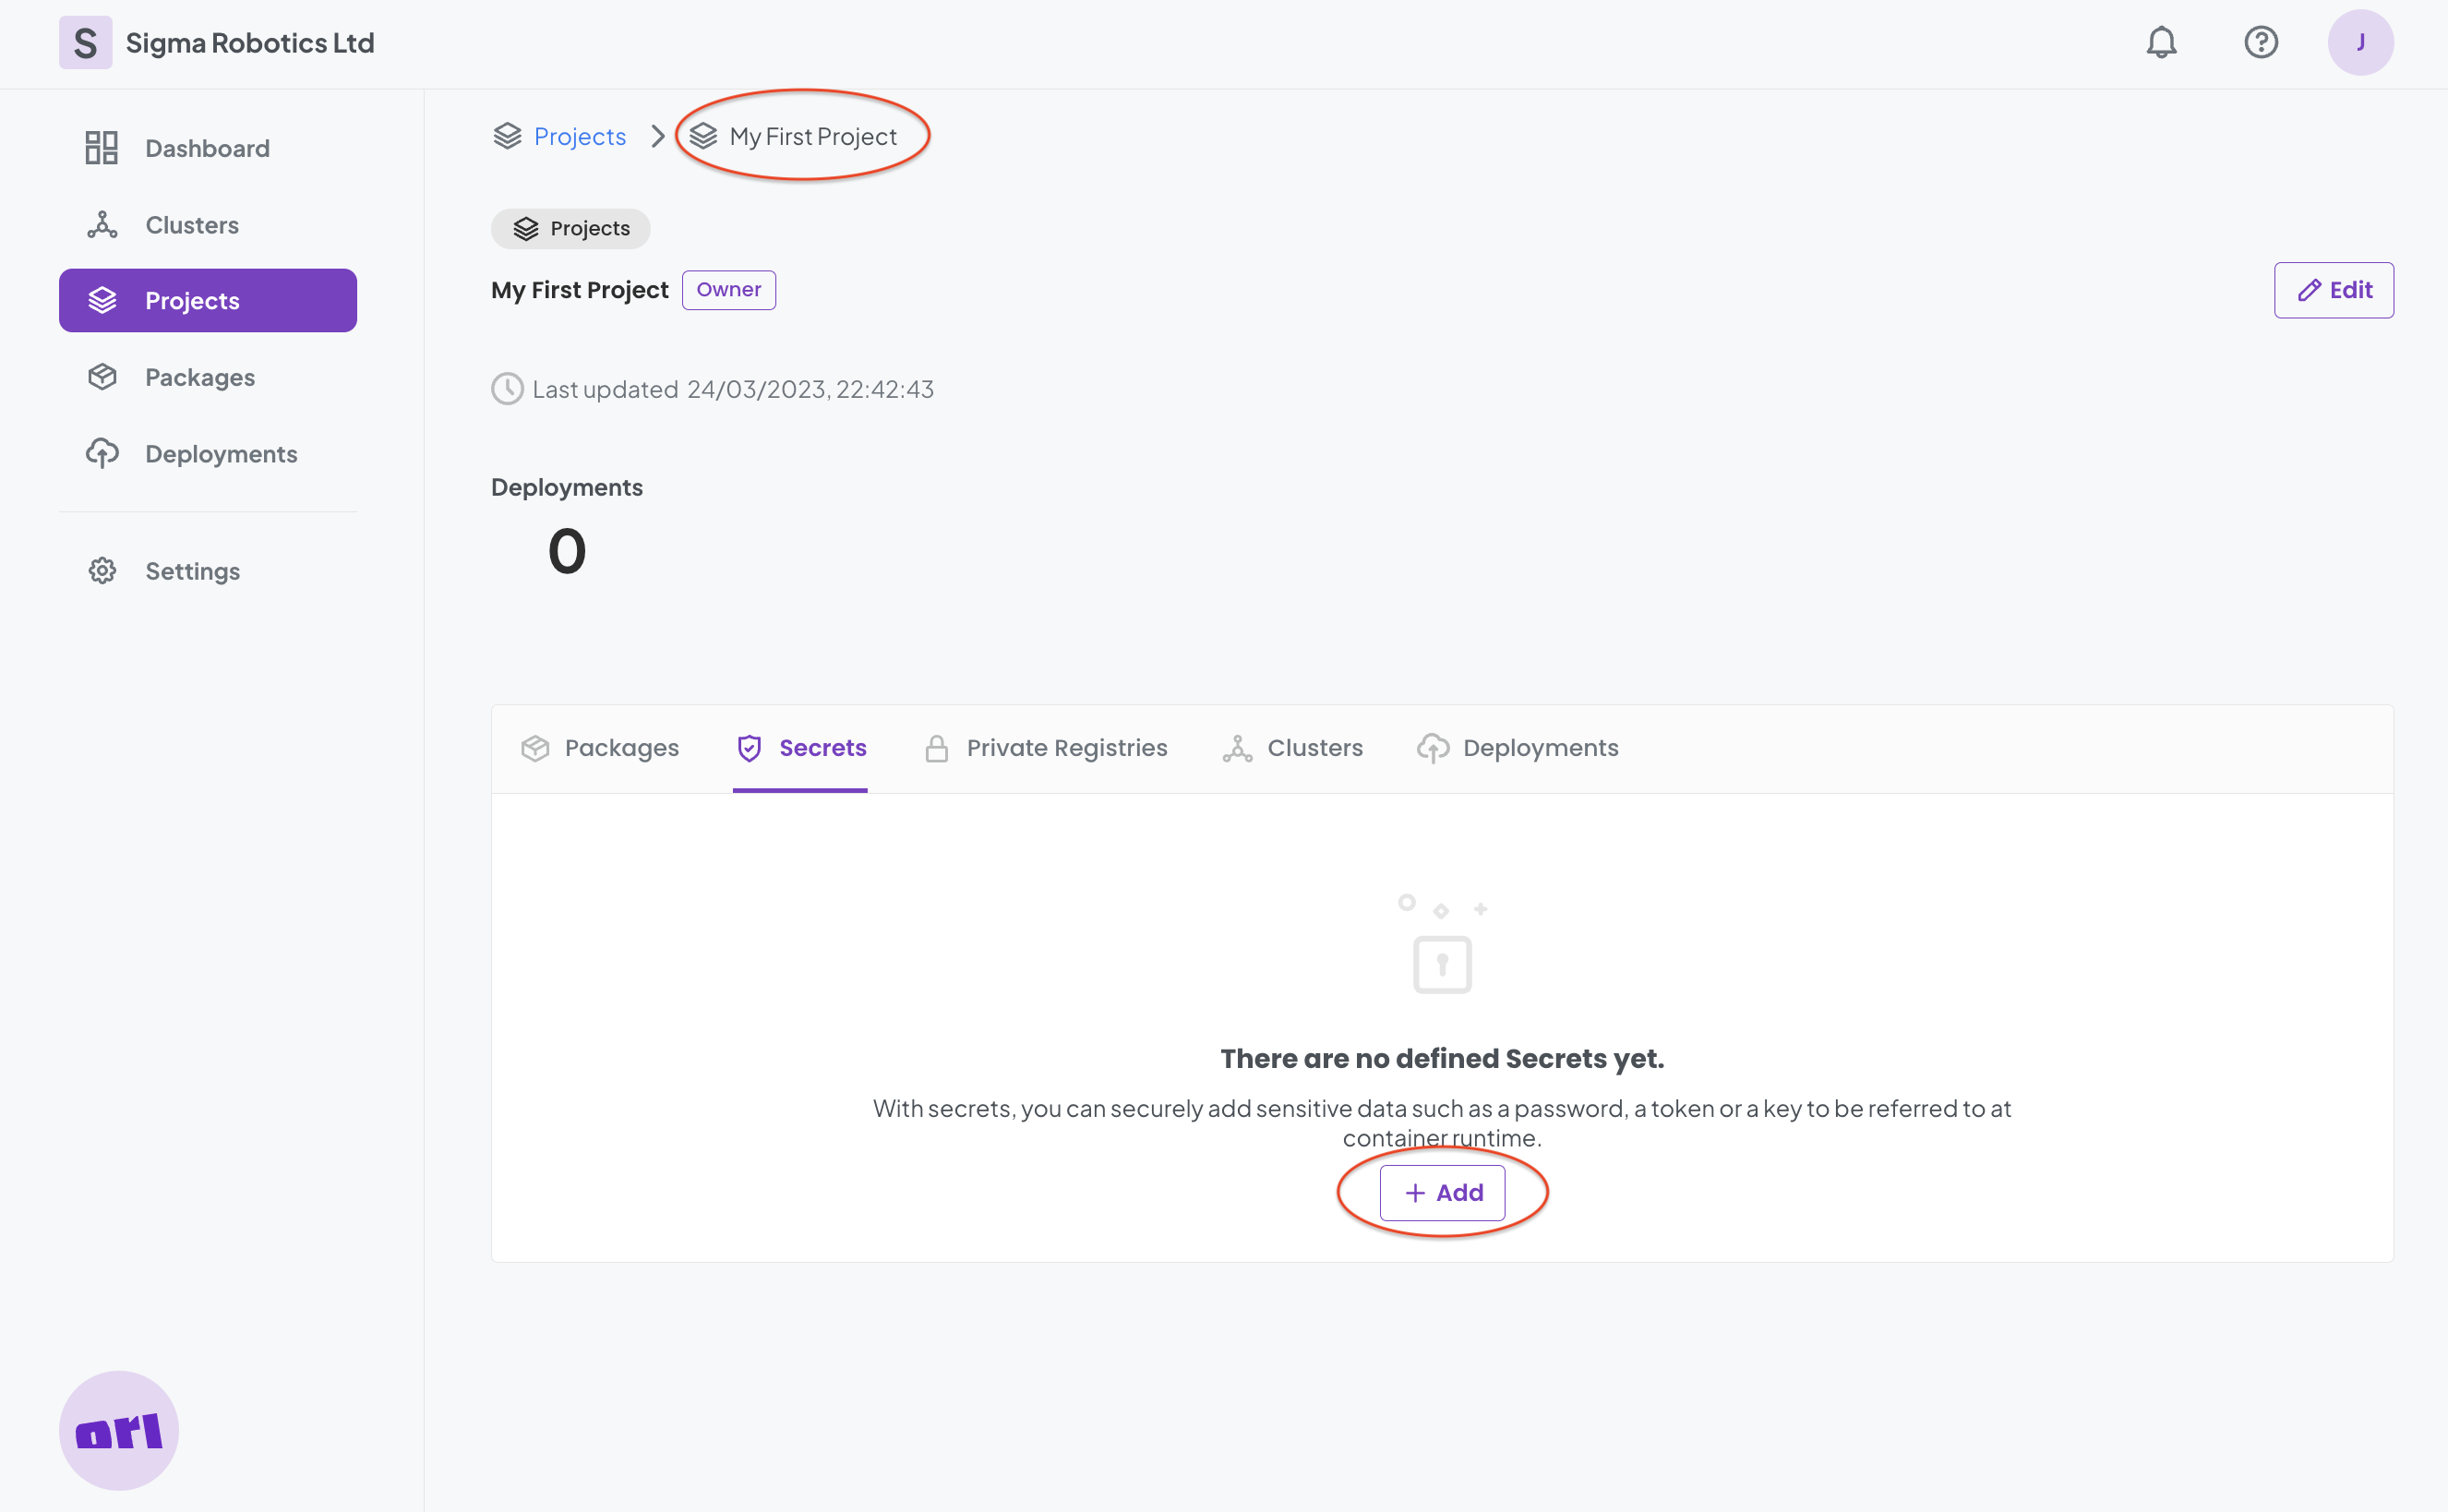
To add your first secret fill int he details as per below:
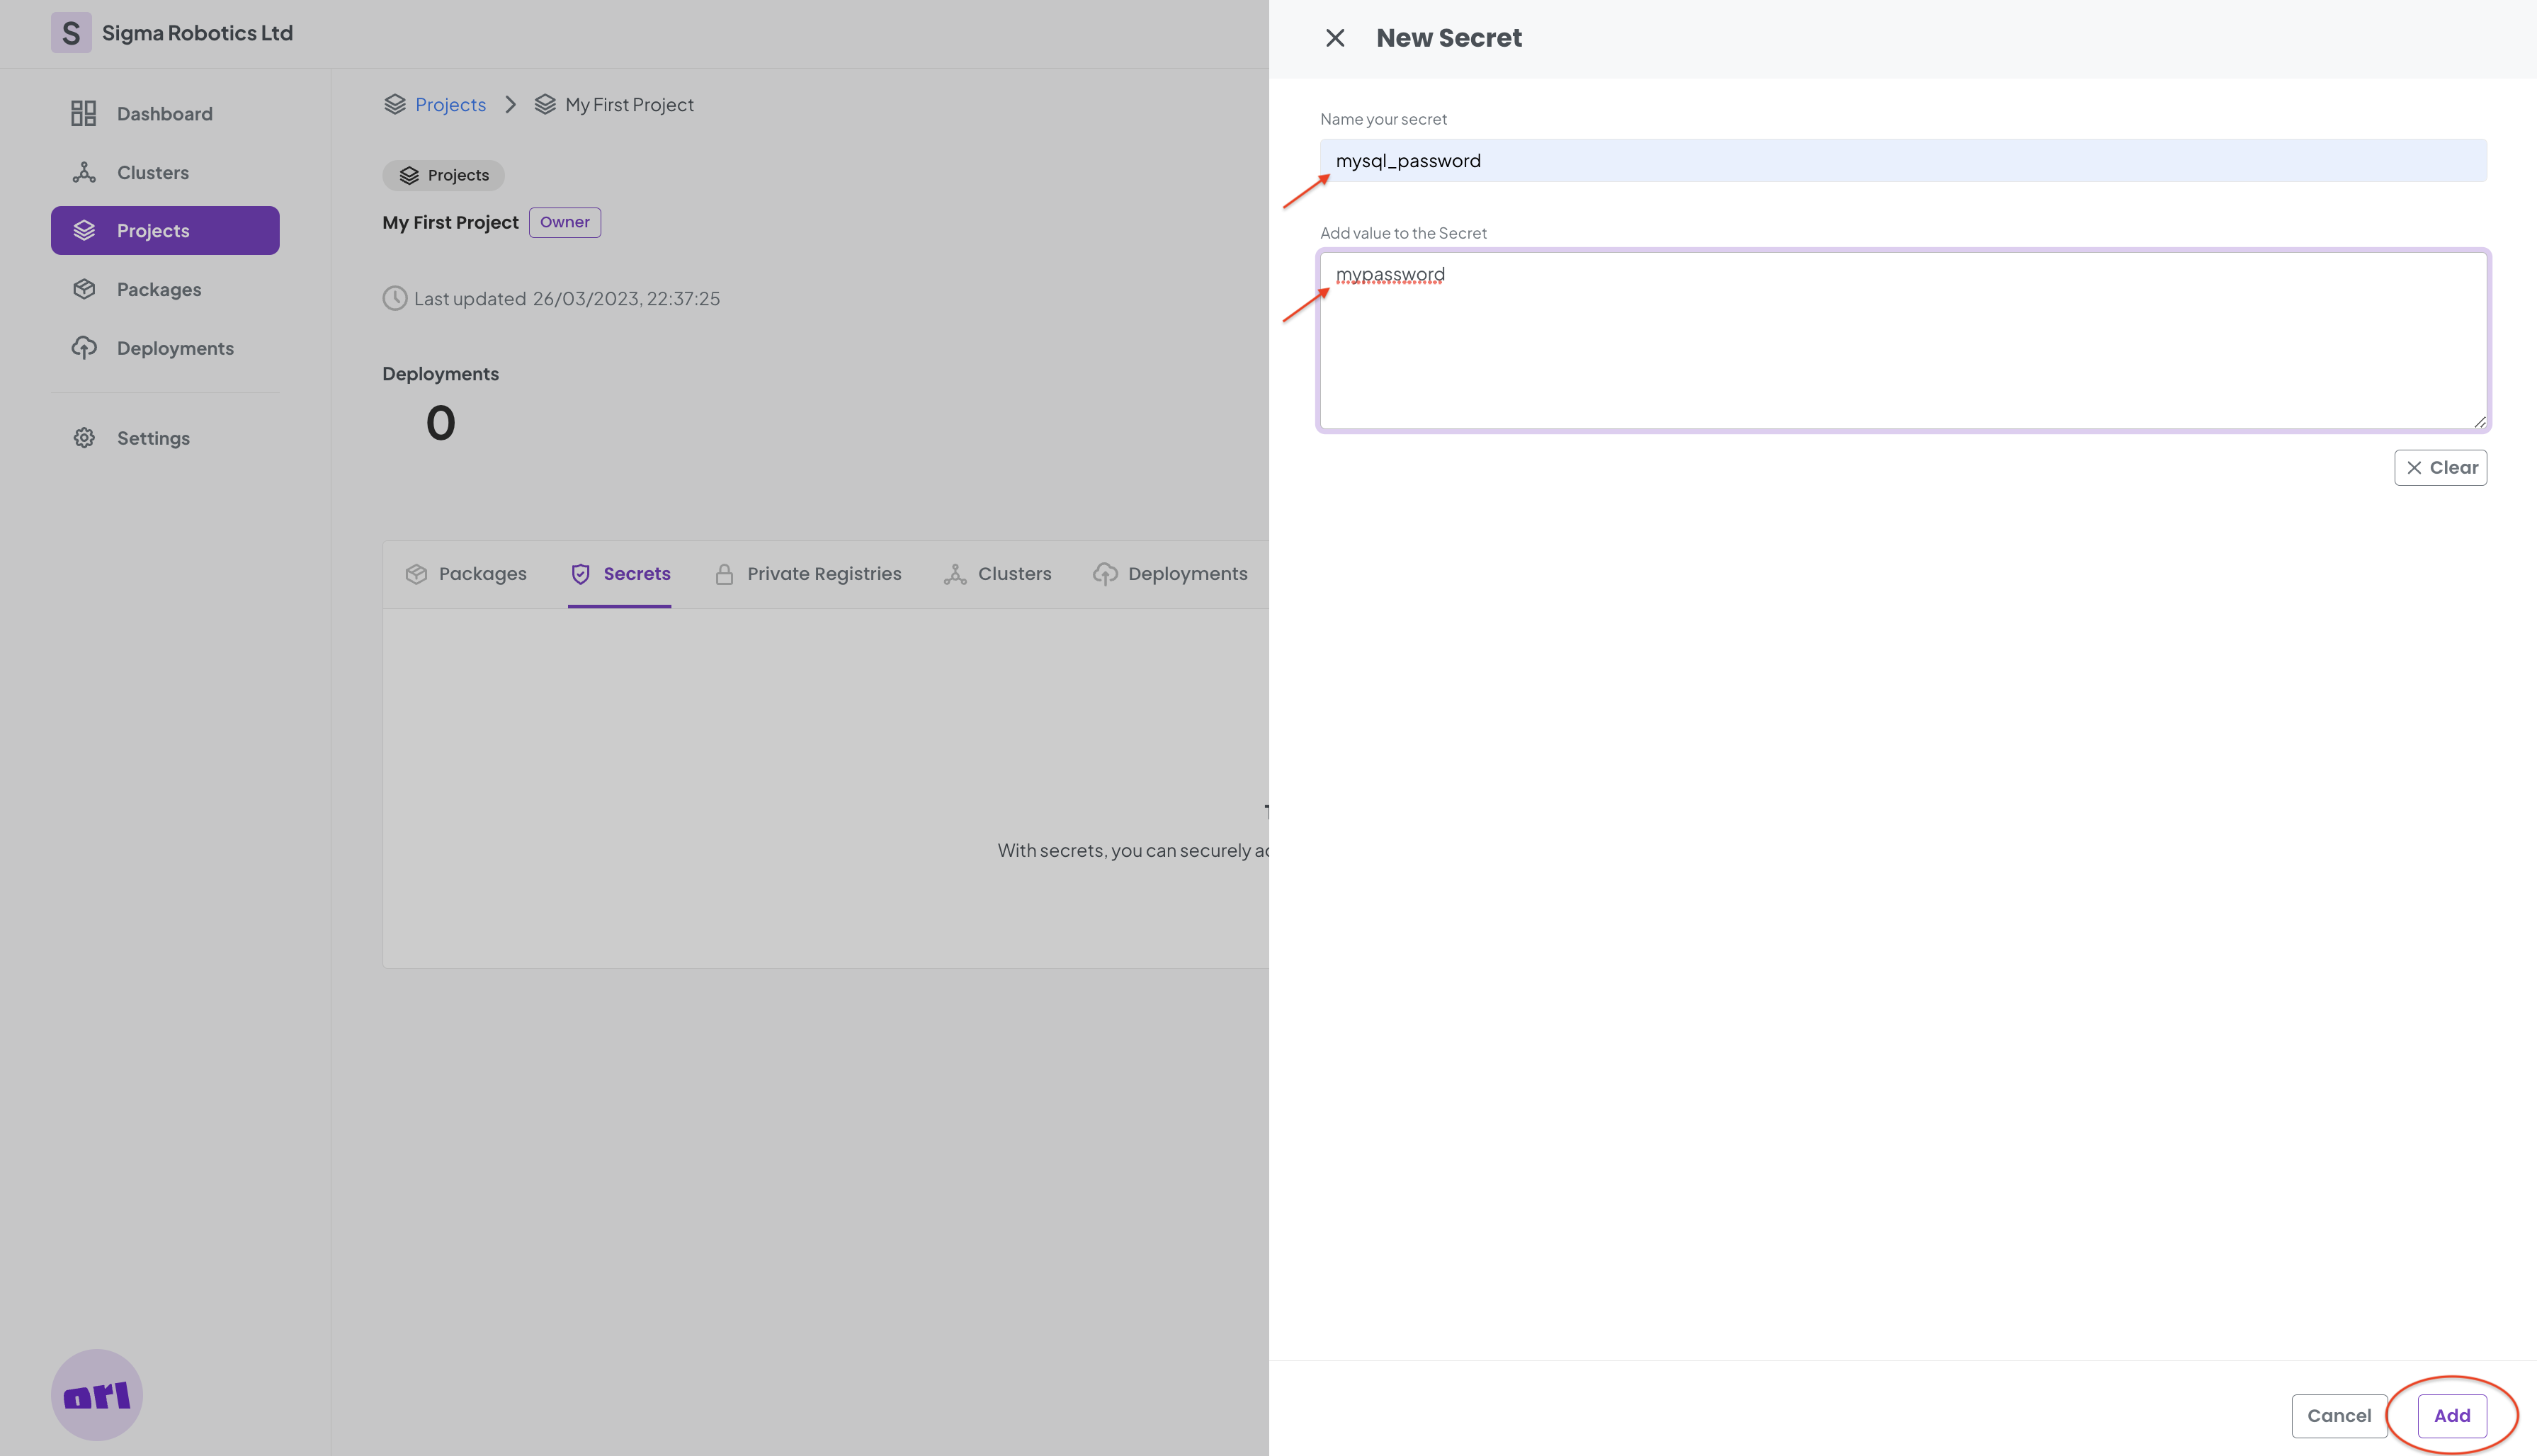
For the mysql_password define your own or use the one below:
mypassword
For the mysql_root_password define your own or use the one below:
mypassword
For db_config paste the following configuration:
CREATE DATABASE IF NOT EXISTS linksdb;
USE linksdb;
-- TABLE USER
-- all passwords will be encrypted using SHA2
CREATE TABLE users (
  id INT(11) NOT NULL AUTO_INCREMENT,
  fullname VARCHAR(100) NOT NULL,
  username VARCHAR(100) NOT NULL,
  password VARCHAR(60) NOT NULL,
  created_at timestamp NOT NULL DEFAULT CURRENT_TIMESTAMP,
  PRIMARY KEY (id)
) AUTO_INCREMENT=2;
-- drop table users
DESCRIBE users;
INSERT INTO users (id, username, password, fullname)
  VALUES (1, 'john', 'john@gmail.com', 'John Carter');
SELECT * FROM users;
-- LINKS TABLE
CREATE TABLE links (
  id INT(11) NOT NULL,
  title VARCHAR(150) NOT NULL,
  url VARCHAR(255) NOT NULL,
  description TEXT,
  user_id INT(11),
  created_at timestamp NOT NULL DEFAULT current_timestamp,
  CONSTRAINT fk_user FOREIGN KEY(user_id) REFERENCES users(id)
);
ALTER TABLE links
  ADD PRIMARY KEY (id);
ALTER TABLE links
  MODIFY id INT(11) NOT NULL AUTO_INCREMENT, AUTO_INCREMENT = 2;
DESCRIBE links;
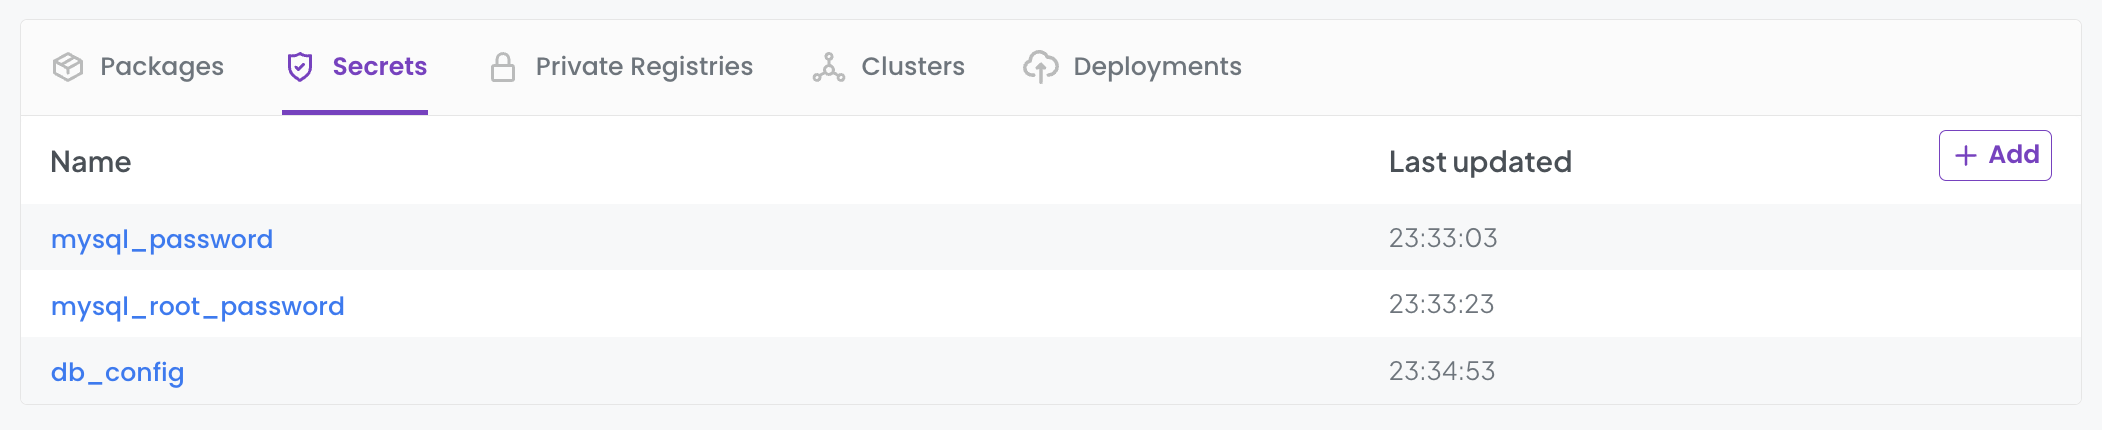
We now have three secrets defined.
Step 3 - Creating Your Package with an Application and a Container
On our Project we are going to create a new Package.
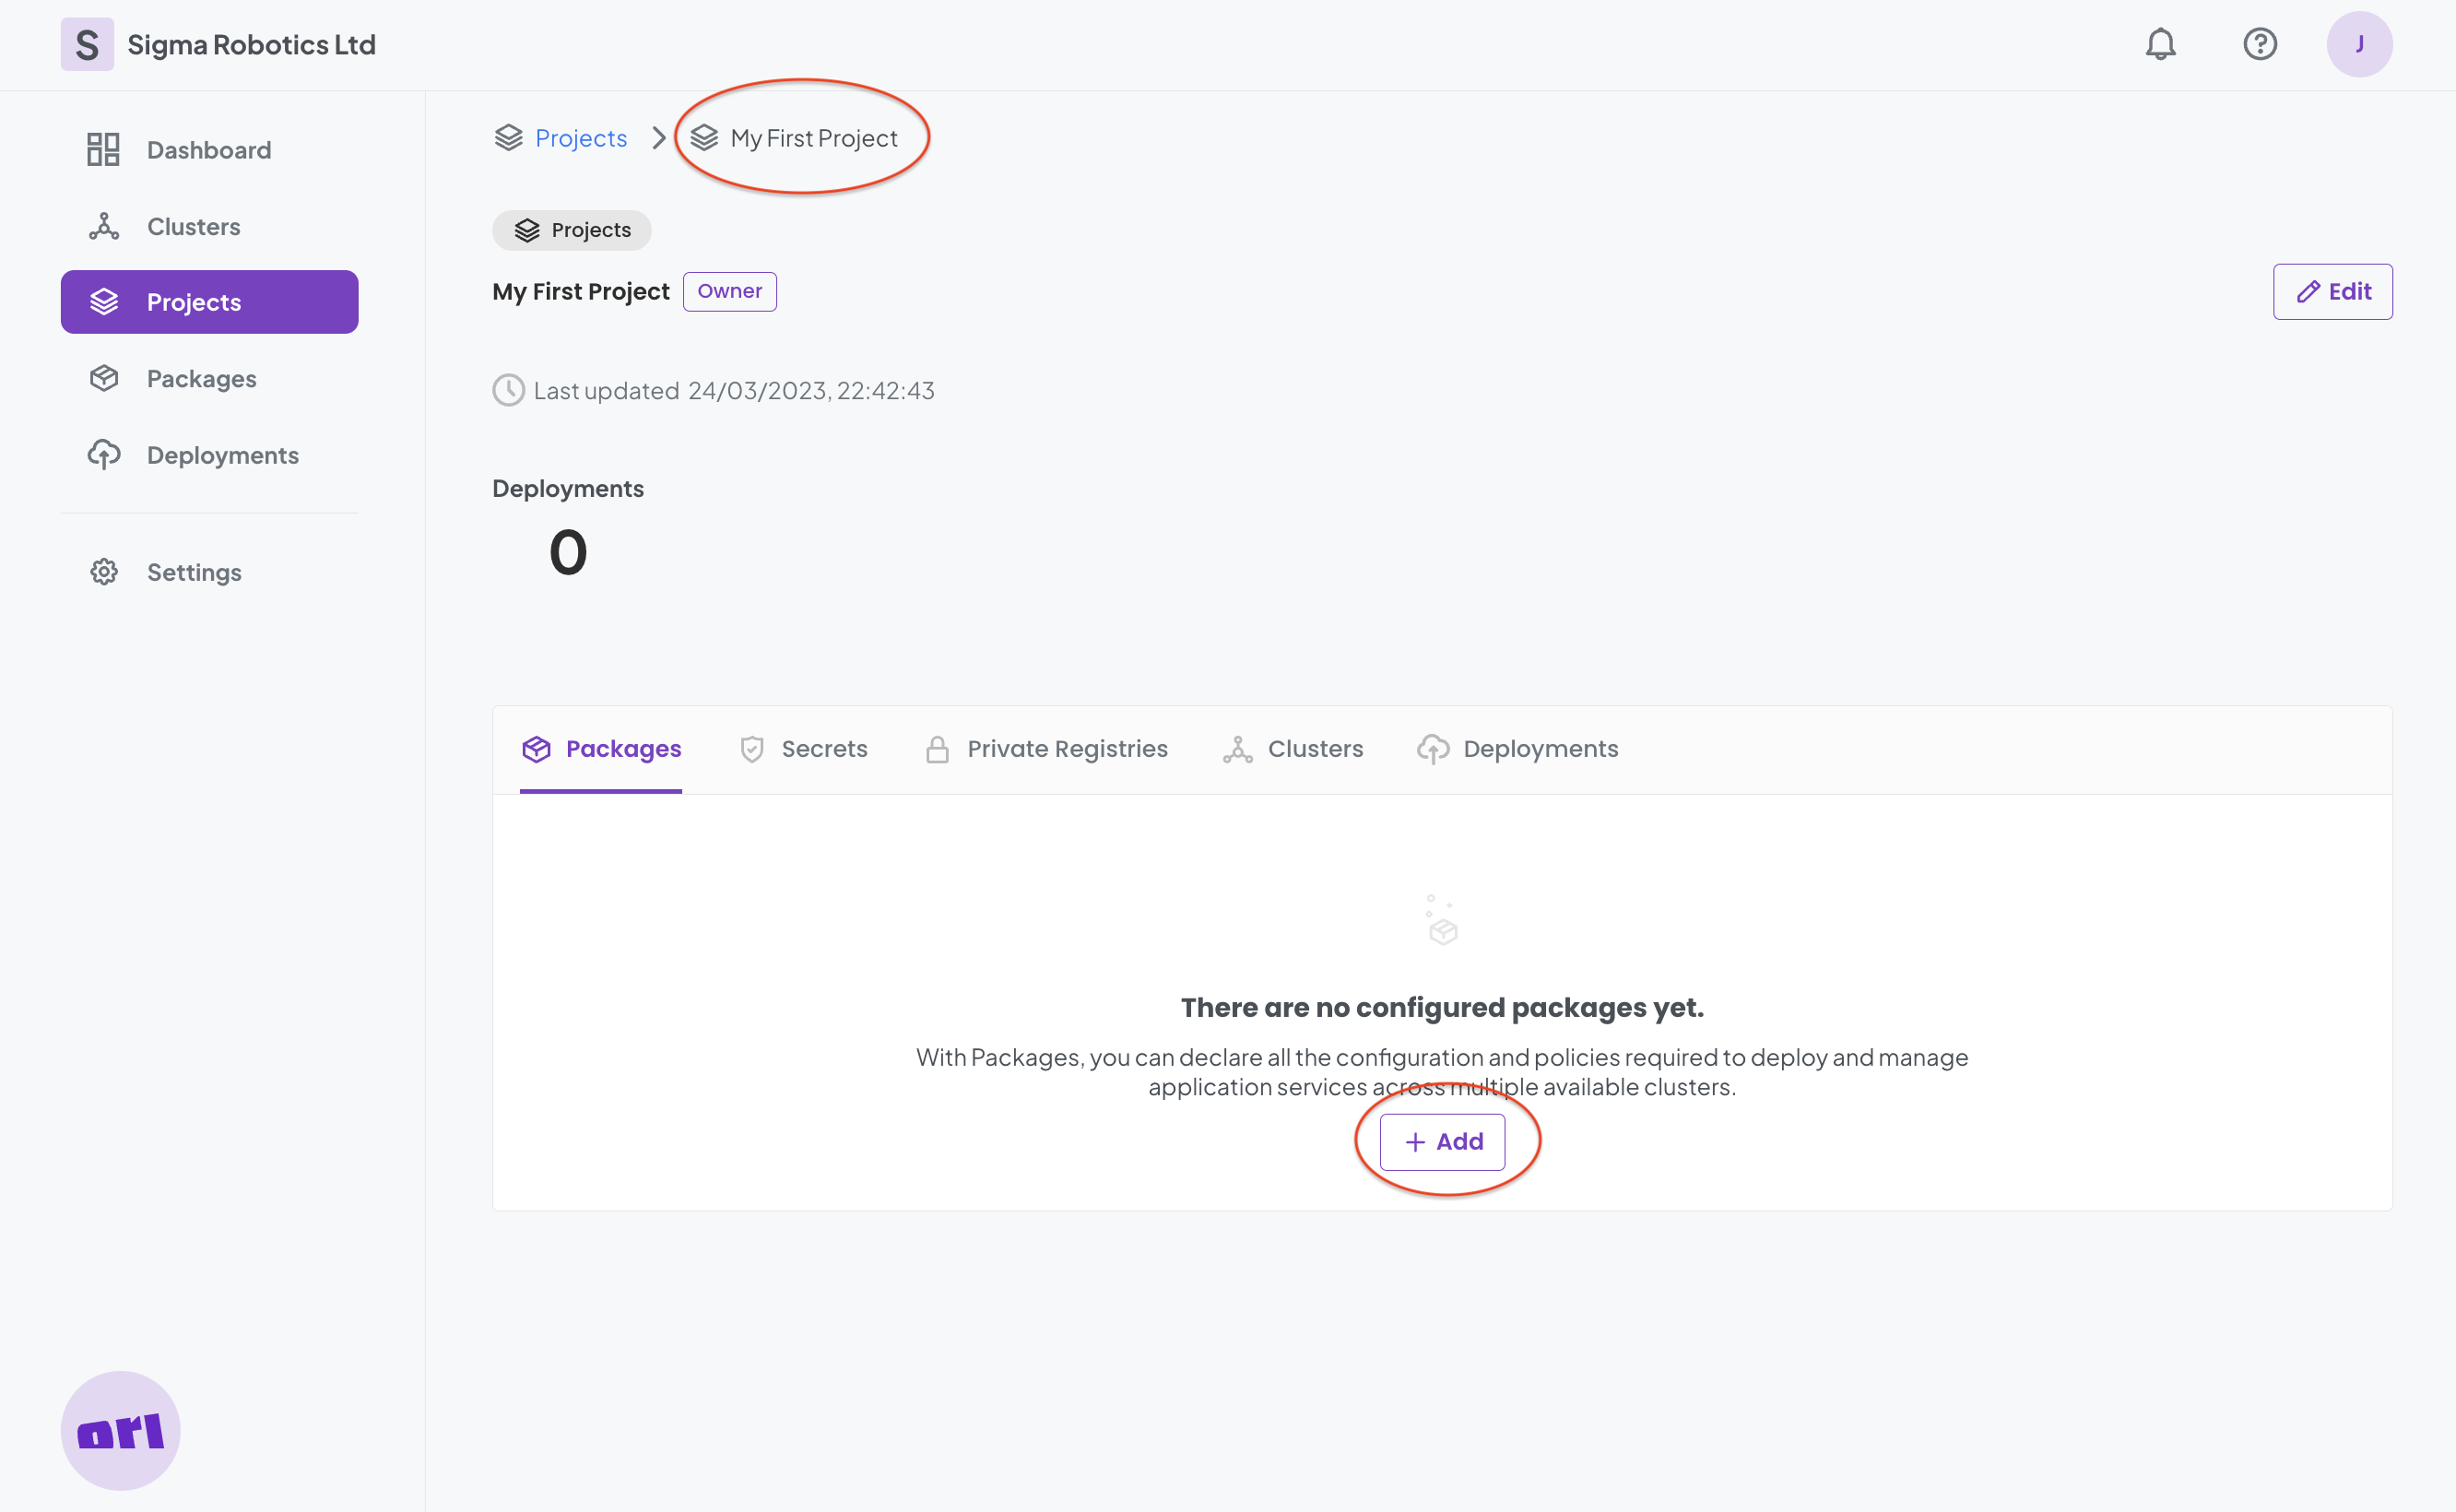
On our new Package we are going to Add a new Application.
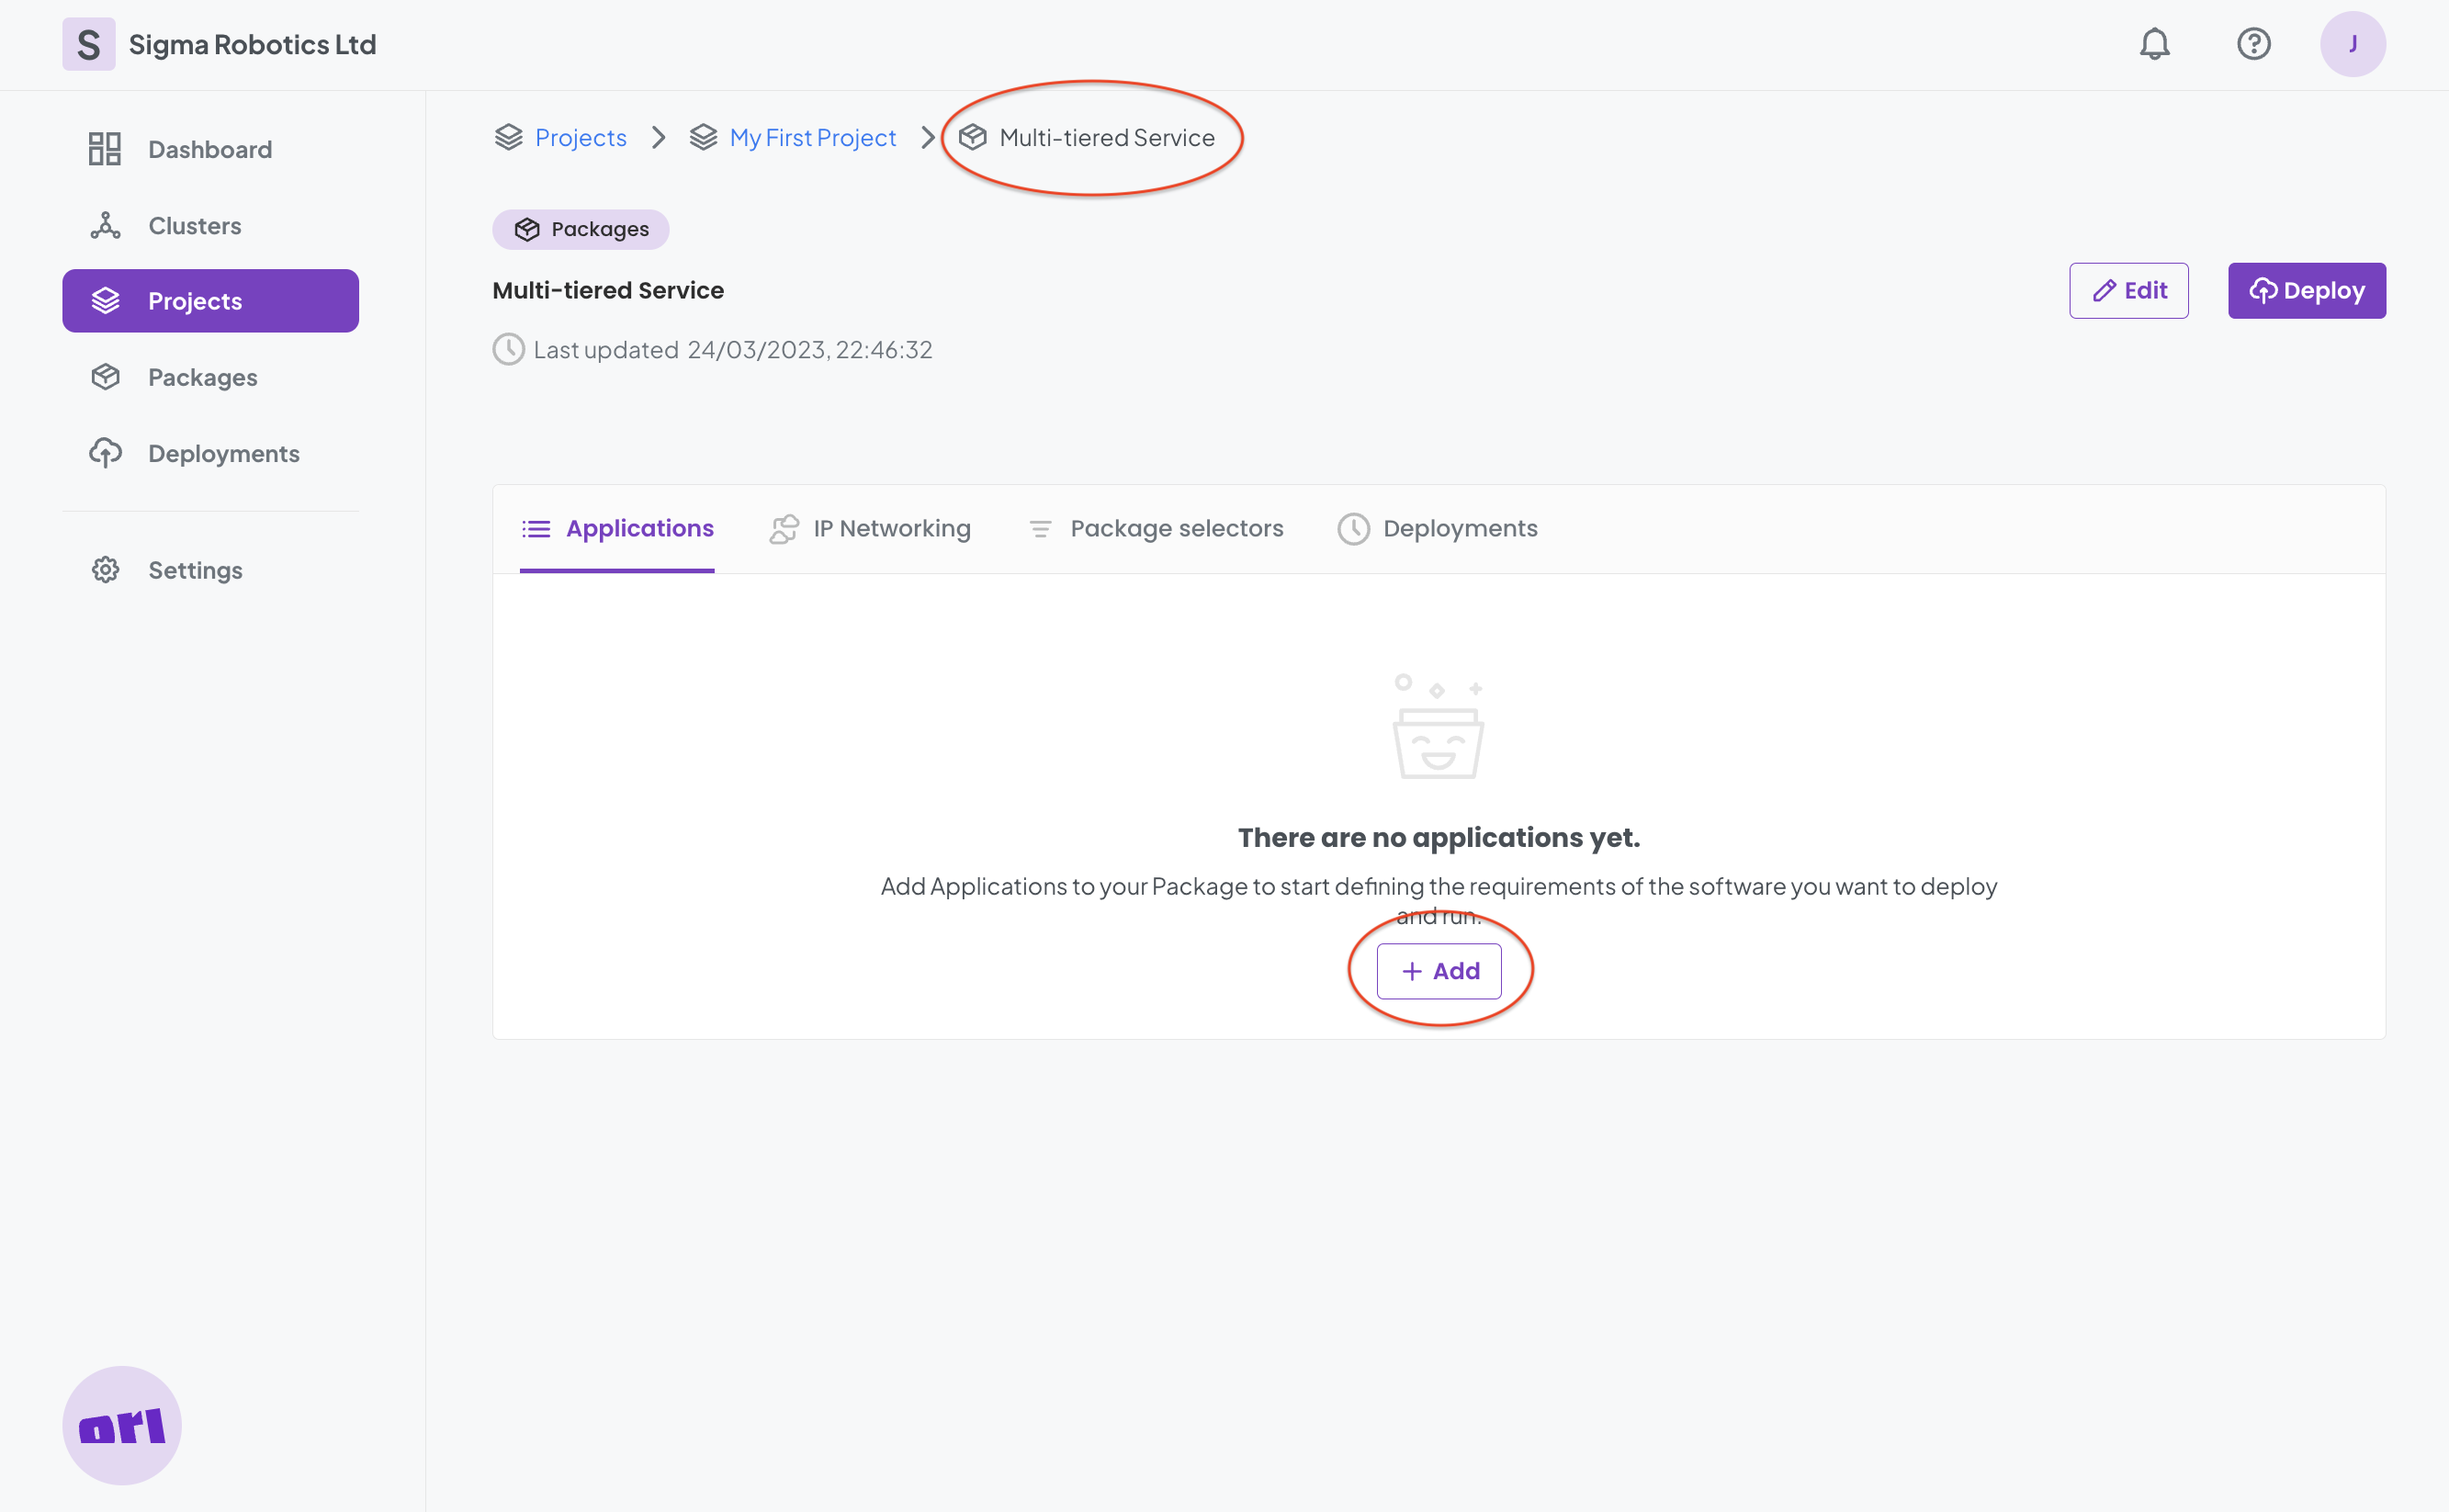
On our Database Application we are going to Add a new Container.
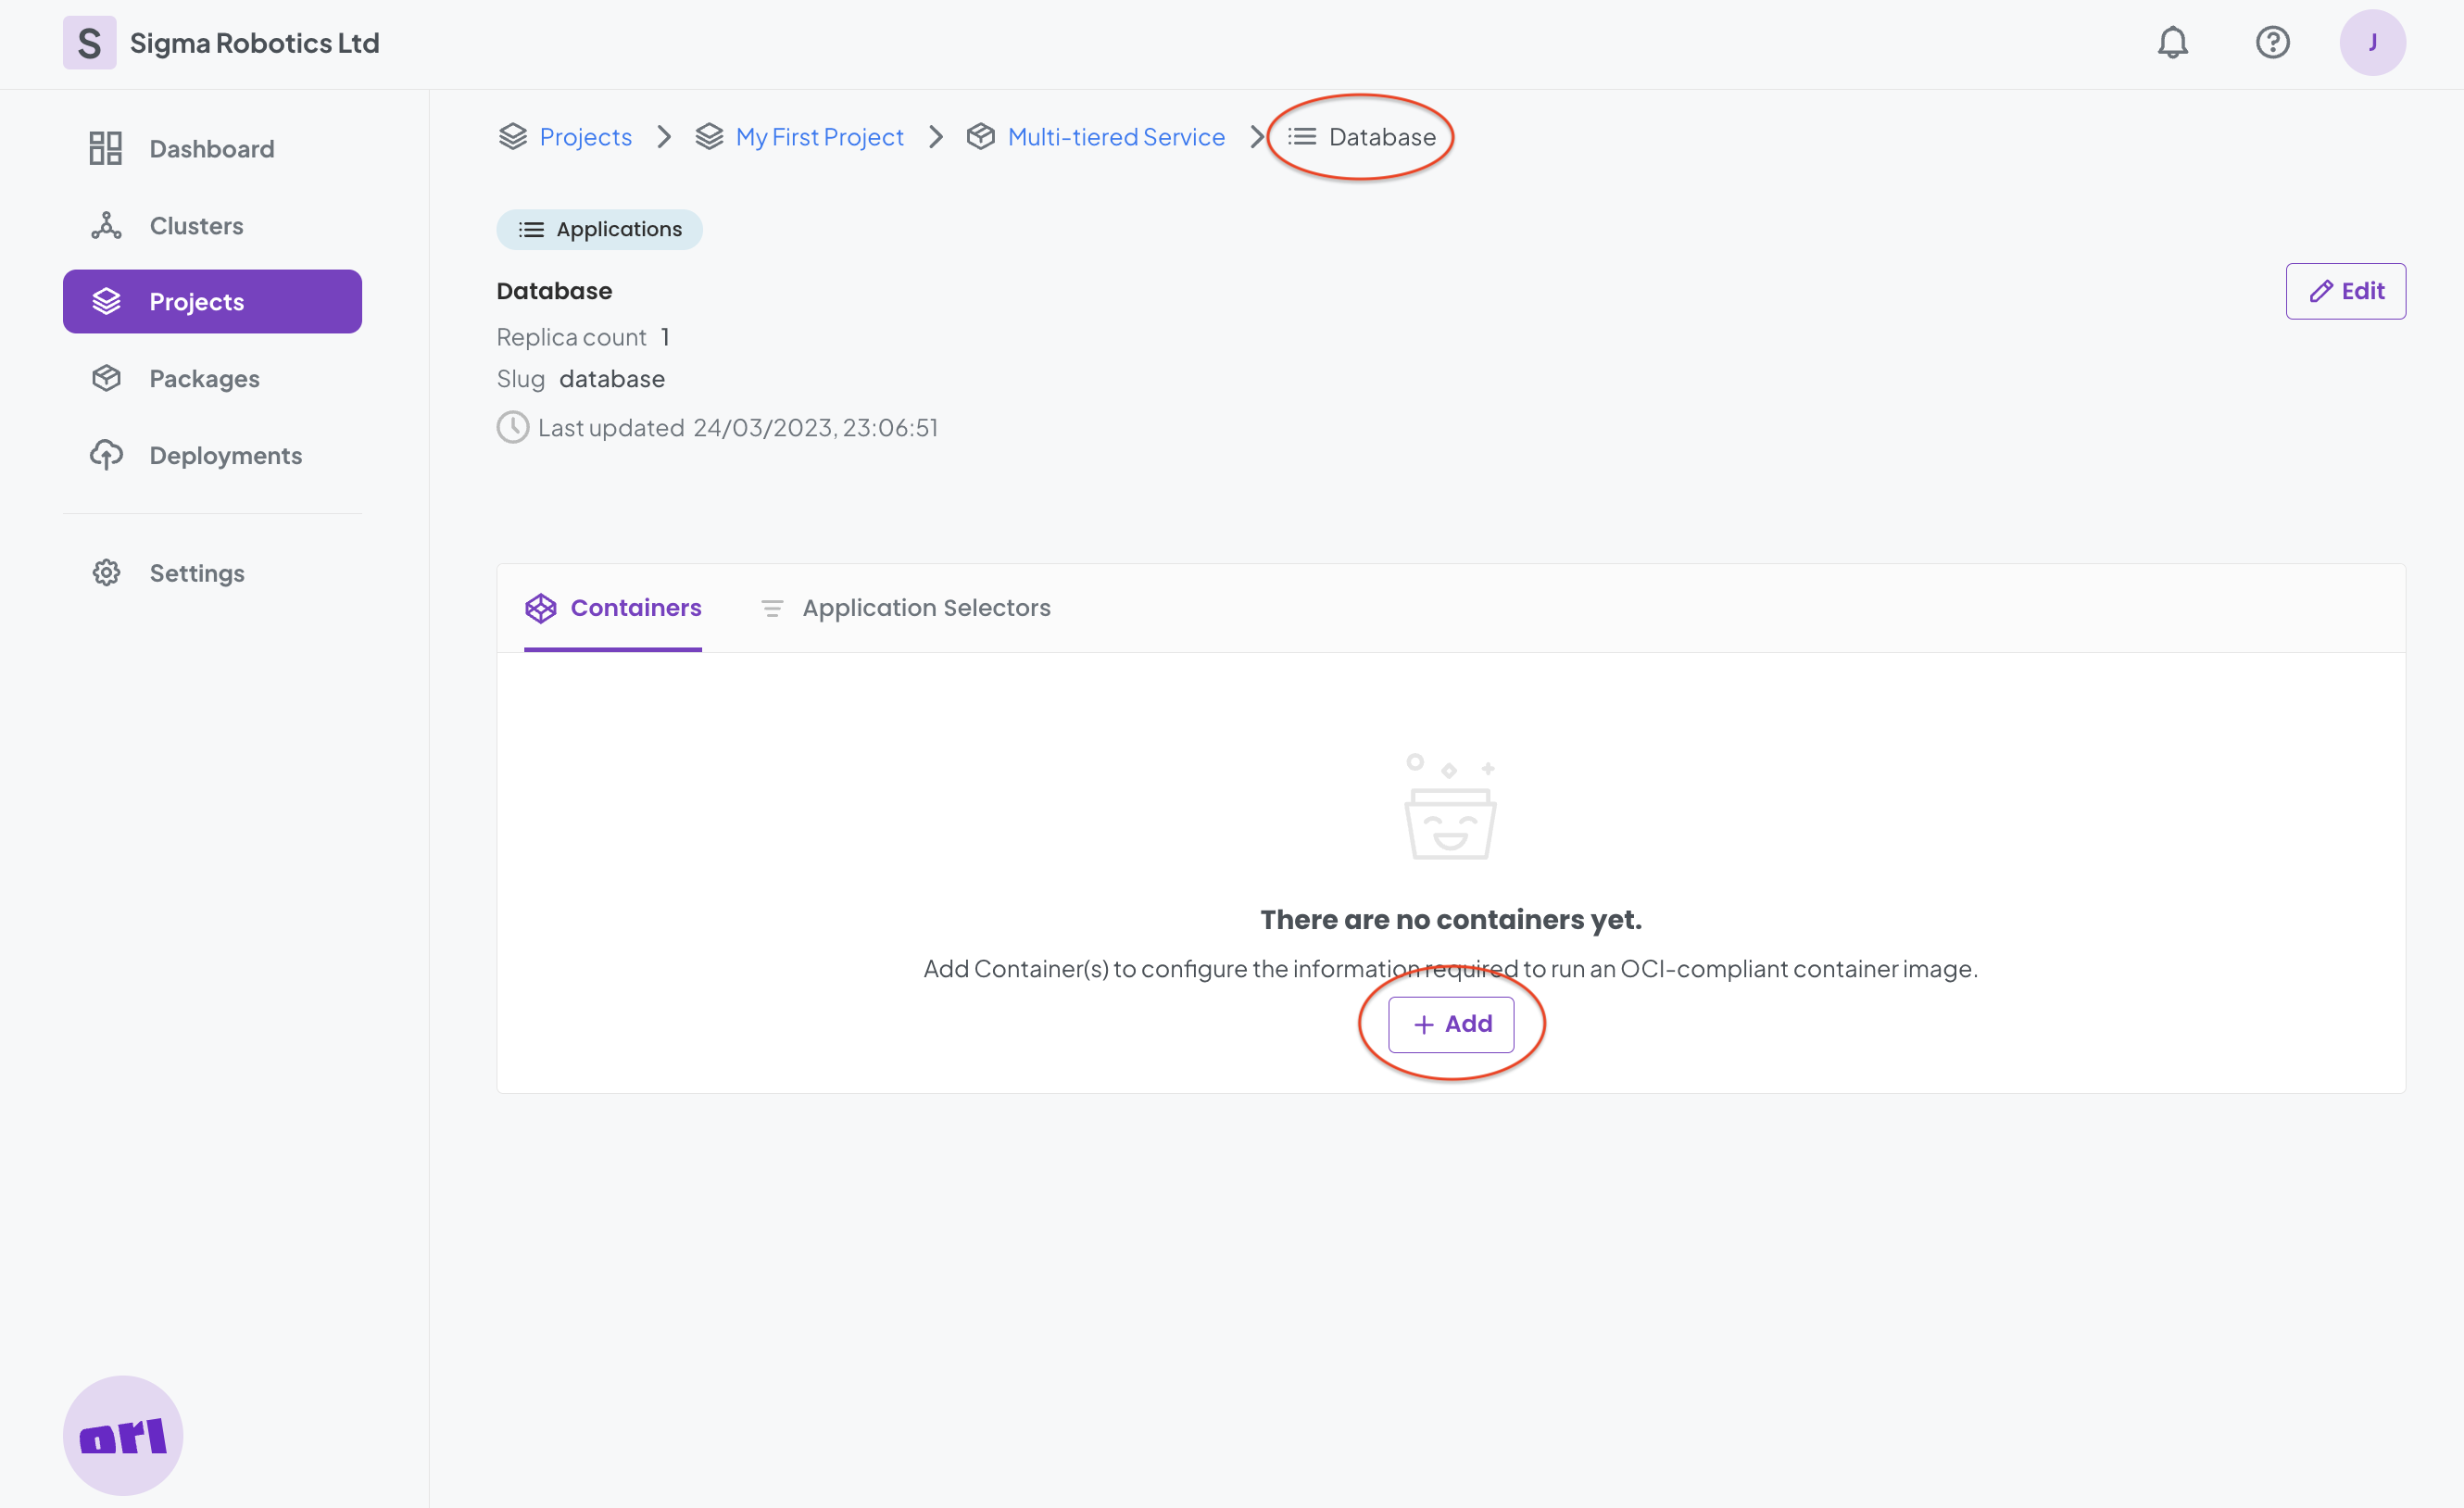
The container will be a mysql image. Fill in the form with the following parameters and select Save
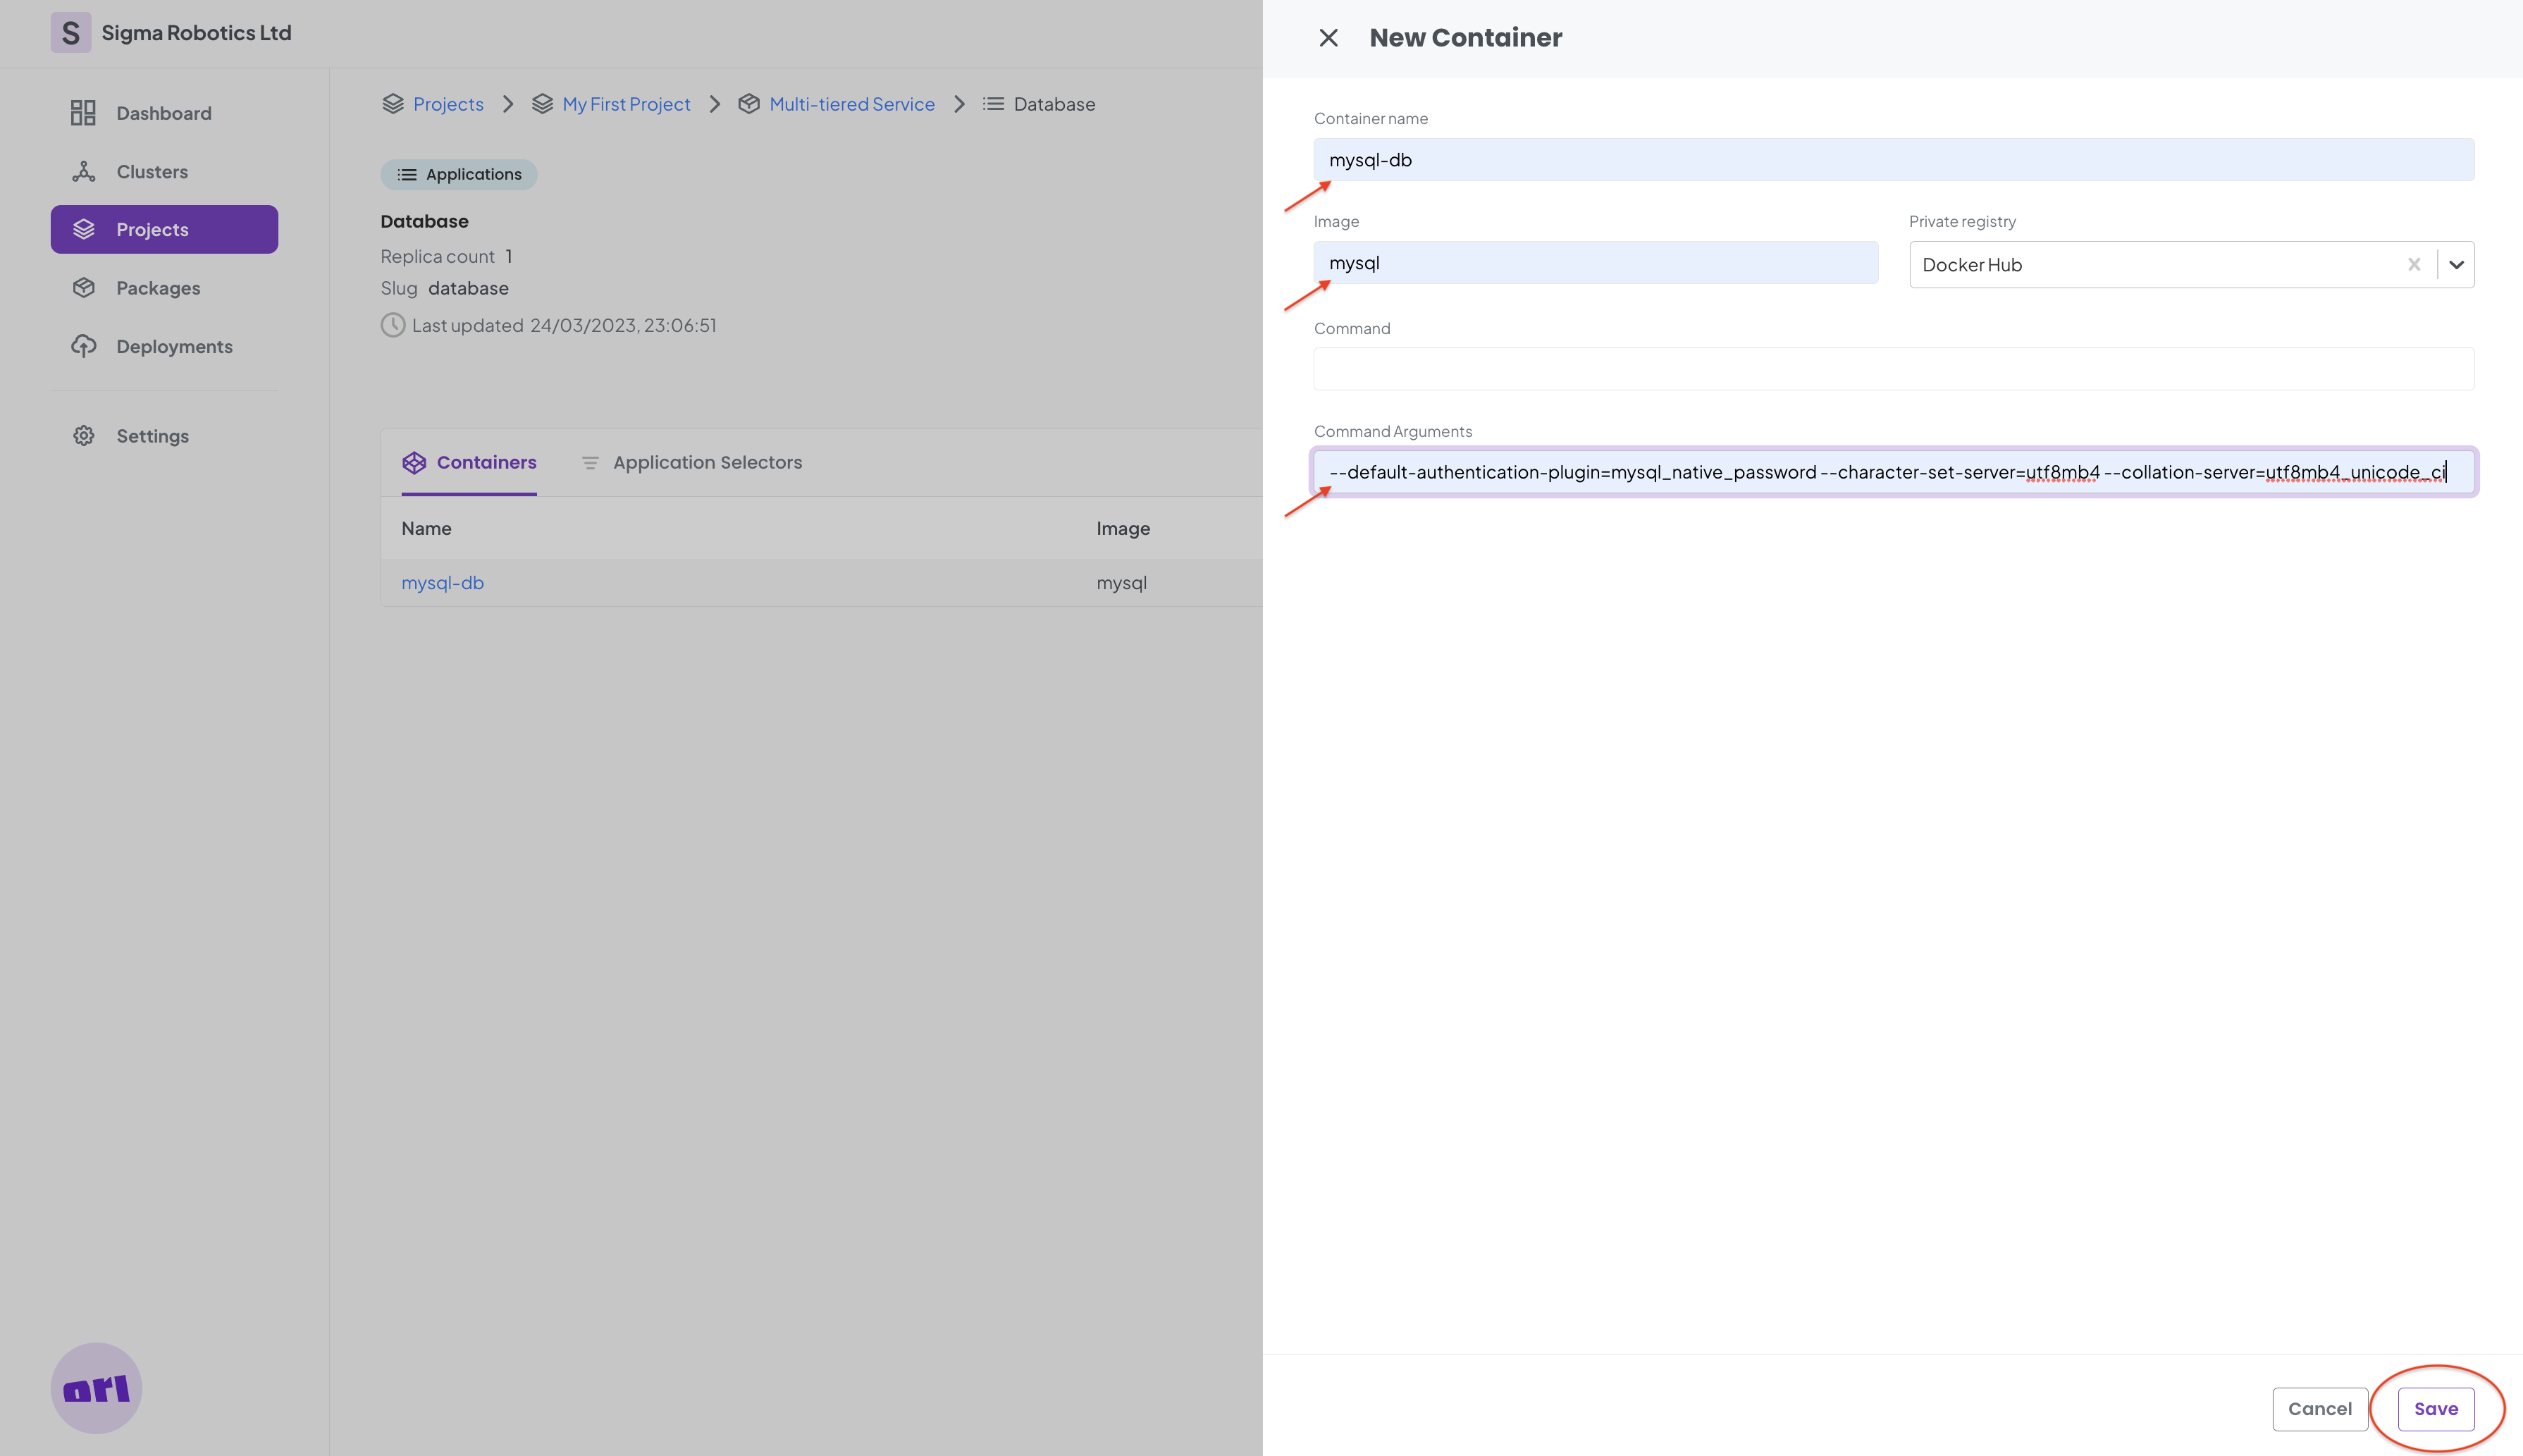
Parameters:
mysql-db
mysql
--default-authentication-plugin=mysql_native_password --character-set-server=utf8mb4 --collation-server=utf8mb4_unicode_ci
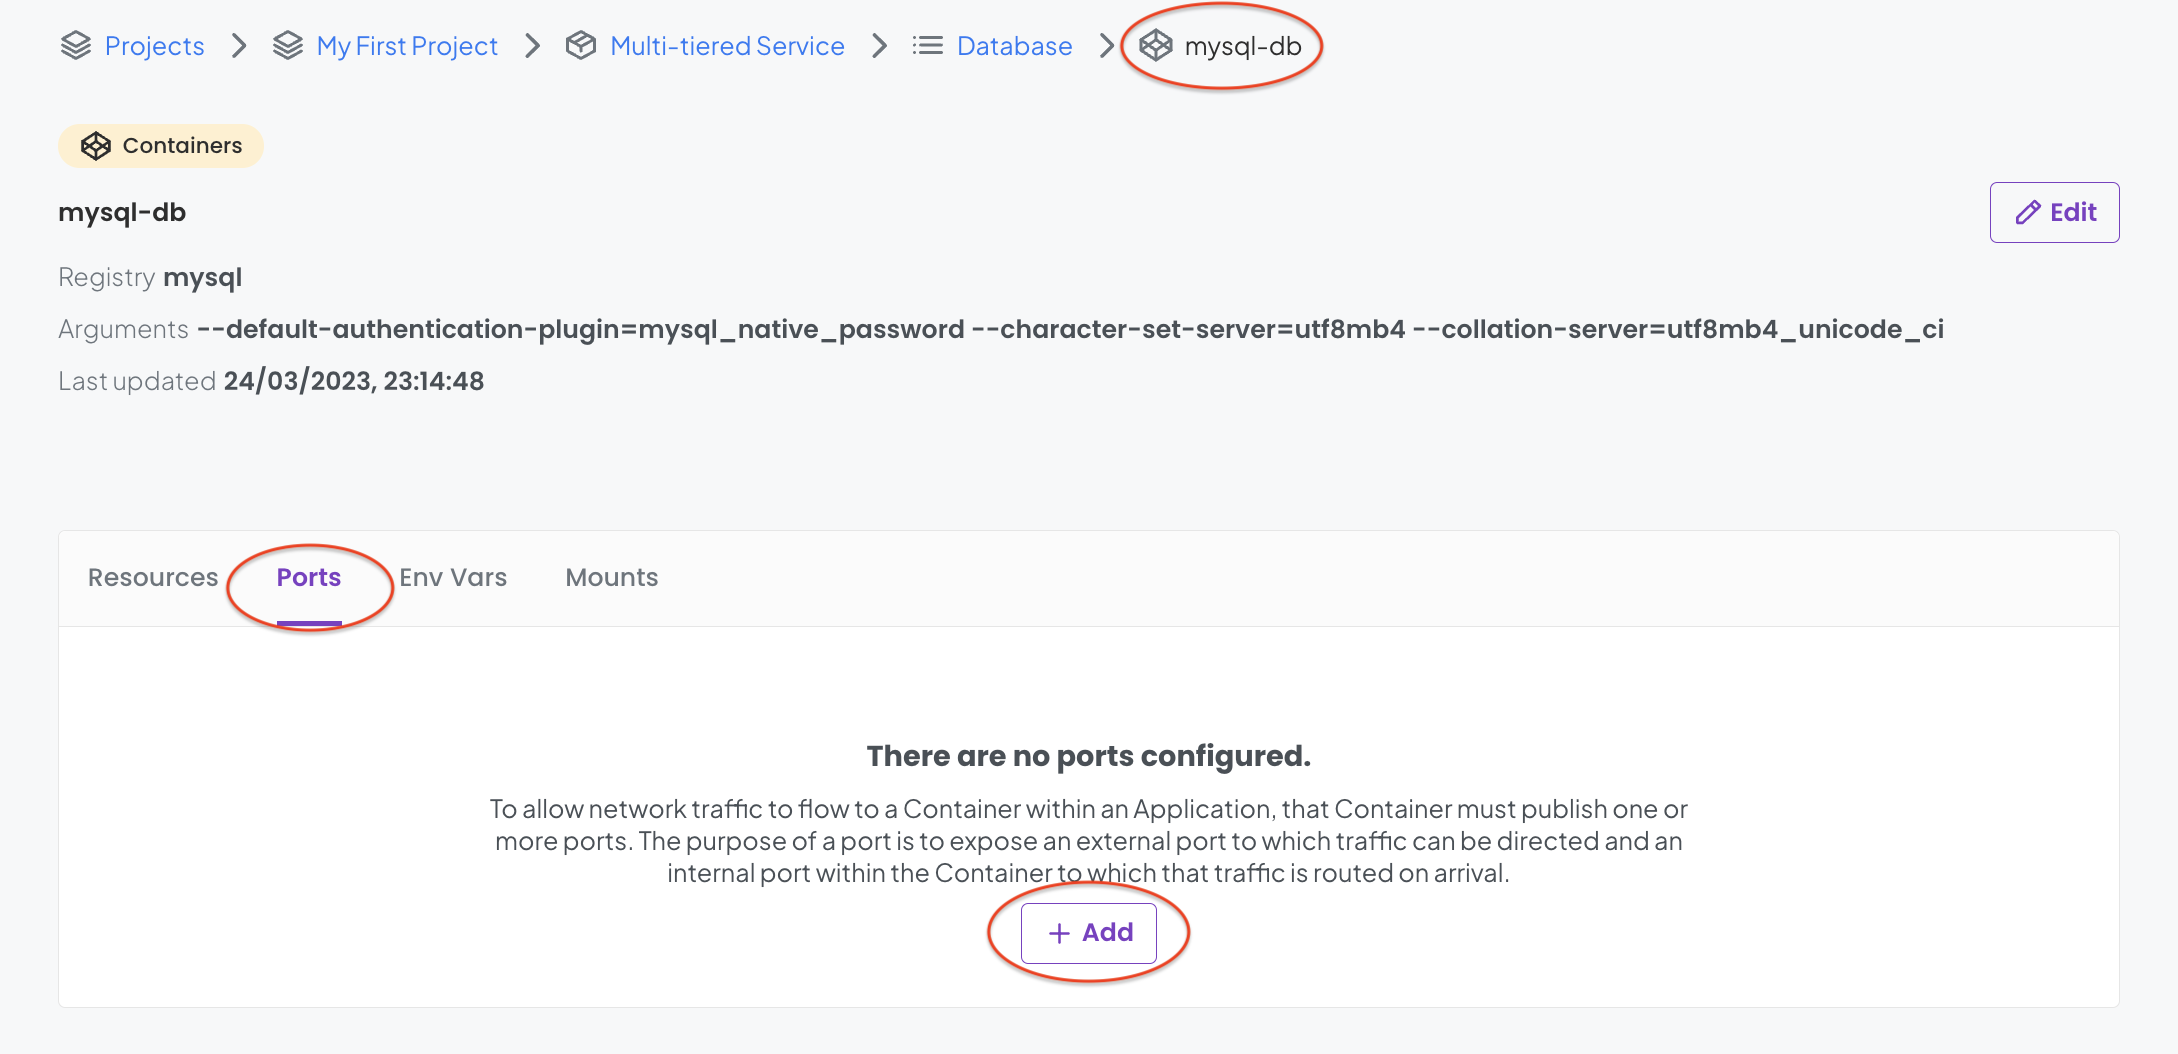
Step 4 - Configuring the Container Details
We now have the Mysql container created. It is now time to add some further configuration. The first step is to add a Port. This will allows us to expose the mysql container to the external world.
And now add the following to the modal:
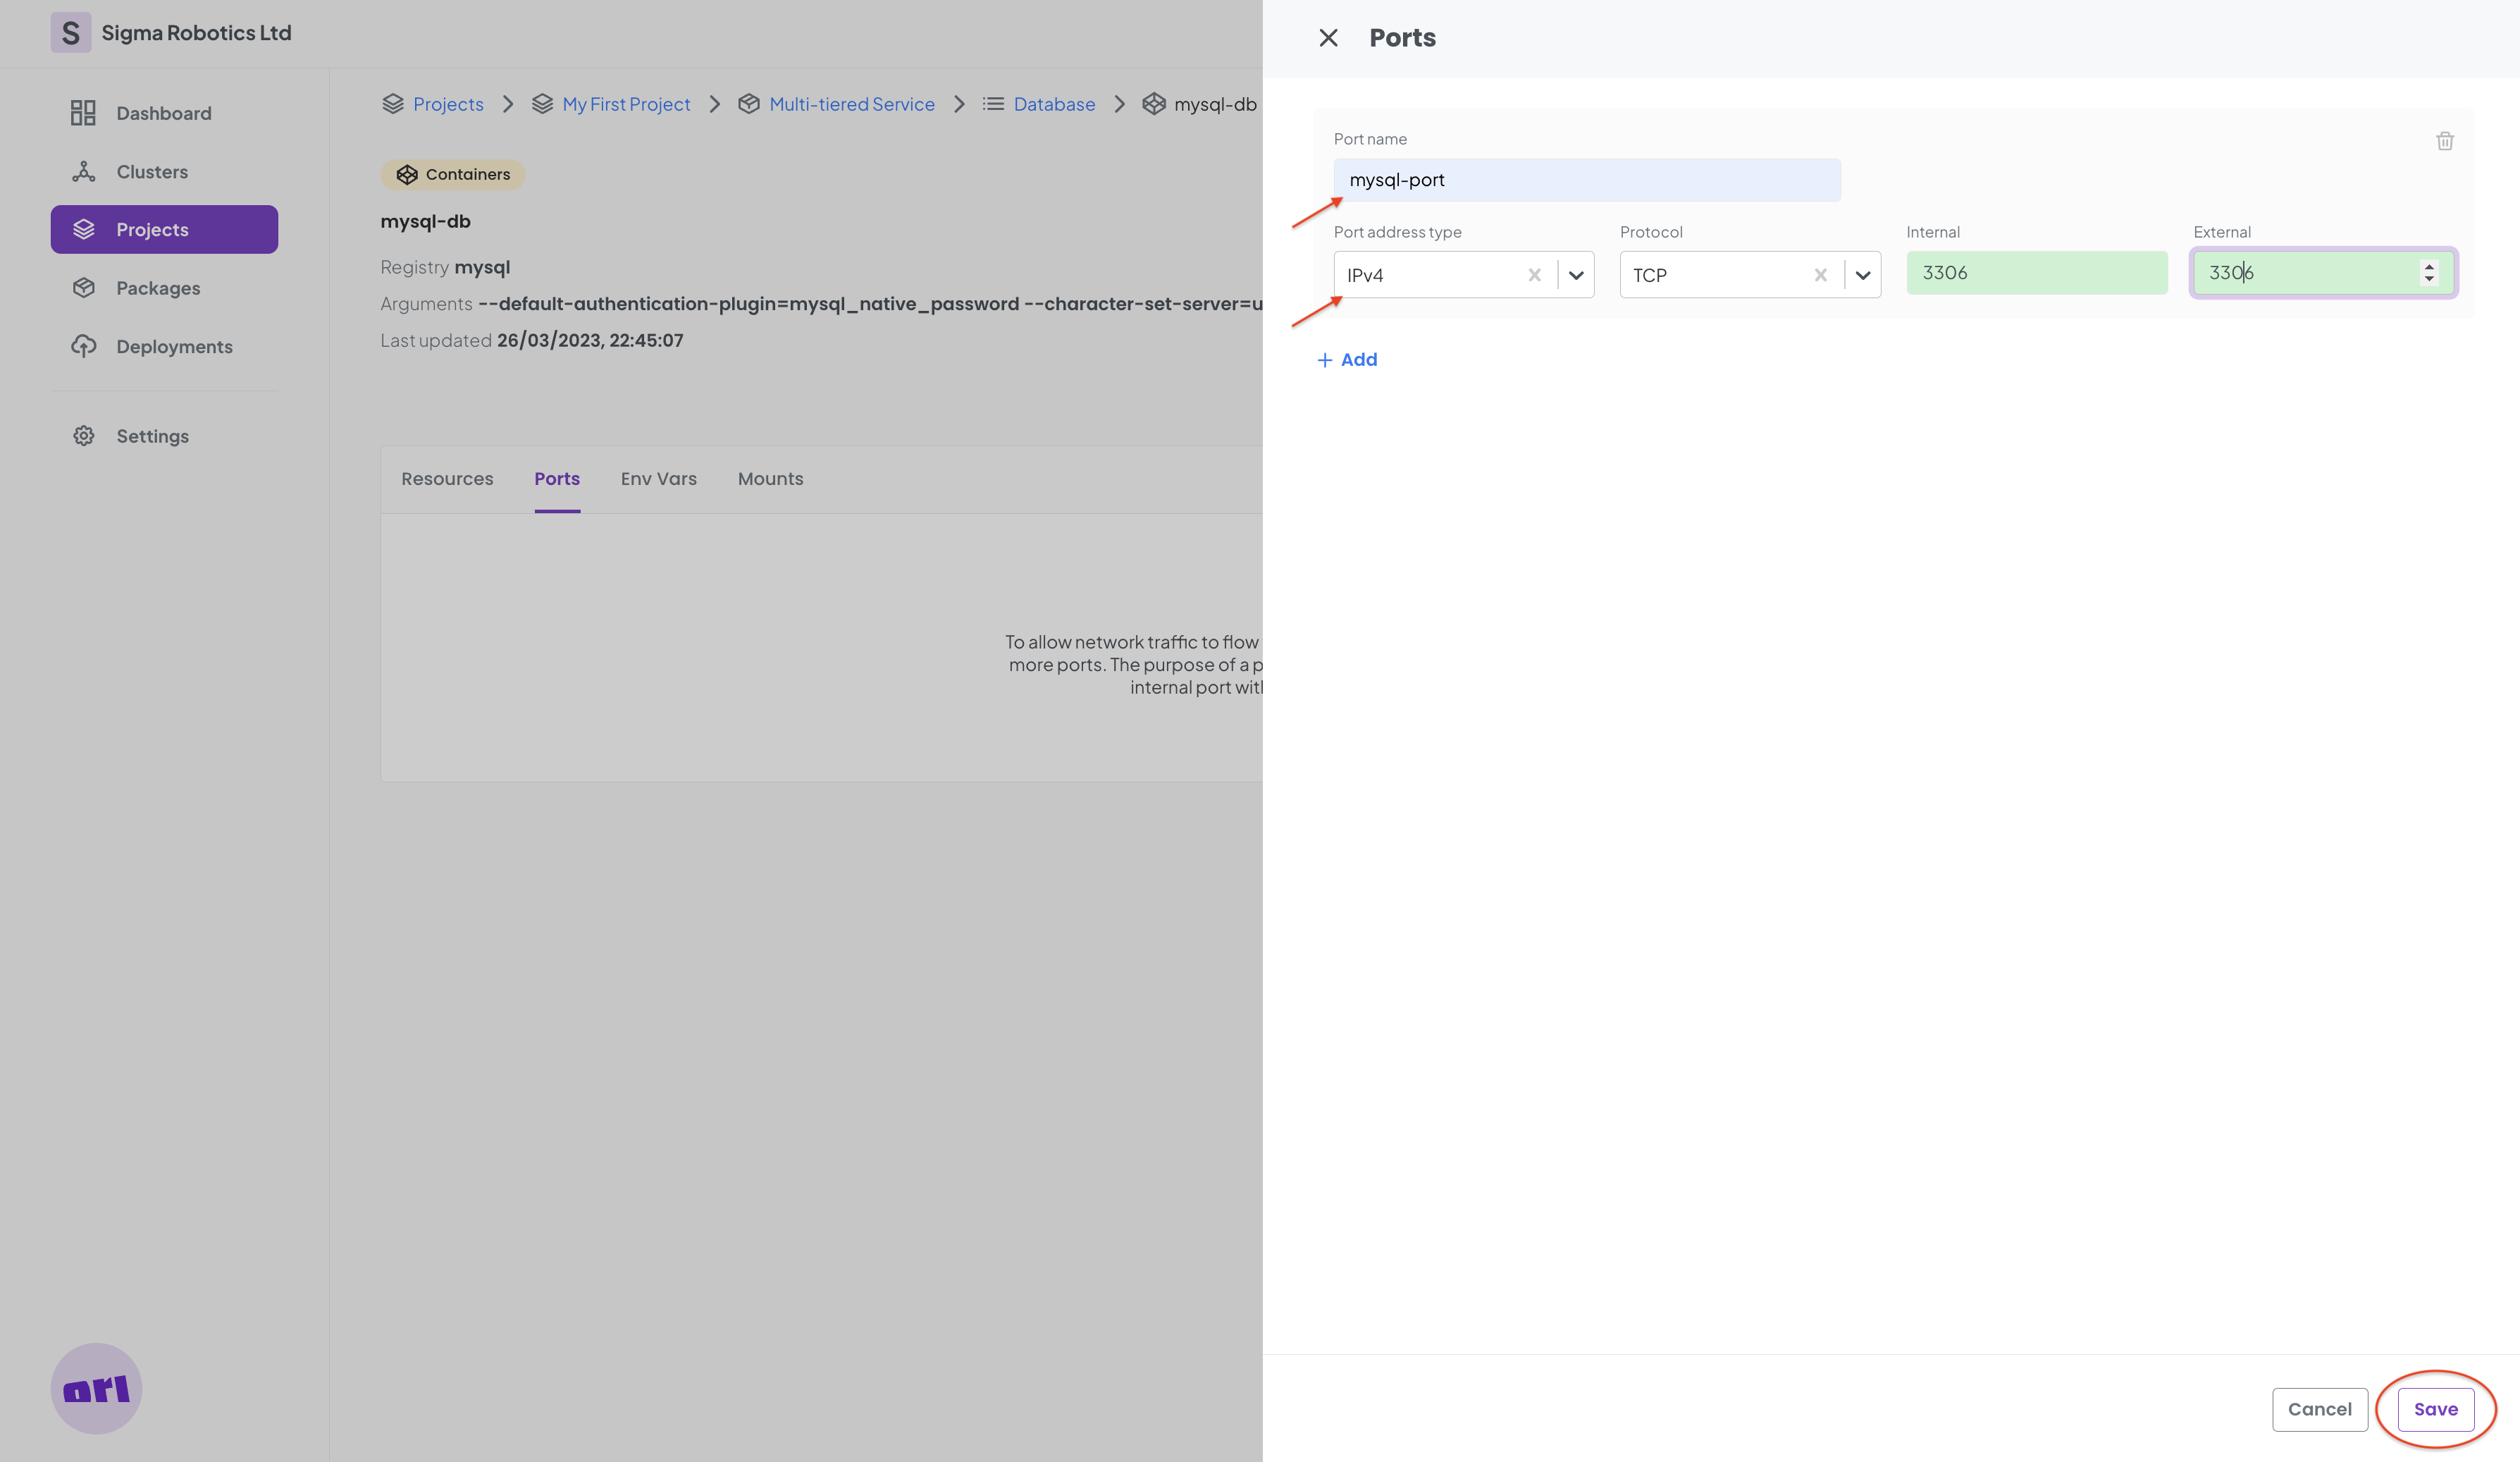
And finally click Save.

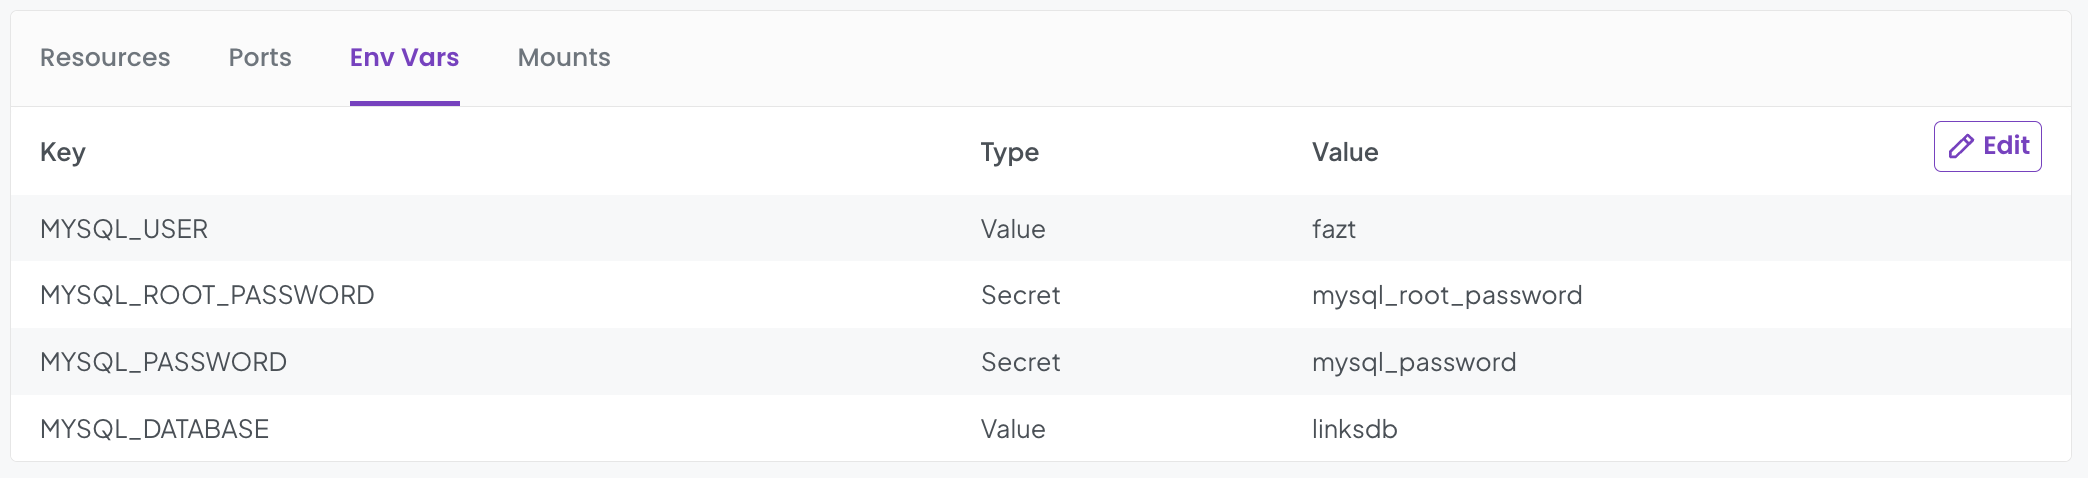
Now we need to add some Environment Variables.
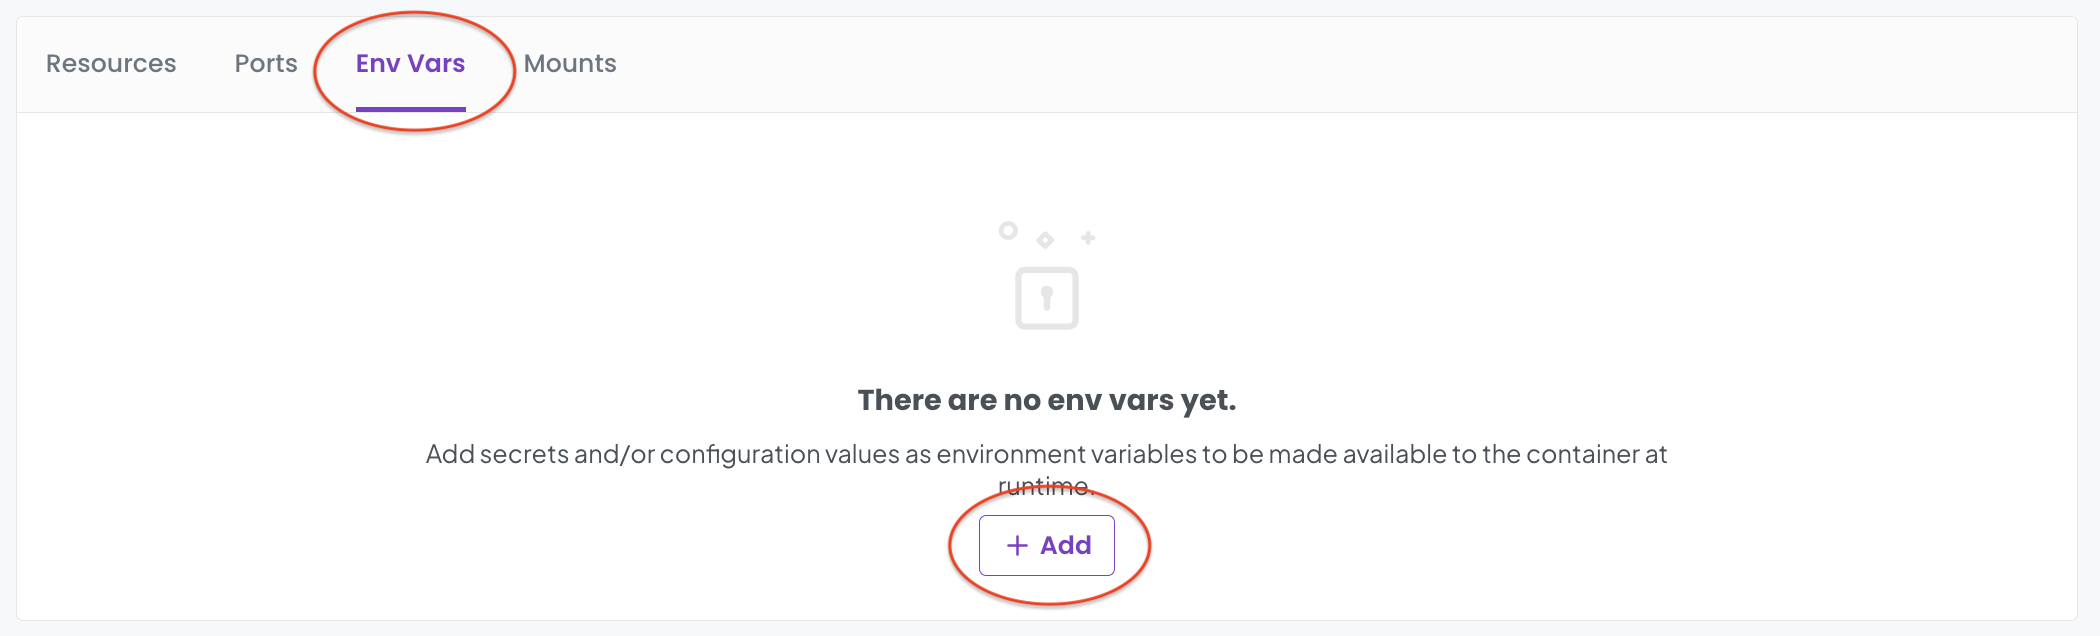
Fill in the modal with the following information:
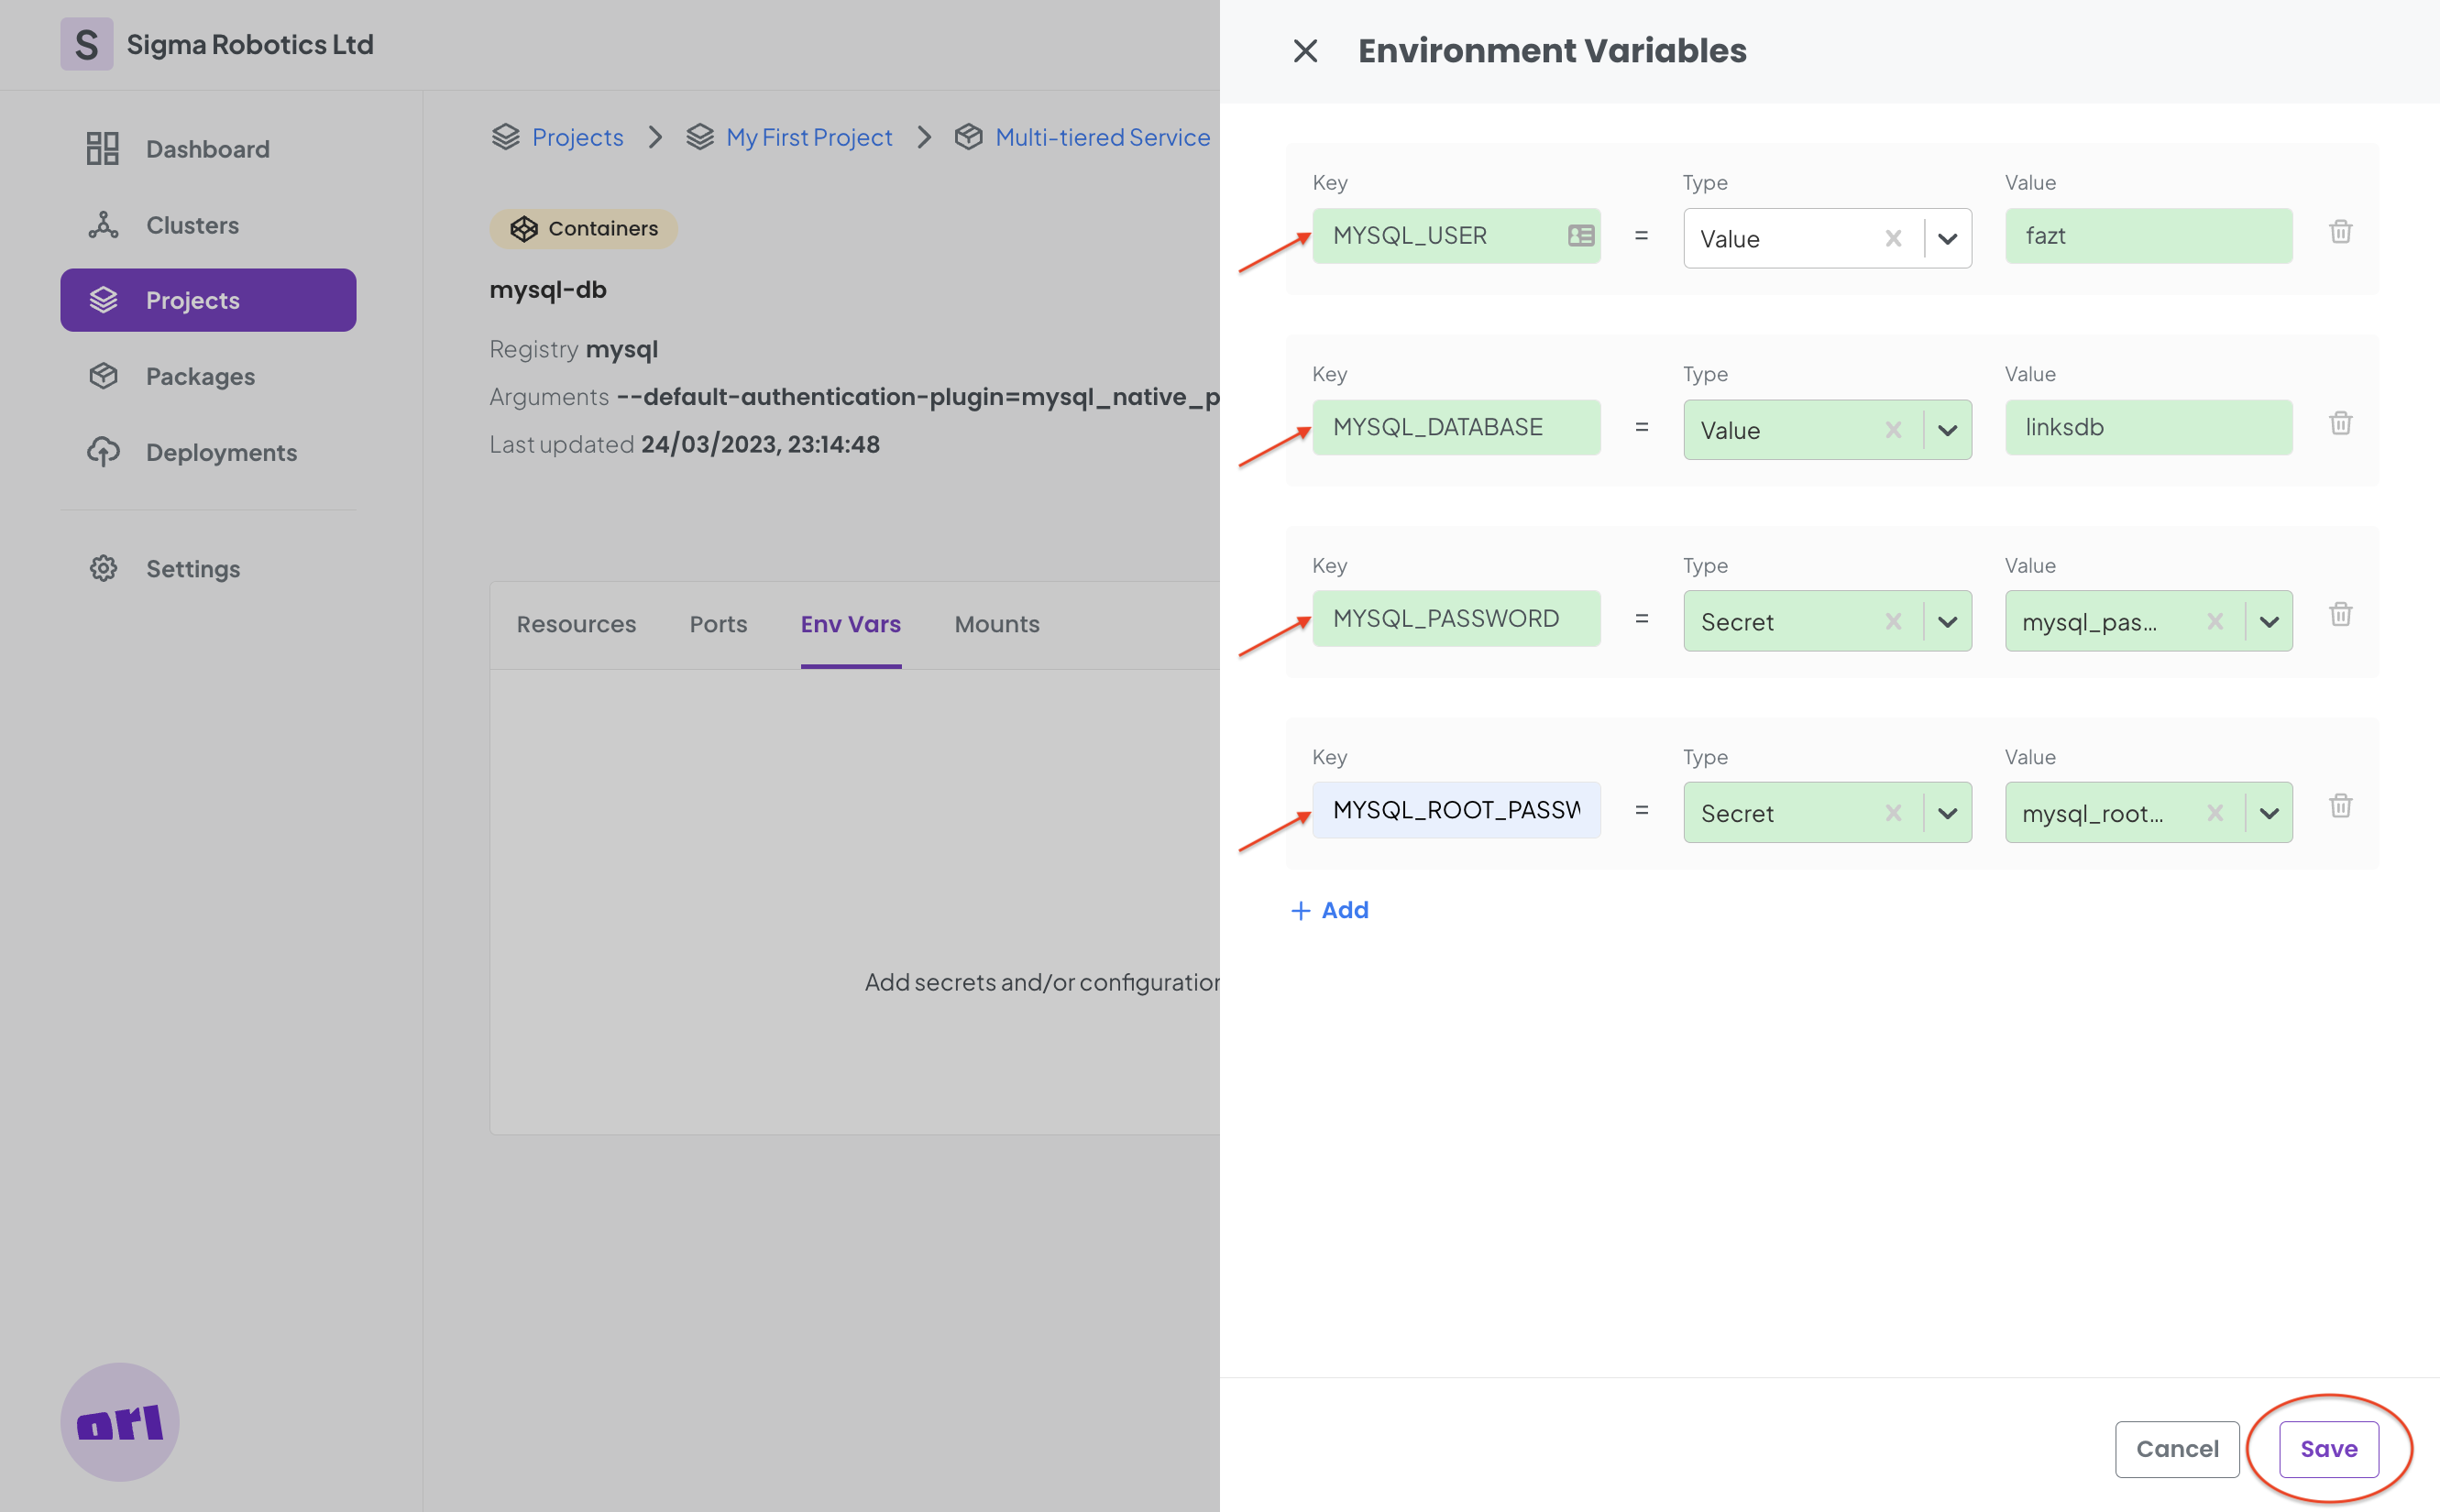
Note how we are making use of the secrets defined earlier on the project. This will ensure the password is securely passed to the container and remains confidential. Finally you will get:
Finally we need to mount the Database configuration on the container. This will be automatically loaded at run time.
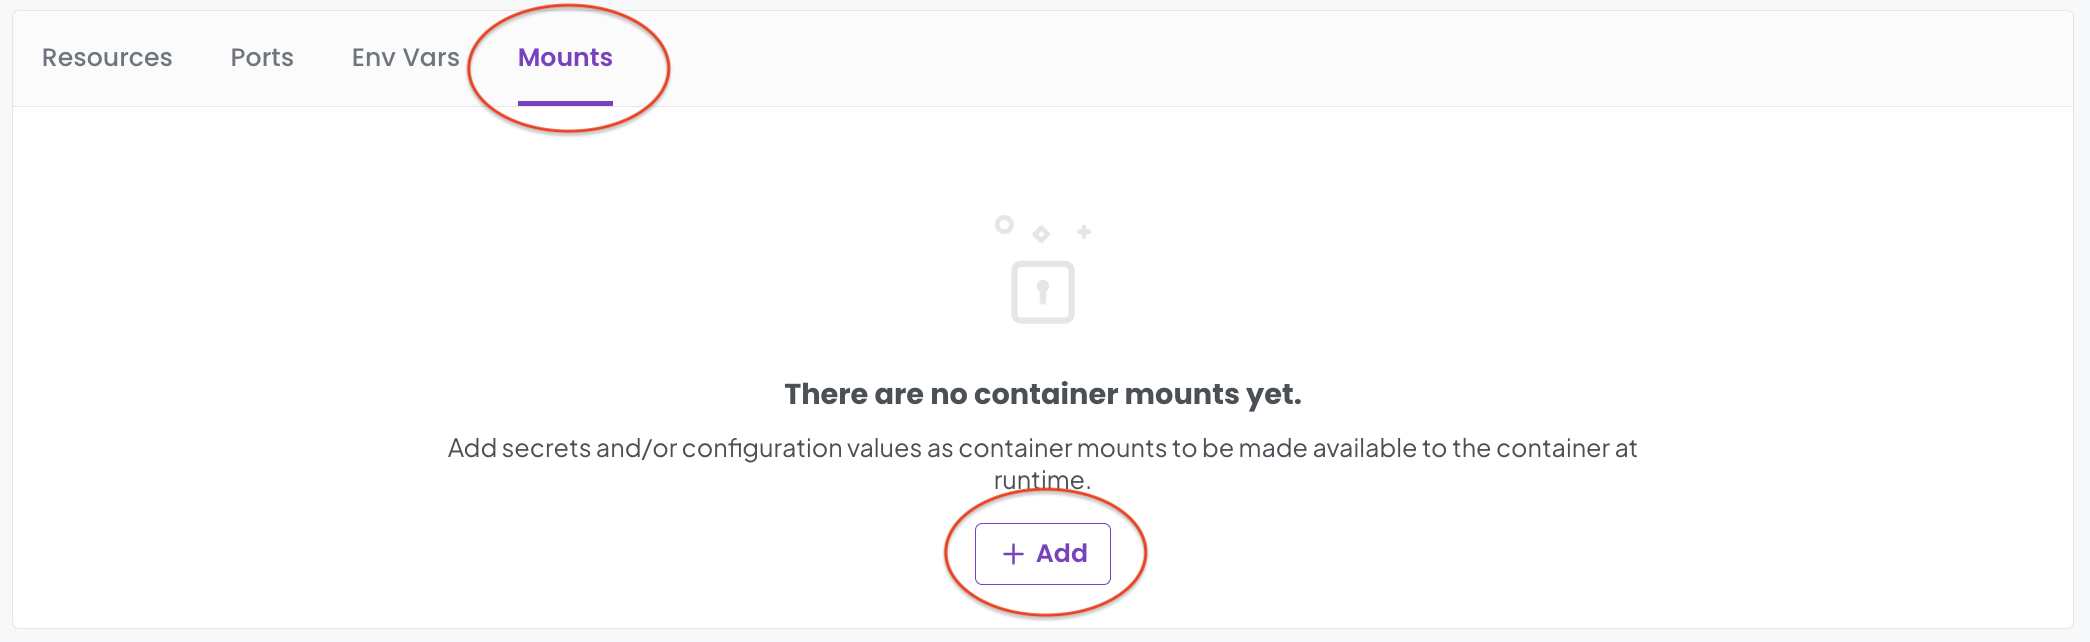
Fill in the modal with the following information and selects Save when finished:
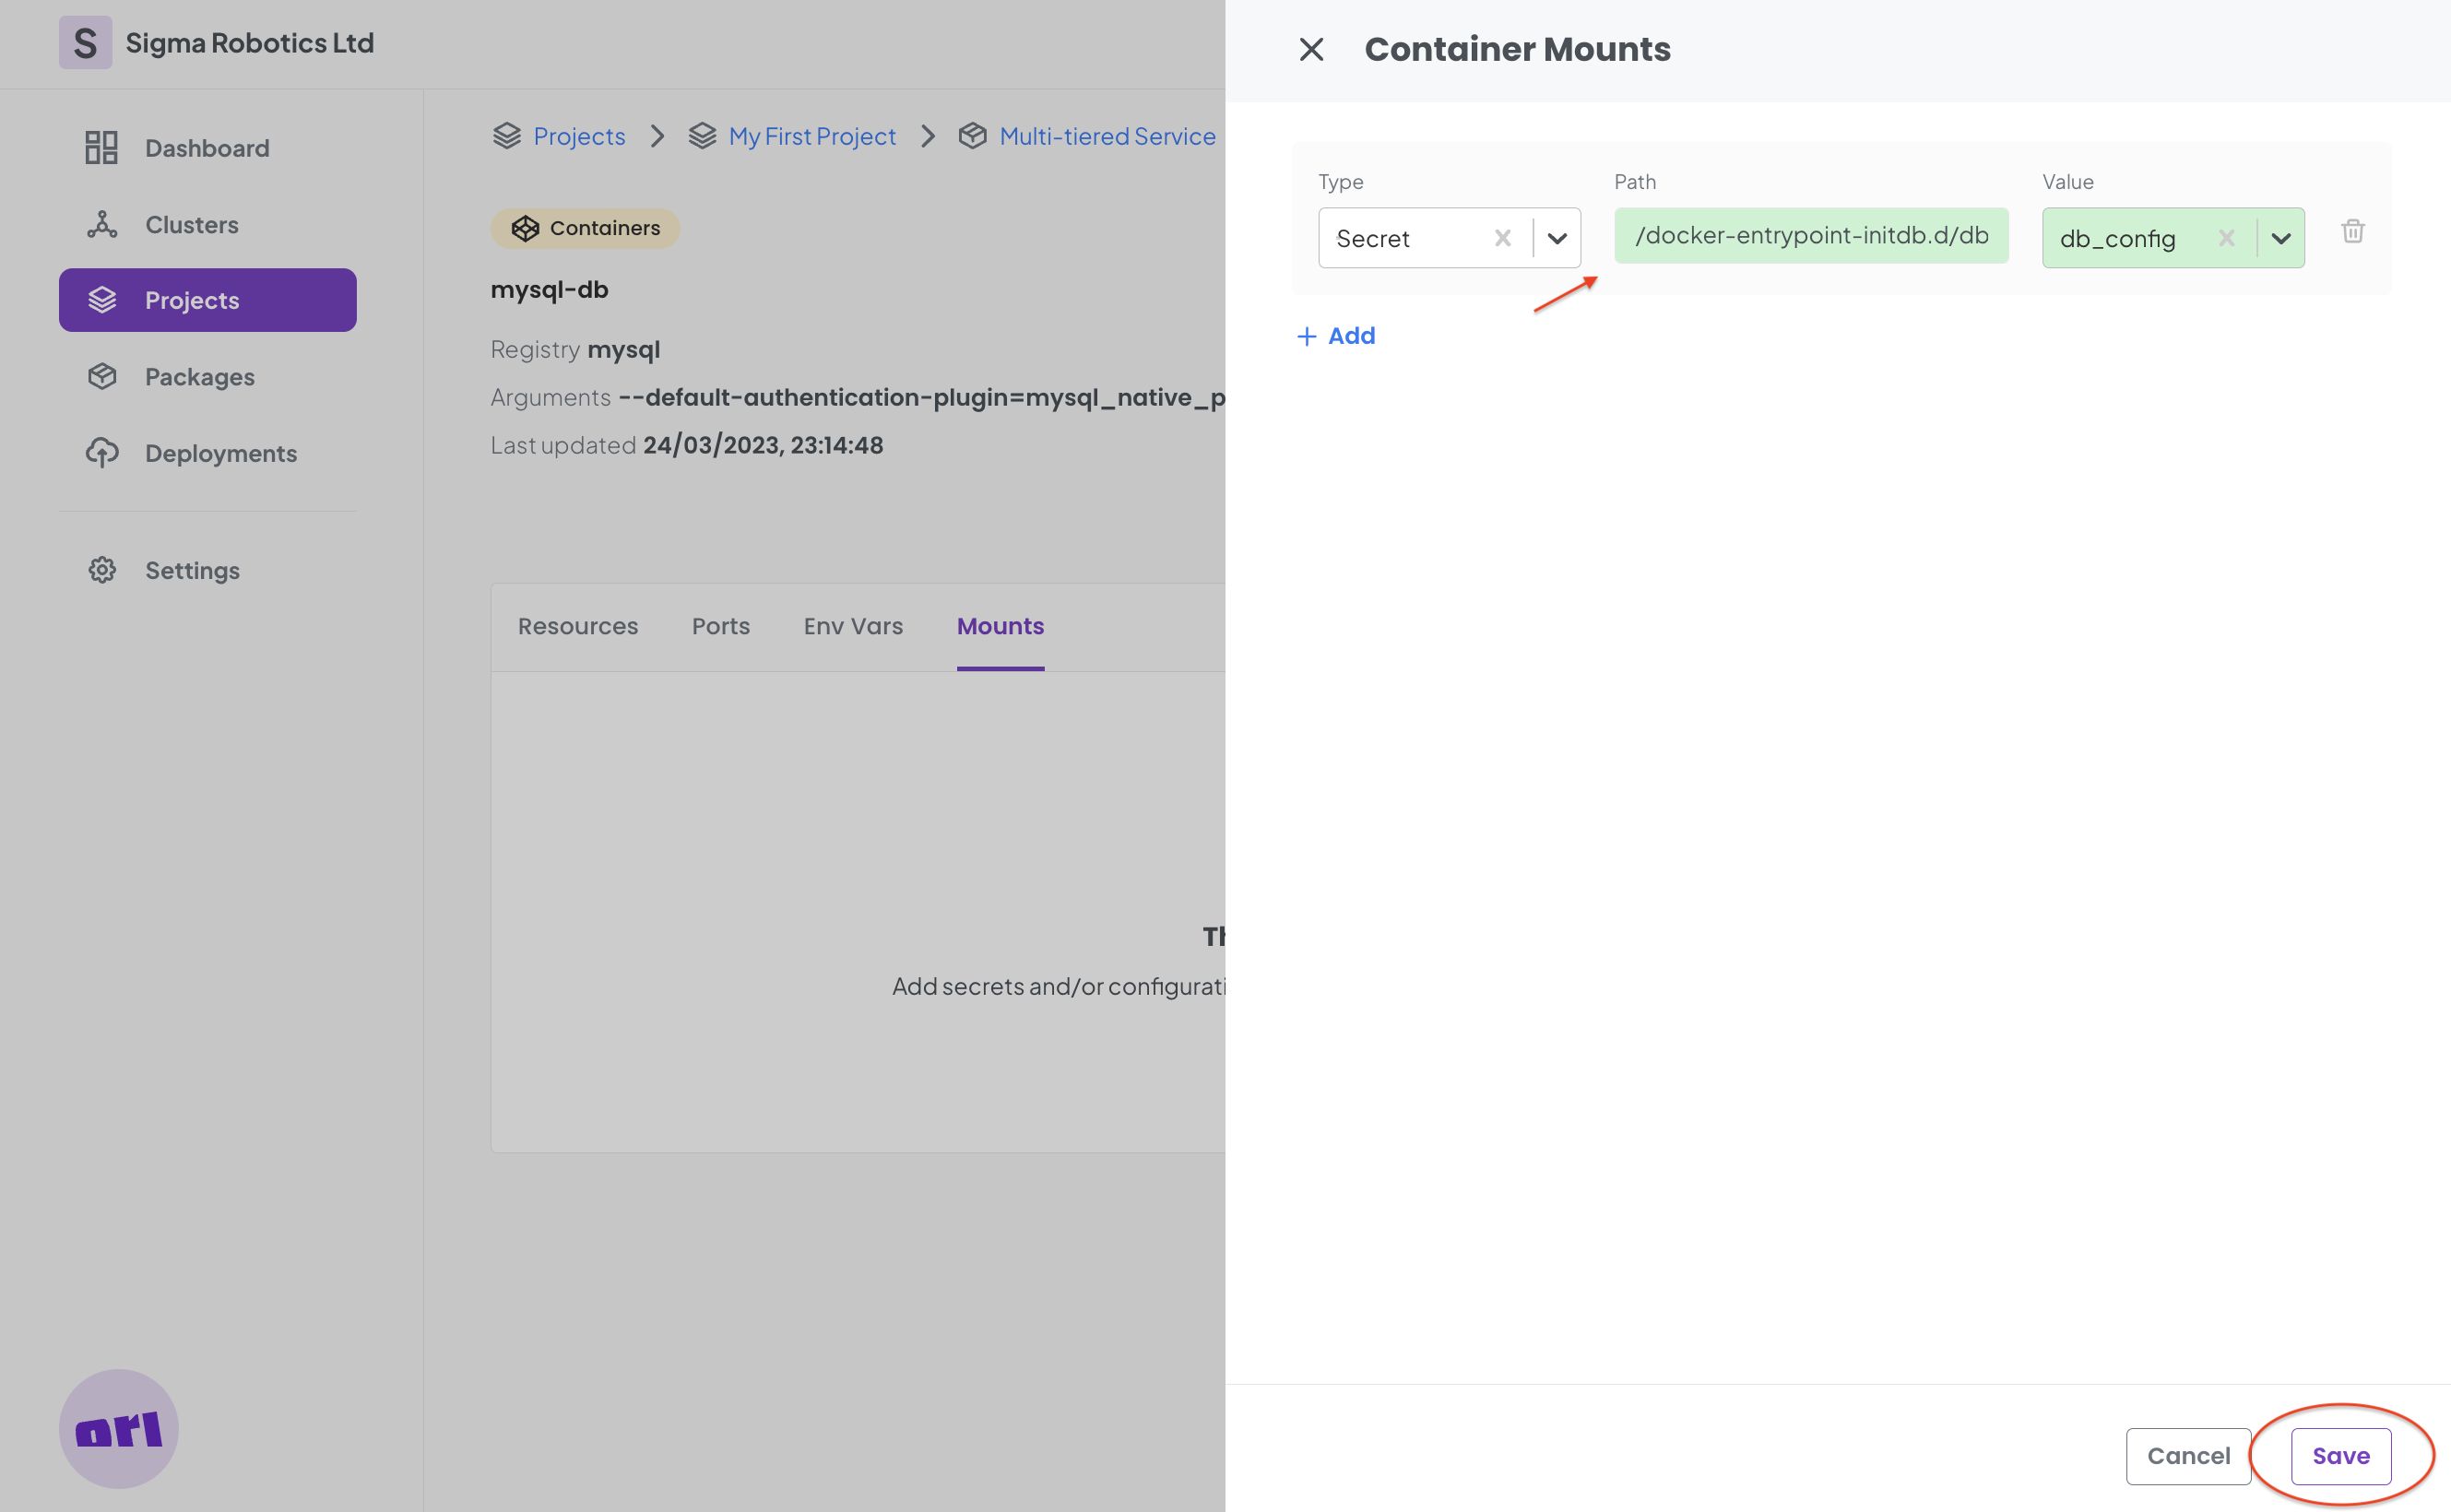
Note that we are securely retrieving the database configuration that we previously stored on the Secrets vault and passing it at runtime to configure the container.

Finally our container is fully configured. We have not defined any specific resource requests and limits but these can be configured on the Resources tab.
Step 5 - Configuring the Network for Exposing the Database Externally
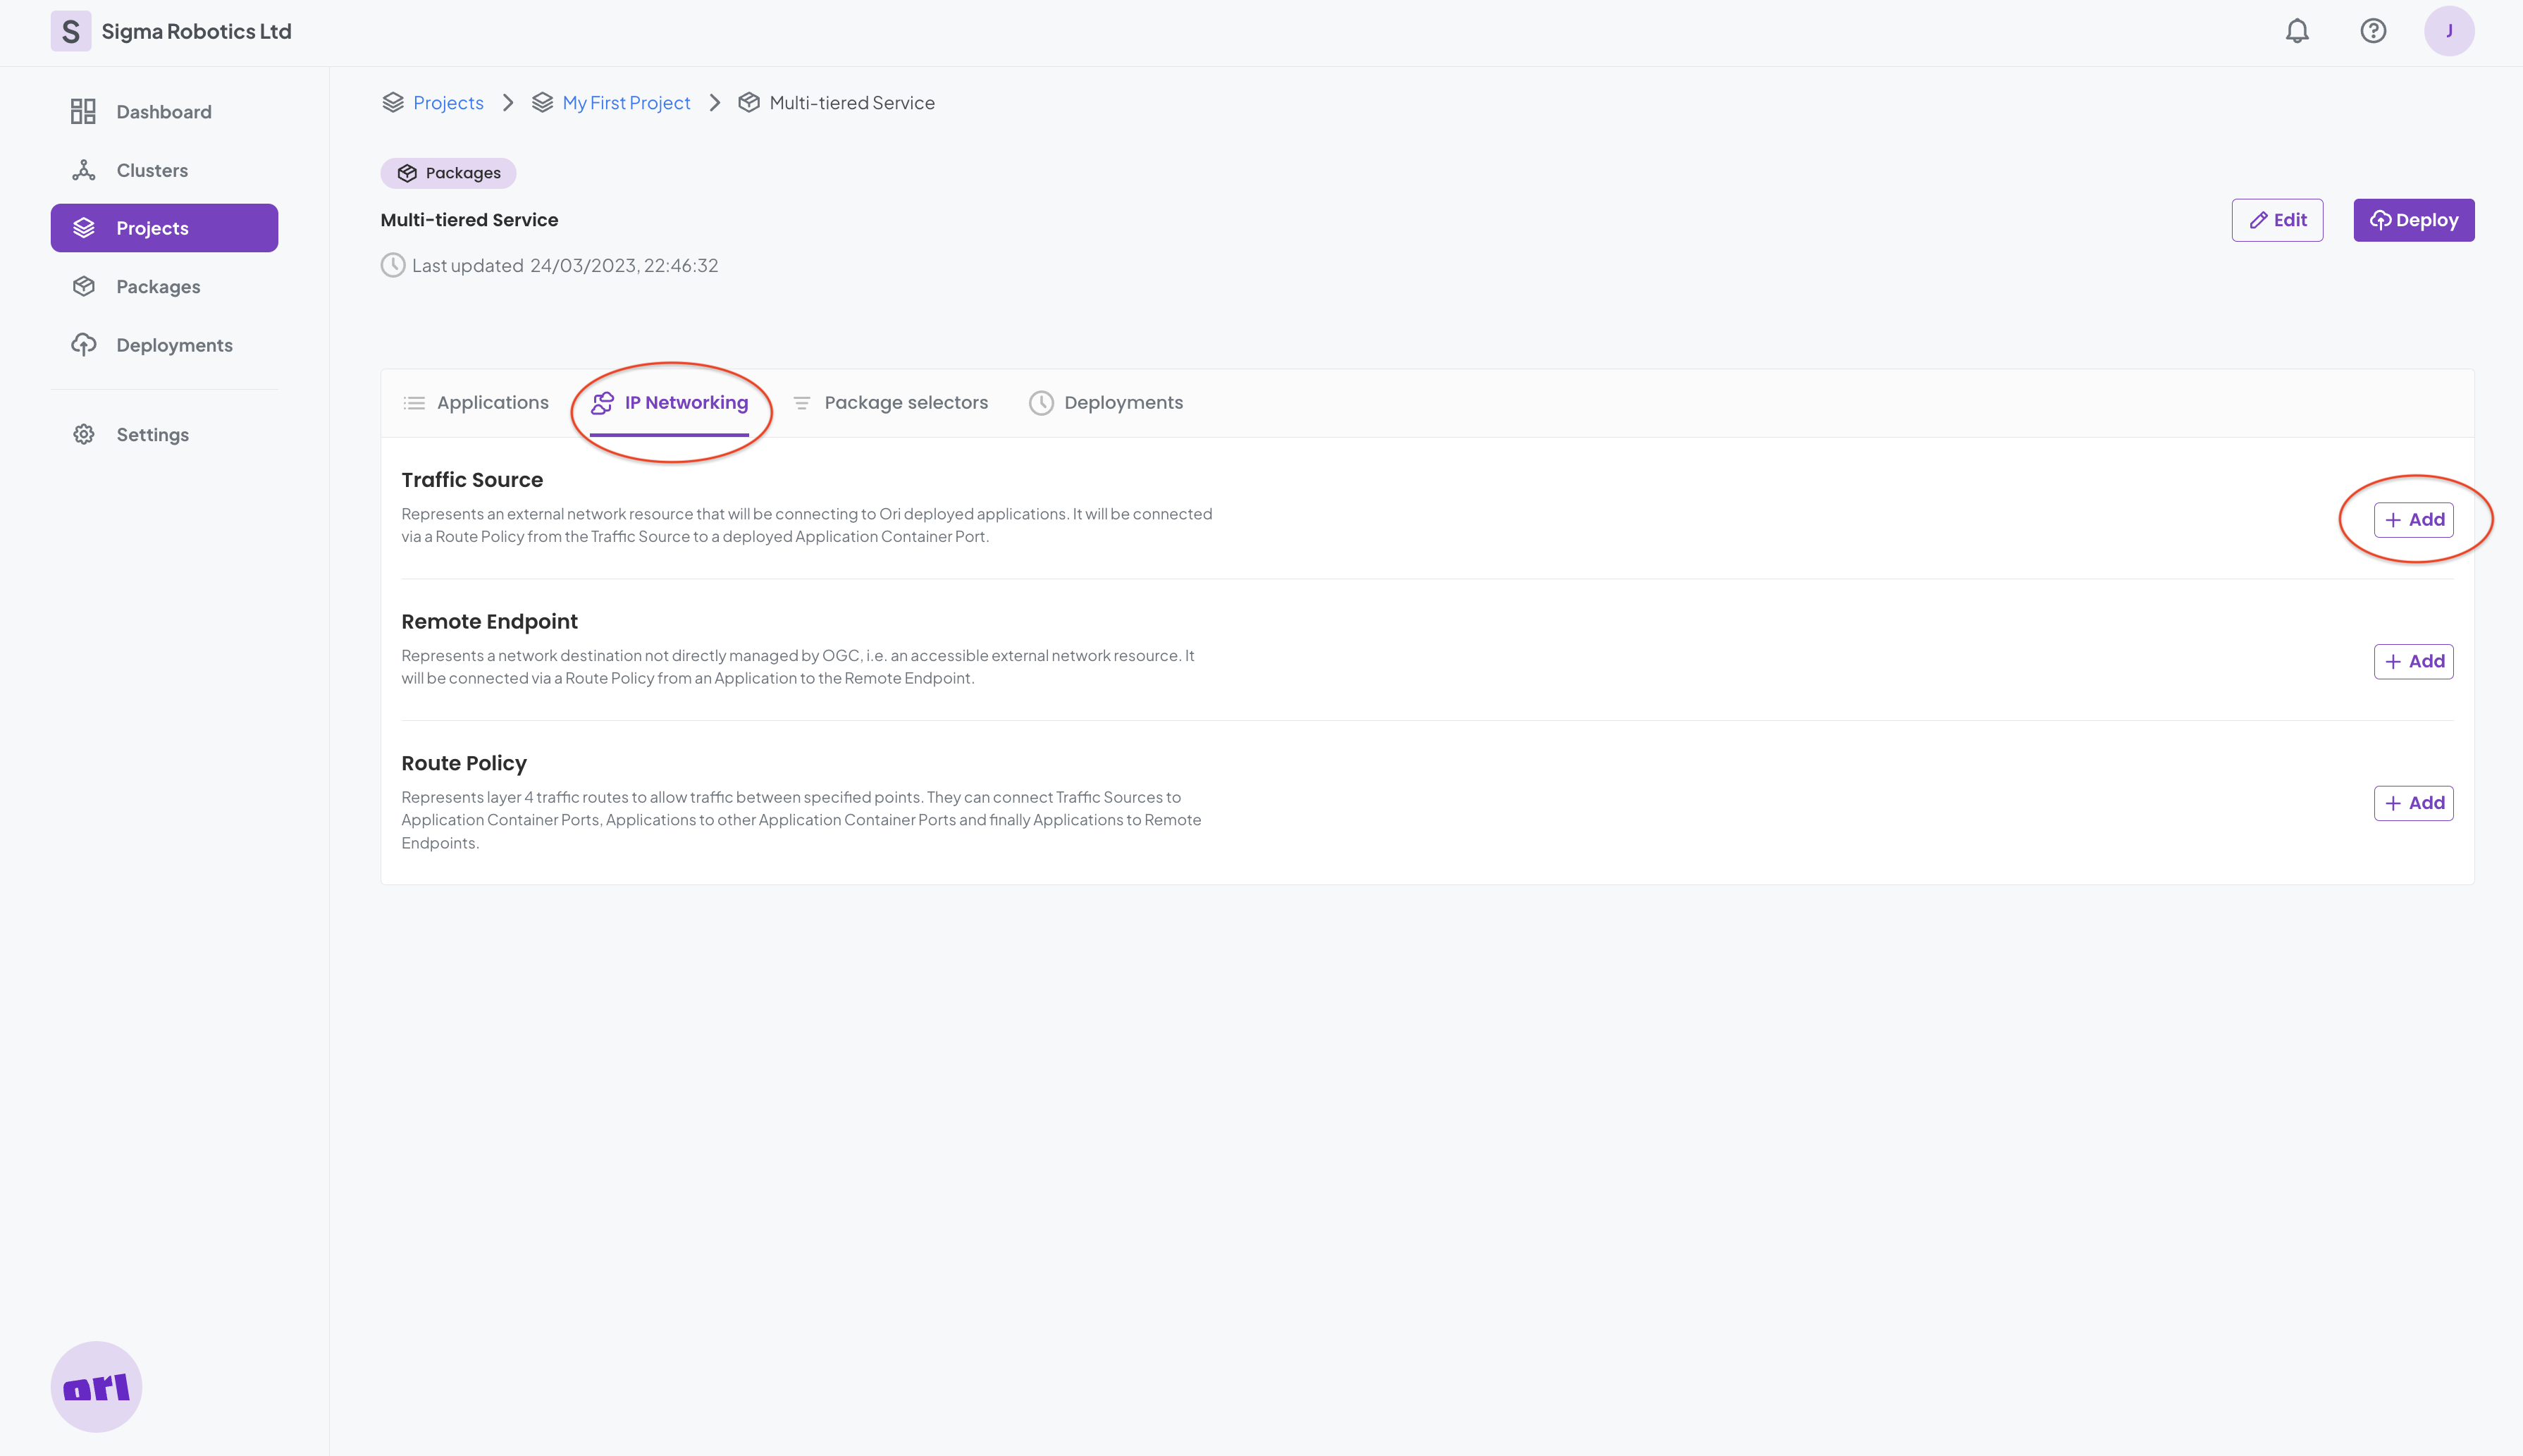
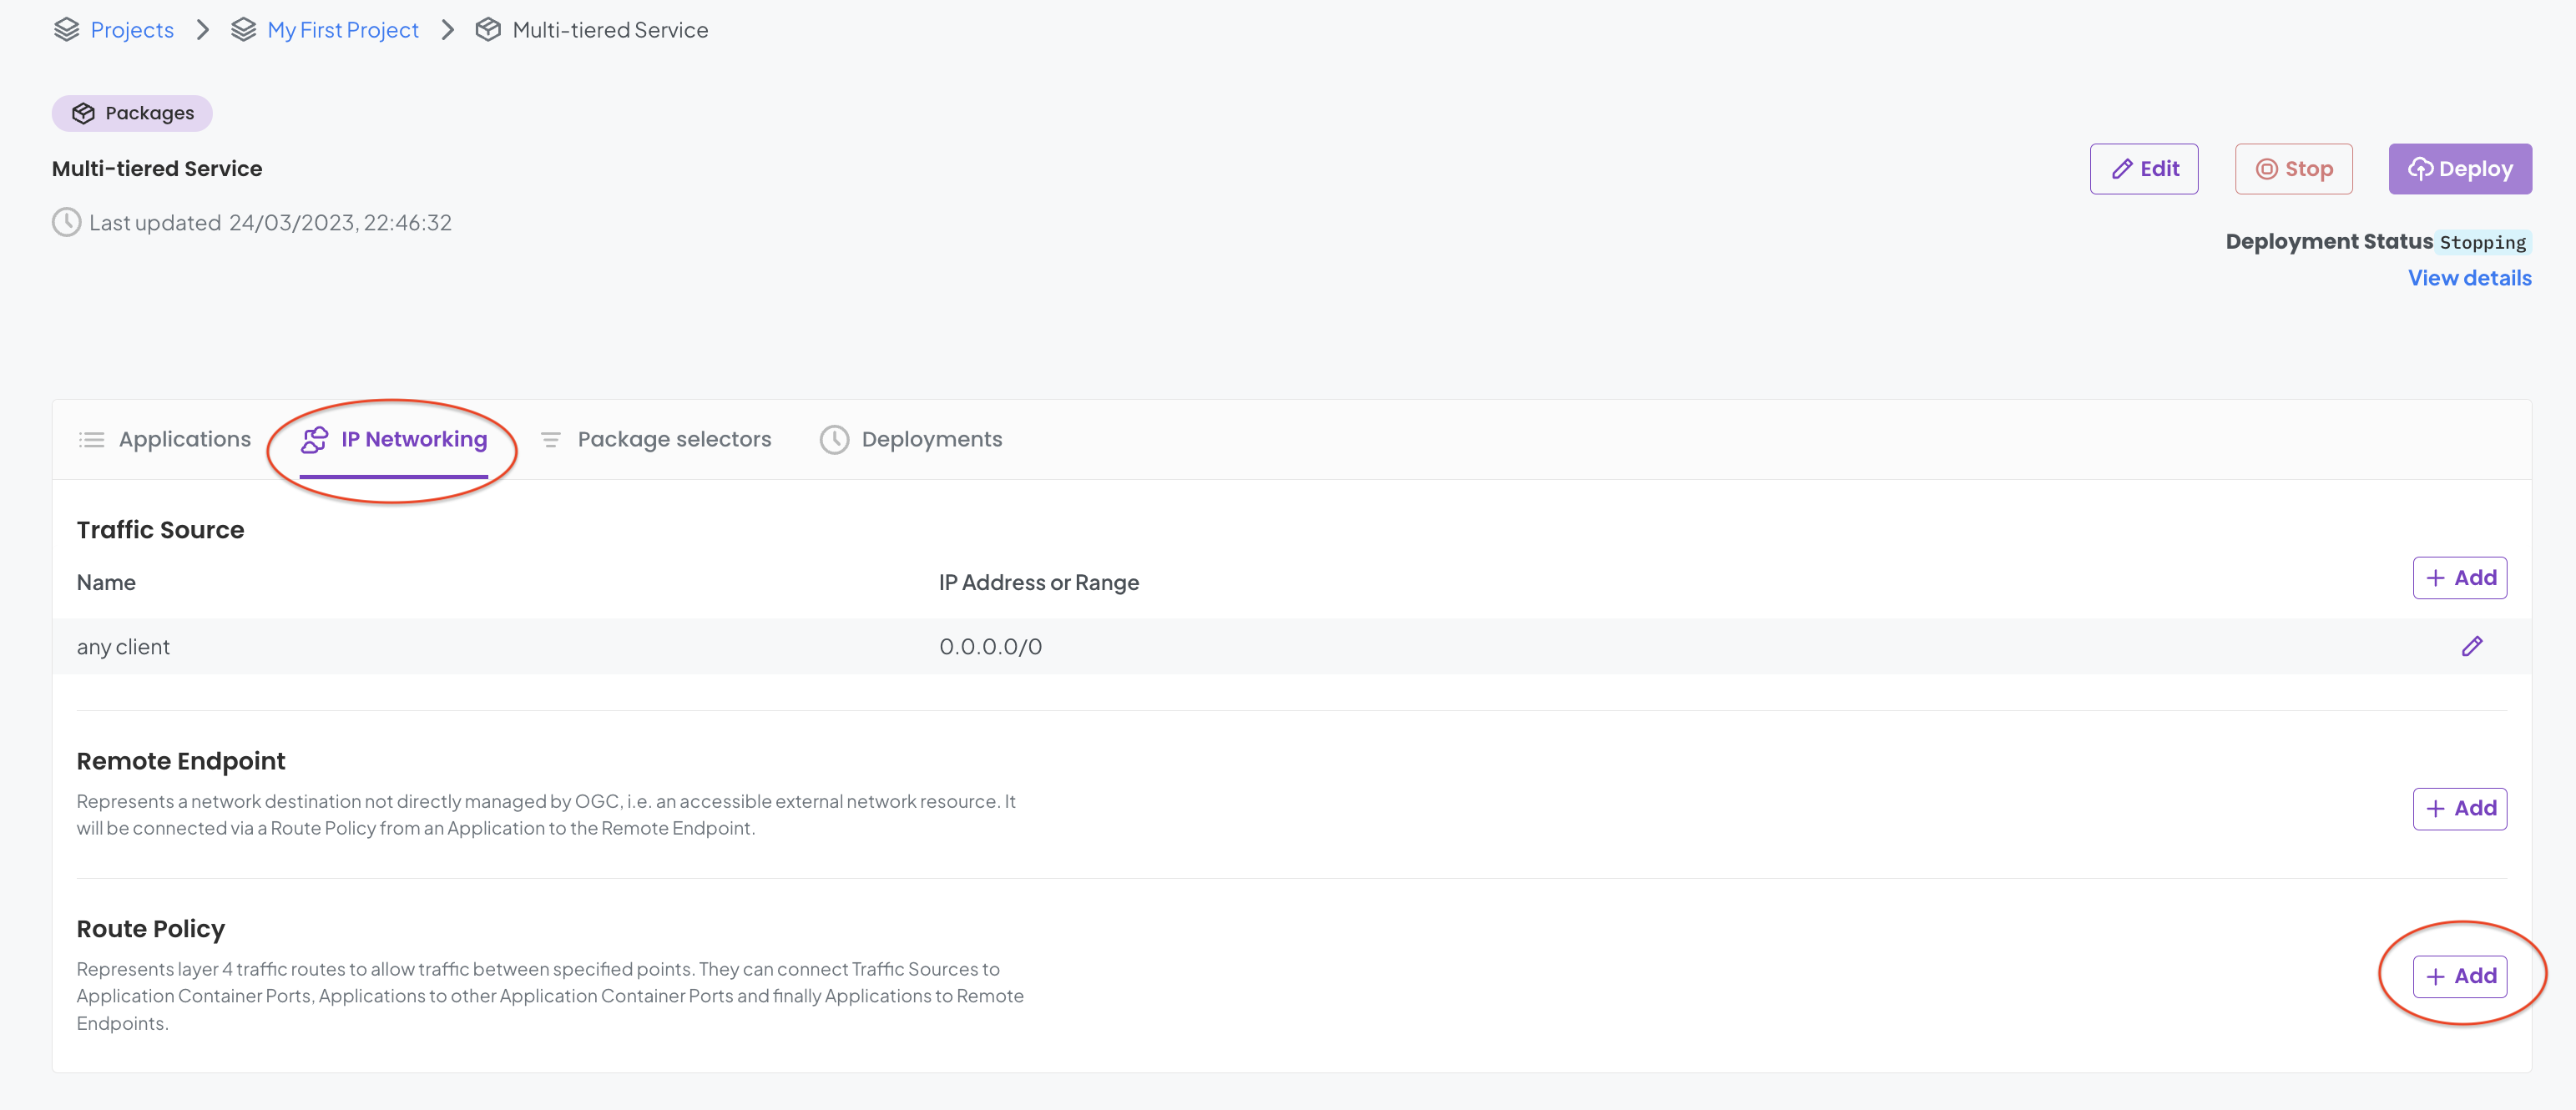
We now revert back to the Package page and are going to configure the Networking for our Database Application.
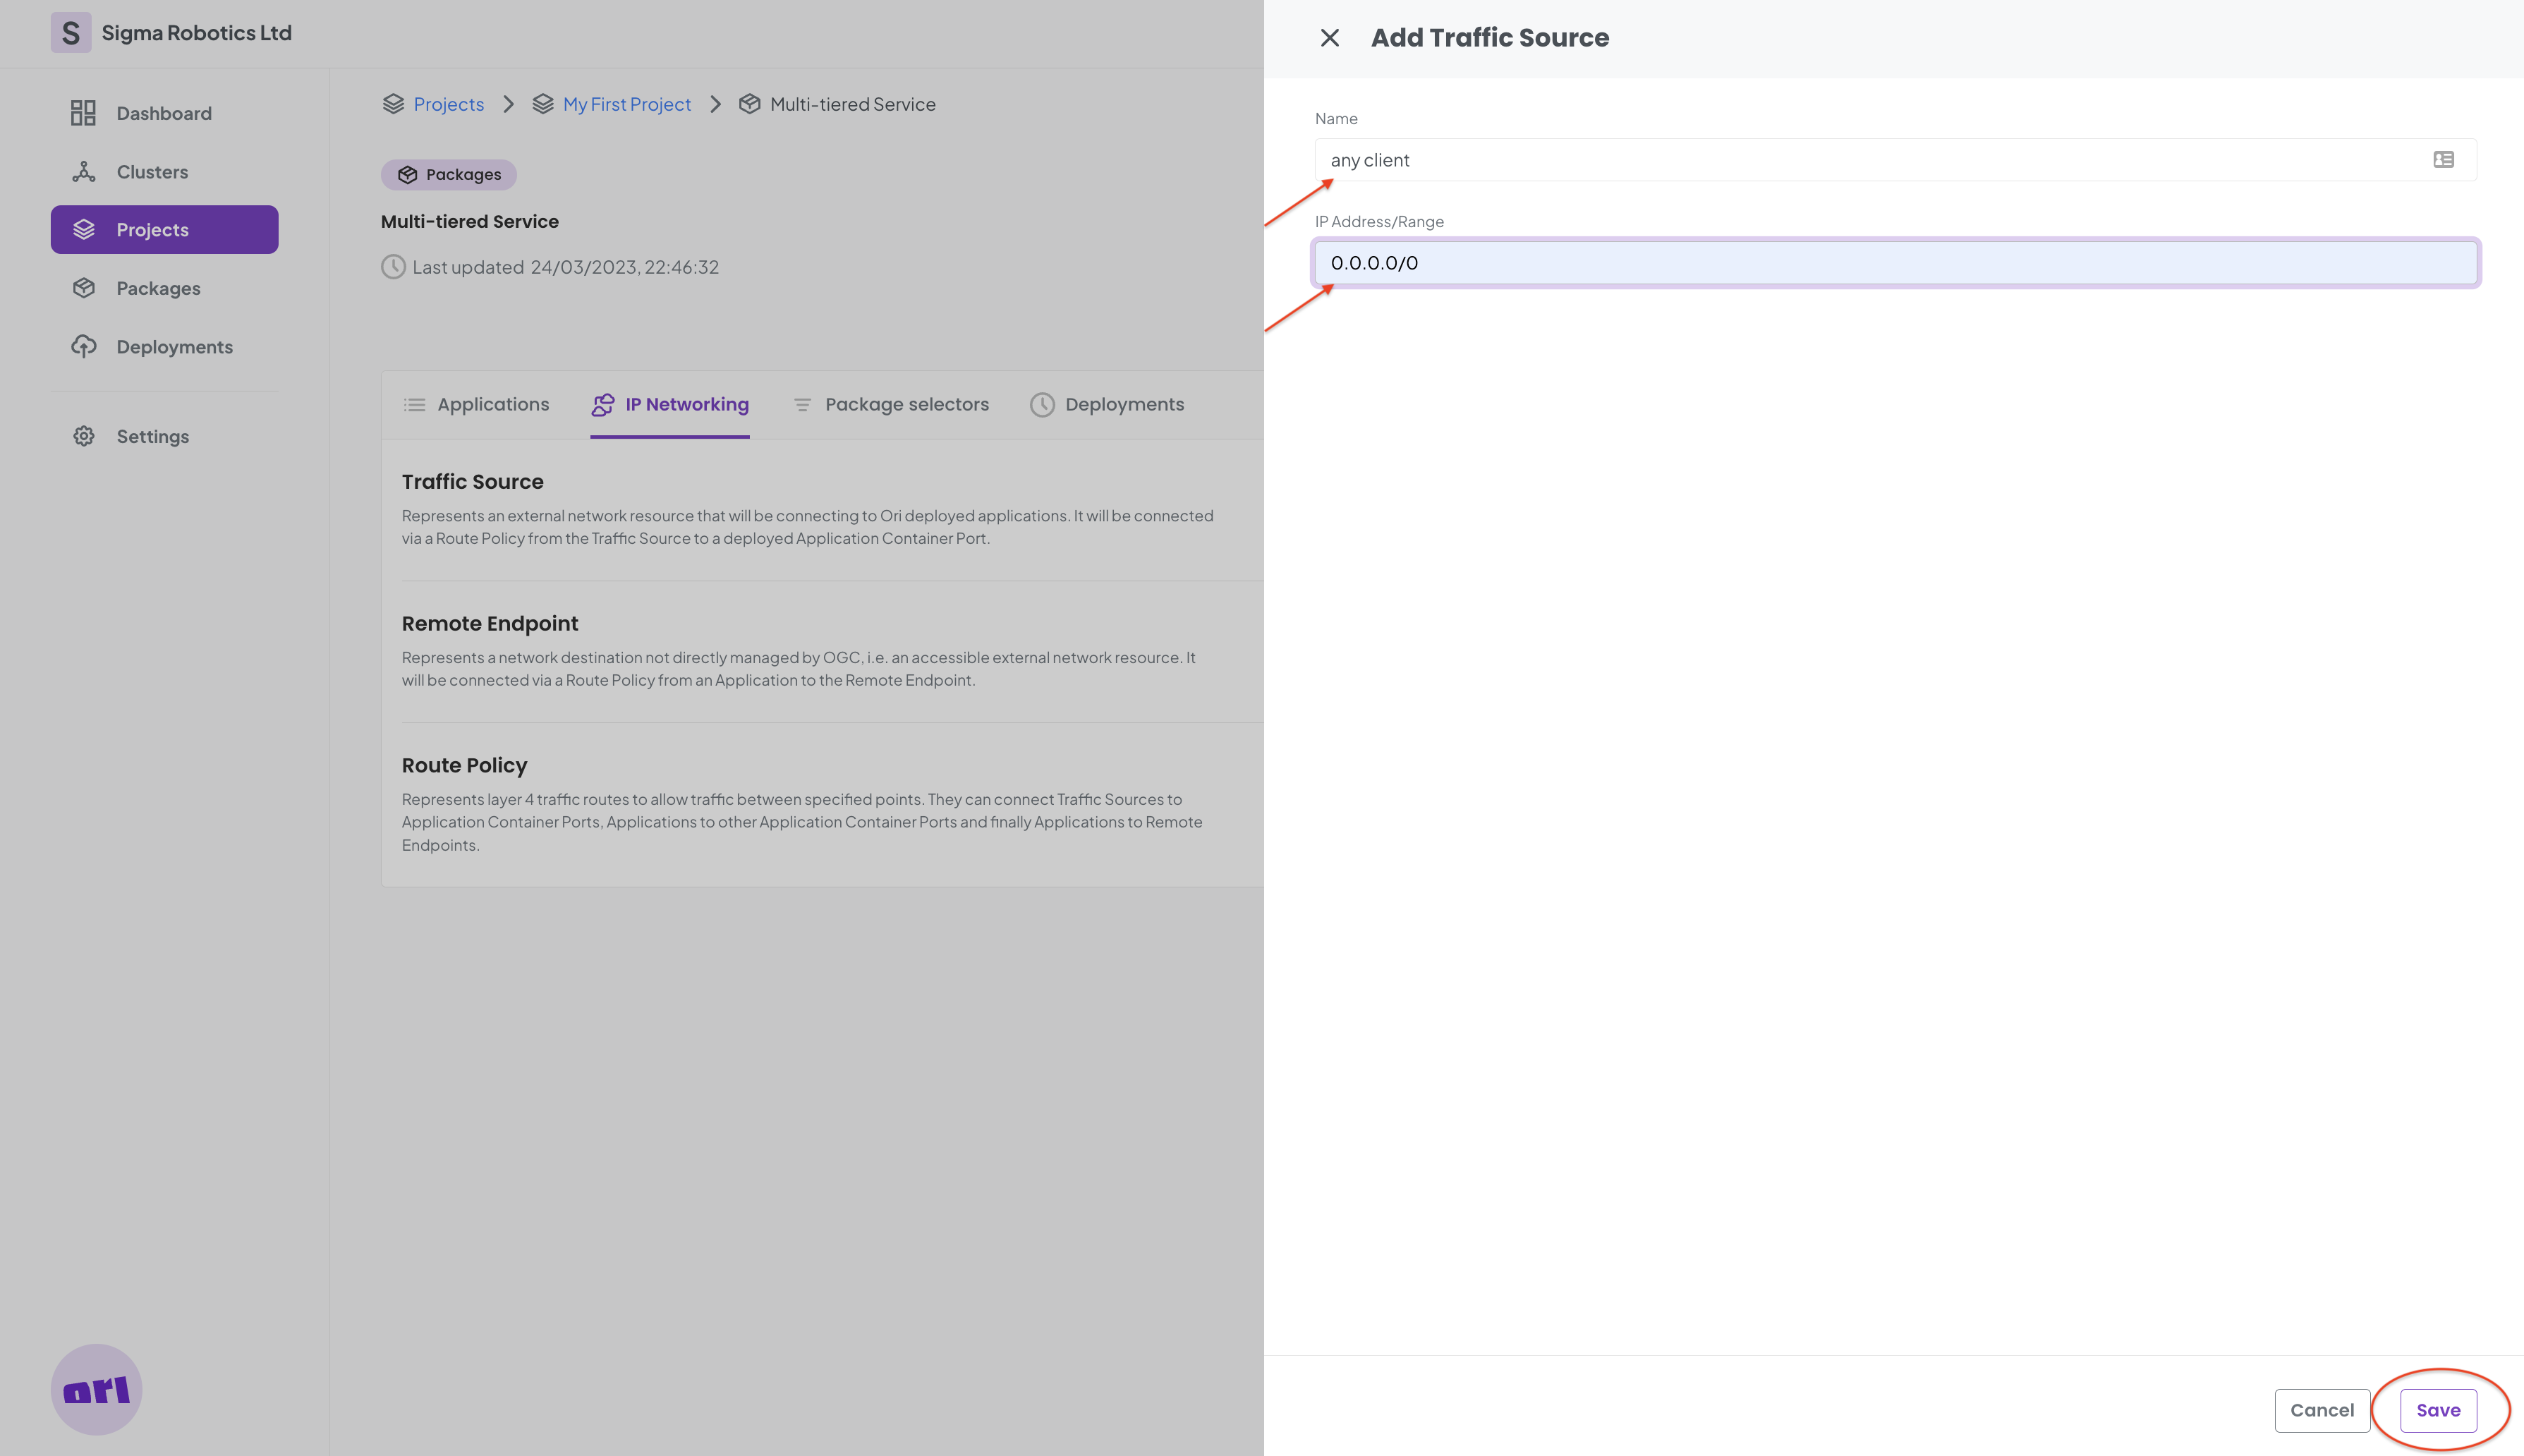
First we add a Traffic Source:
This Traffic Source represents all clients with any IPv4 Address:
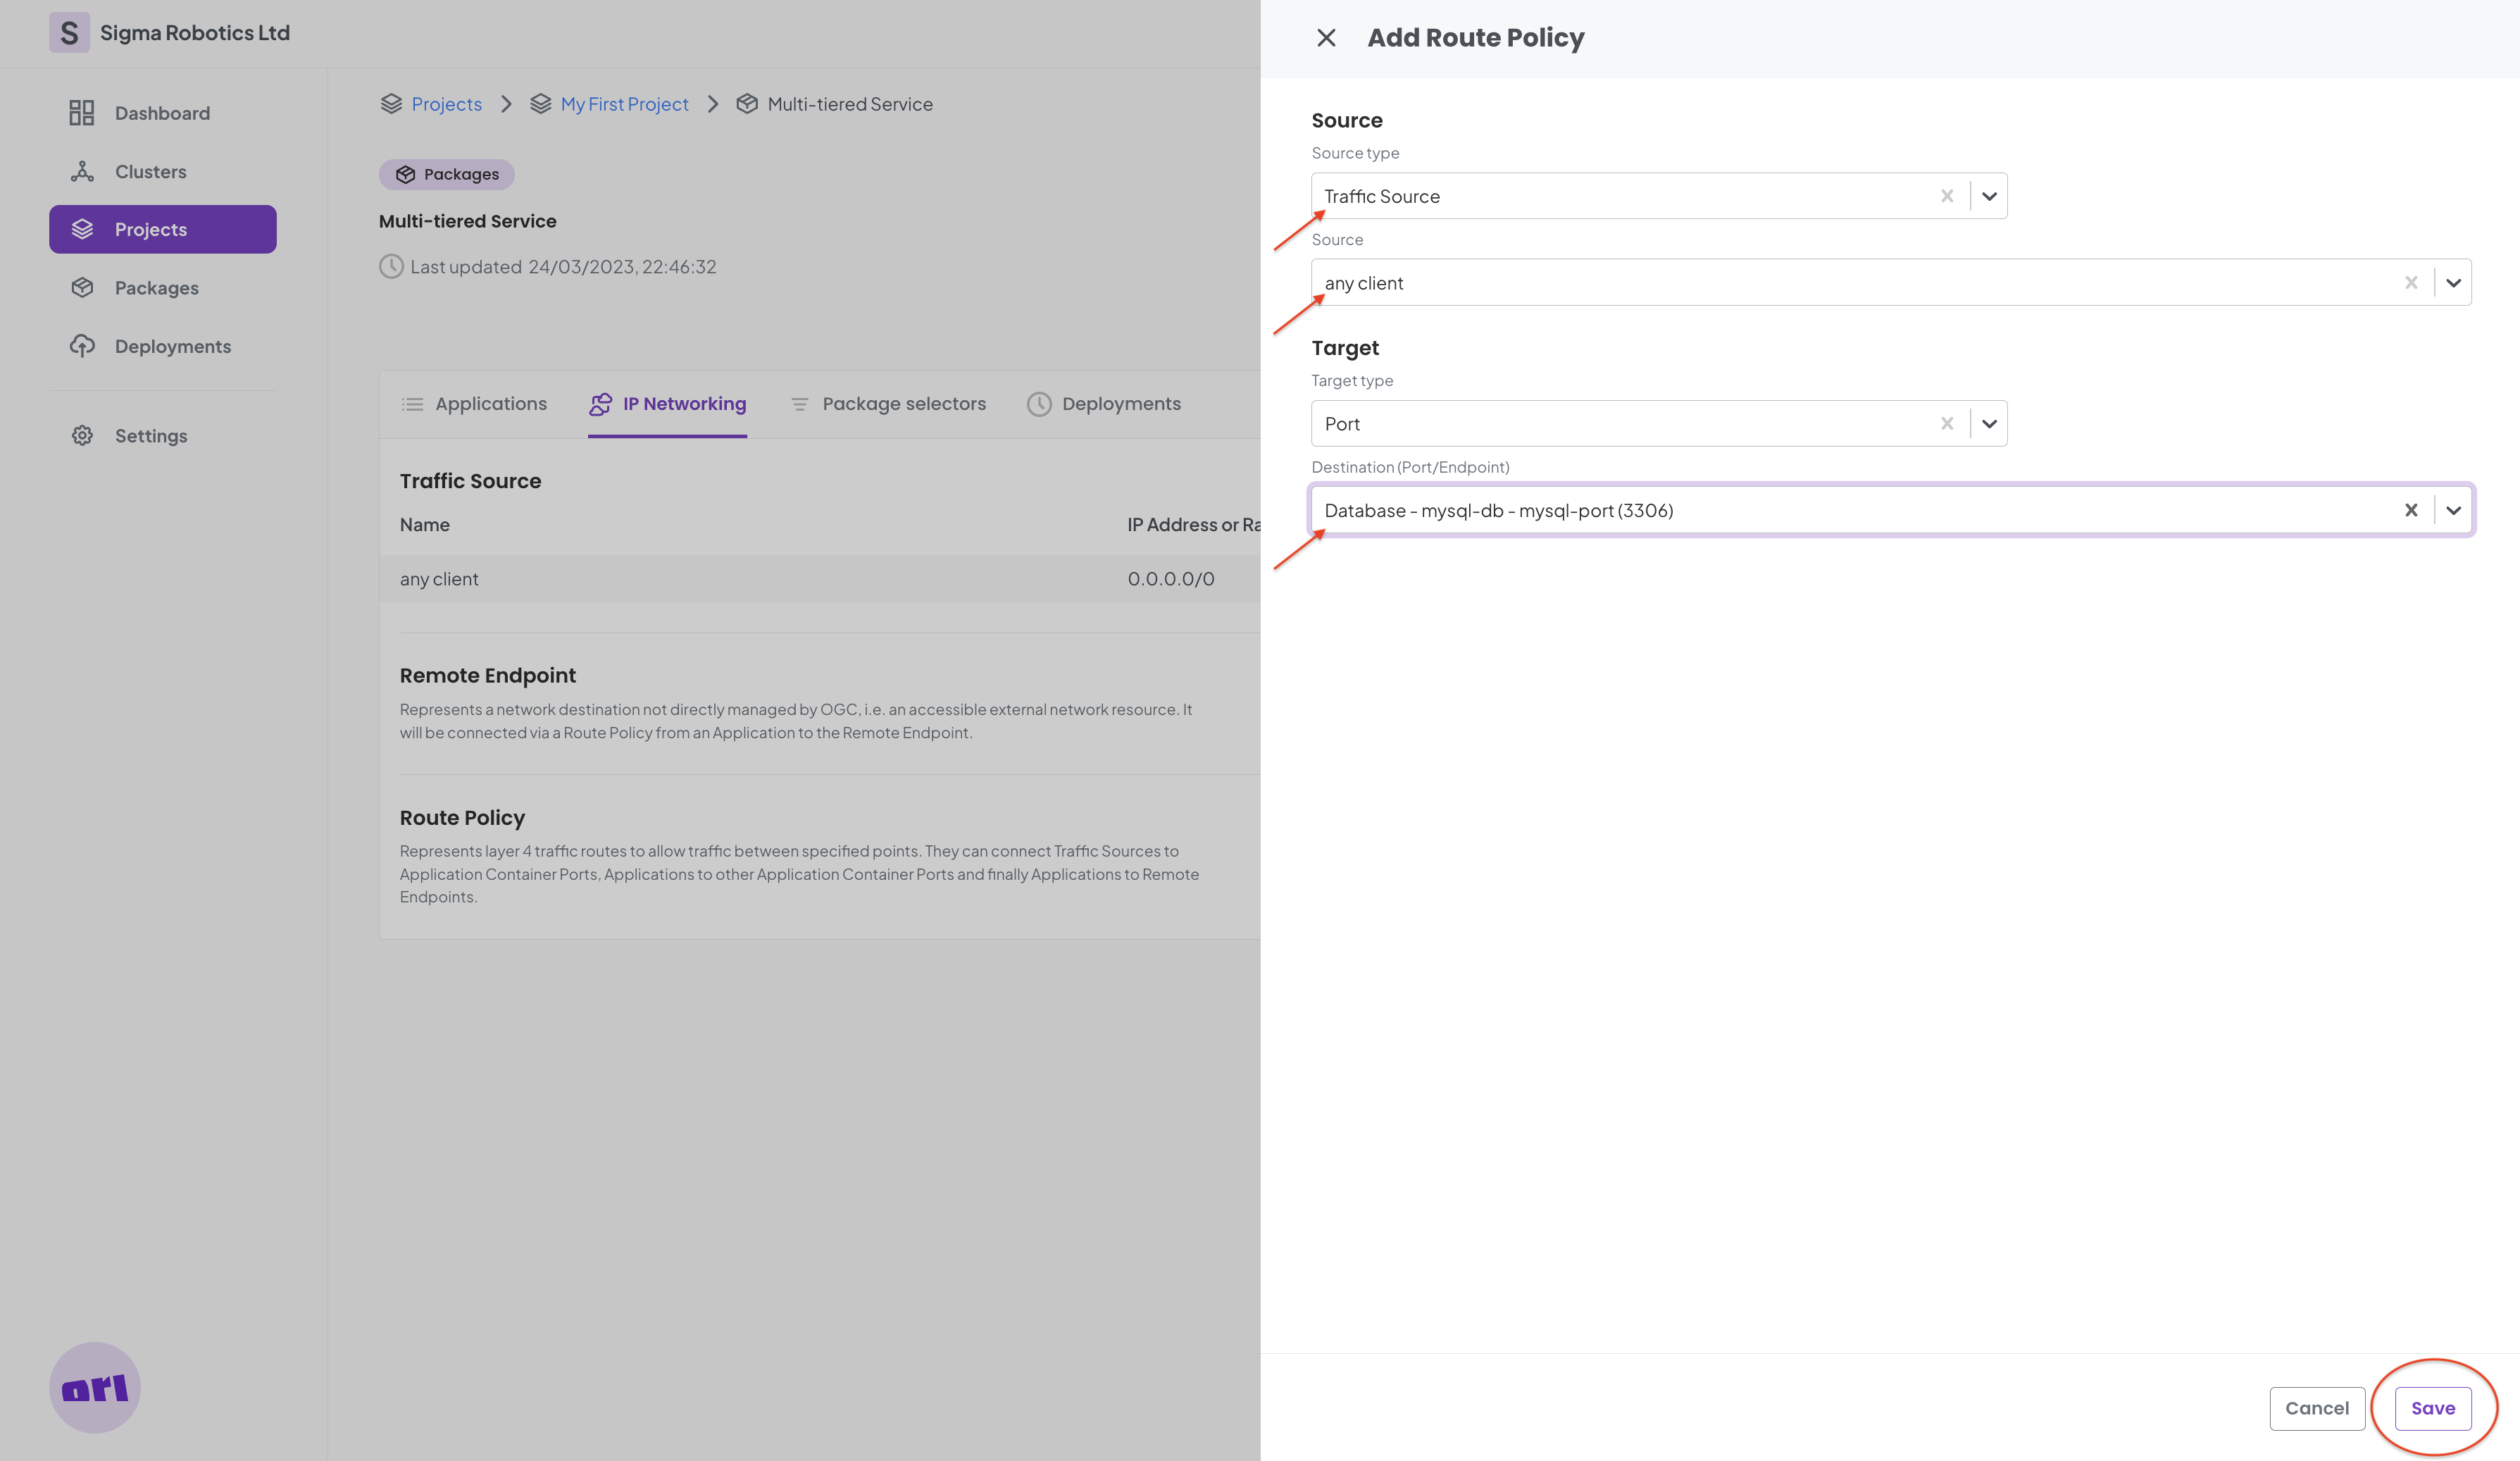
Now we add a Route Policy:
And we select the Traffic Source we just created above and we then select the mysql-port we created before in the Container configuration section.
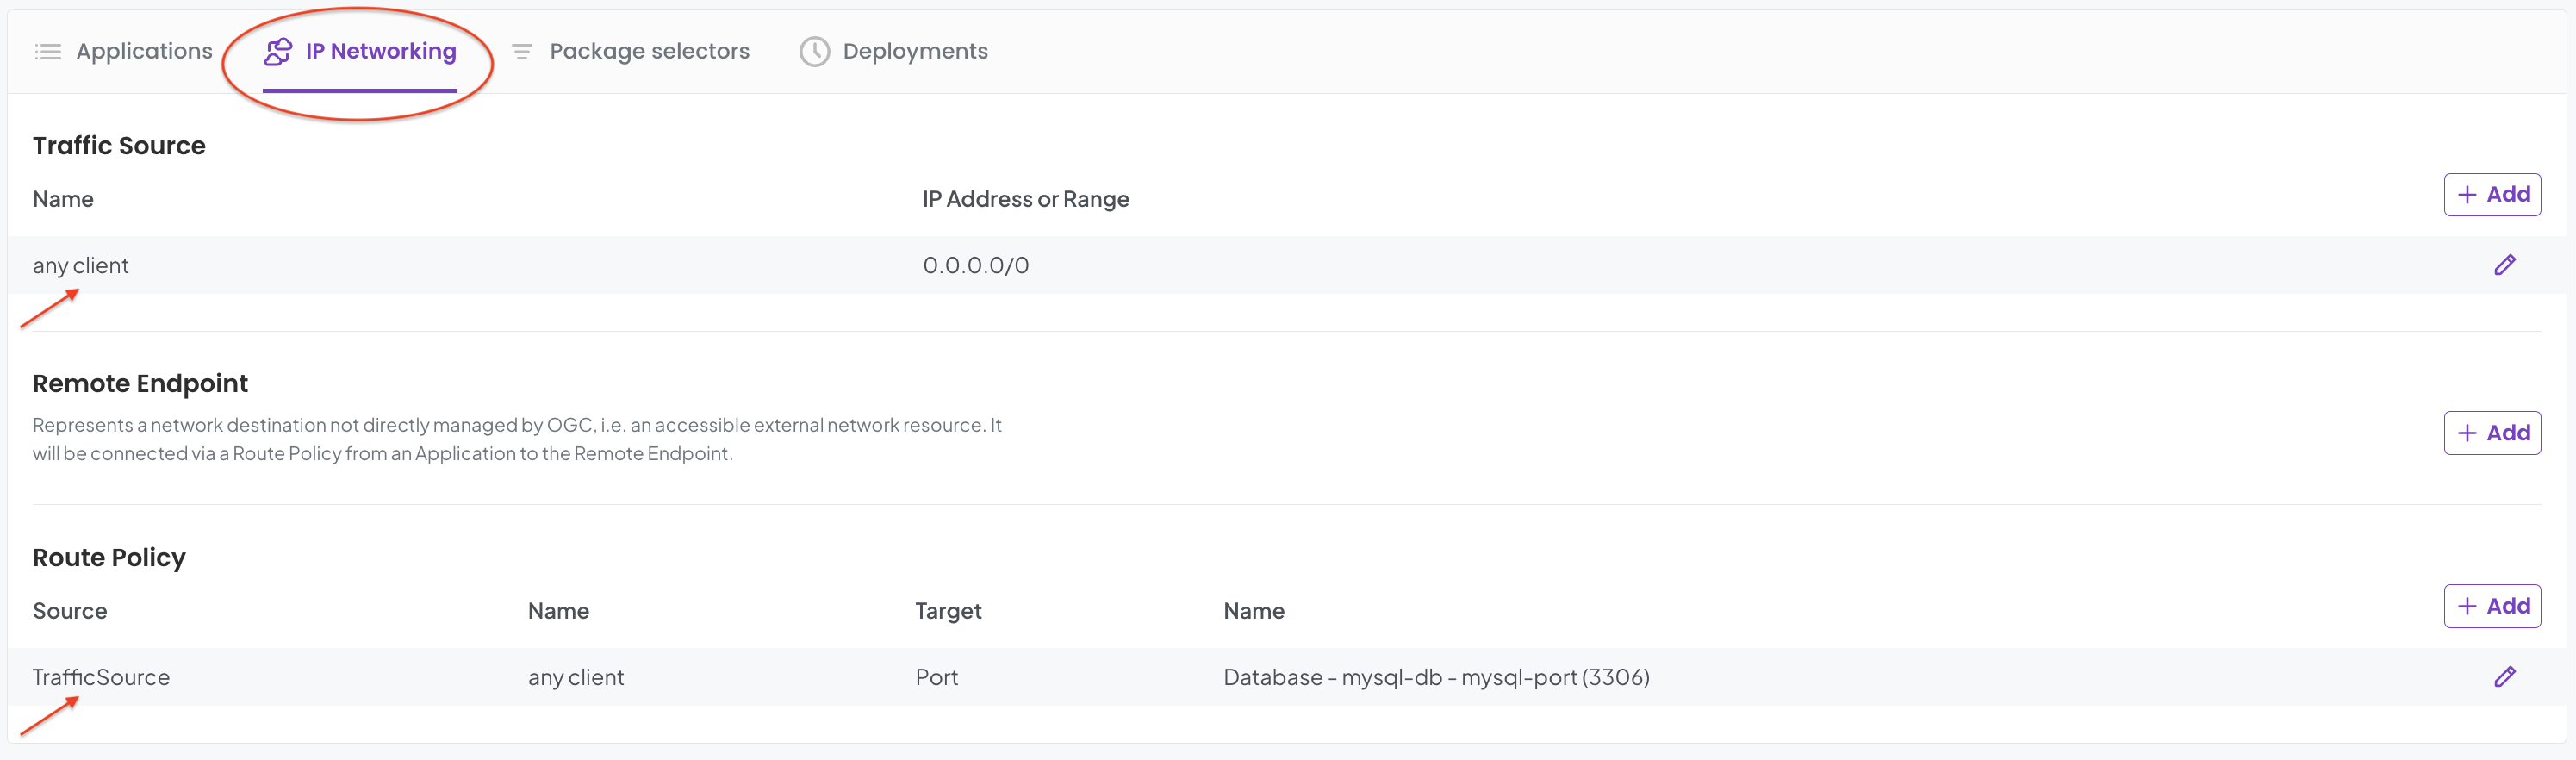
Finally the route policy is in place and the networking for the Database Application is ready.
Let's test it all out!
Step 6 - Deploy to Test our Database Configuration
Let’s now deploy our database container to make sure it is working properly.
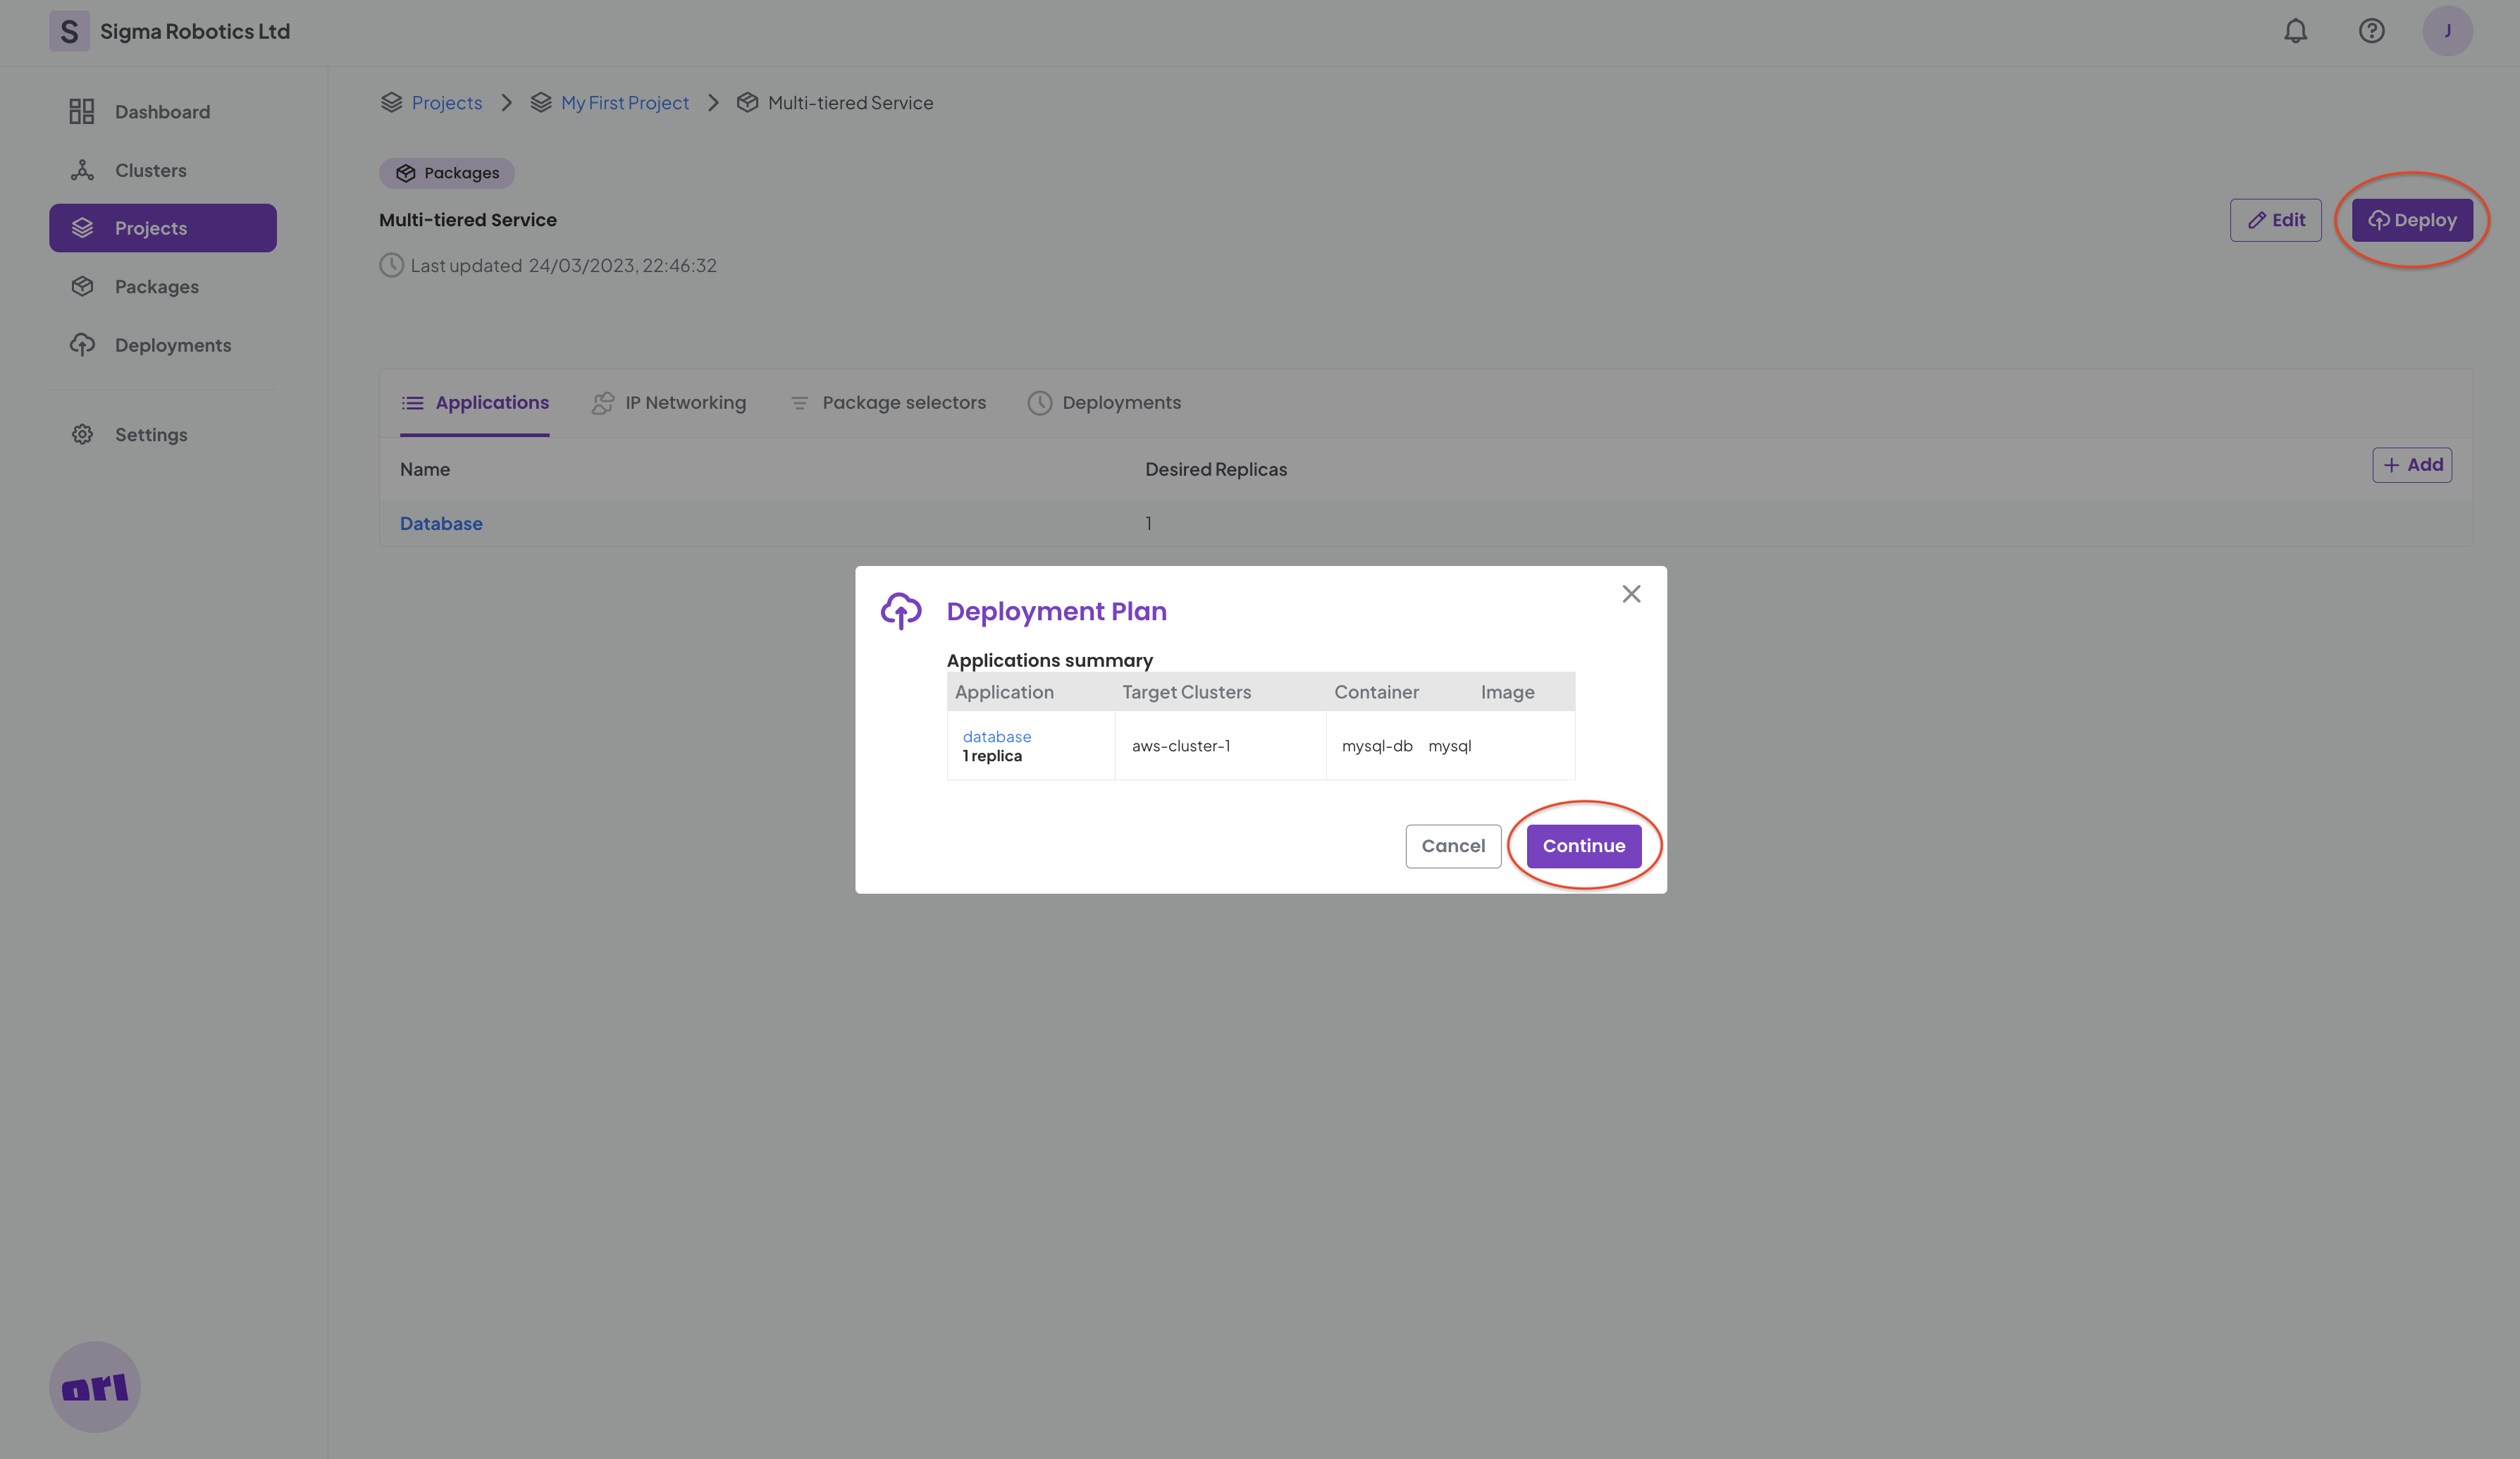
We Select Deploy on the Package page and then Continue with the plan provided:
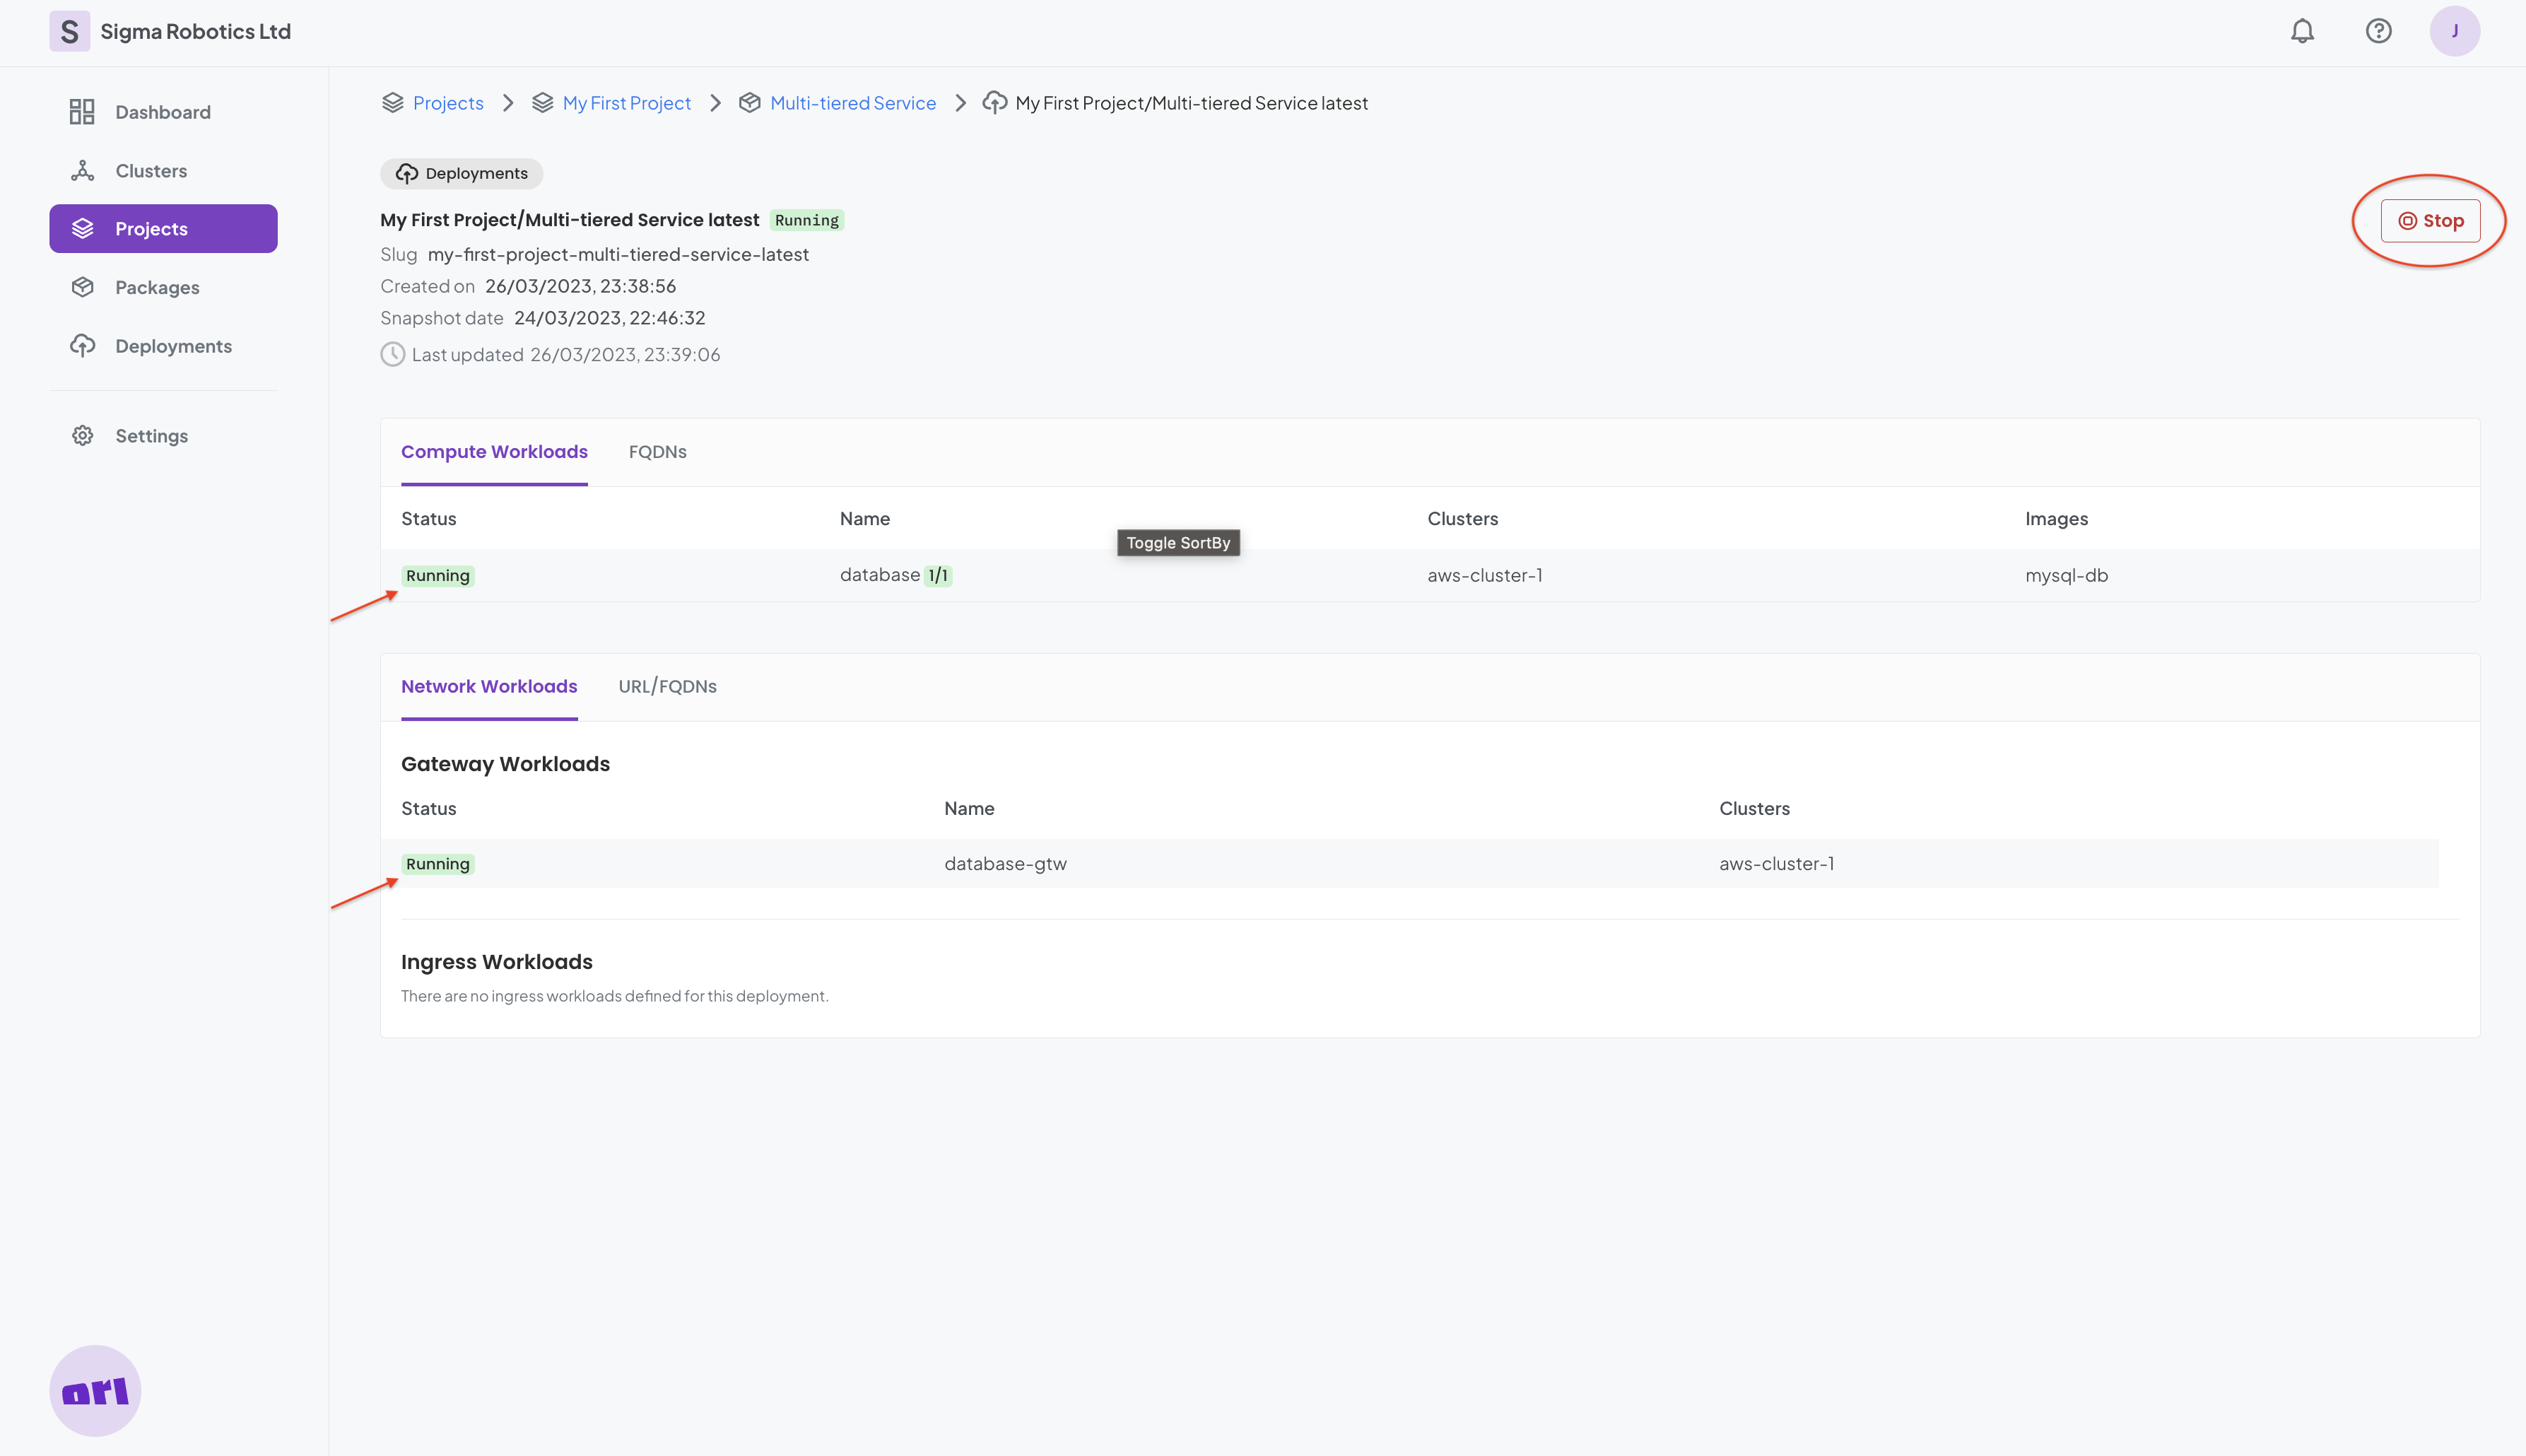
We can now see the database running on the Cluster and we can also see the Load Balancer that exposes the application externally int he Gateway Workloads table:
Selecting the FQDNs tab we see the Fully Qualified Domain Name for exposing the Database to the external world.
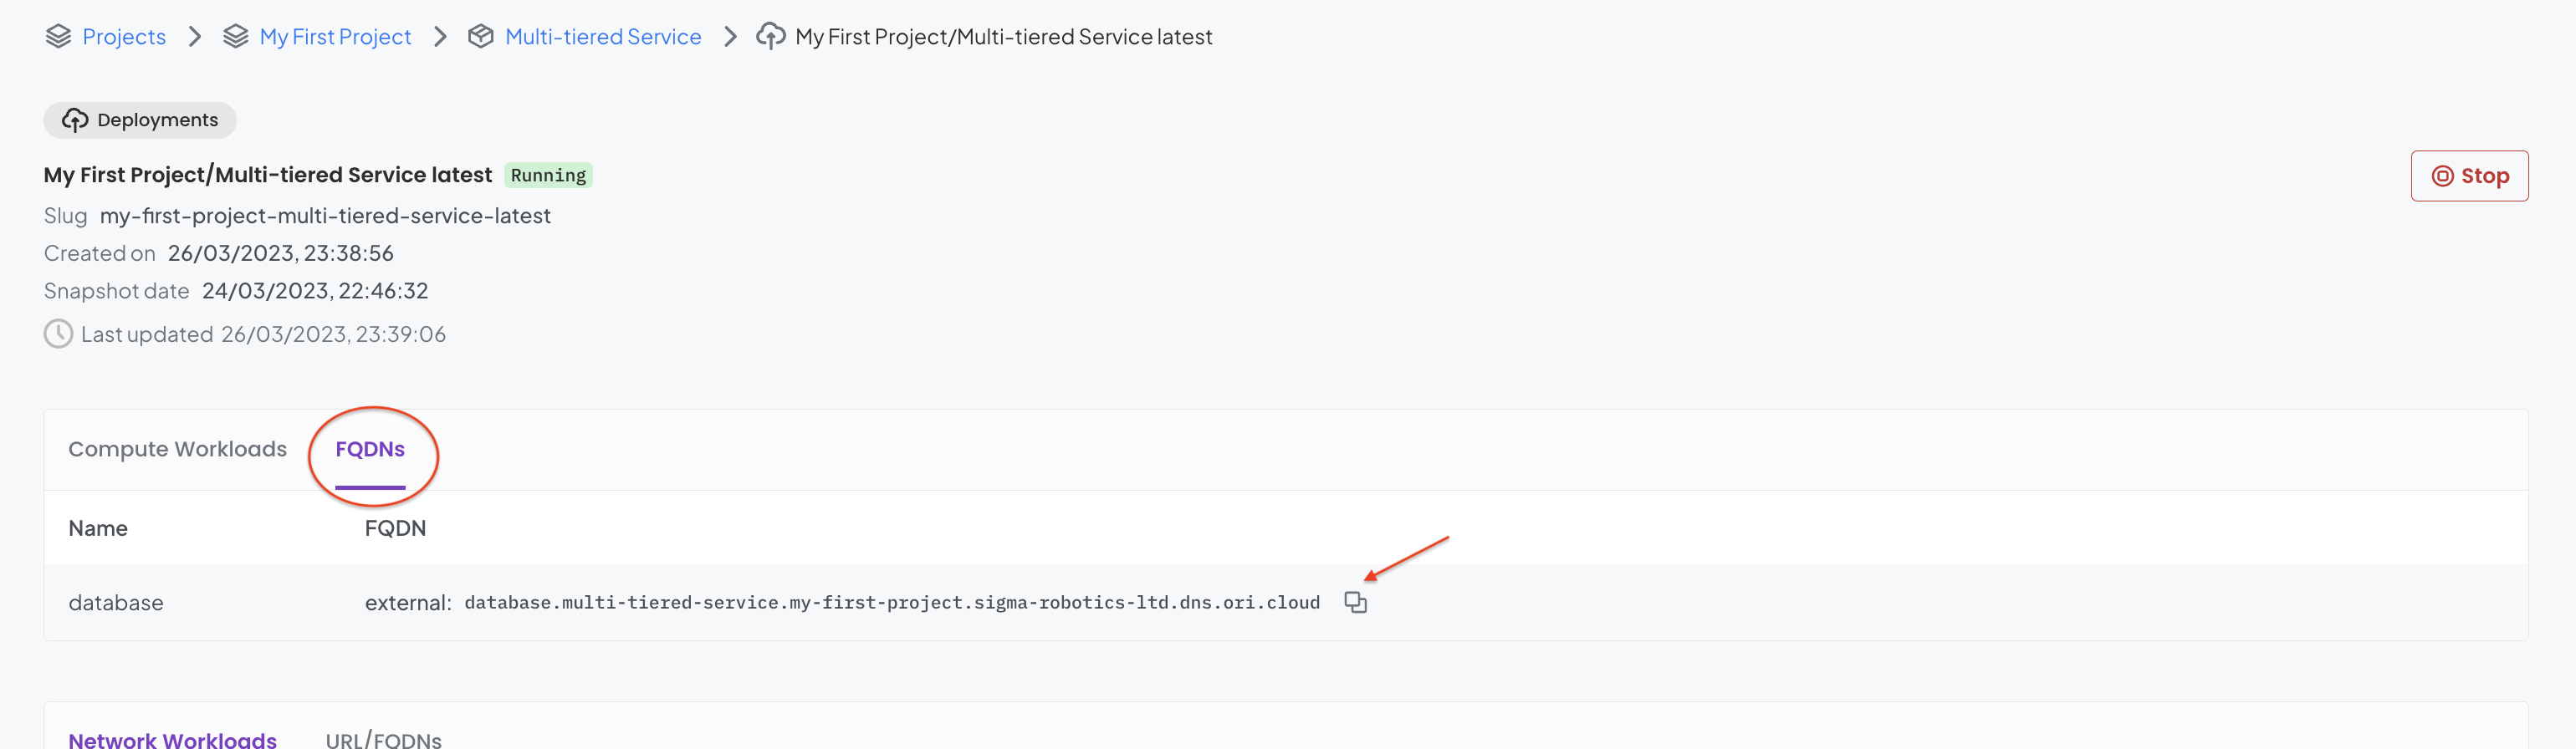
We will keep track of this for later use in part 2.
database.multi-tiered-service.my-first-project.sigma-robotics-ltd.dns.ori.cloud
It is time to Stop the Database now and move to the next set of configurations.

We are now going to move to Part 2.
Part 2 - Configuring the Notes Application
Step 1 - Configuring the Notes App
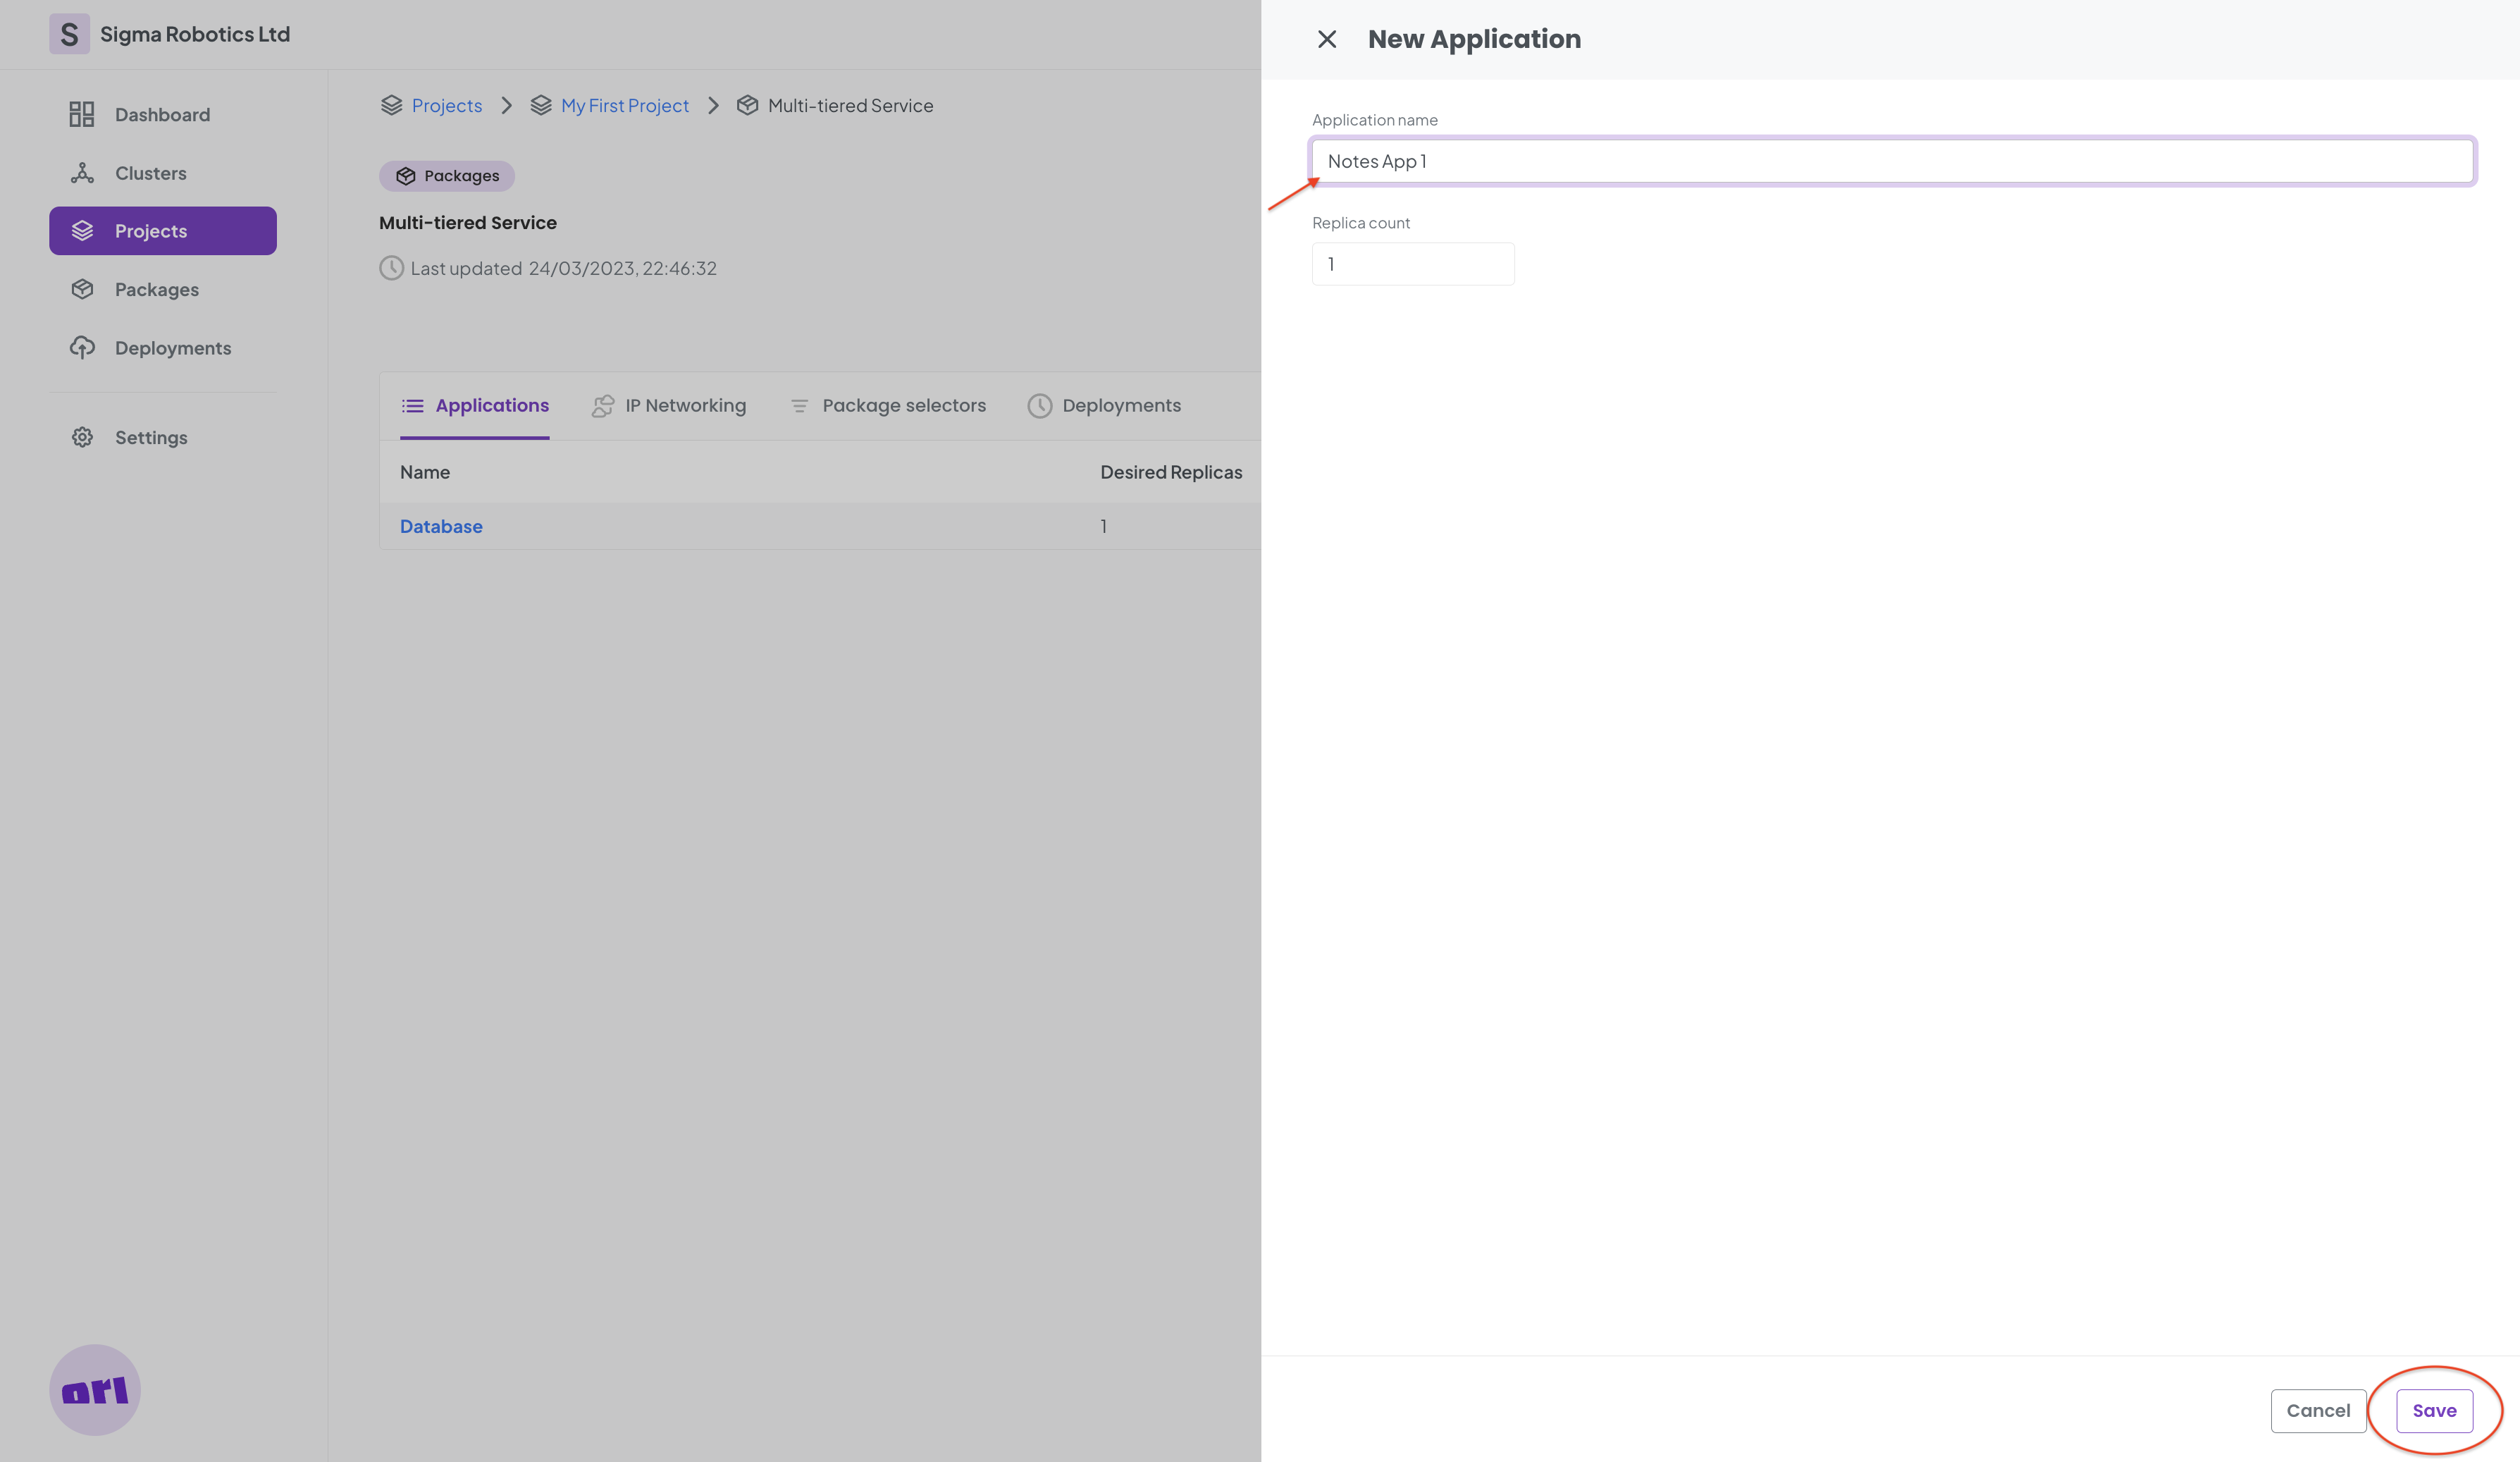
We are going to configure three identical Application Instances of the Notes App, starting with the first instance. This is so that we can place them in different clouds. We add a new App as show below:
Now lets add a Container to the Notes Application:
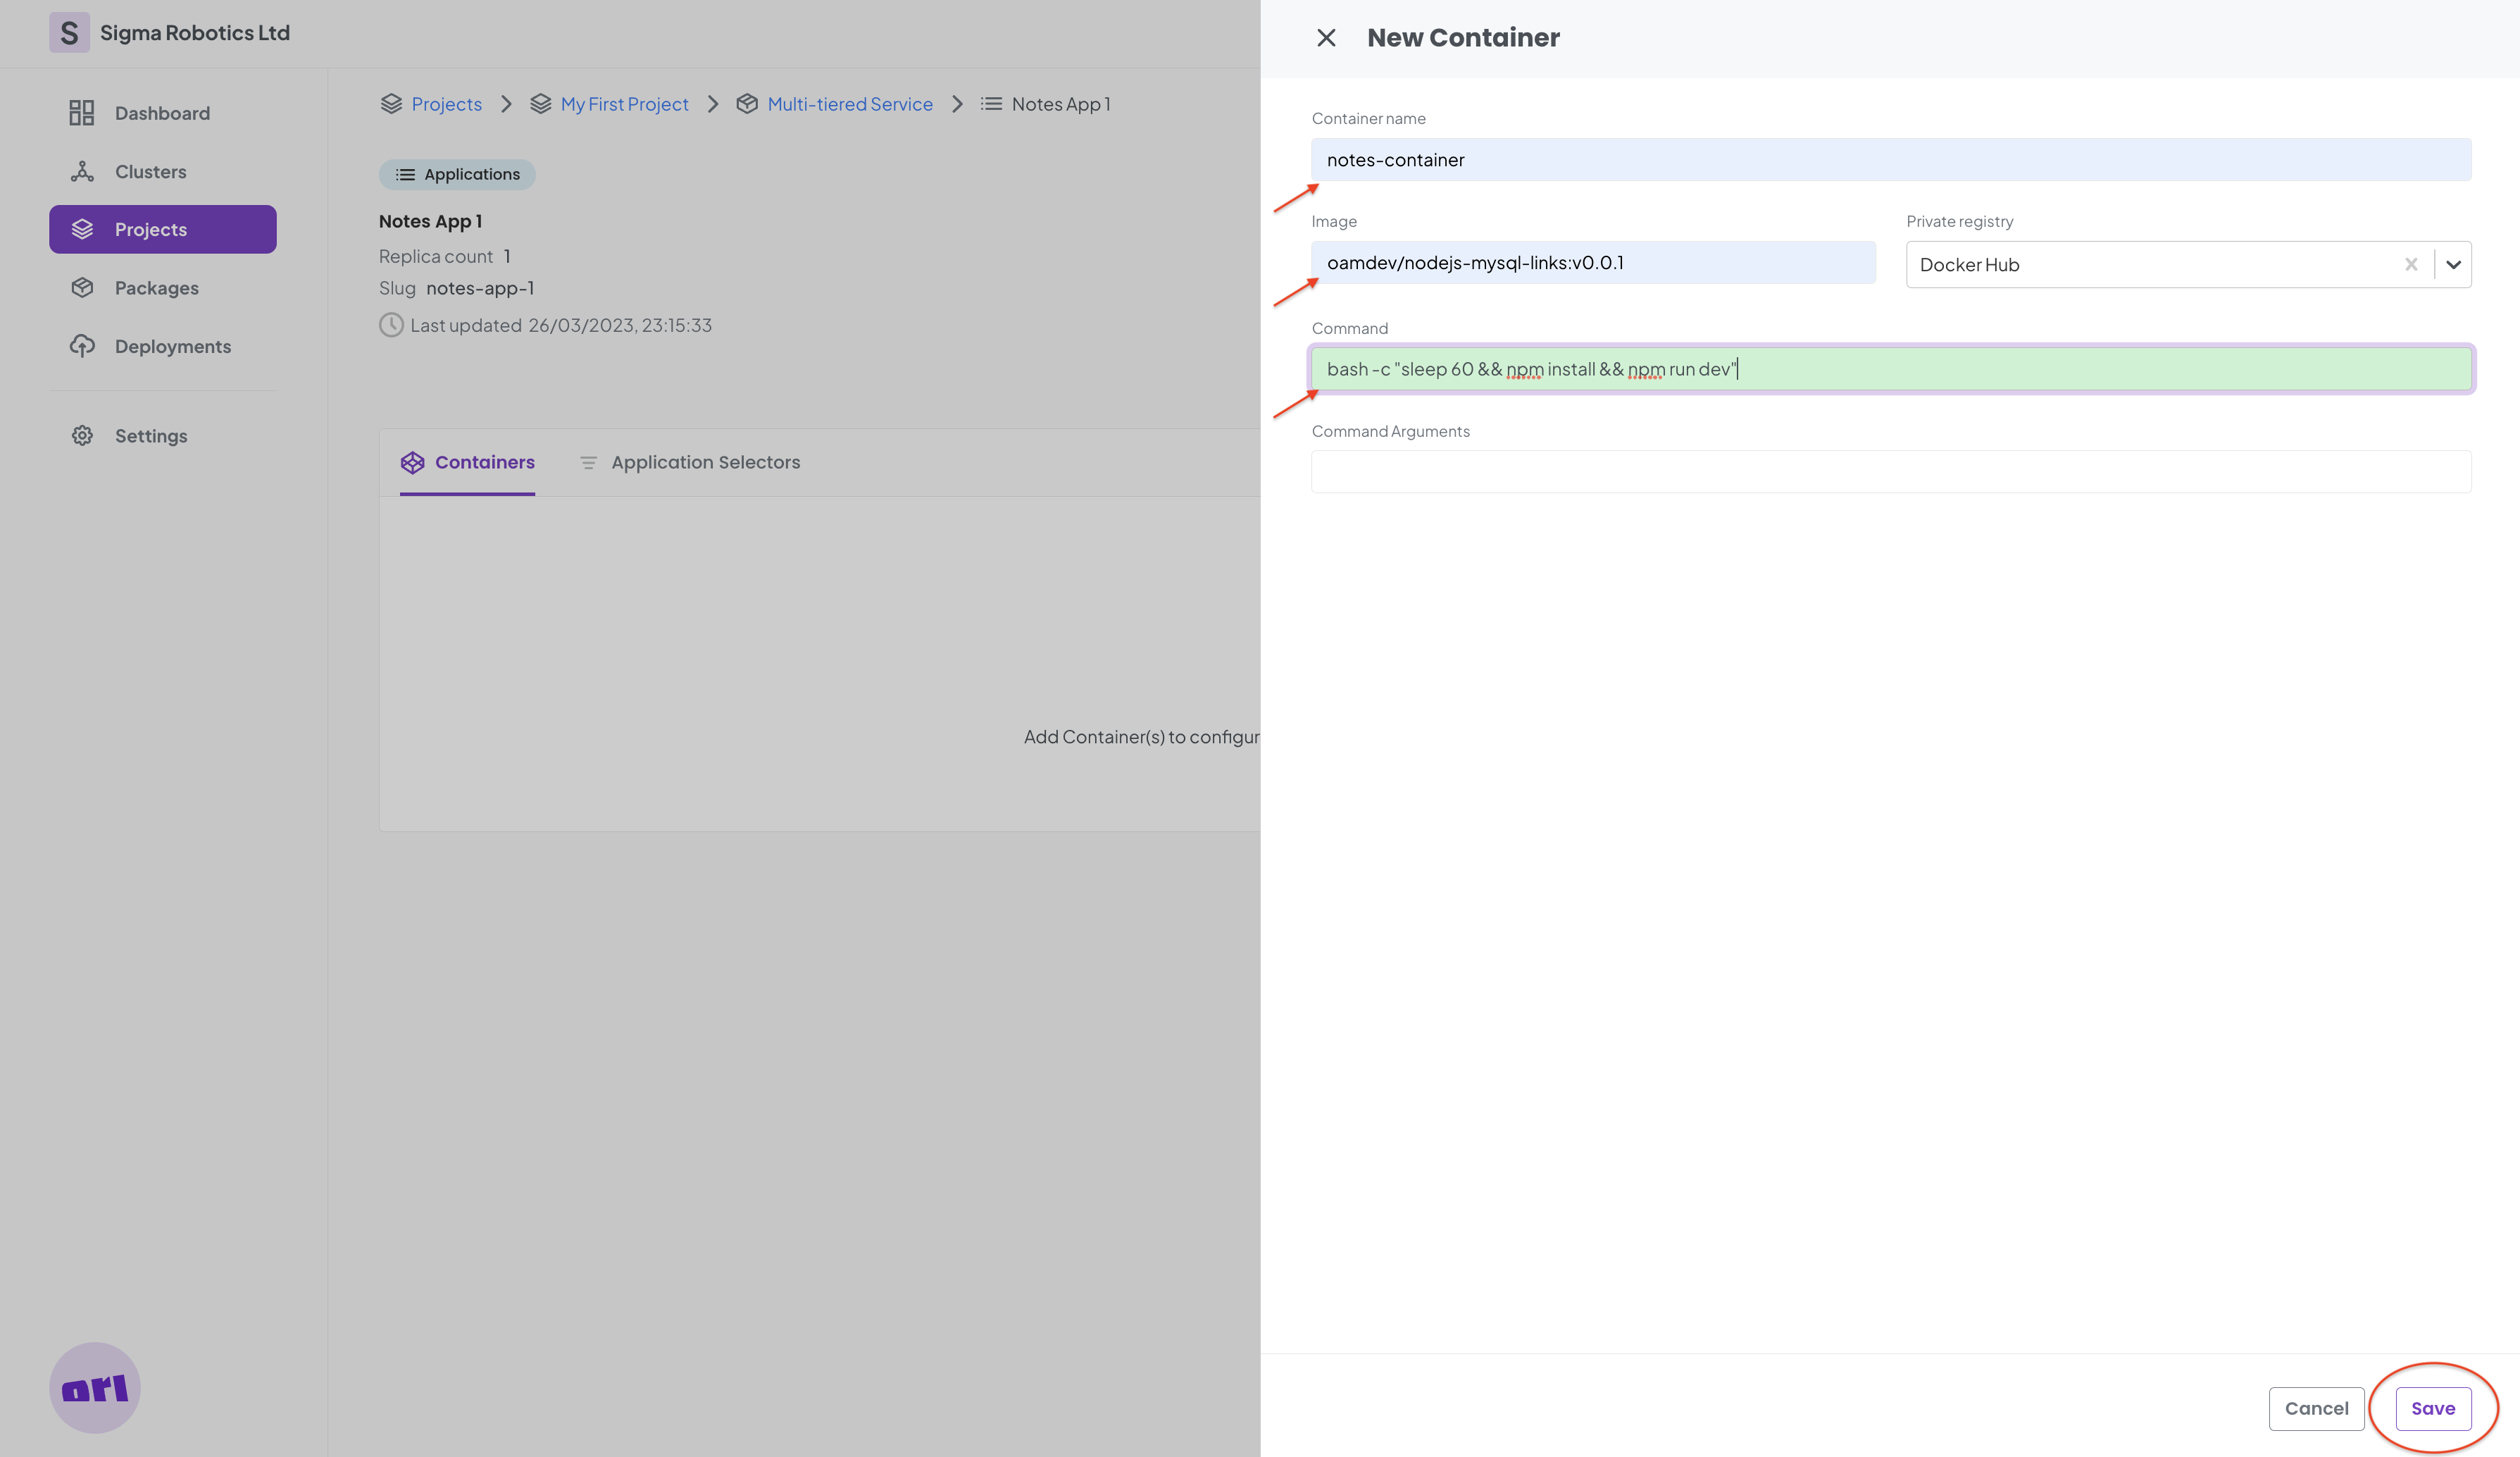
notes-container
oamdev/nodejs-mysql-links:v0.0.1
bash -c "sleep 60 && npm install && npm run dev"
Note we are adding a delay of 60 seconds (sleep 60) to the notes App startup command. This will ensure there is enough time for the Database to come up before the Notes Application accesses it.
Step 2 - Configuring the Notes Container
We add a Port to the notes App as per the process above. The following appears on the Ports table:

We add Environment Variables to the Notes container now. The following appears on the Env Vars table:
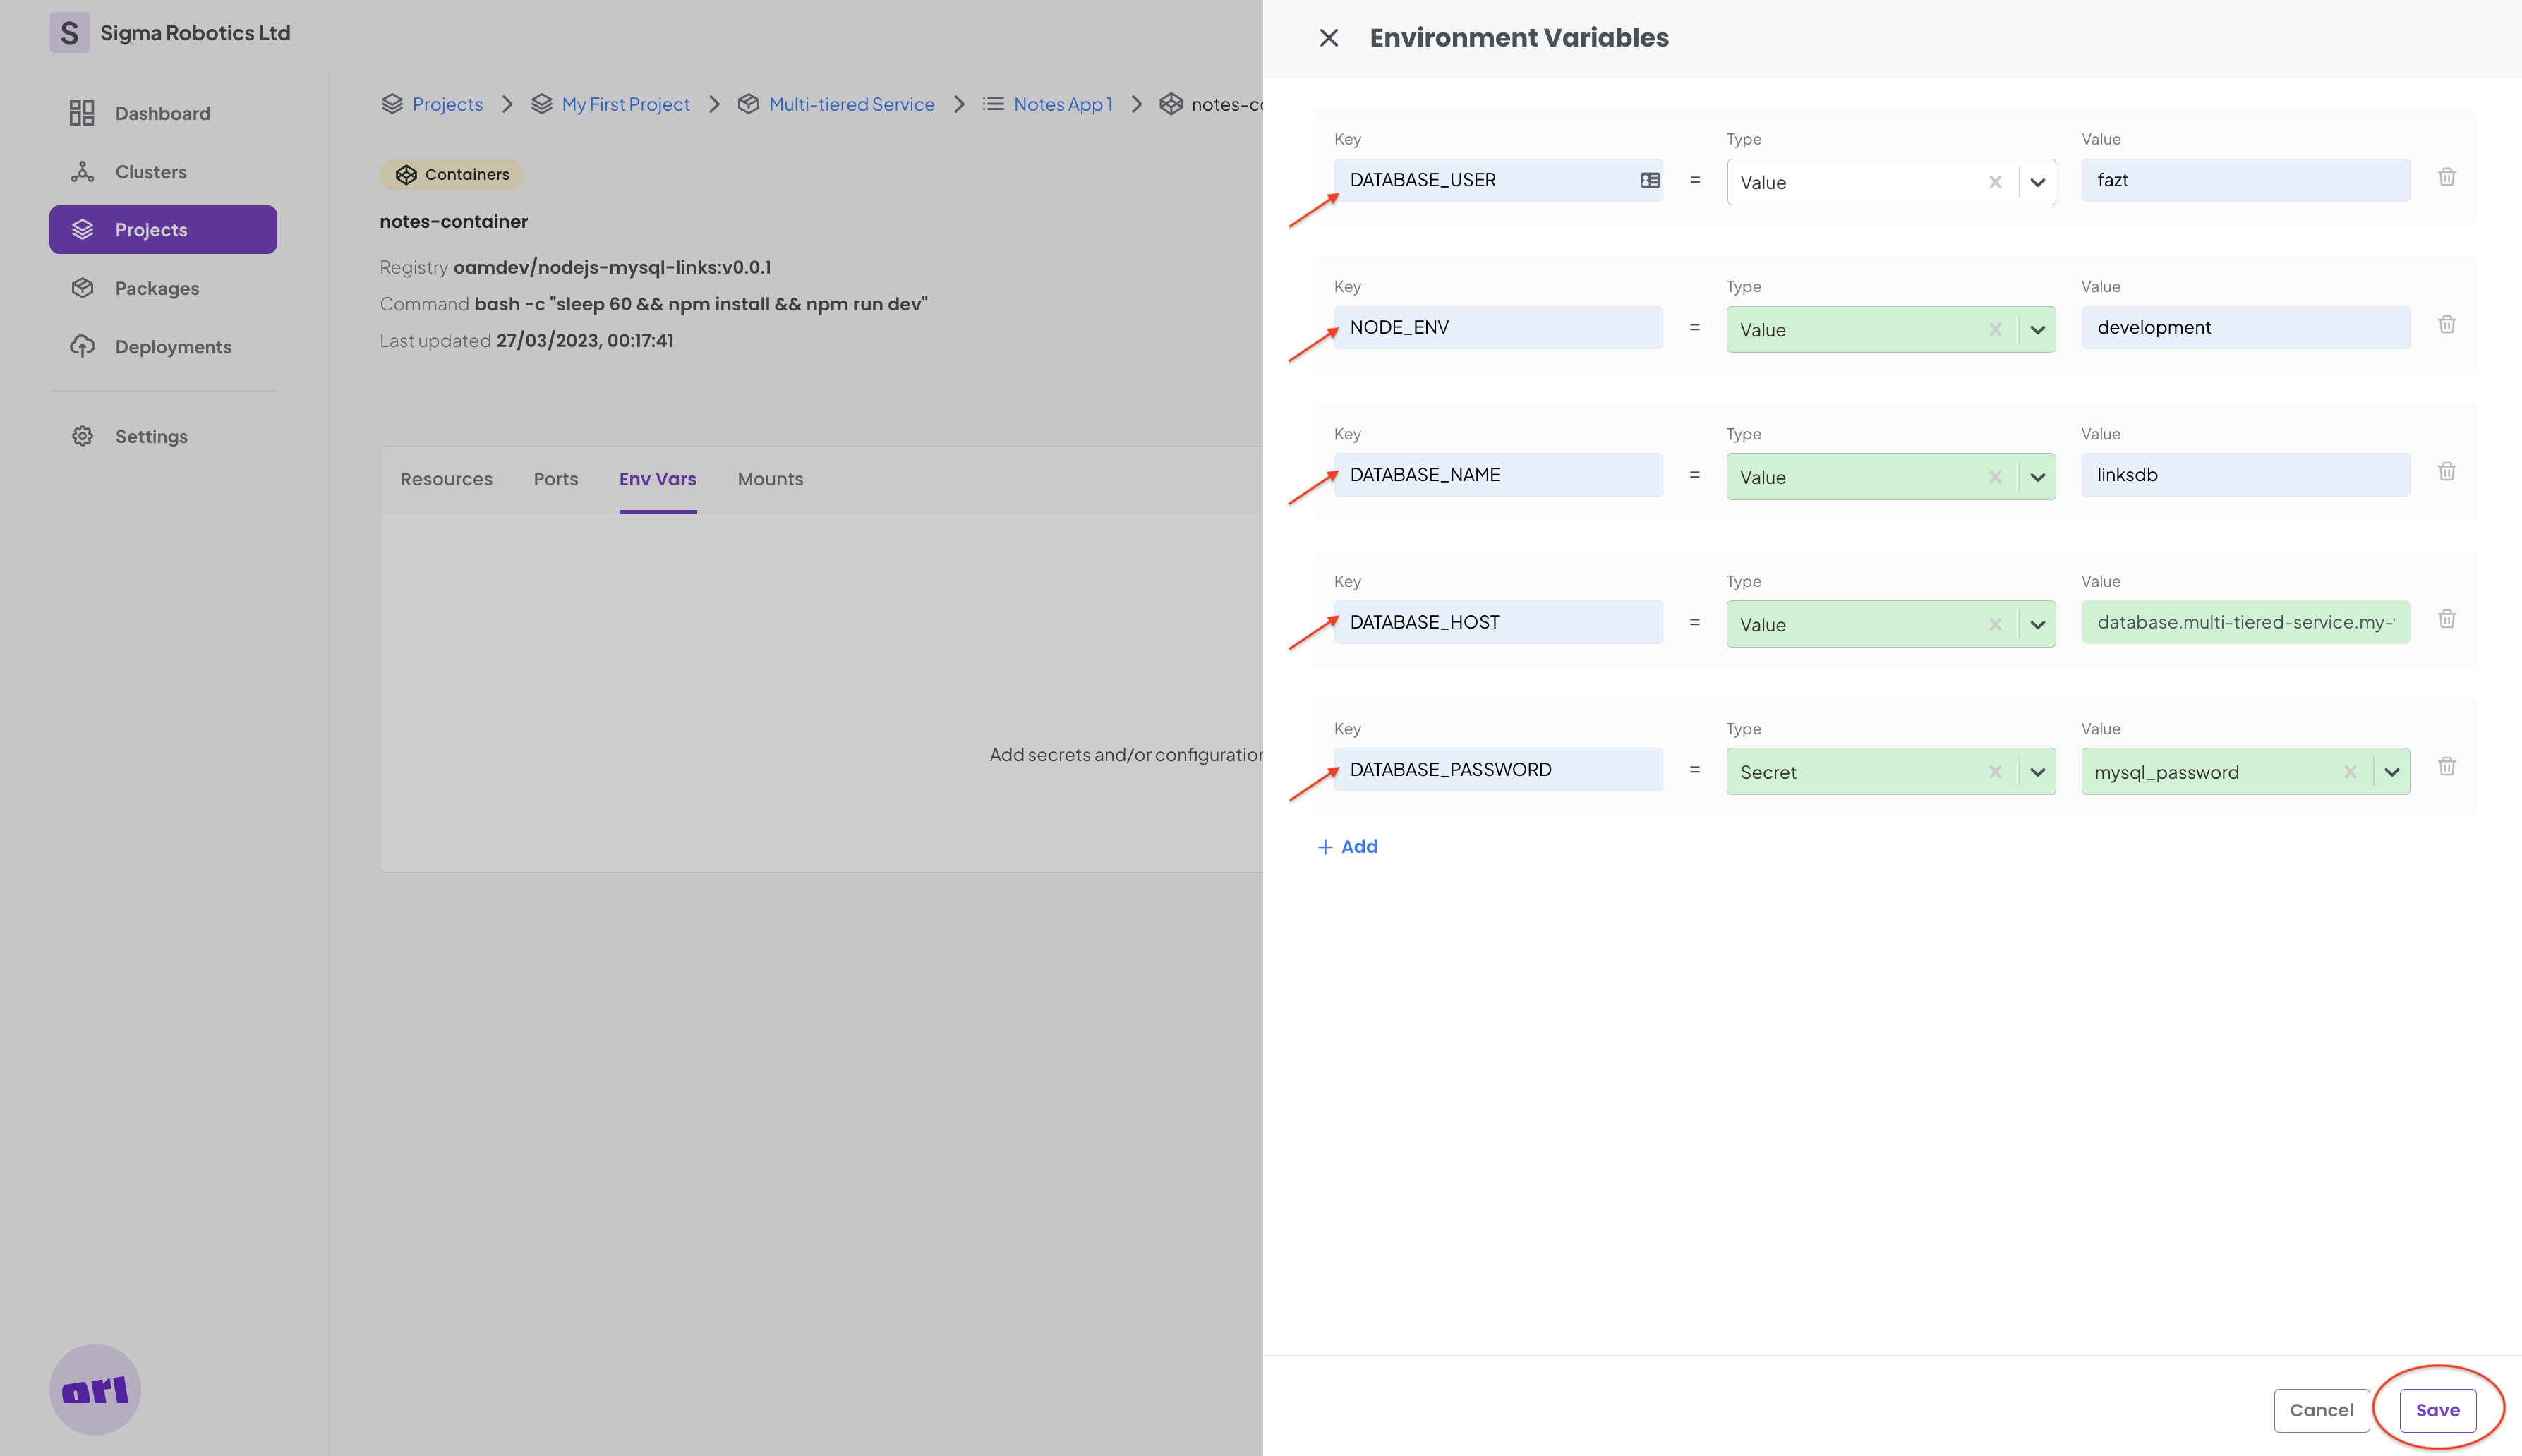
For DATABASE_USER:
fazt
For NODE_ENV:
development
For DATABASE_NAME:
linksdb
Note that the database will be accessible on the below FQDN as seen above when we tested Deploying the Database (this FQDN is independent of any cloud/cluster where it runs!). For DATABASE_HOST:
database.multi-tiered-service.my-first-project.sigma-robotics-ltd.dns.ori.cloud
For DATABASE_PASSWORD we use the mysql_password secret.
Finally the configuration looks like the table below:

That's all. Our Notes container is fully configured now.
Step 3 - Configuring the Notes Application Network
It is now time to configure the Networking for the Notes Application.
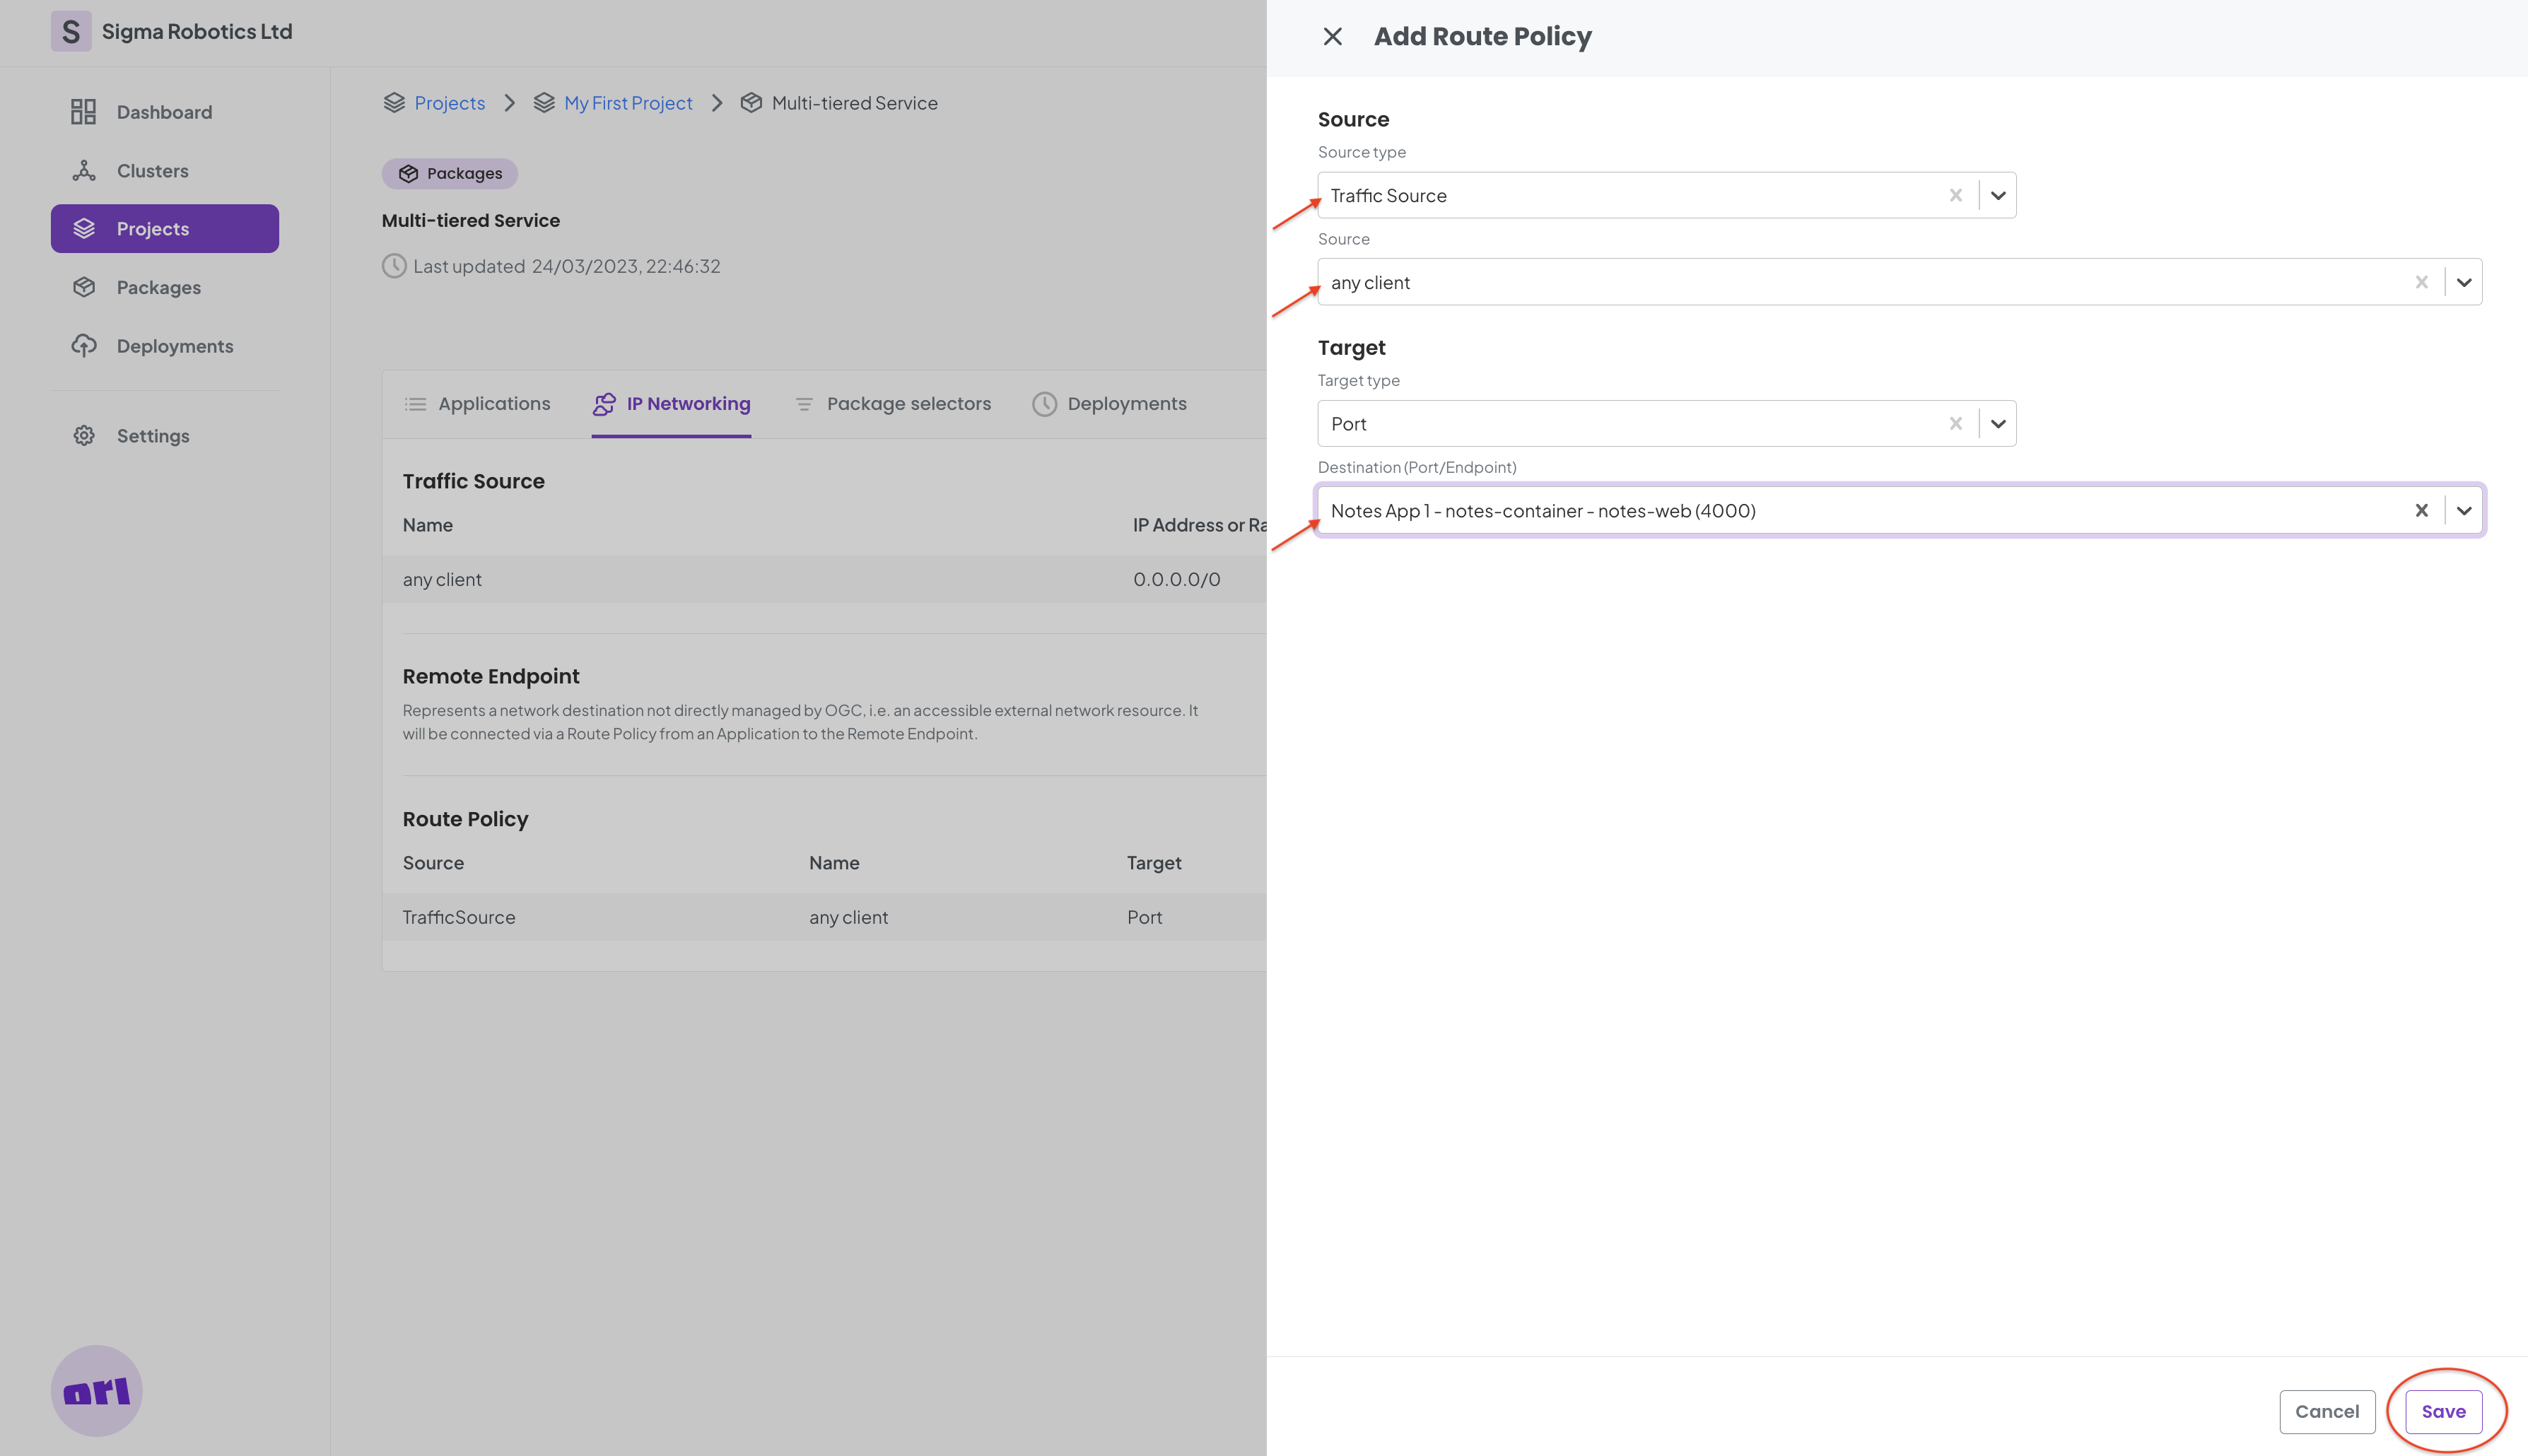
First let's add another route policy to the Notes App:
This enables the Notes Application to be accessible on the Internet:
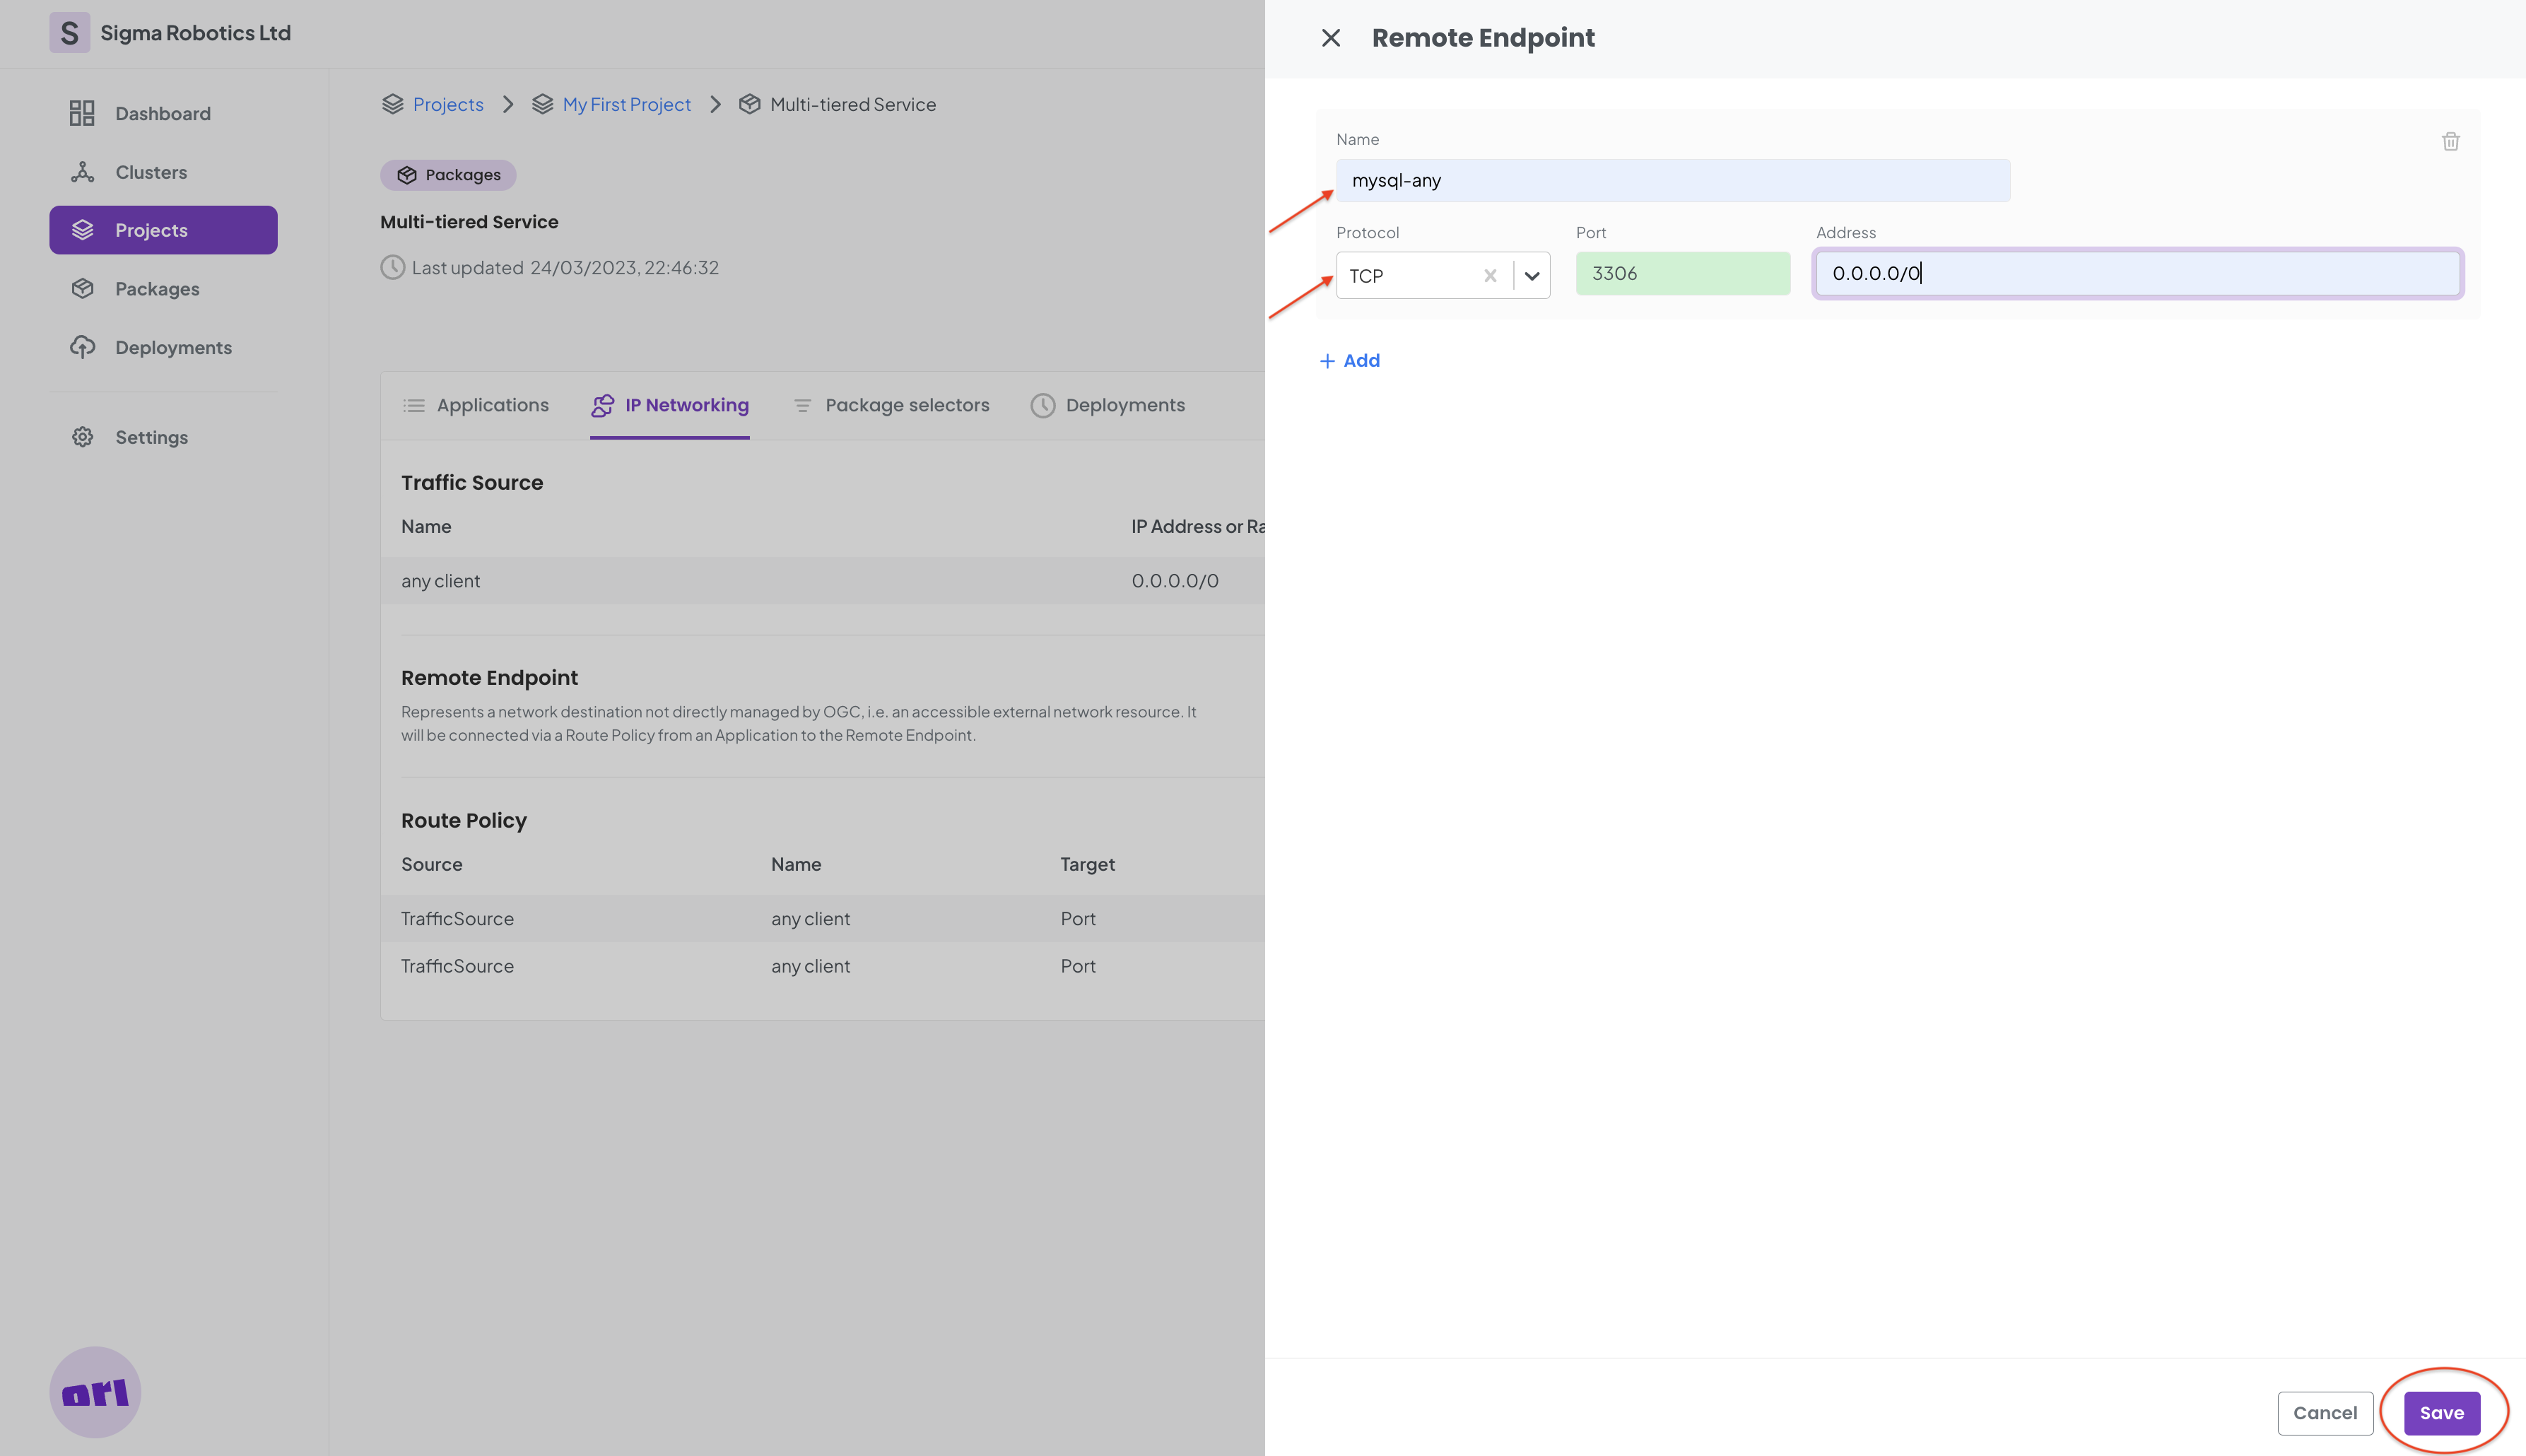
To connect the Notes Application to the Mysql Database Application, we need to create a Remote Endpoint that will allow the Notes Application to talk to the external world:
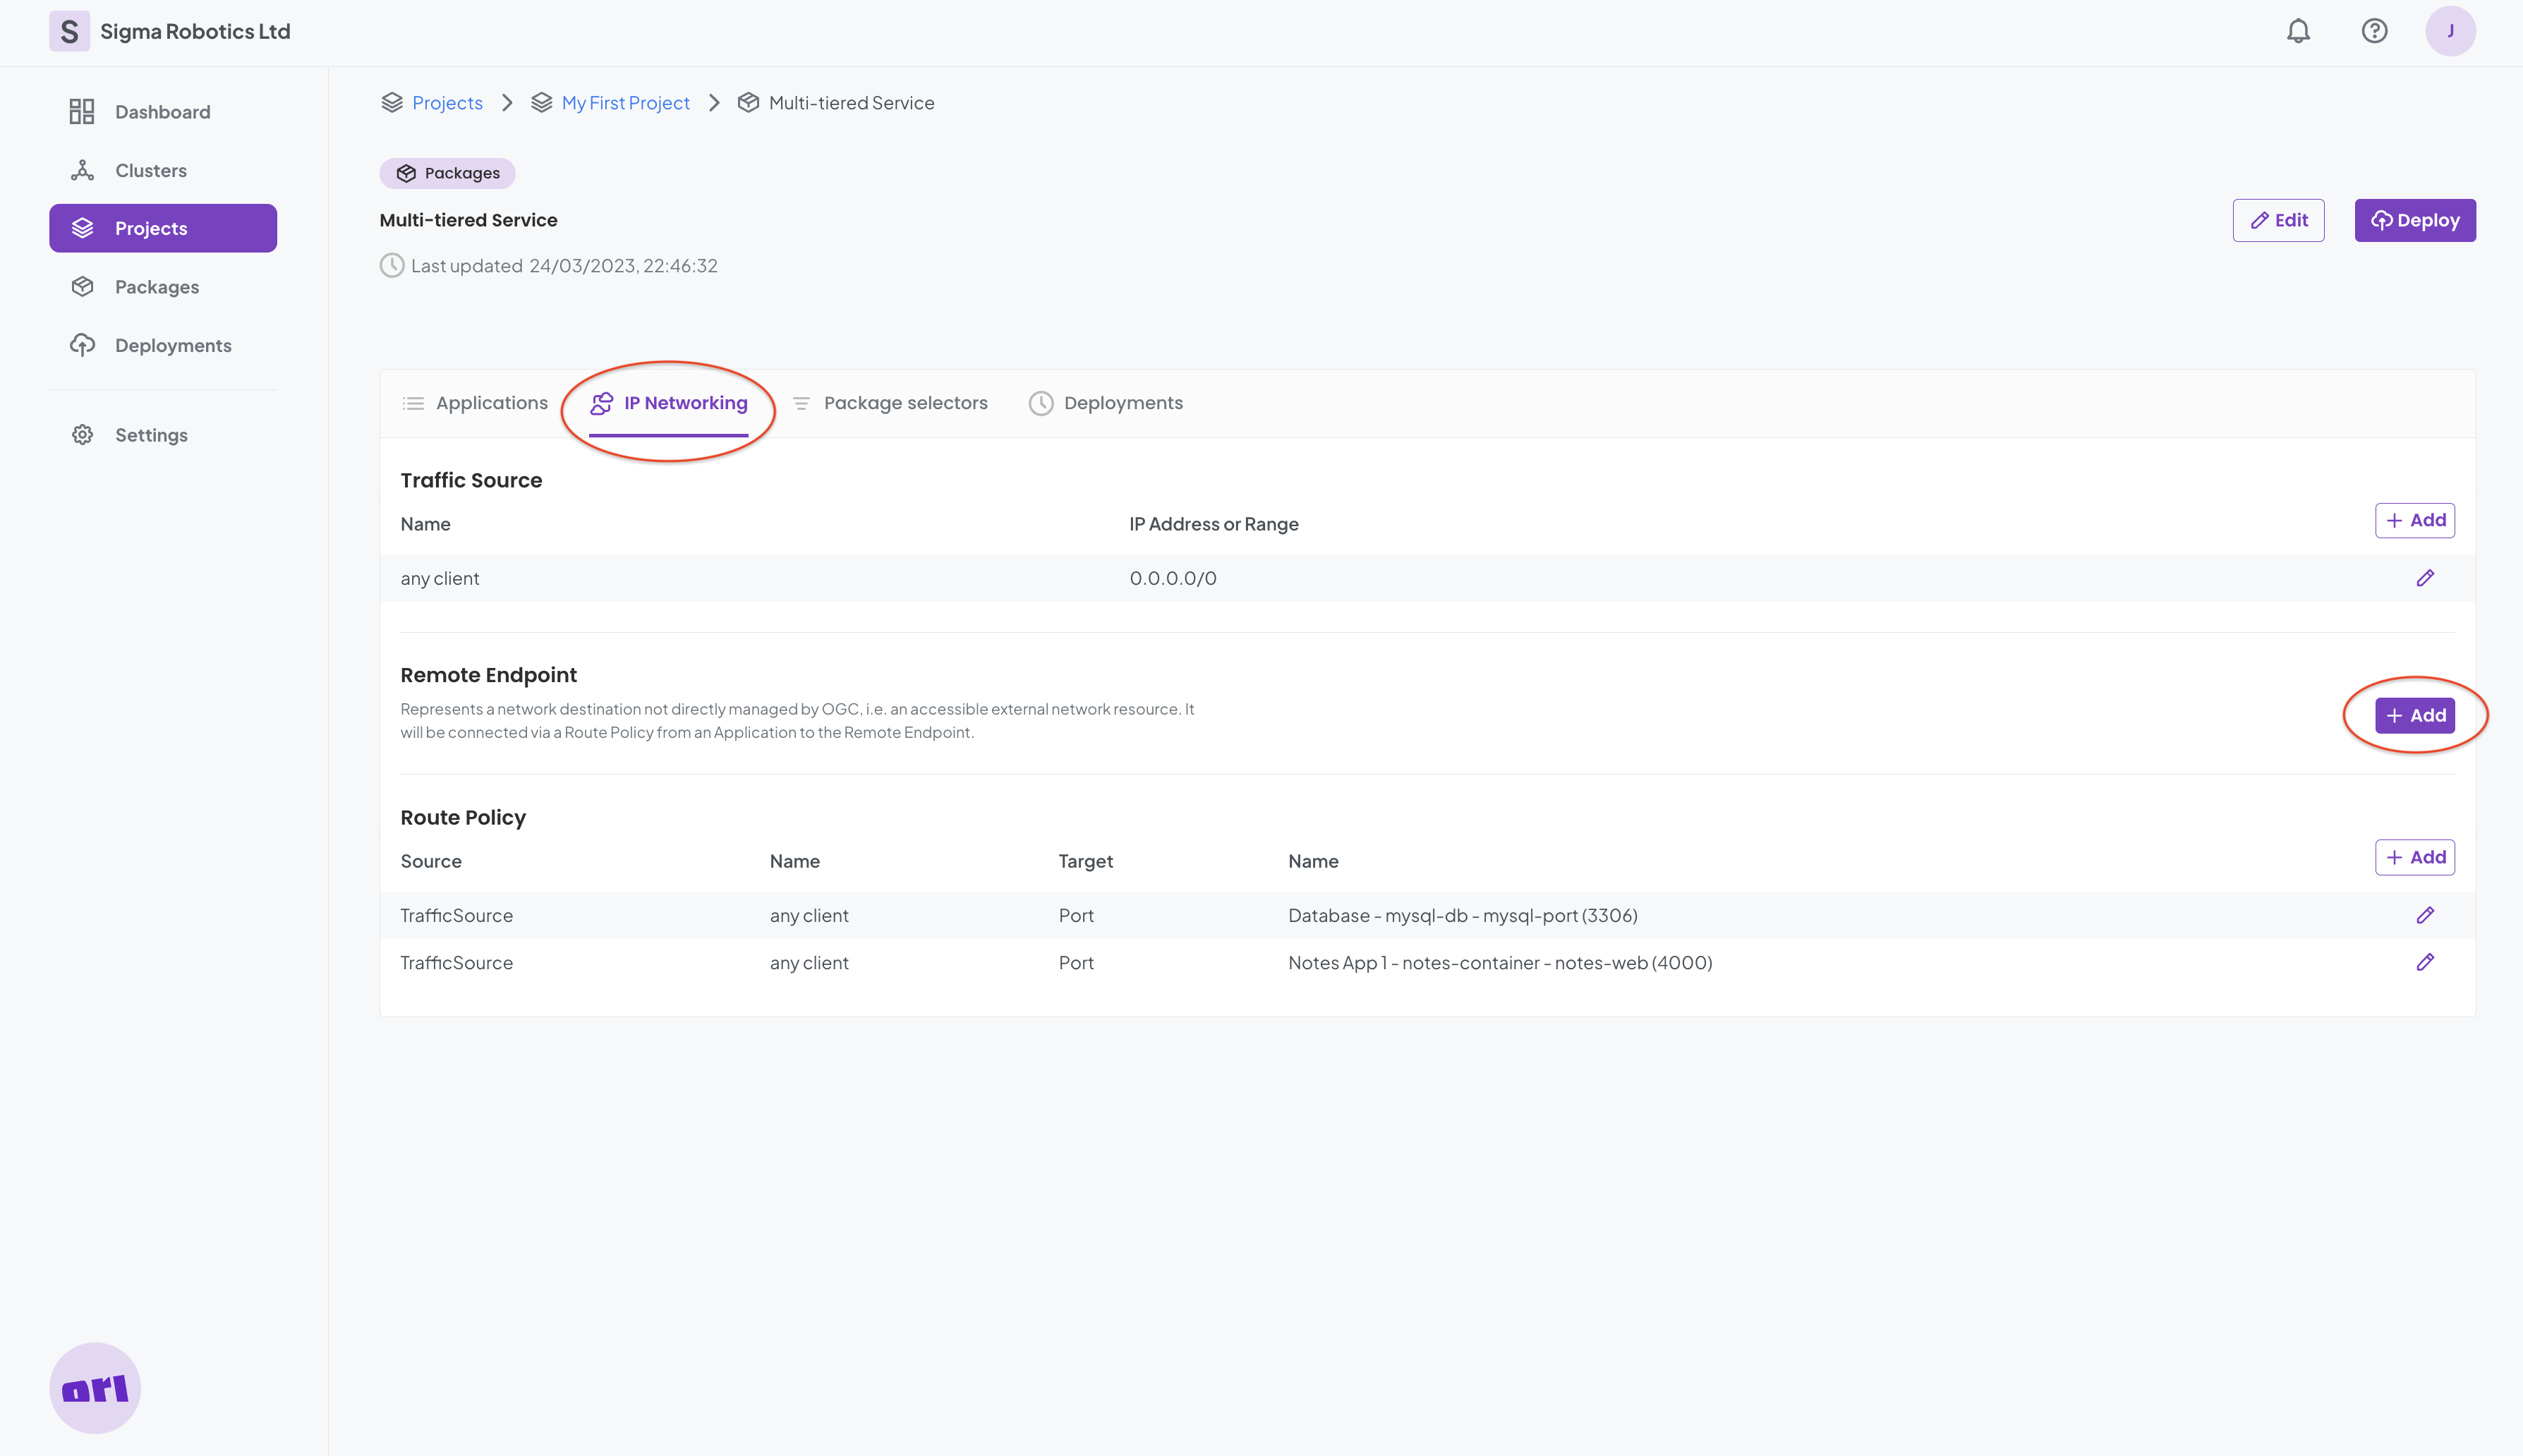
Th external endpoint is only for mysql traffic:
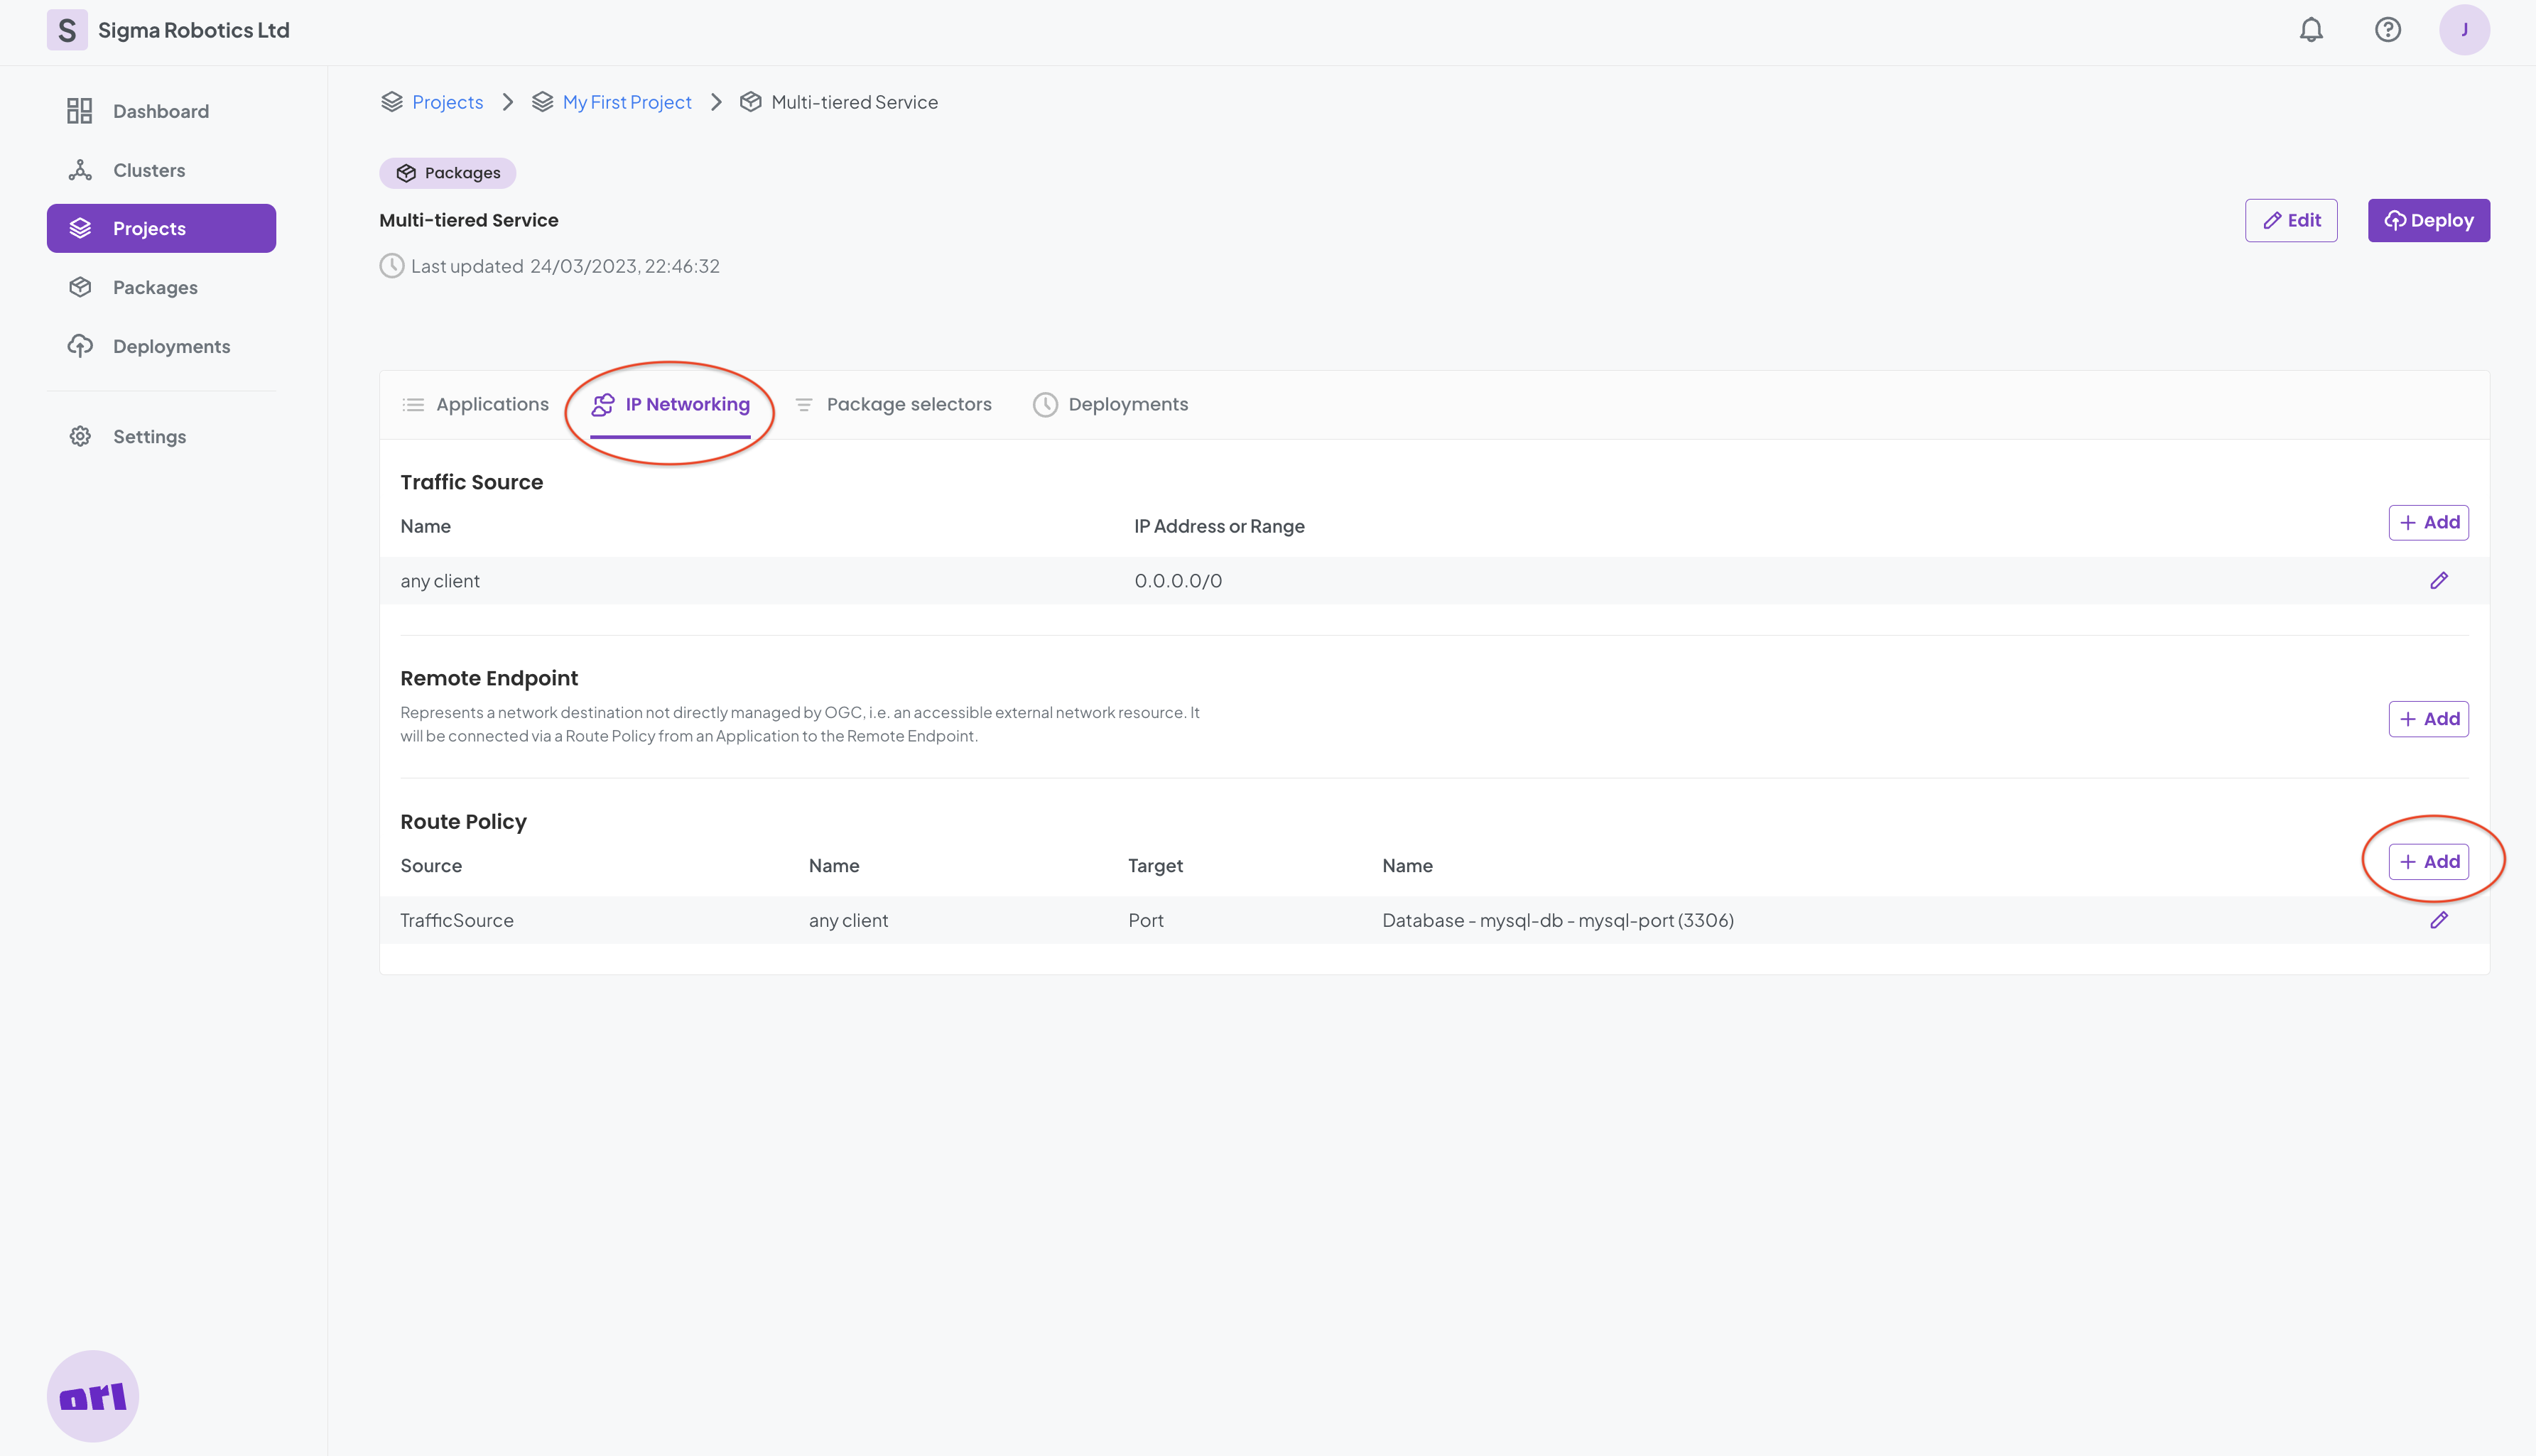
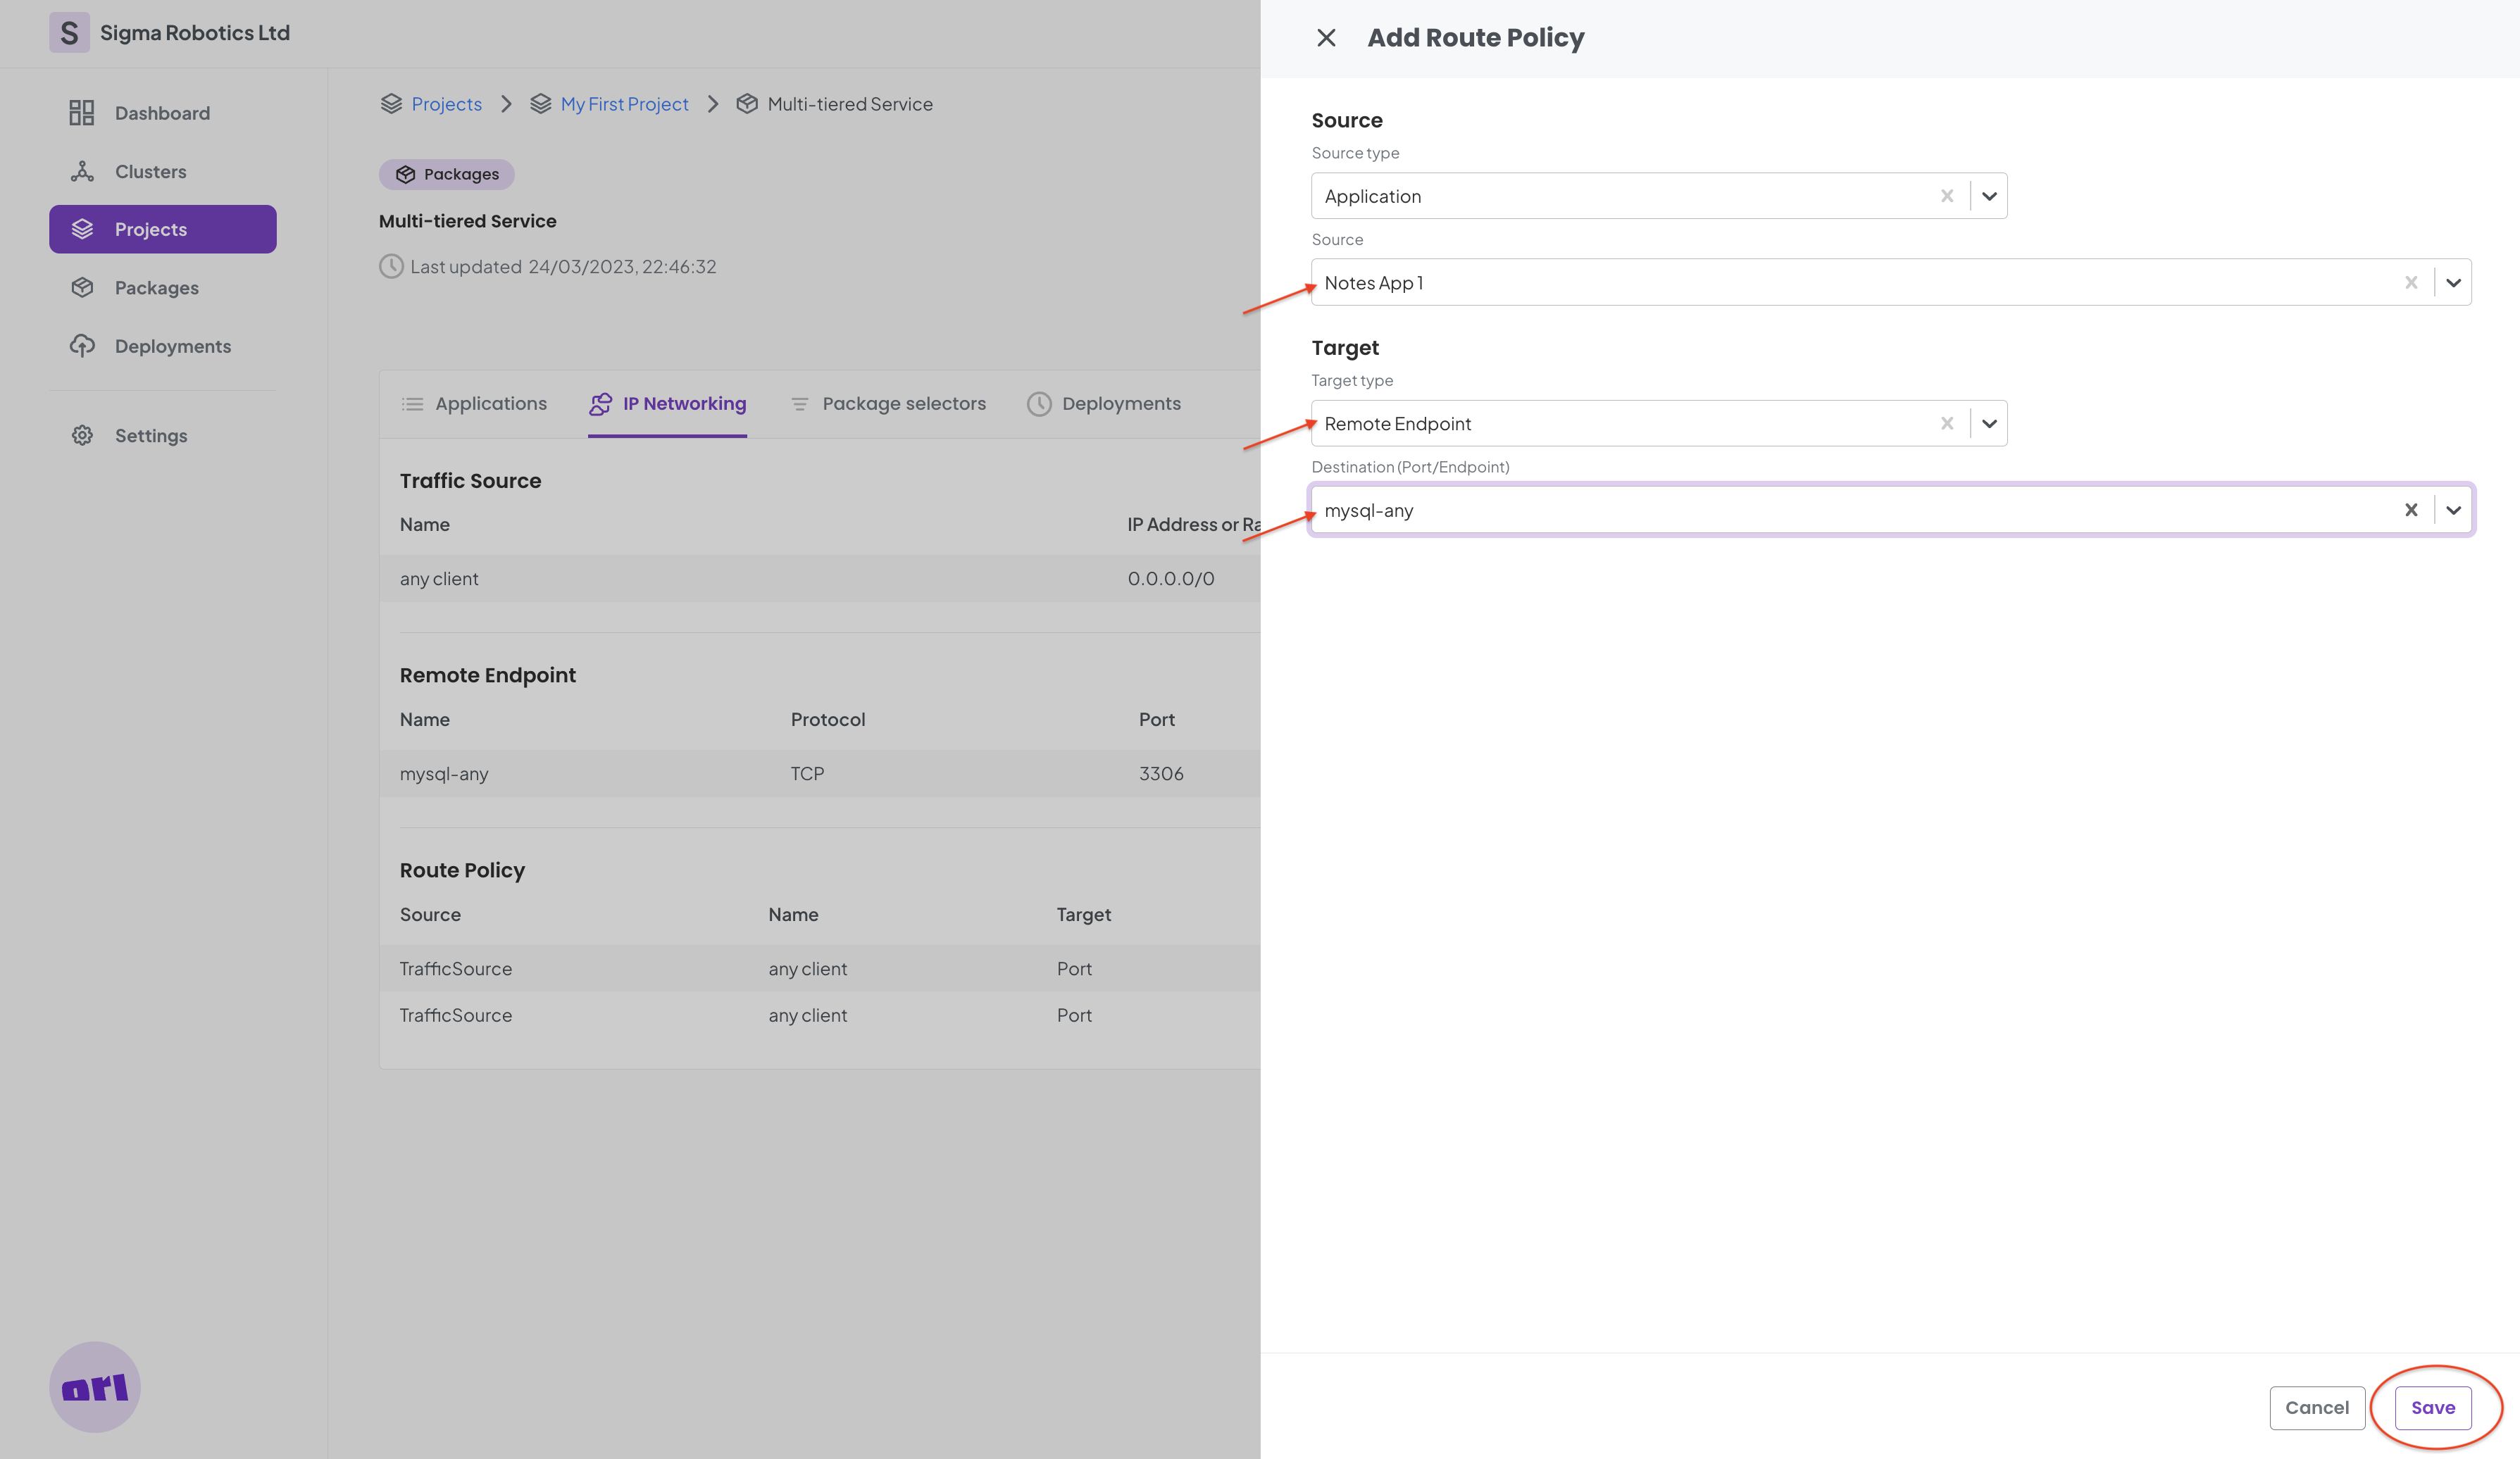
Finally we another route policy to the notes Application:
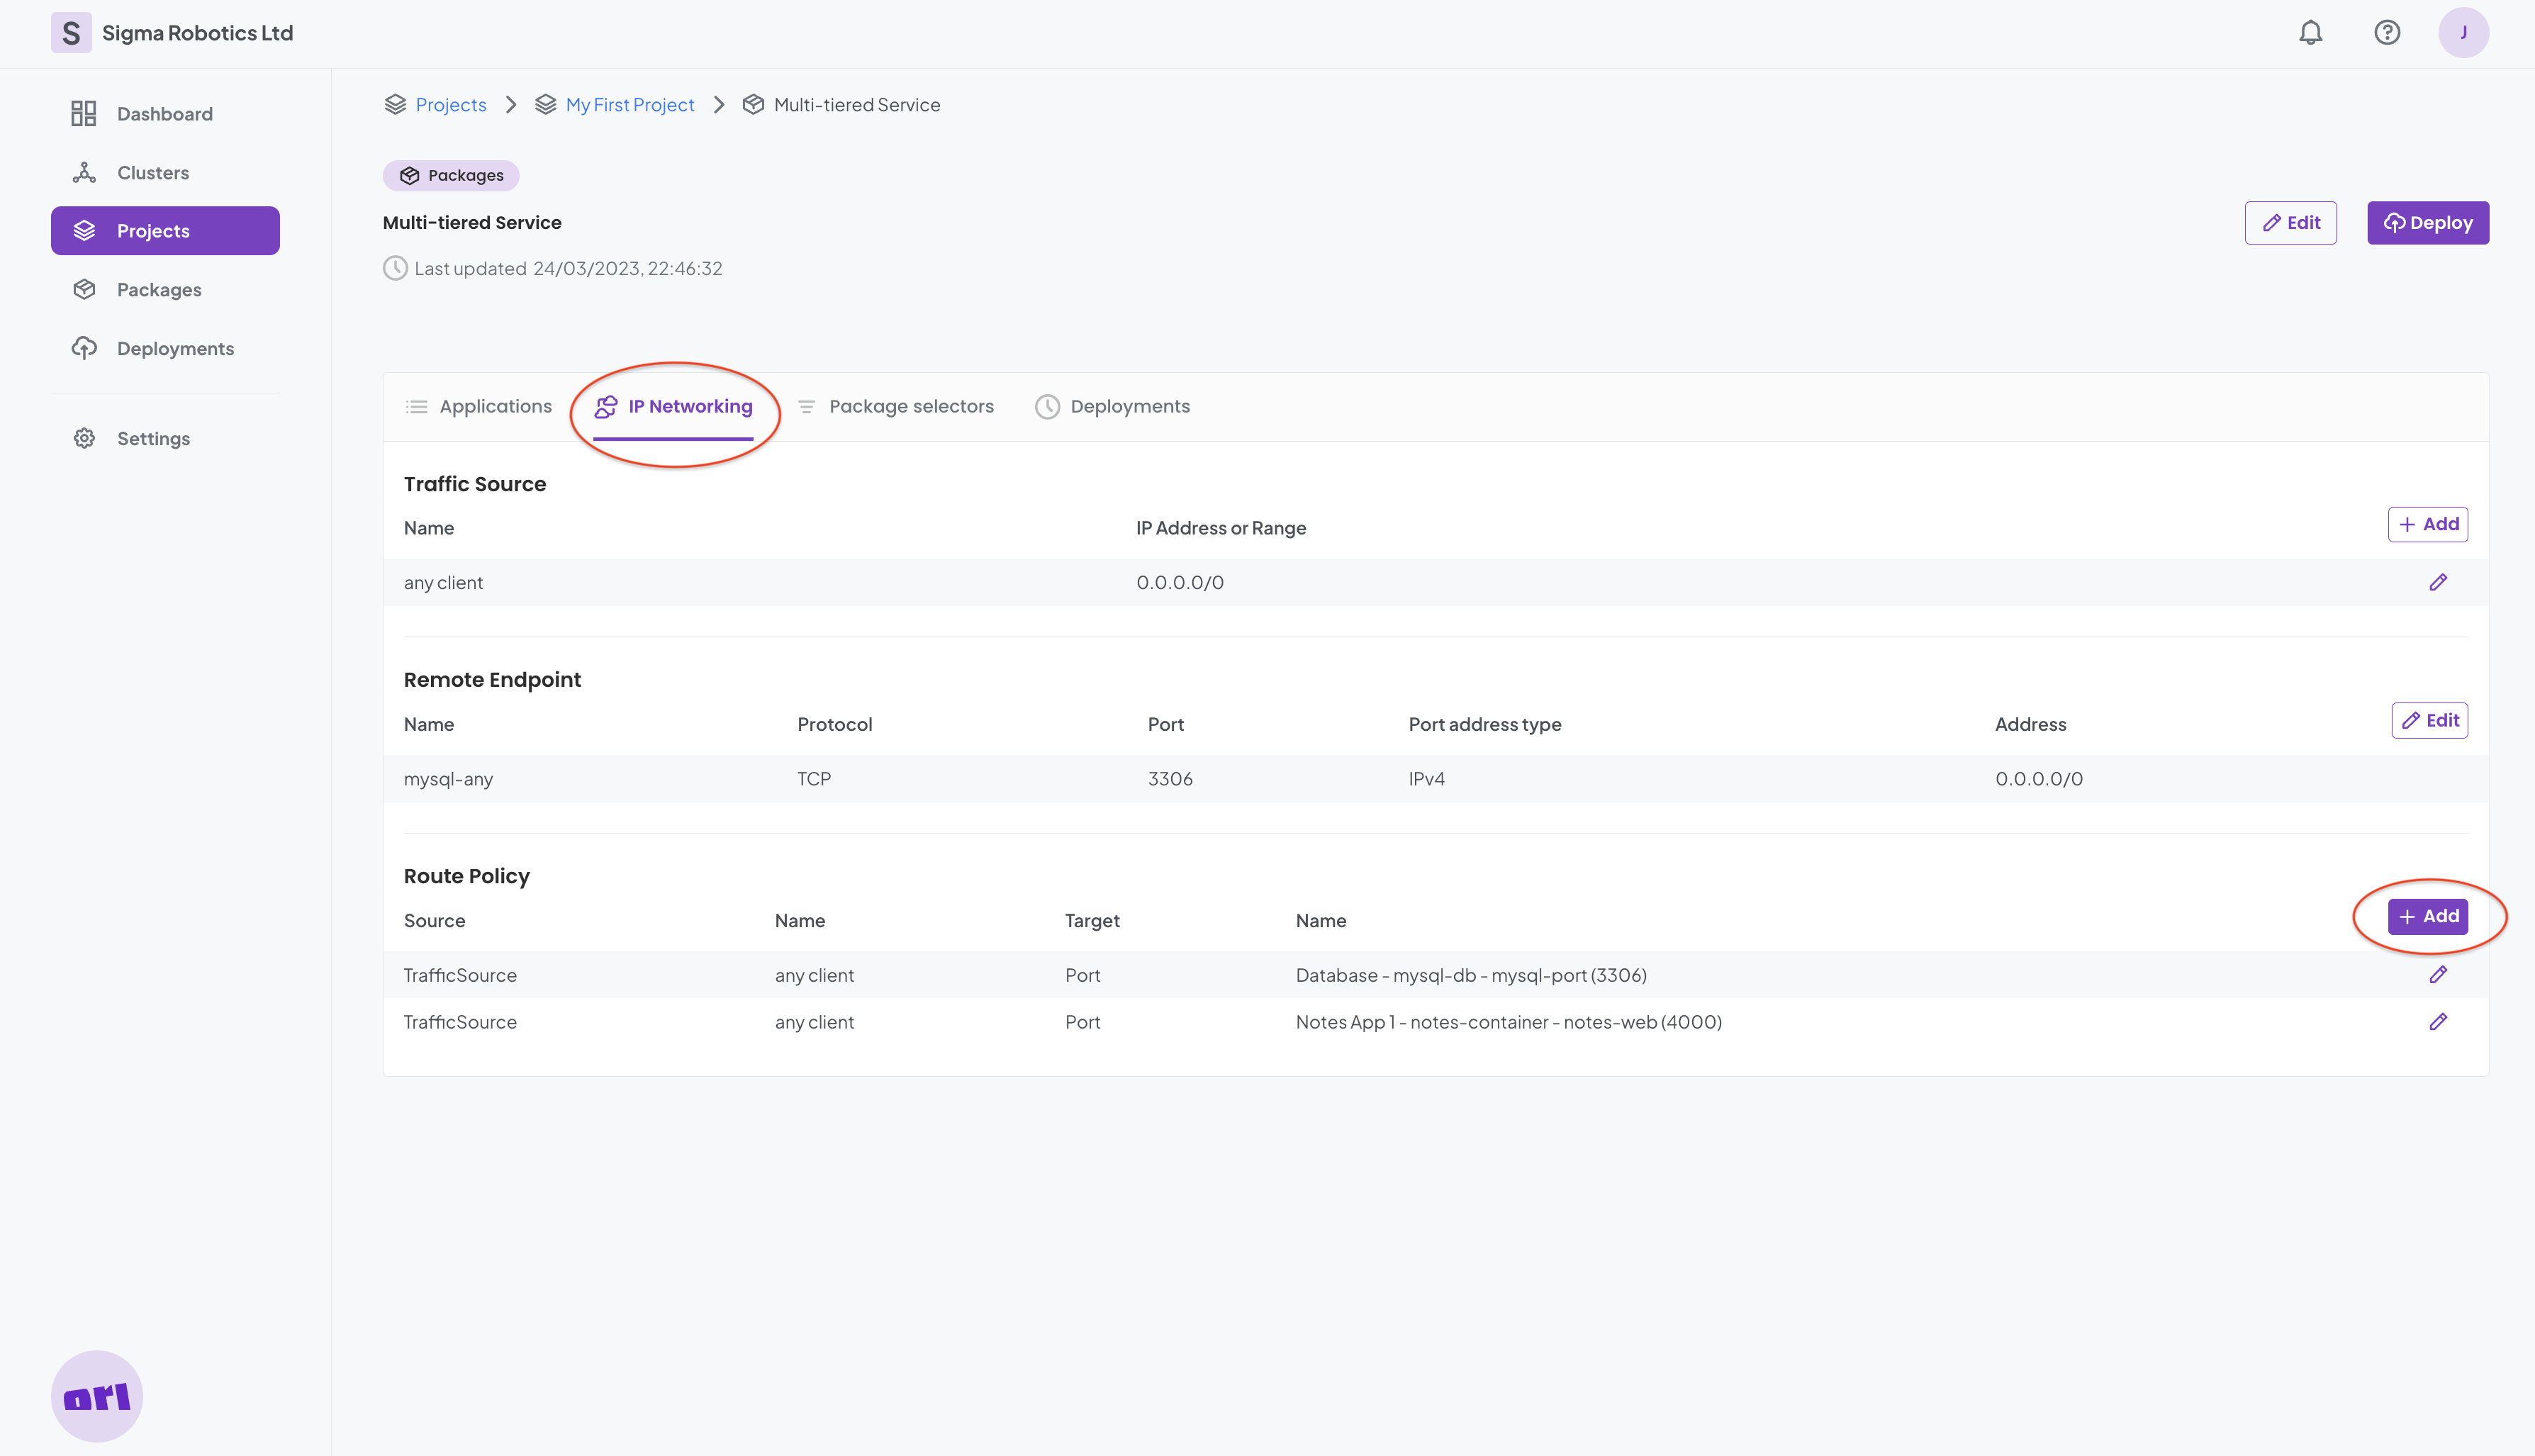
This allows the Notes Application to connect externally to the Database, wherever that will be sited on Multi-cloud:
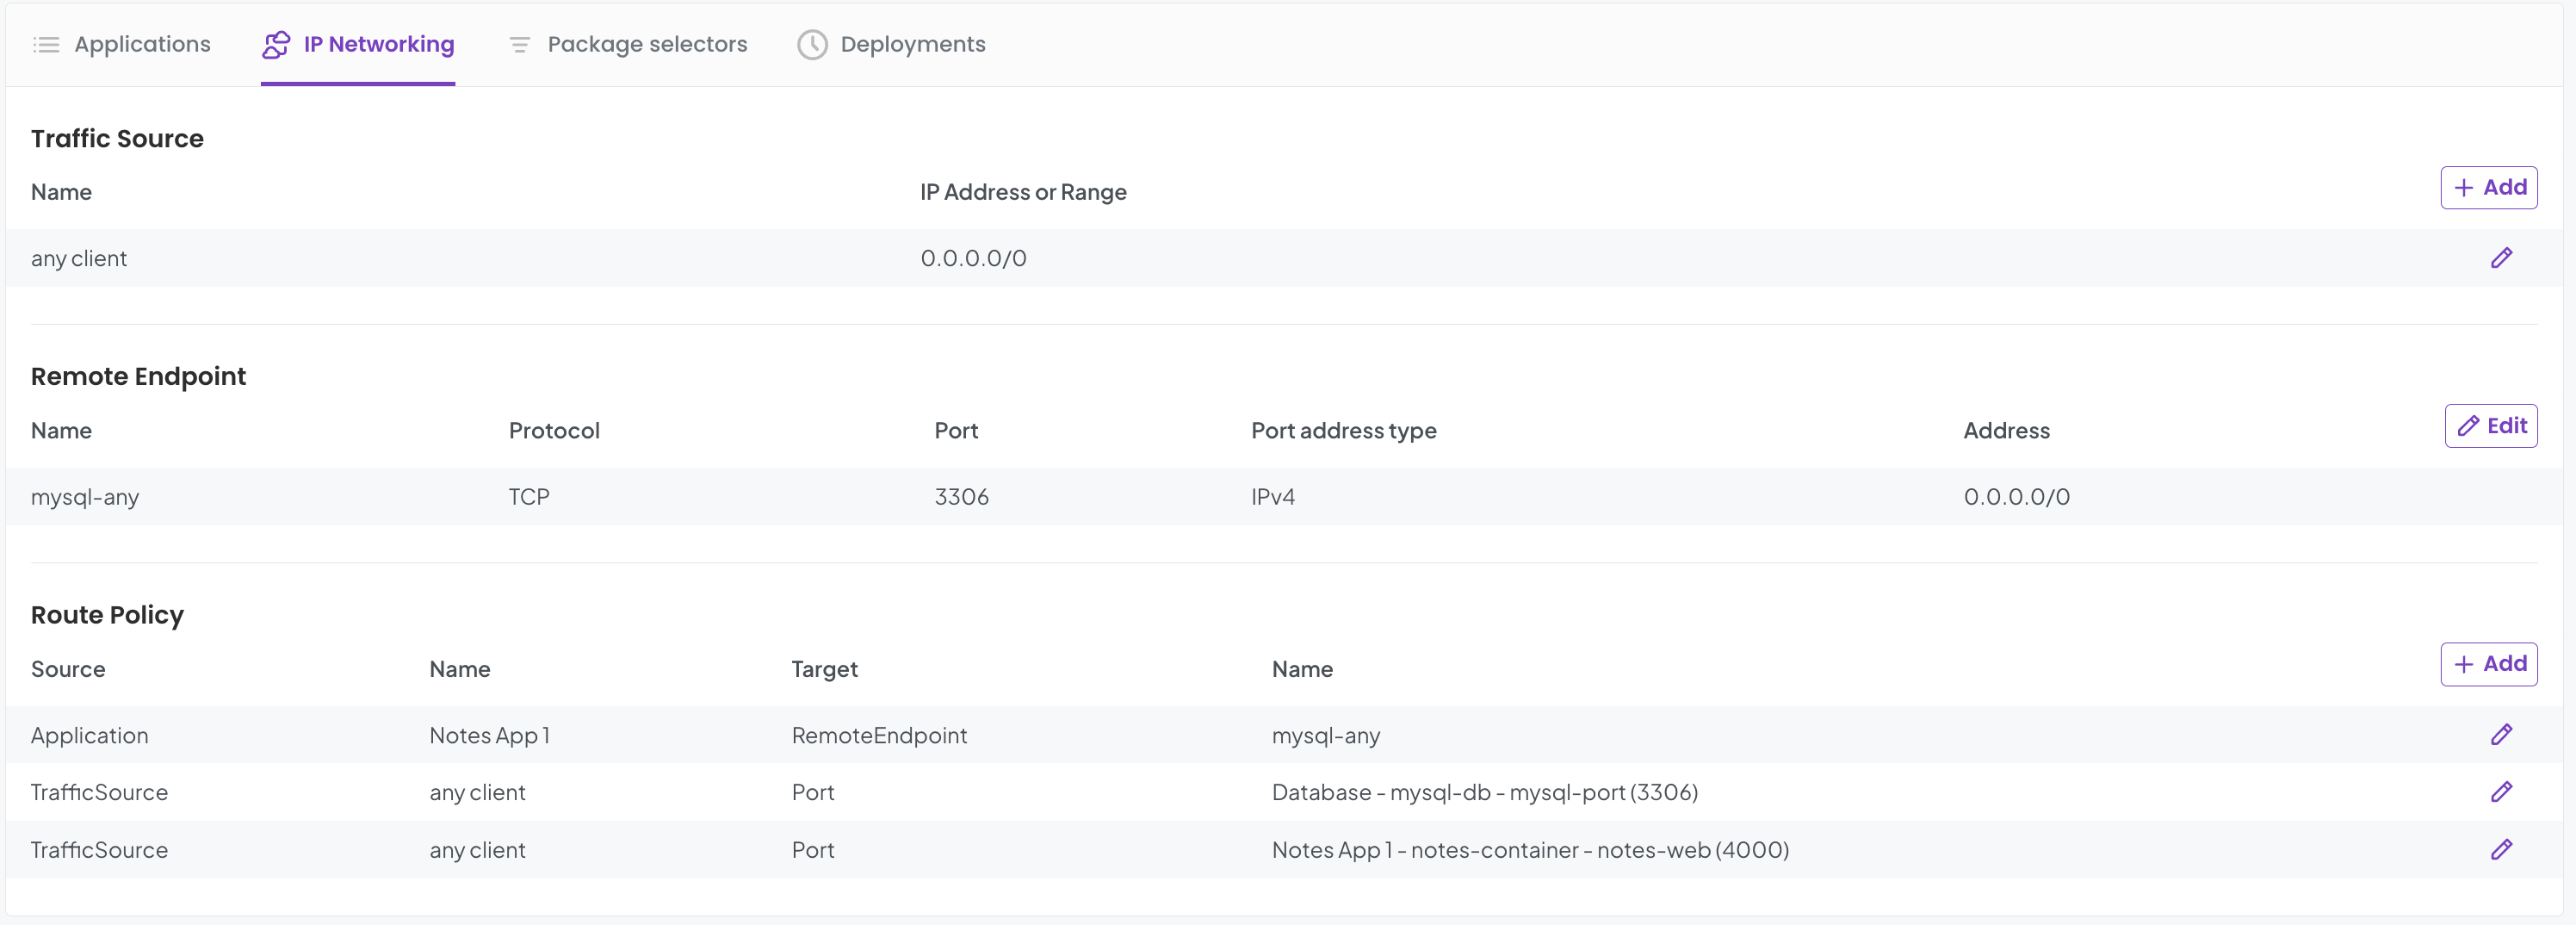
Finally the configuration of our Package networking looks like this:
And that's it. We can now test our package!
Step 4 - Testing our Package With Notes and Database
Now let's deploy our package and see what happens. All the Applications will be deployed in the same cluster for the moment. This is good enough to test our Service.
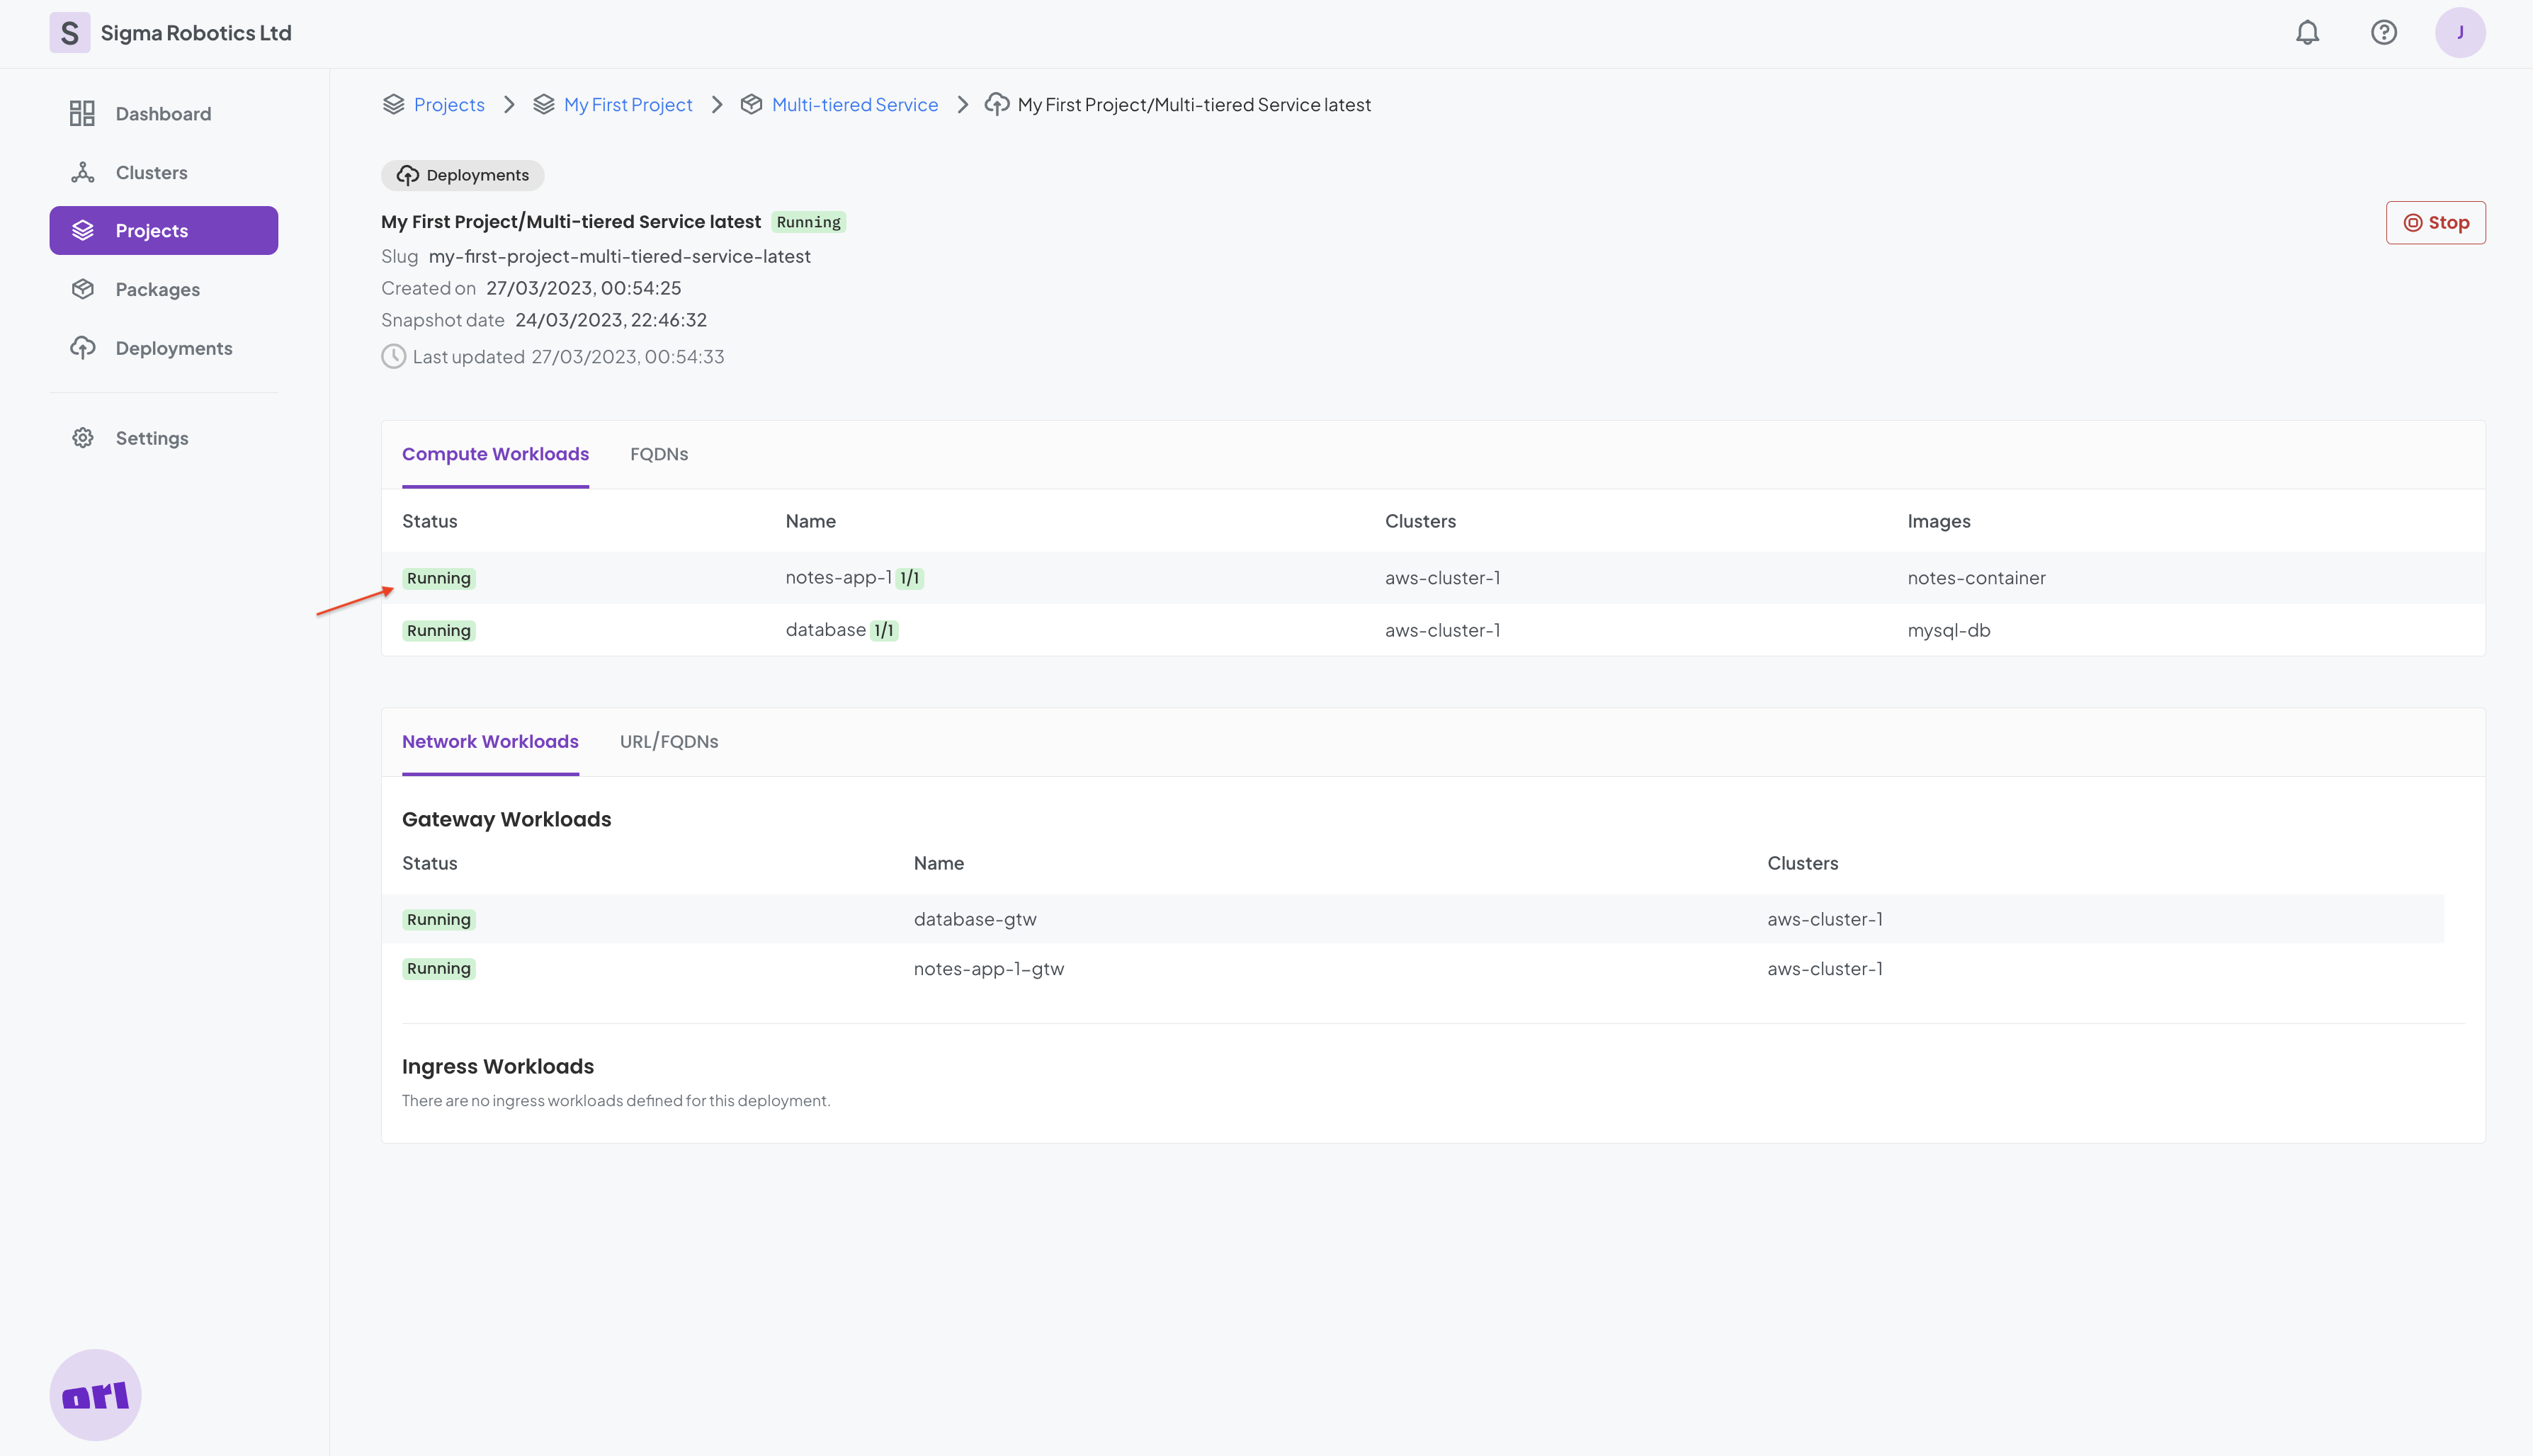
The package is running and we can see the FQDN for the Notes Application:
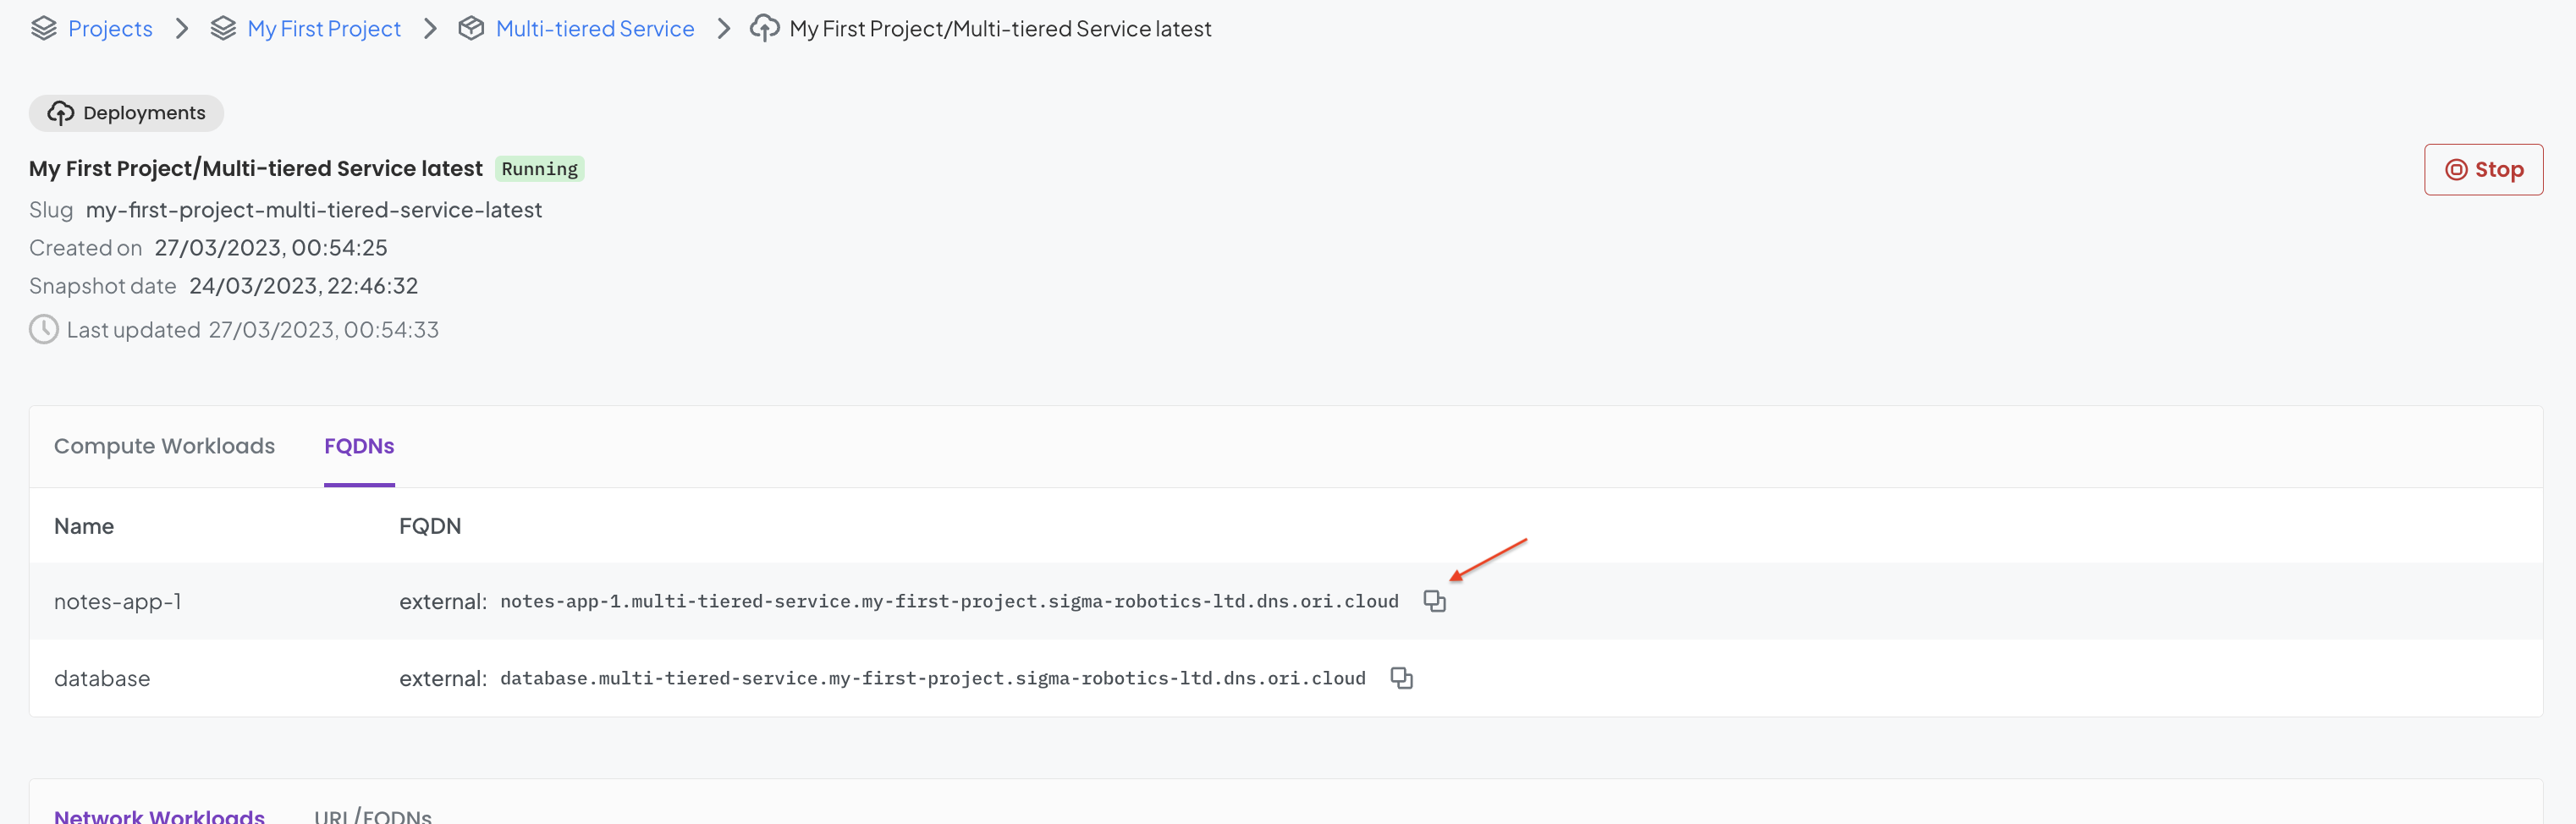
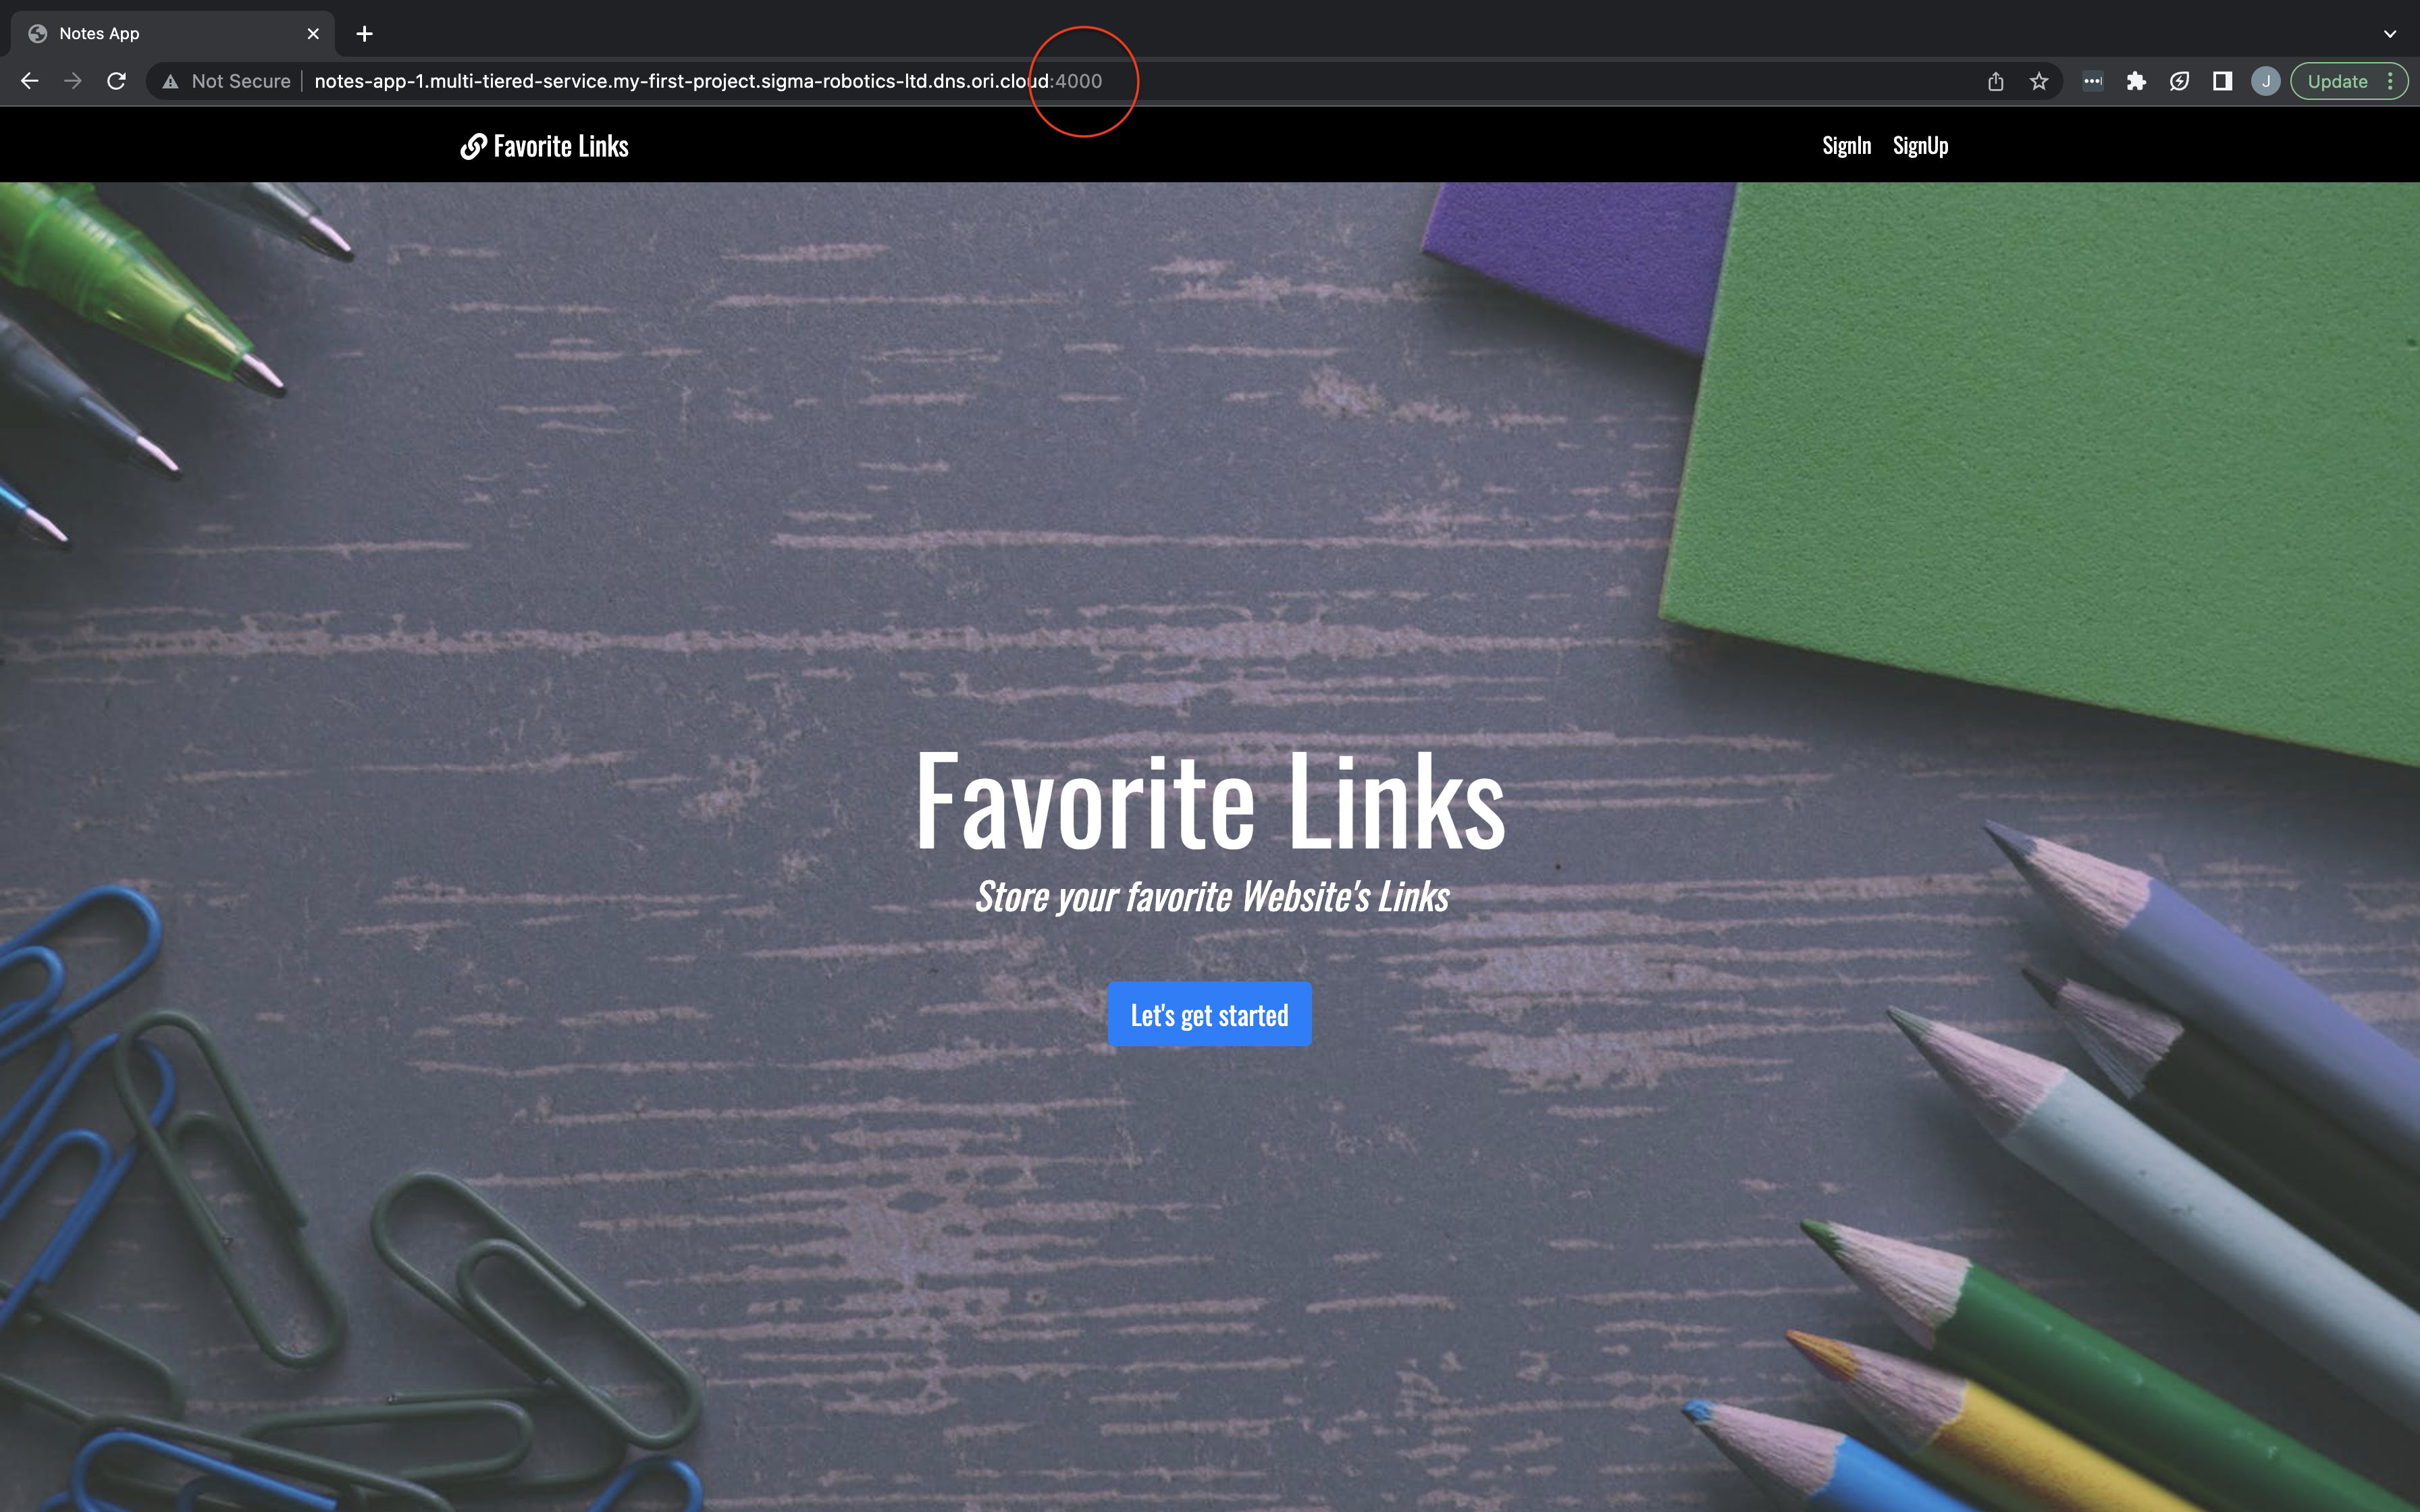
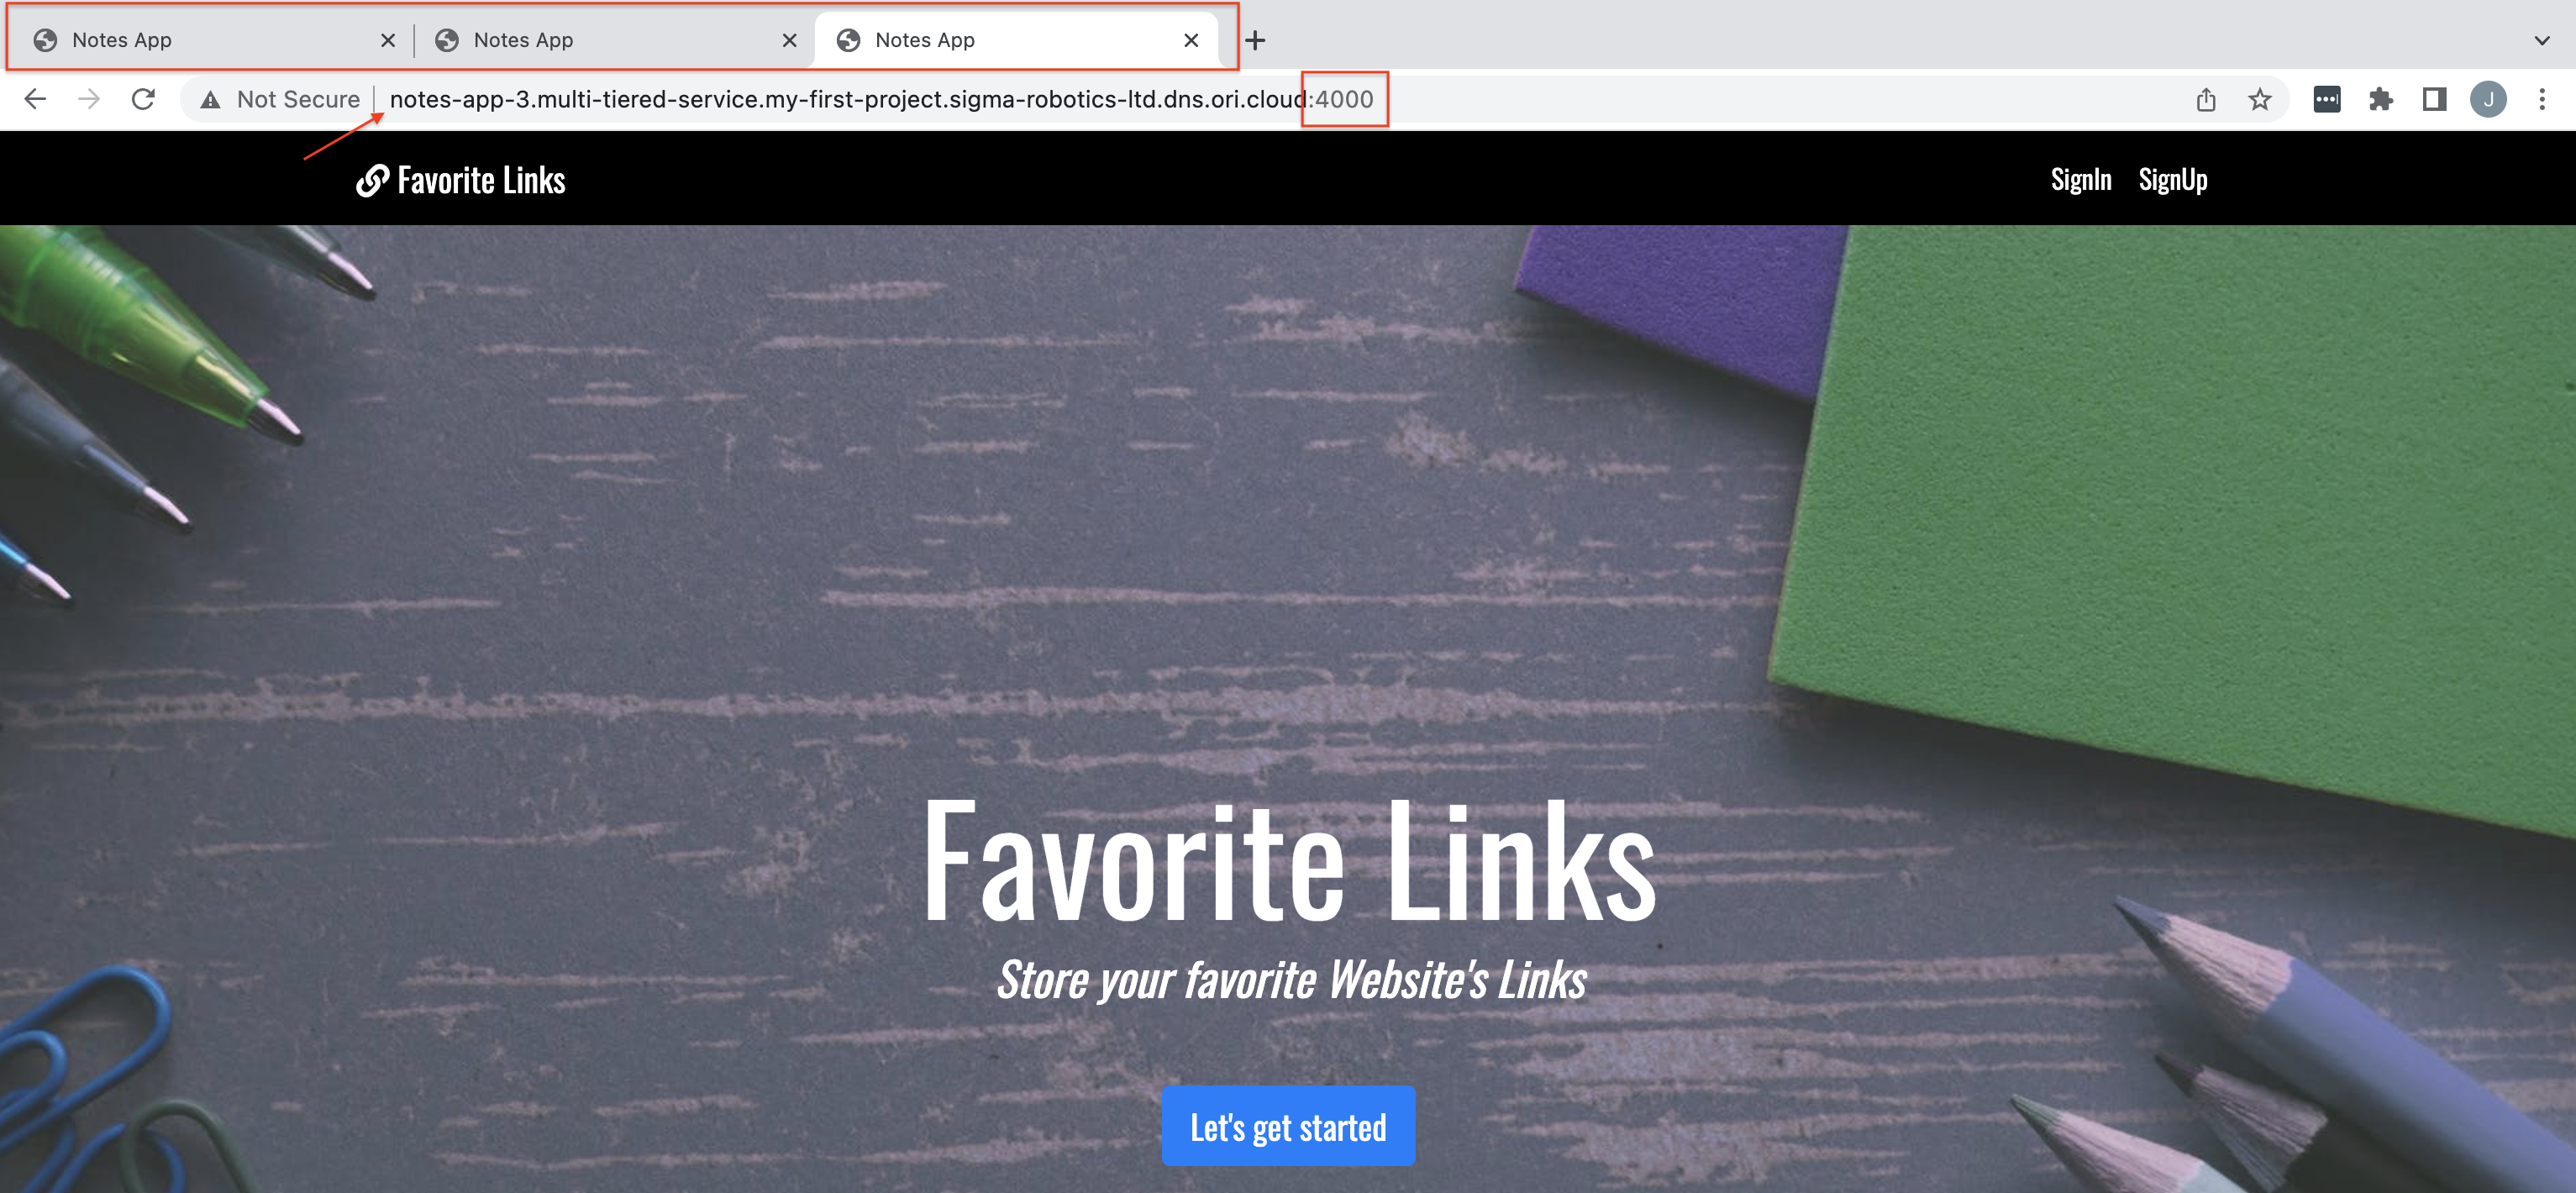
We need to add the port 4000 to it to allow access (as we exposed it on port 4000 when configuring it):
http://notes-app-1.multi-tiered-service.my-first-project.sigma-robotics-ltd.dns.ori.cloud:4000/links
We wait 30-60 seconds and now the website is up on the internet:
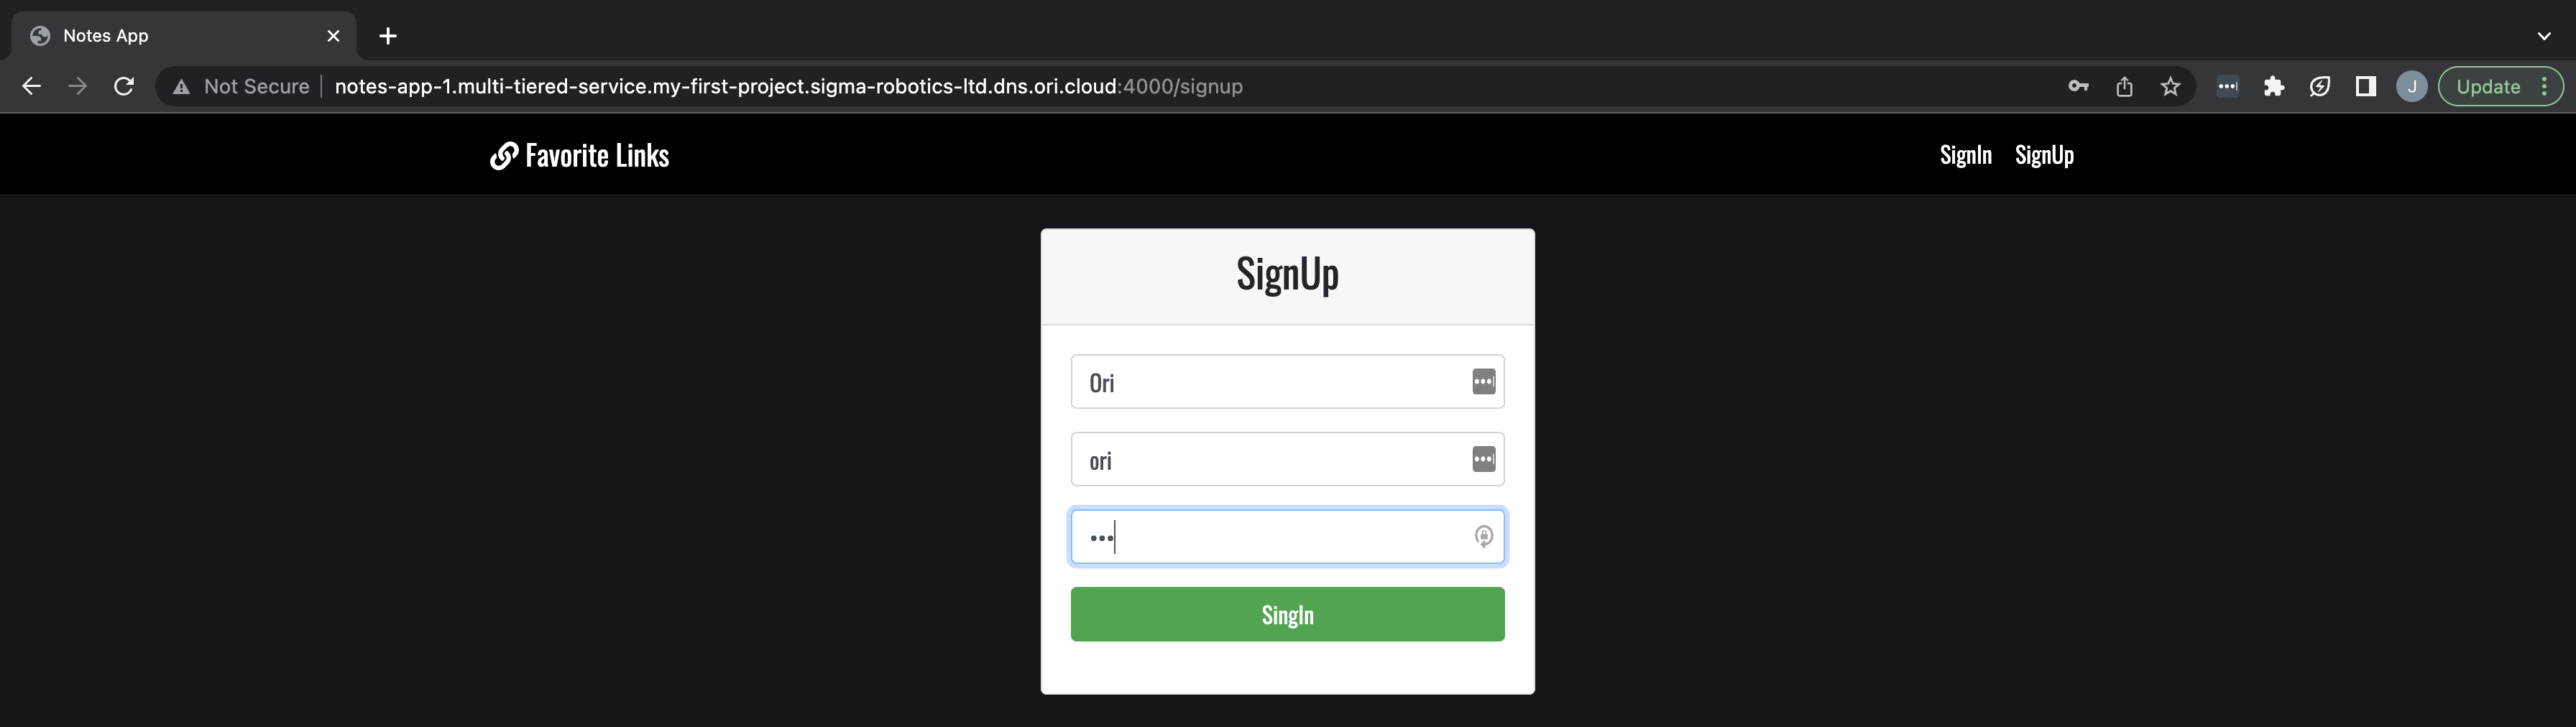
To test the application we will sign-up:
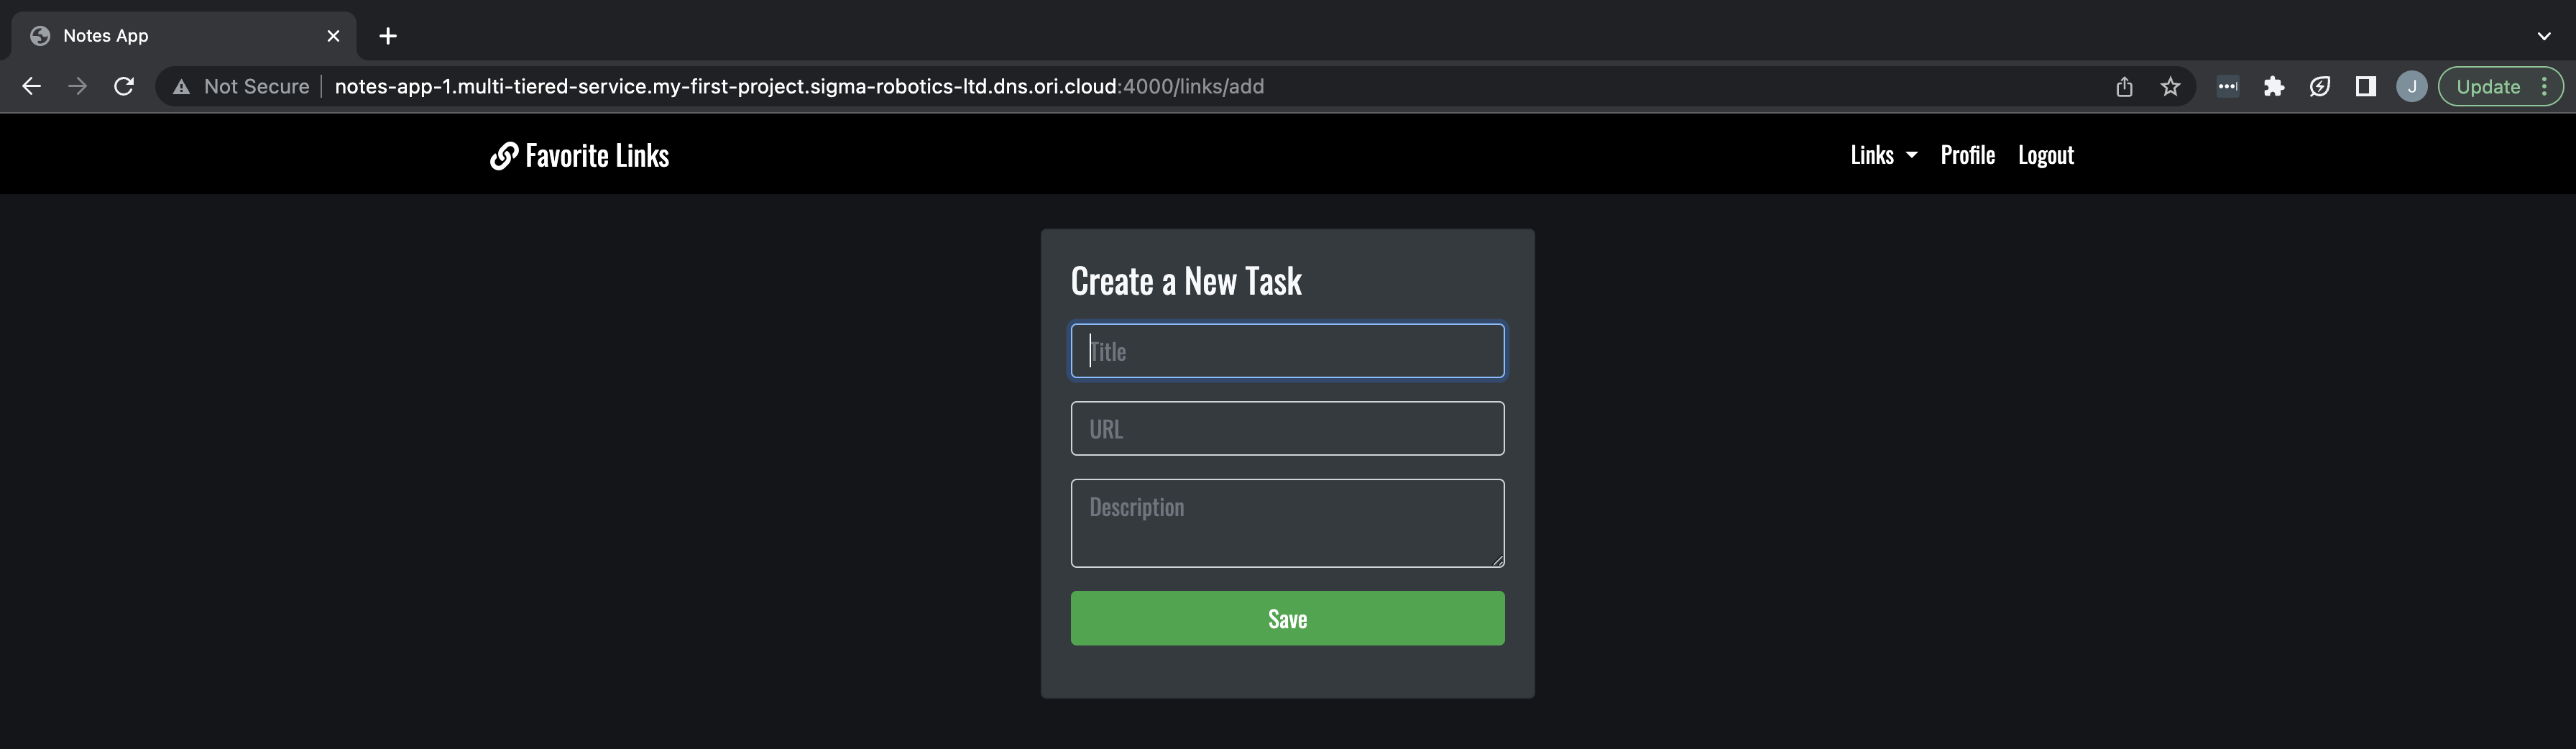
Then add a website link:
And finally we can see it on the database:
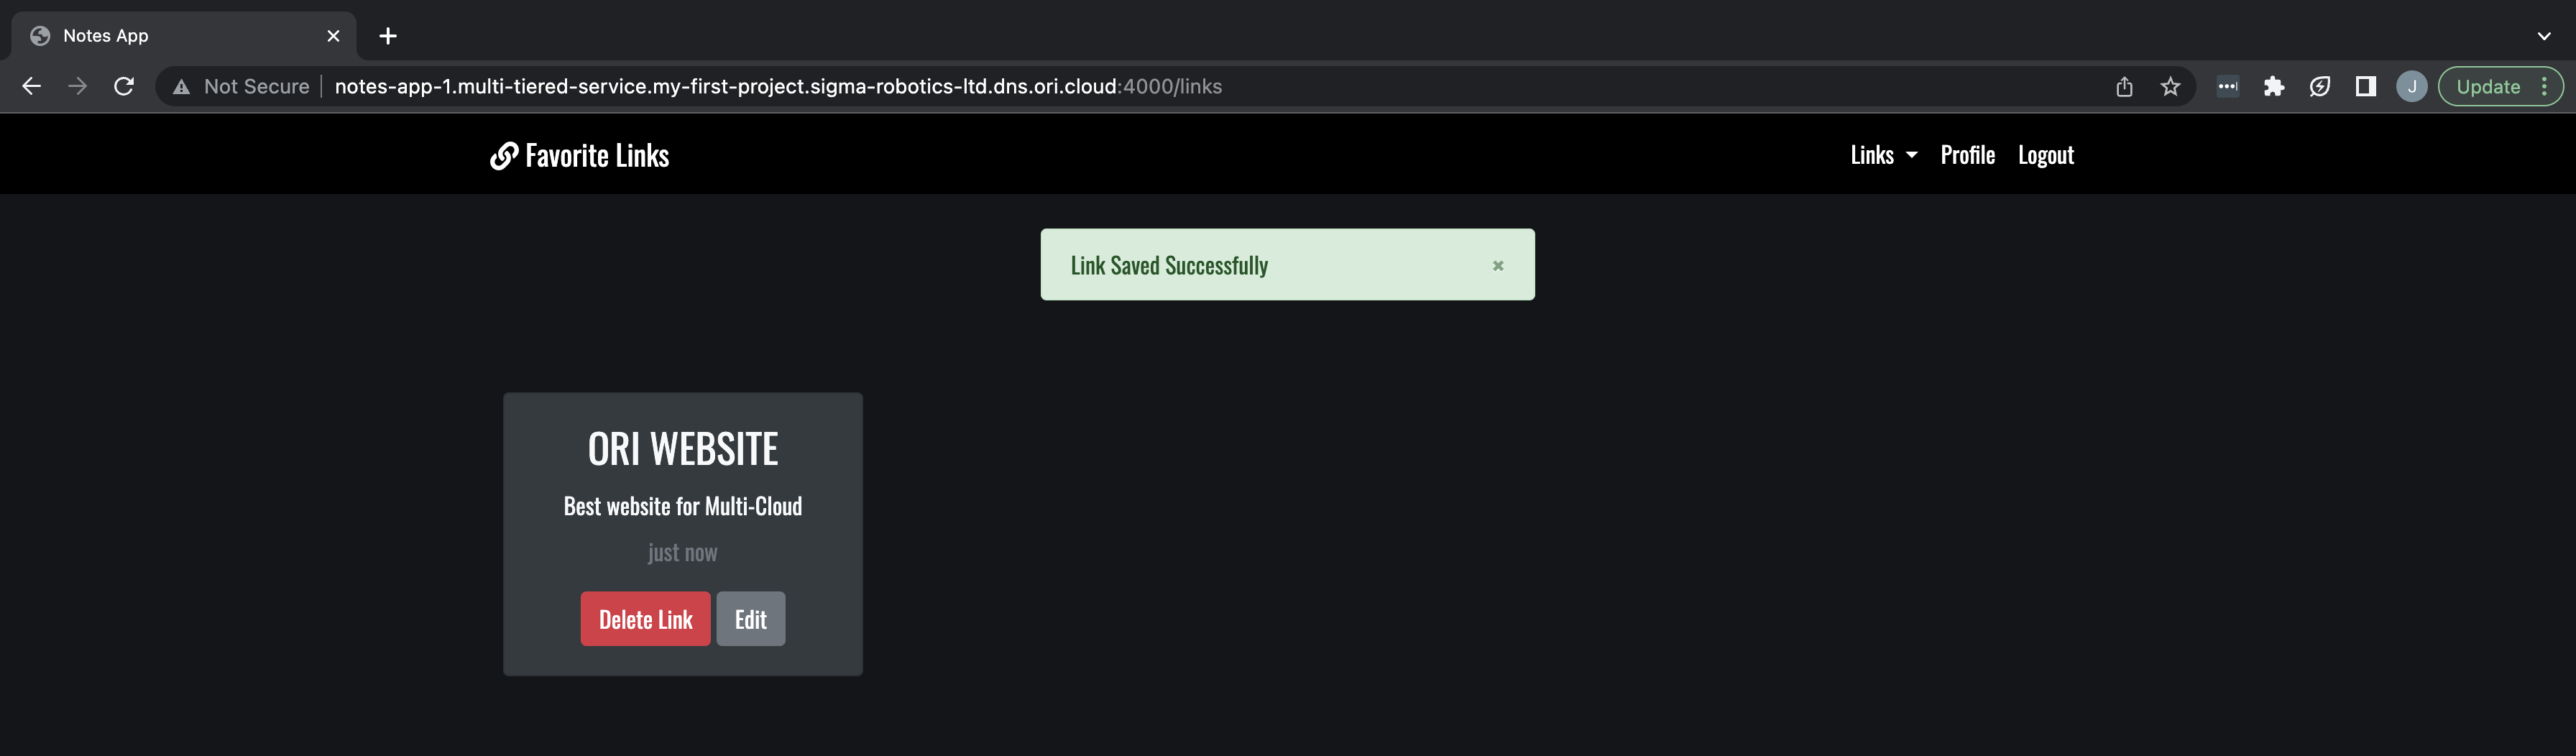
Brilliant, so far this is working perfectly!
Let' now stop the Package as we don't need to keep it running for now.

In Part 3 we will look into deploying into Multi-cloud.
Part 3 - Deploying Our Package to Multi-Cloud and Testing
OK, this is the big moment - in Part 3 we are going to do 3 things:
- Configure 2 more Notes Application Instances and their Networking;
- Configure our Cluster Labels and Application selectors for deploying on Multi-Cloud;
- Deploy our Application Service on Multi-Cloud and test it out.
Let's get to work.
Step 1 - Configure the Additional Notes Applications and Networking
First we are going to Configure two more exact copies of the Notes Application. For that we are going to repeat the steps 1, 2 and 3 in Part 2.
It is ok to run this How To Guide with just 2 Notes Apps, But as I have 3 clusters, I have gone for 3 Notes Application Instances too.
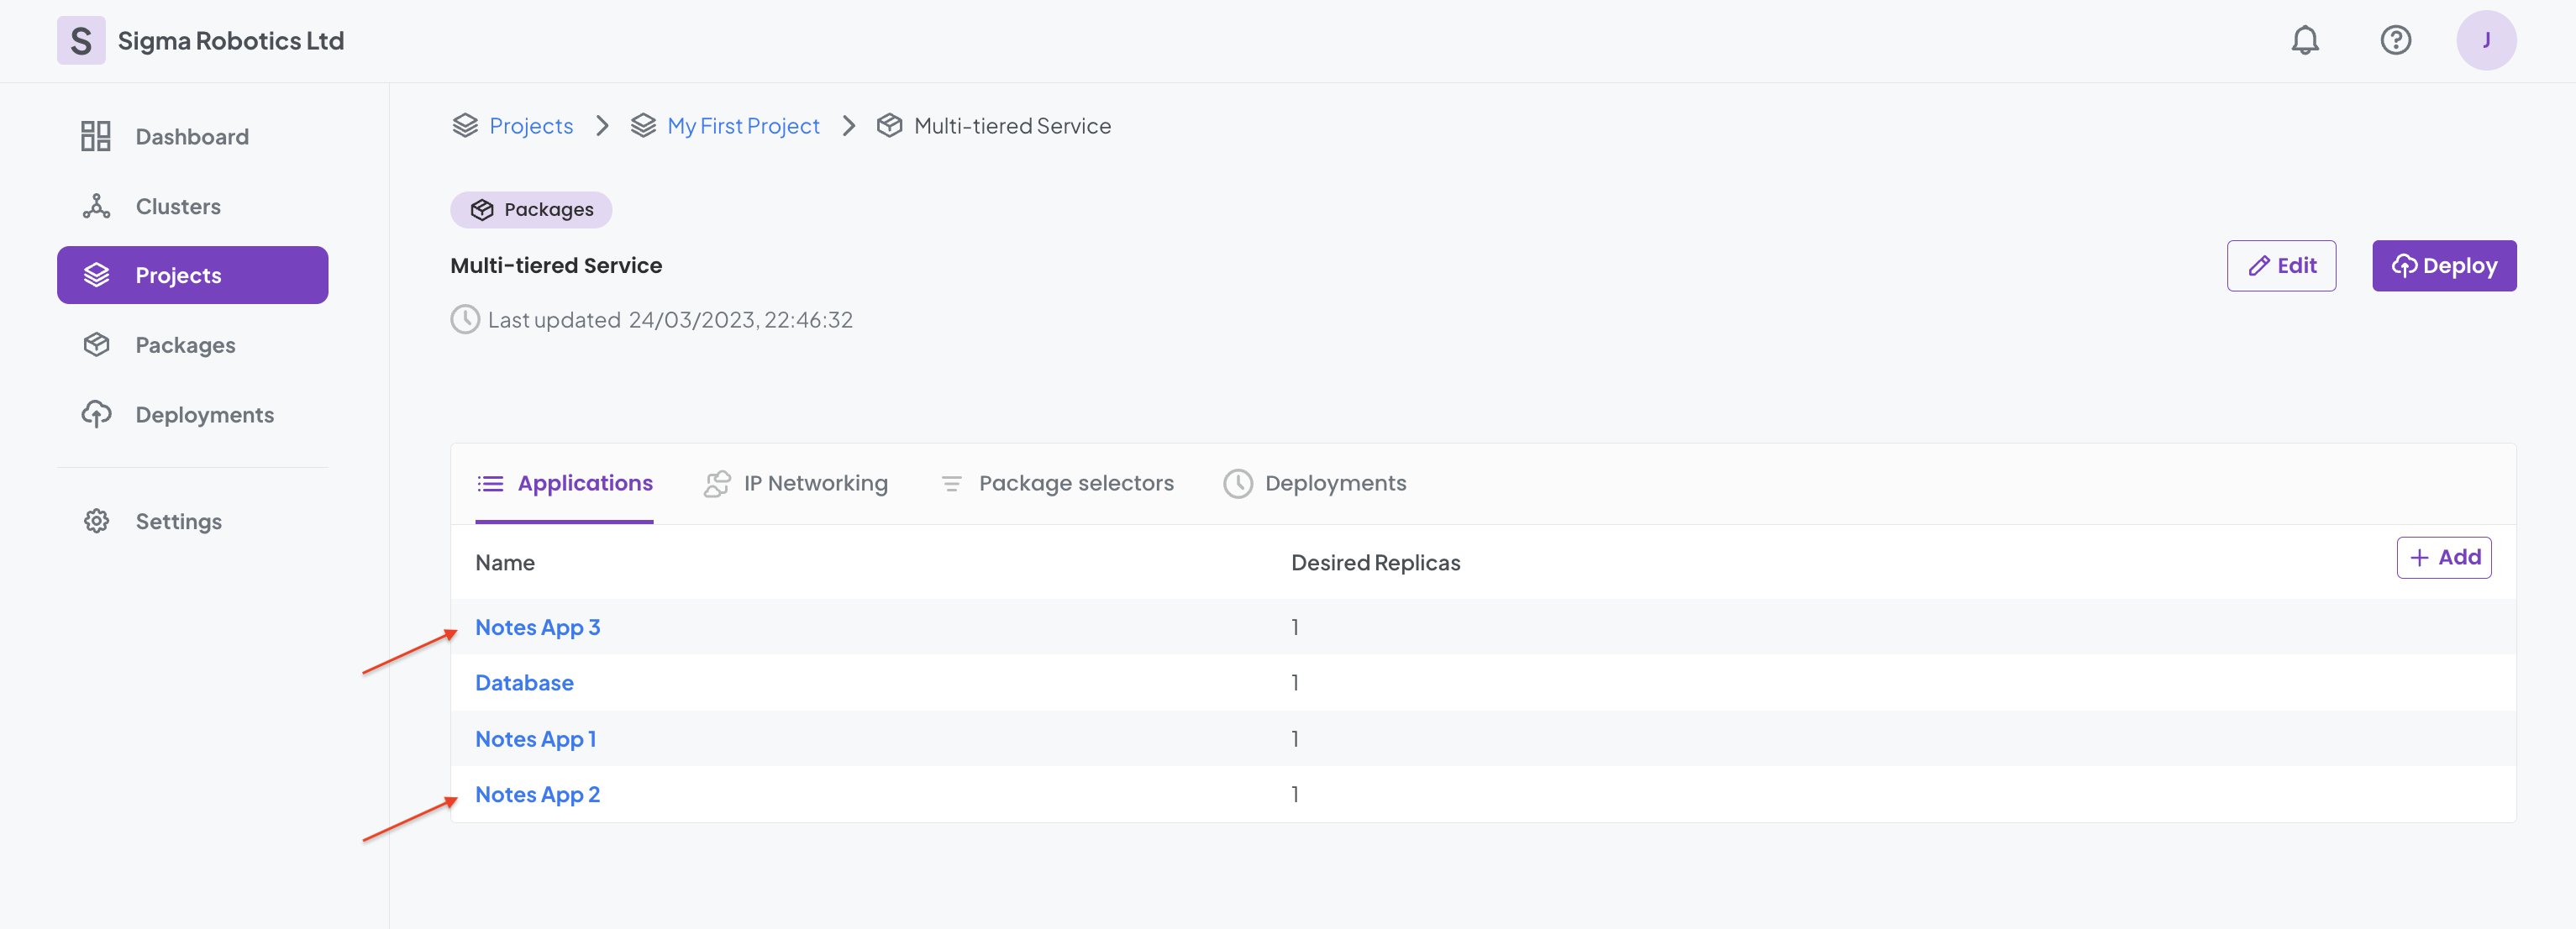
After that we end up with:
Now it is time to sort the networking. As we have done all the preparation work before this is a 30-second job. On the Package Details page we end up with the table below:
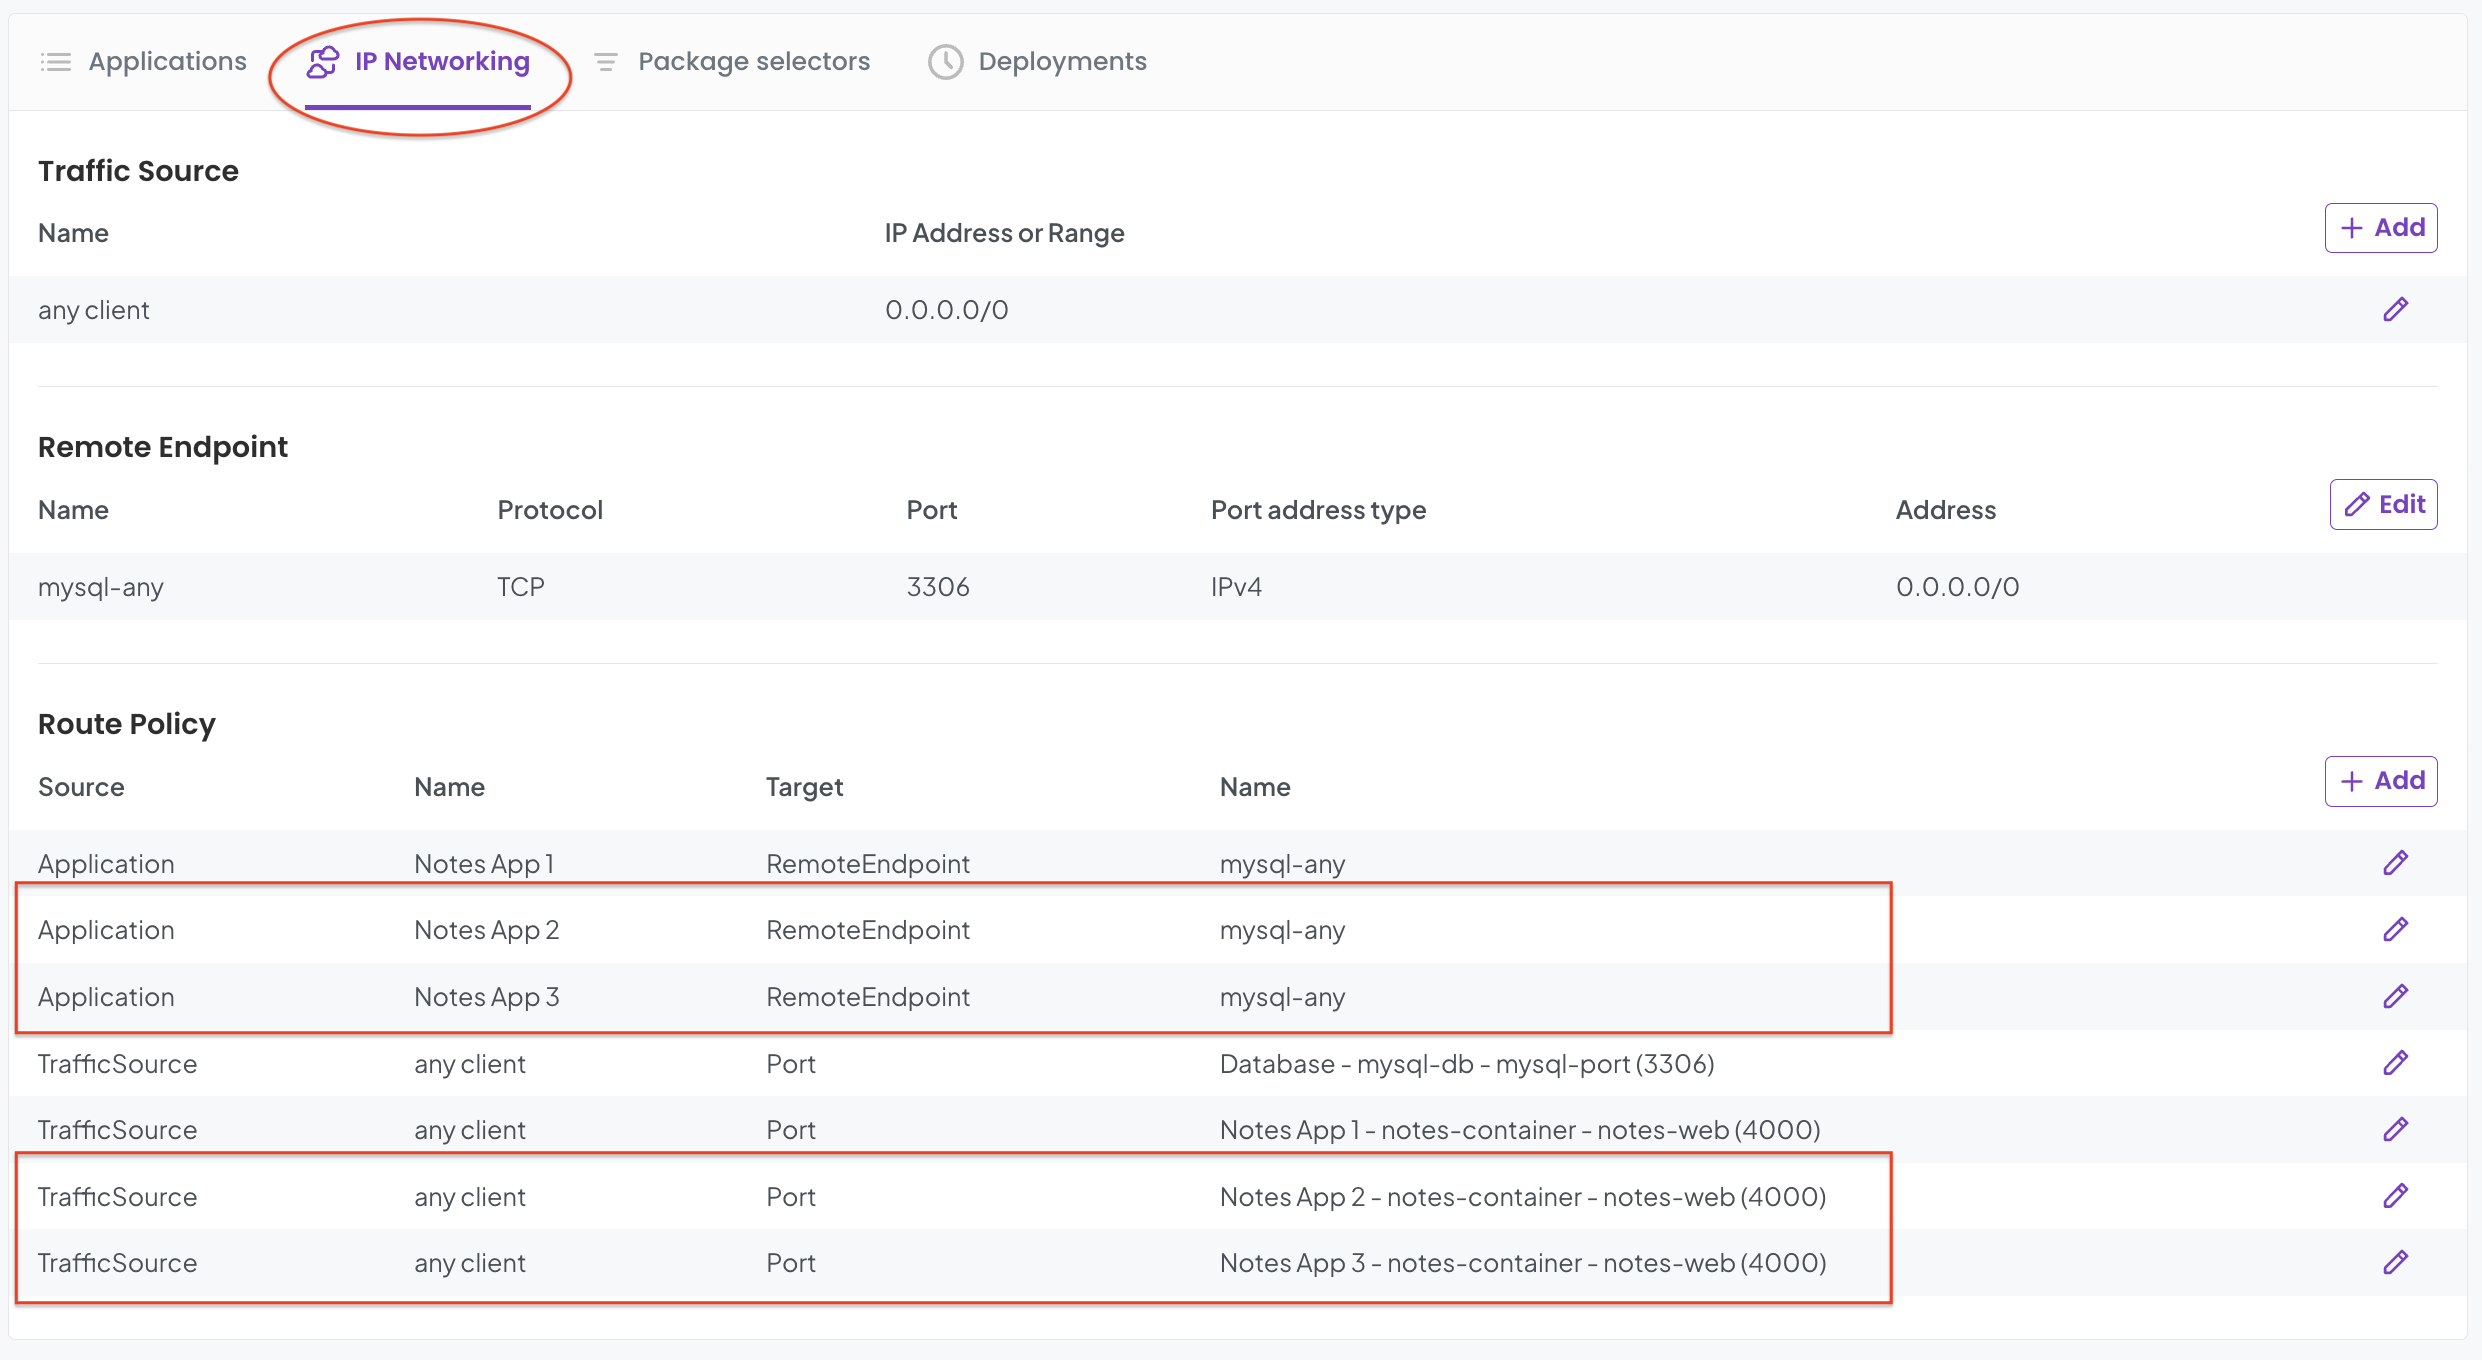
Now let's get to work on our policies.
Step 2 - Configure the Clusters and the Policies
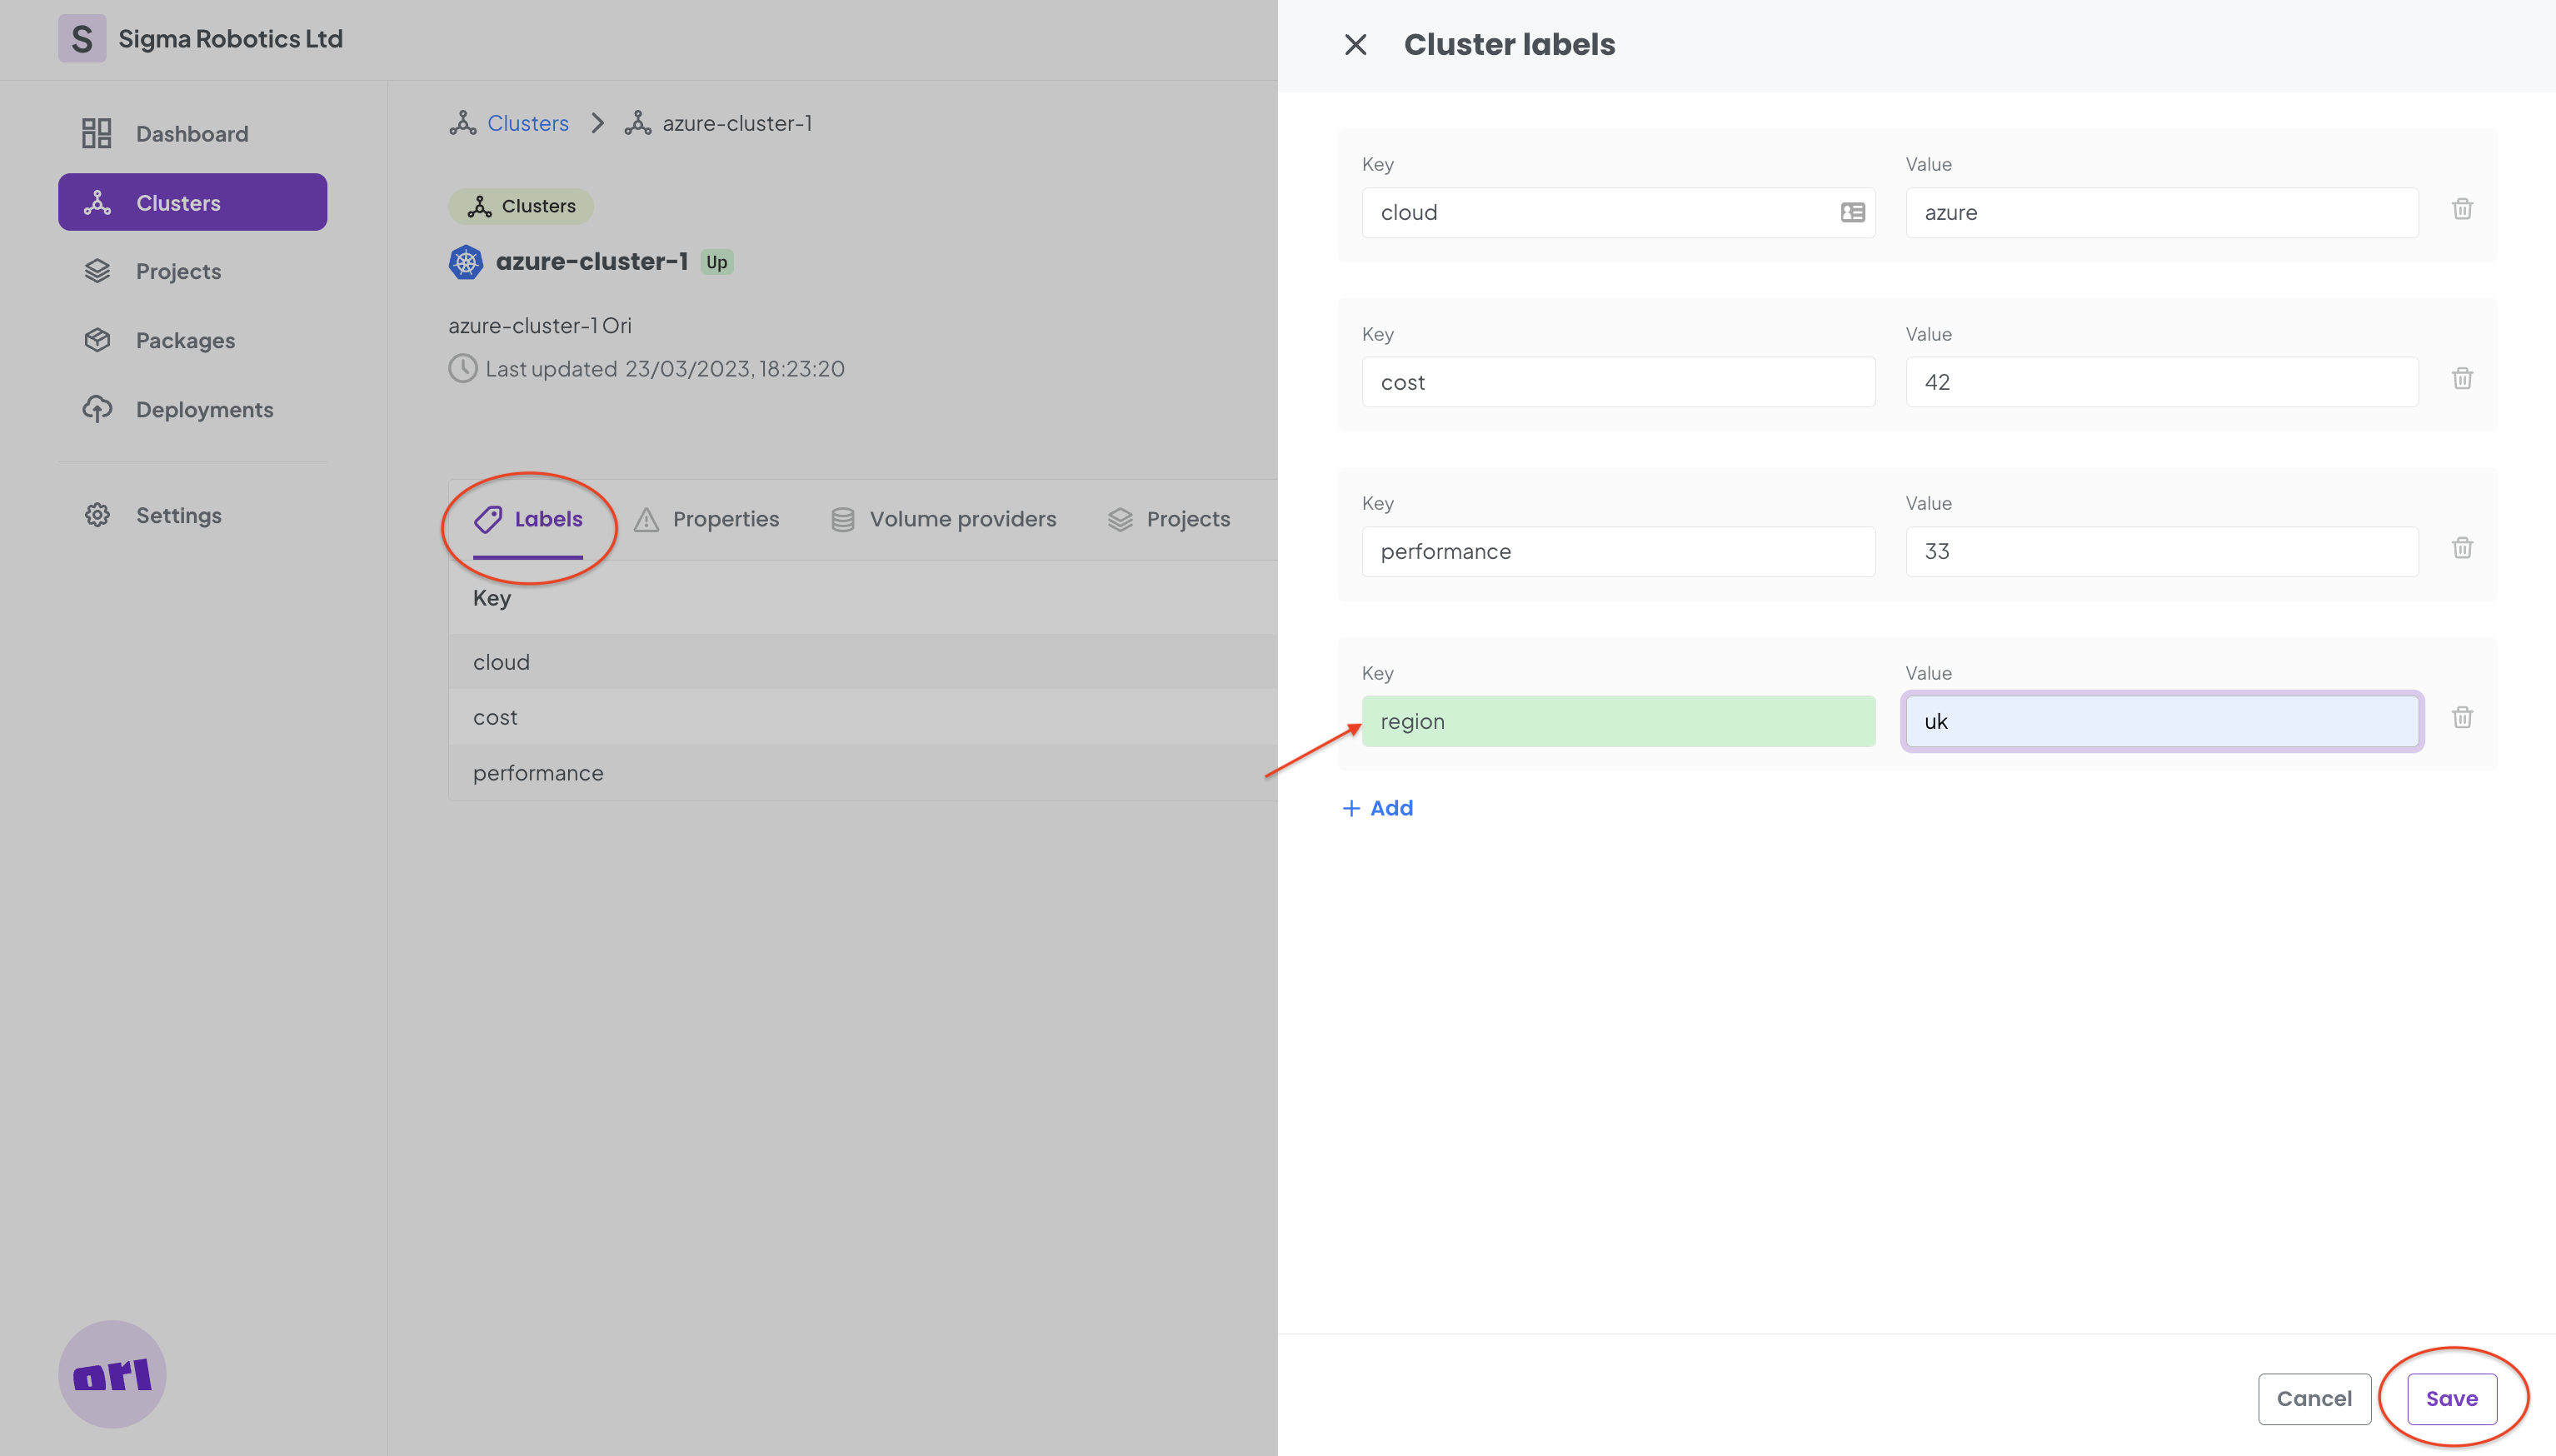
Let's configure some cluster labels for each the the Clusters we have. We start by navigating to the Azure cluster we have and we give it a region label, in this case uk:
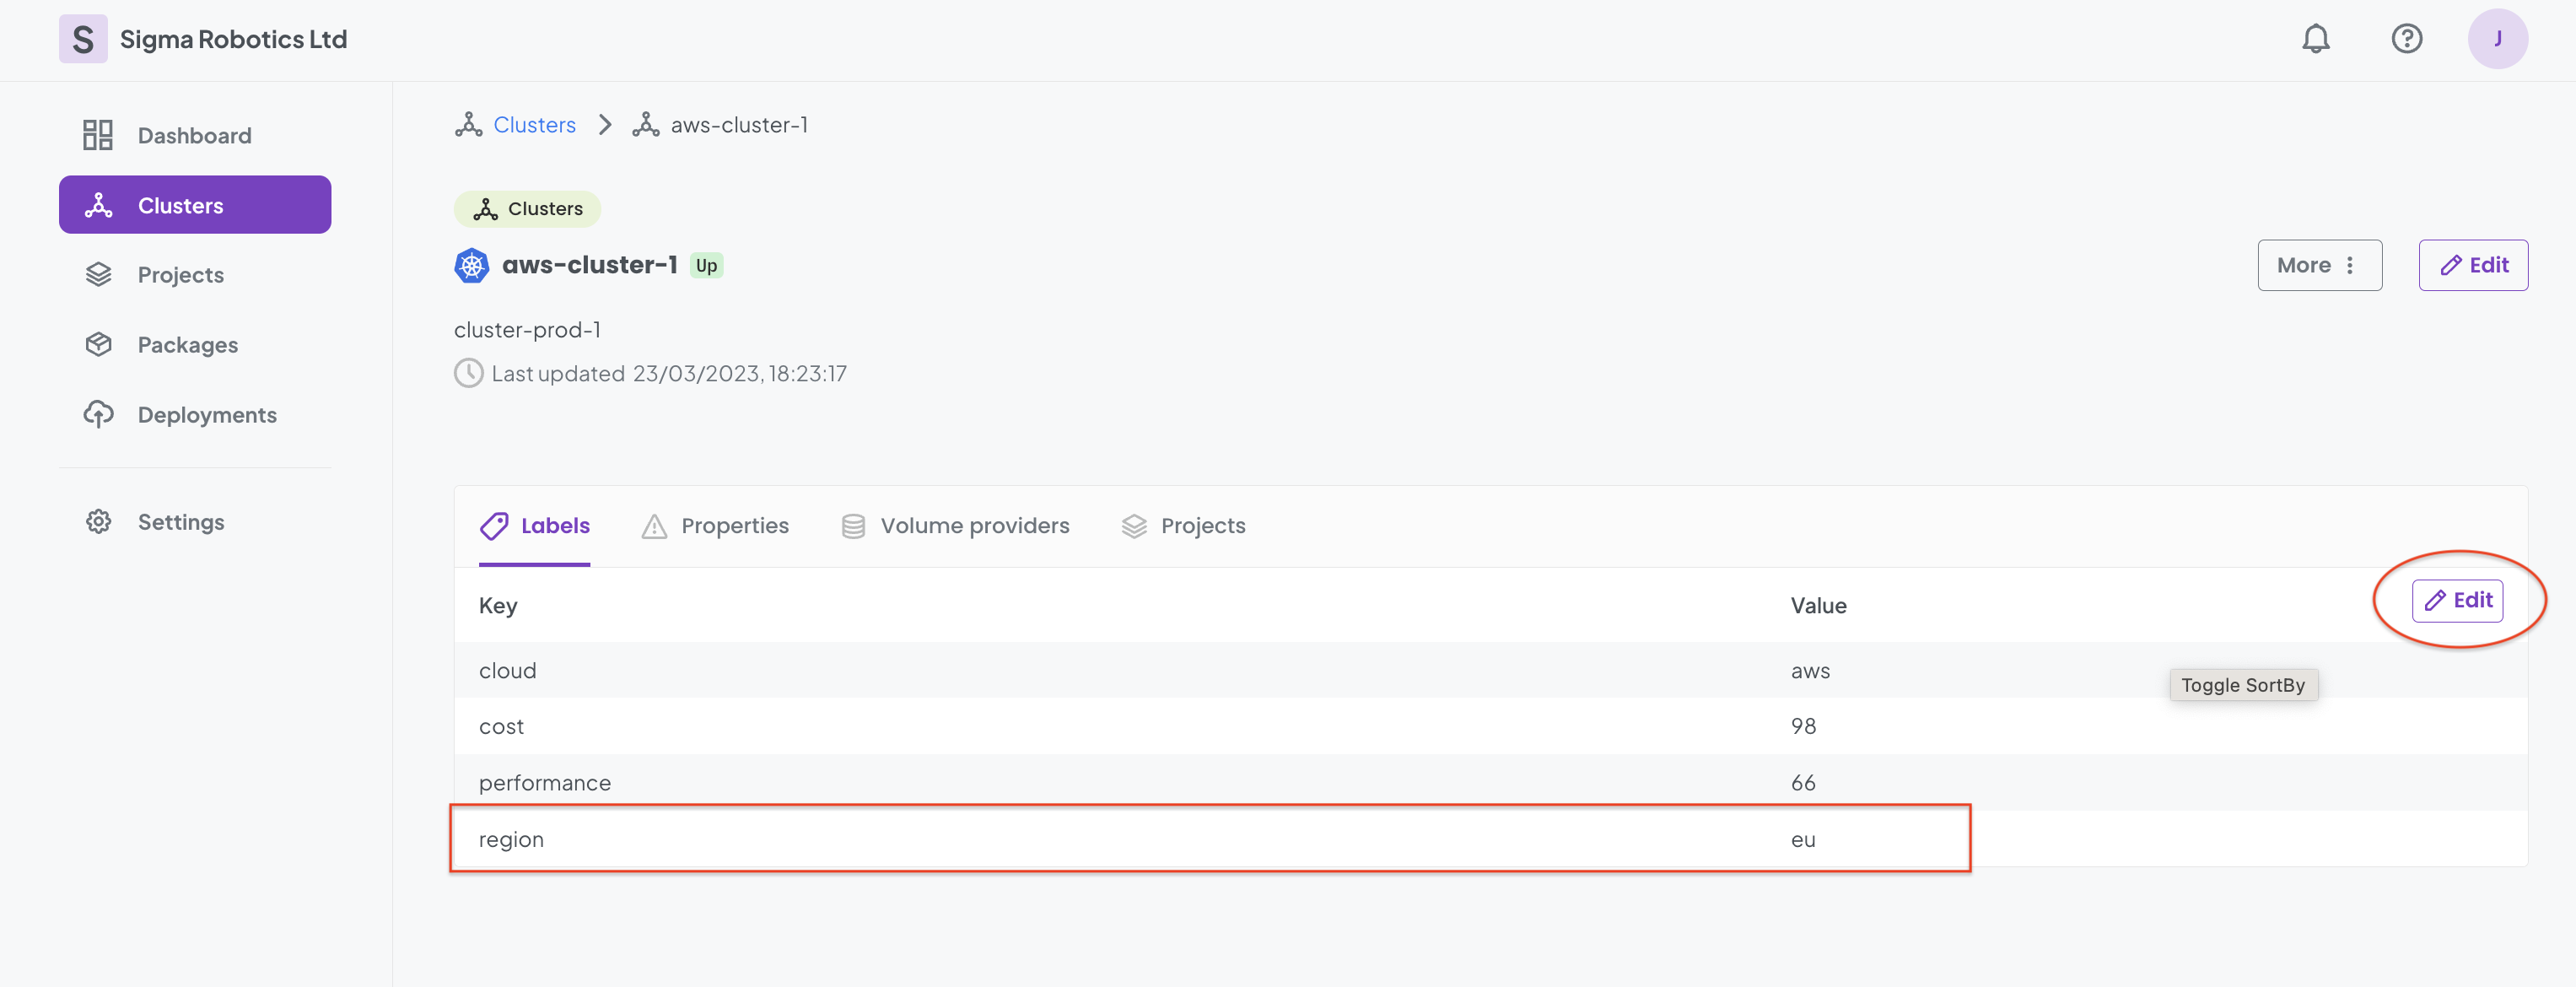
Fro the AWS cluster we give the region label a eu label:
And finally for the GCP cluster we set the region label to us:
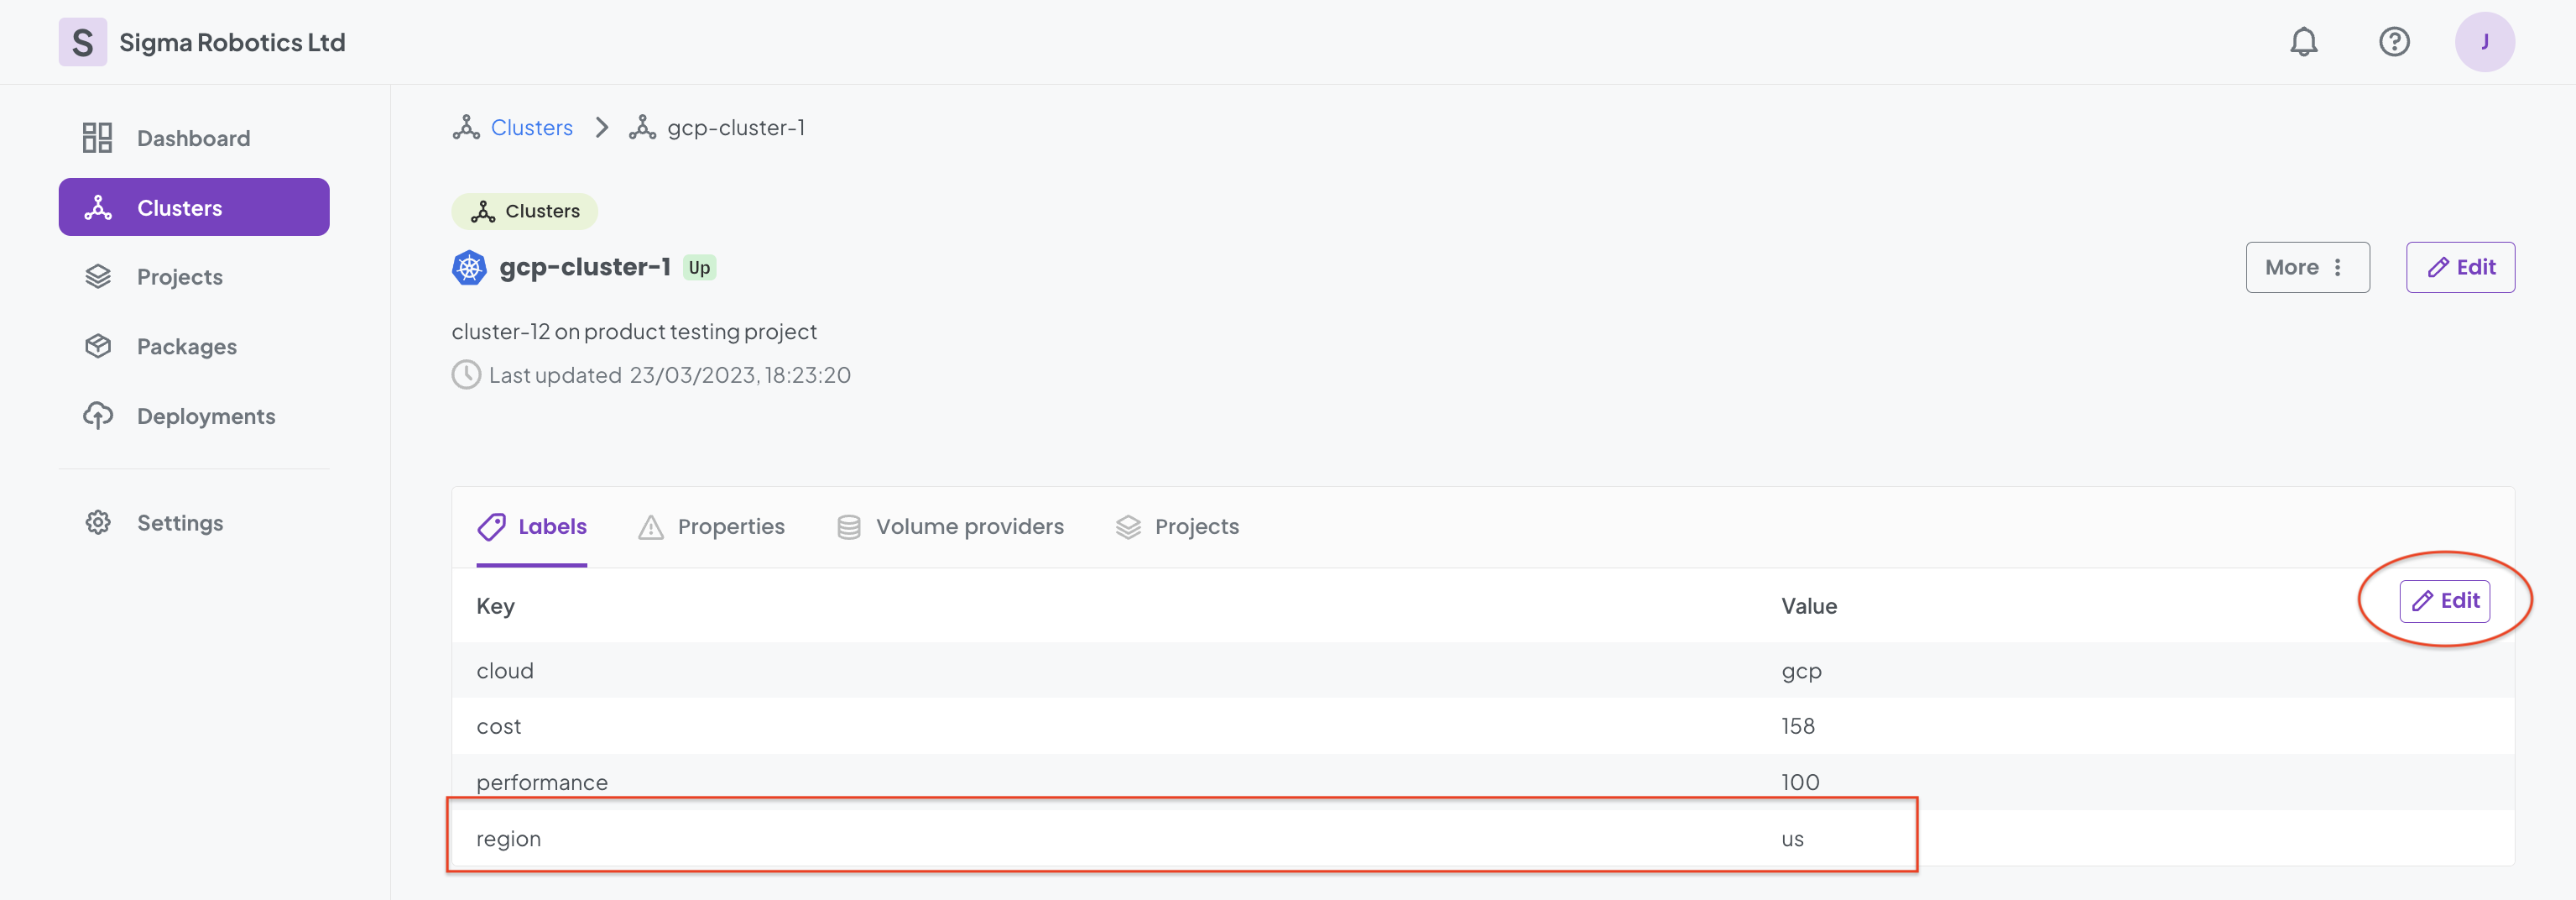
And that is all we need to do to our Clusters.
Now we go back to our Notes Multi-tiered Service Package. We select the Notes App 1 first:

We now select the Application Selectors for the Notes App 1, and Add a new Selector:
We now add region Selector with value uk to this Application:

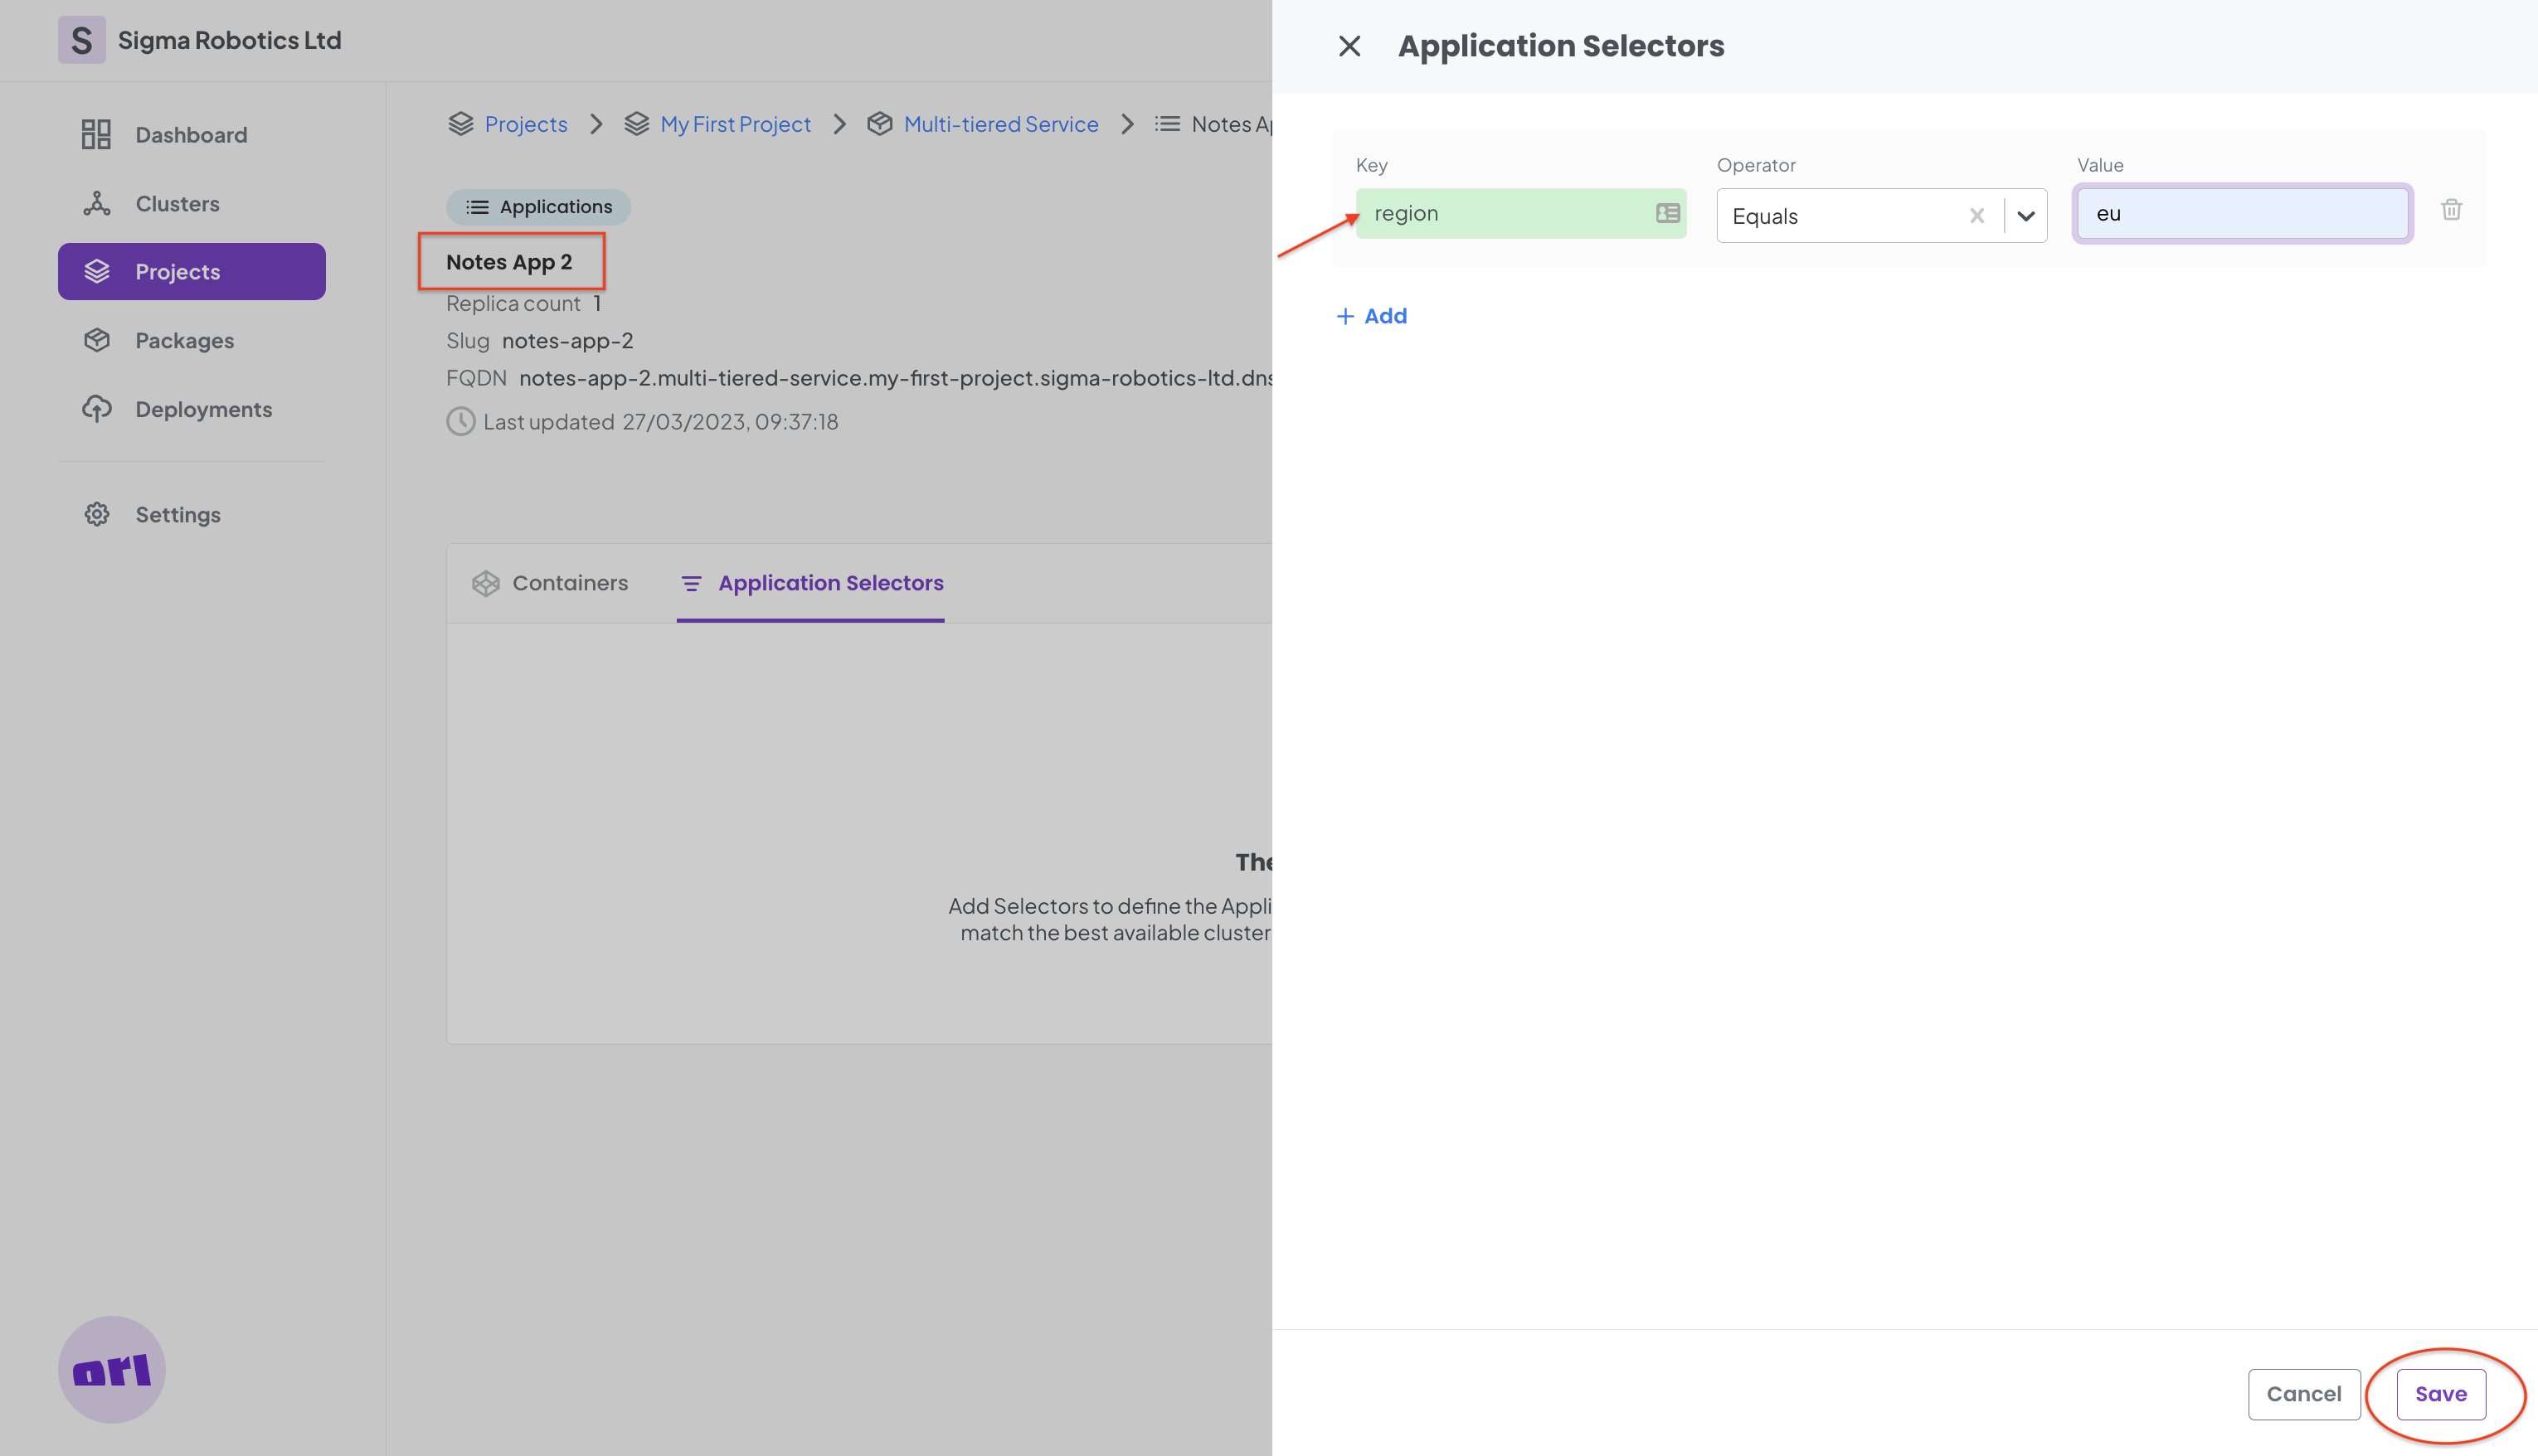
We repeat the same process as above for Notes App 2, now with region Selector with value eu:
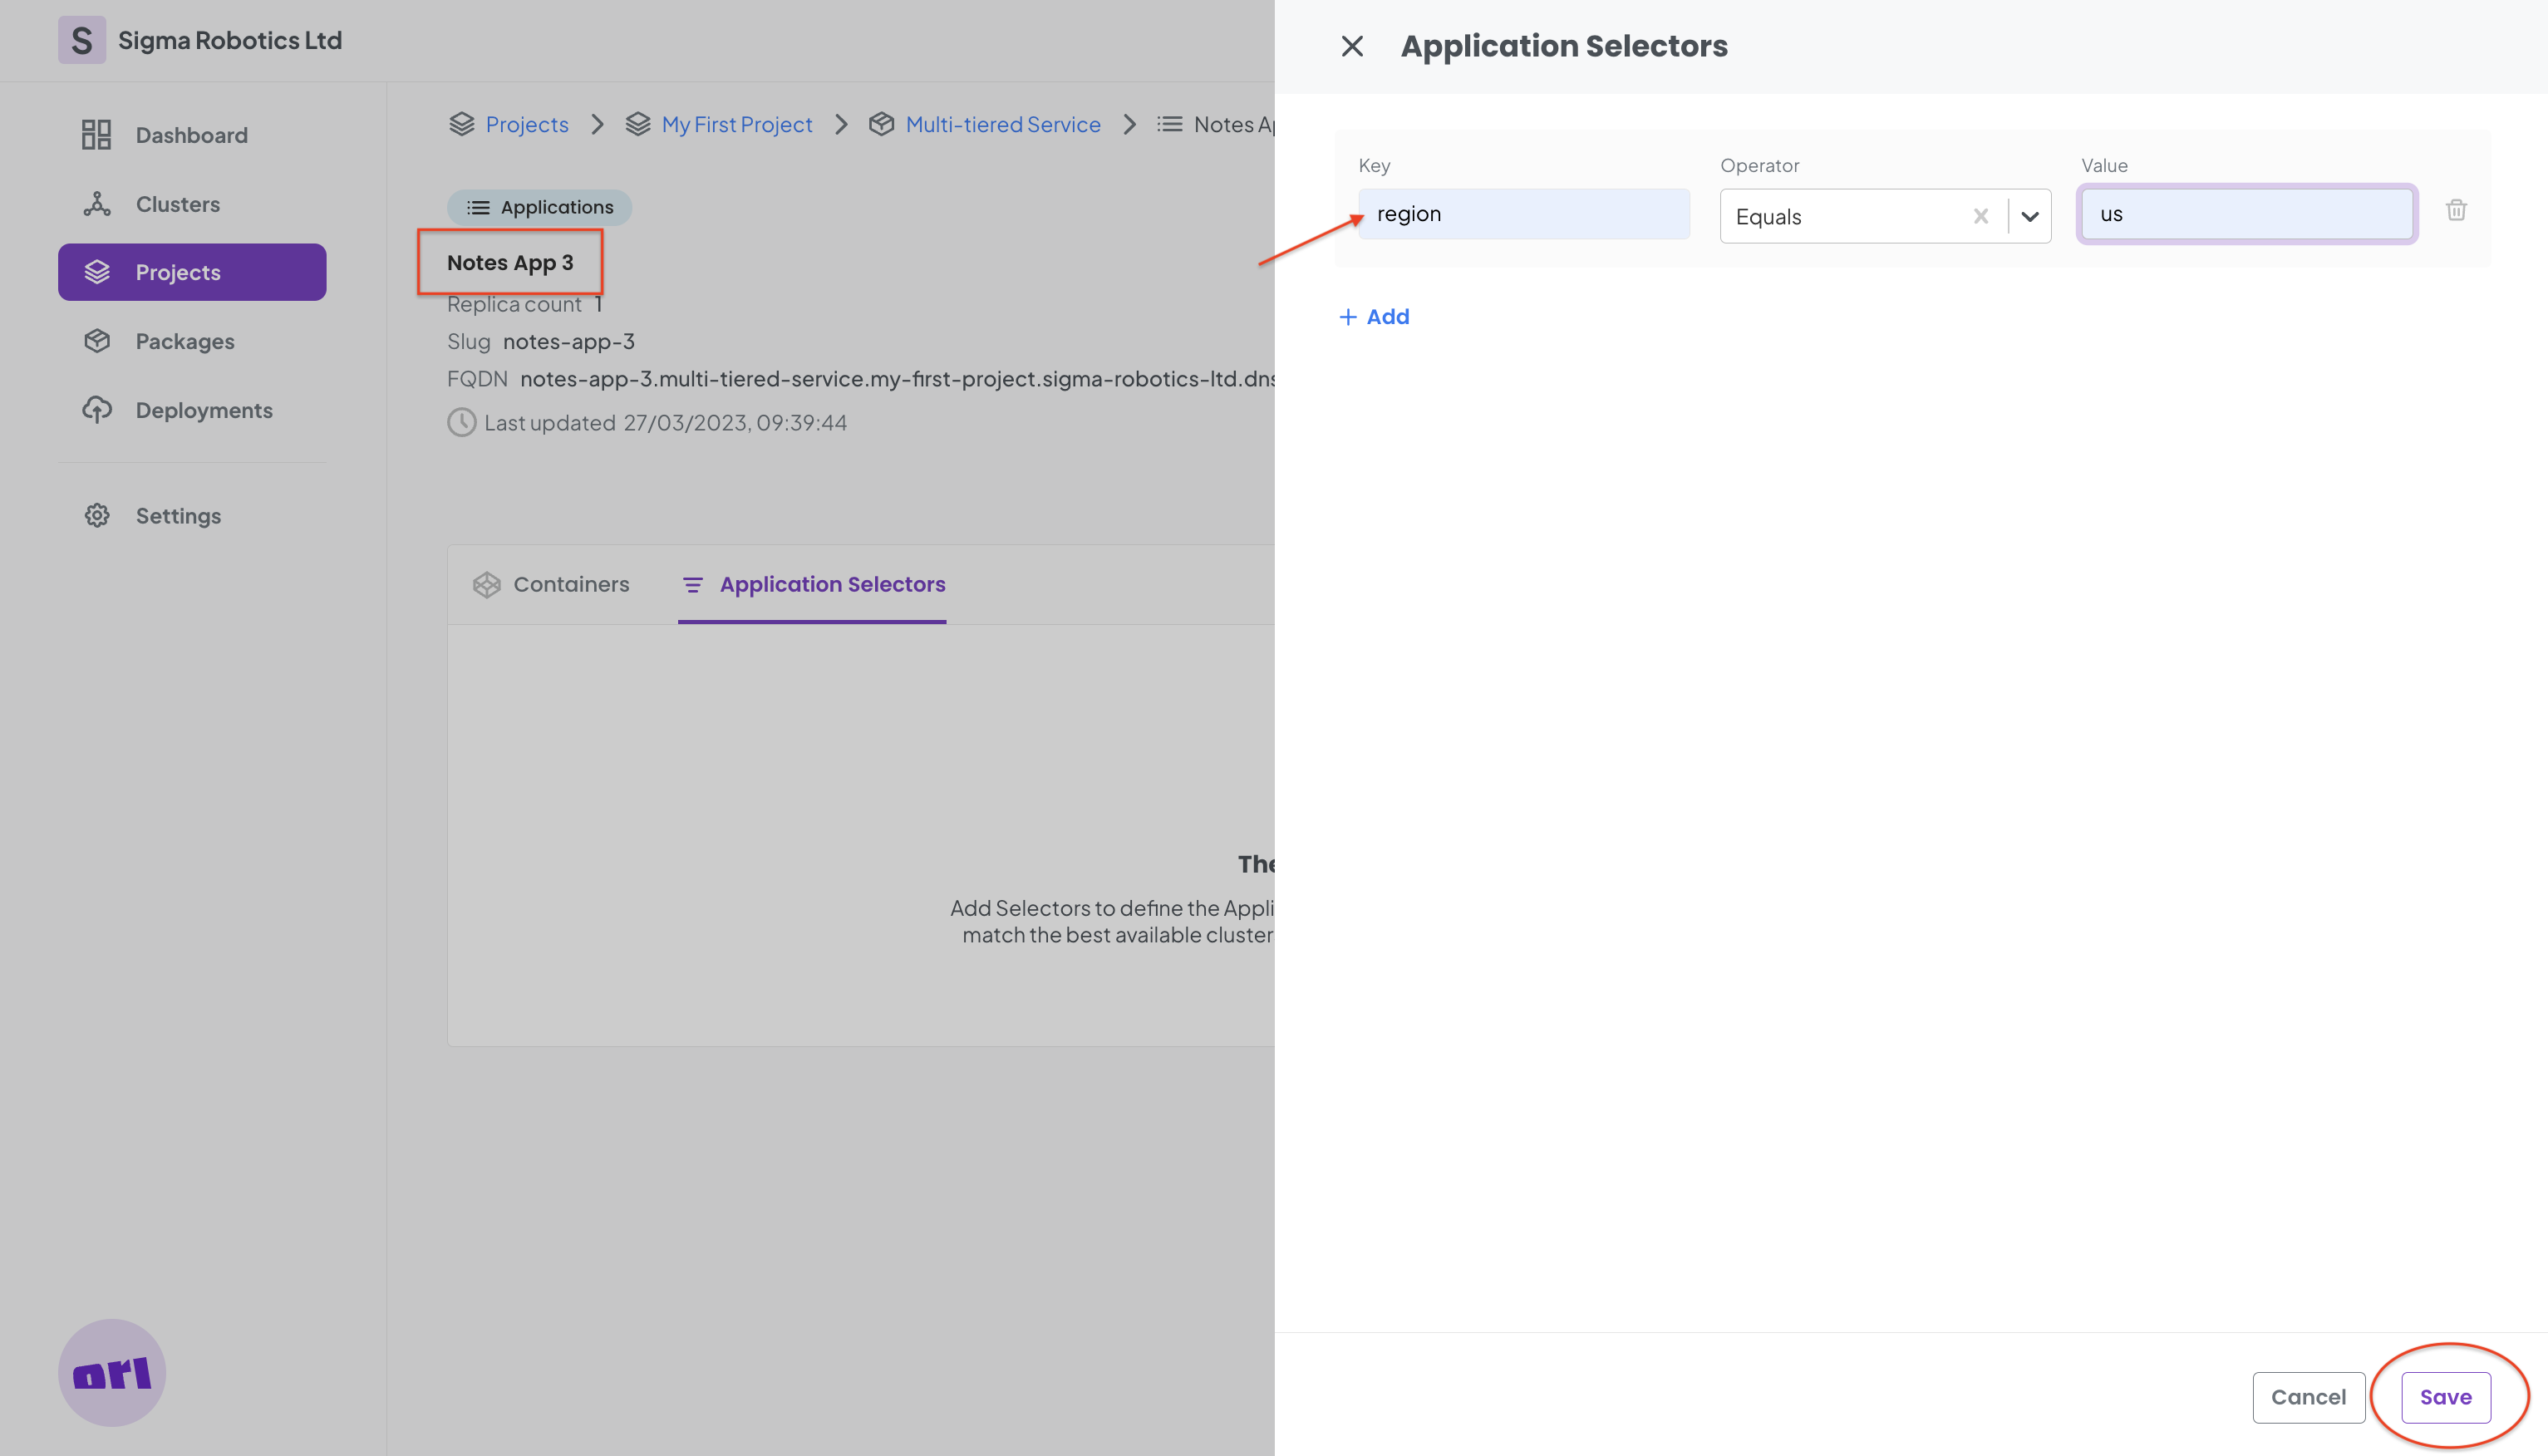
And finally the Notes App 3, we set region Selector to us:
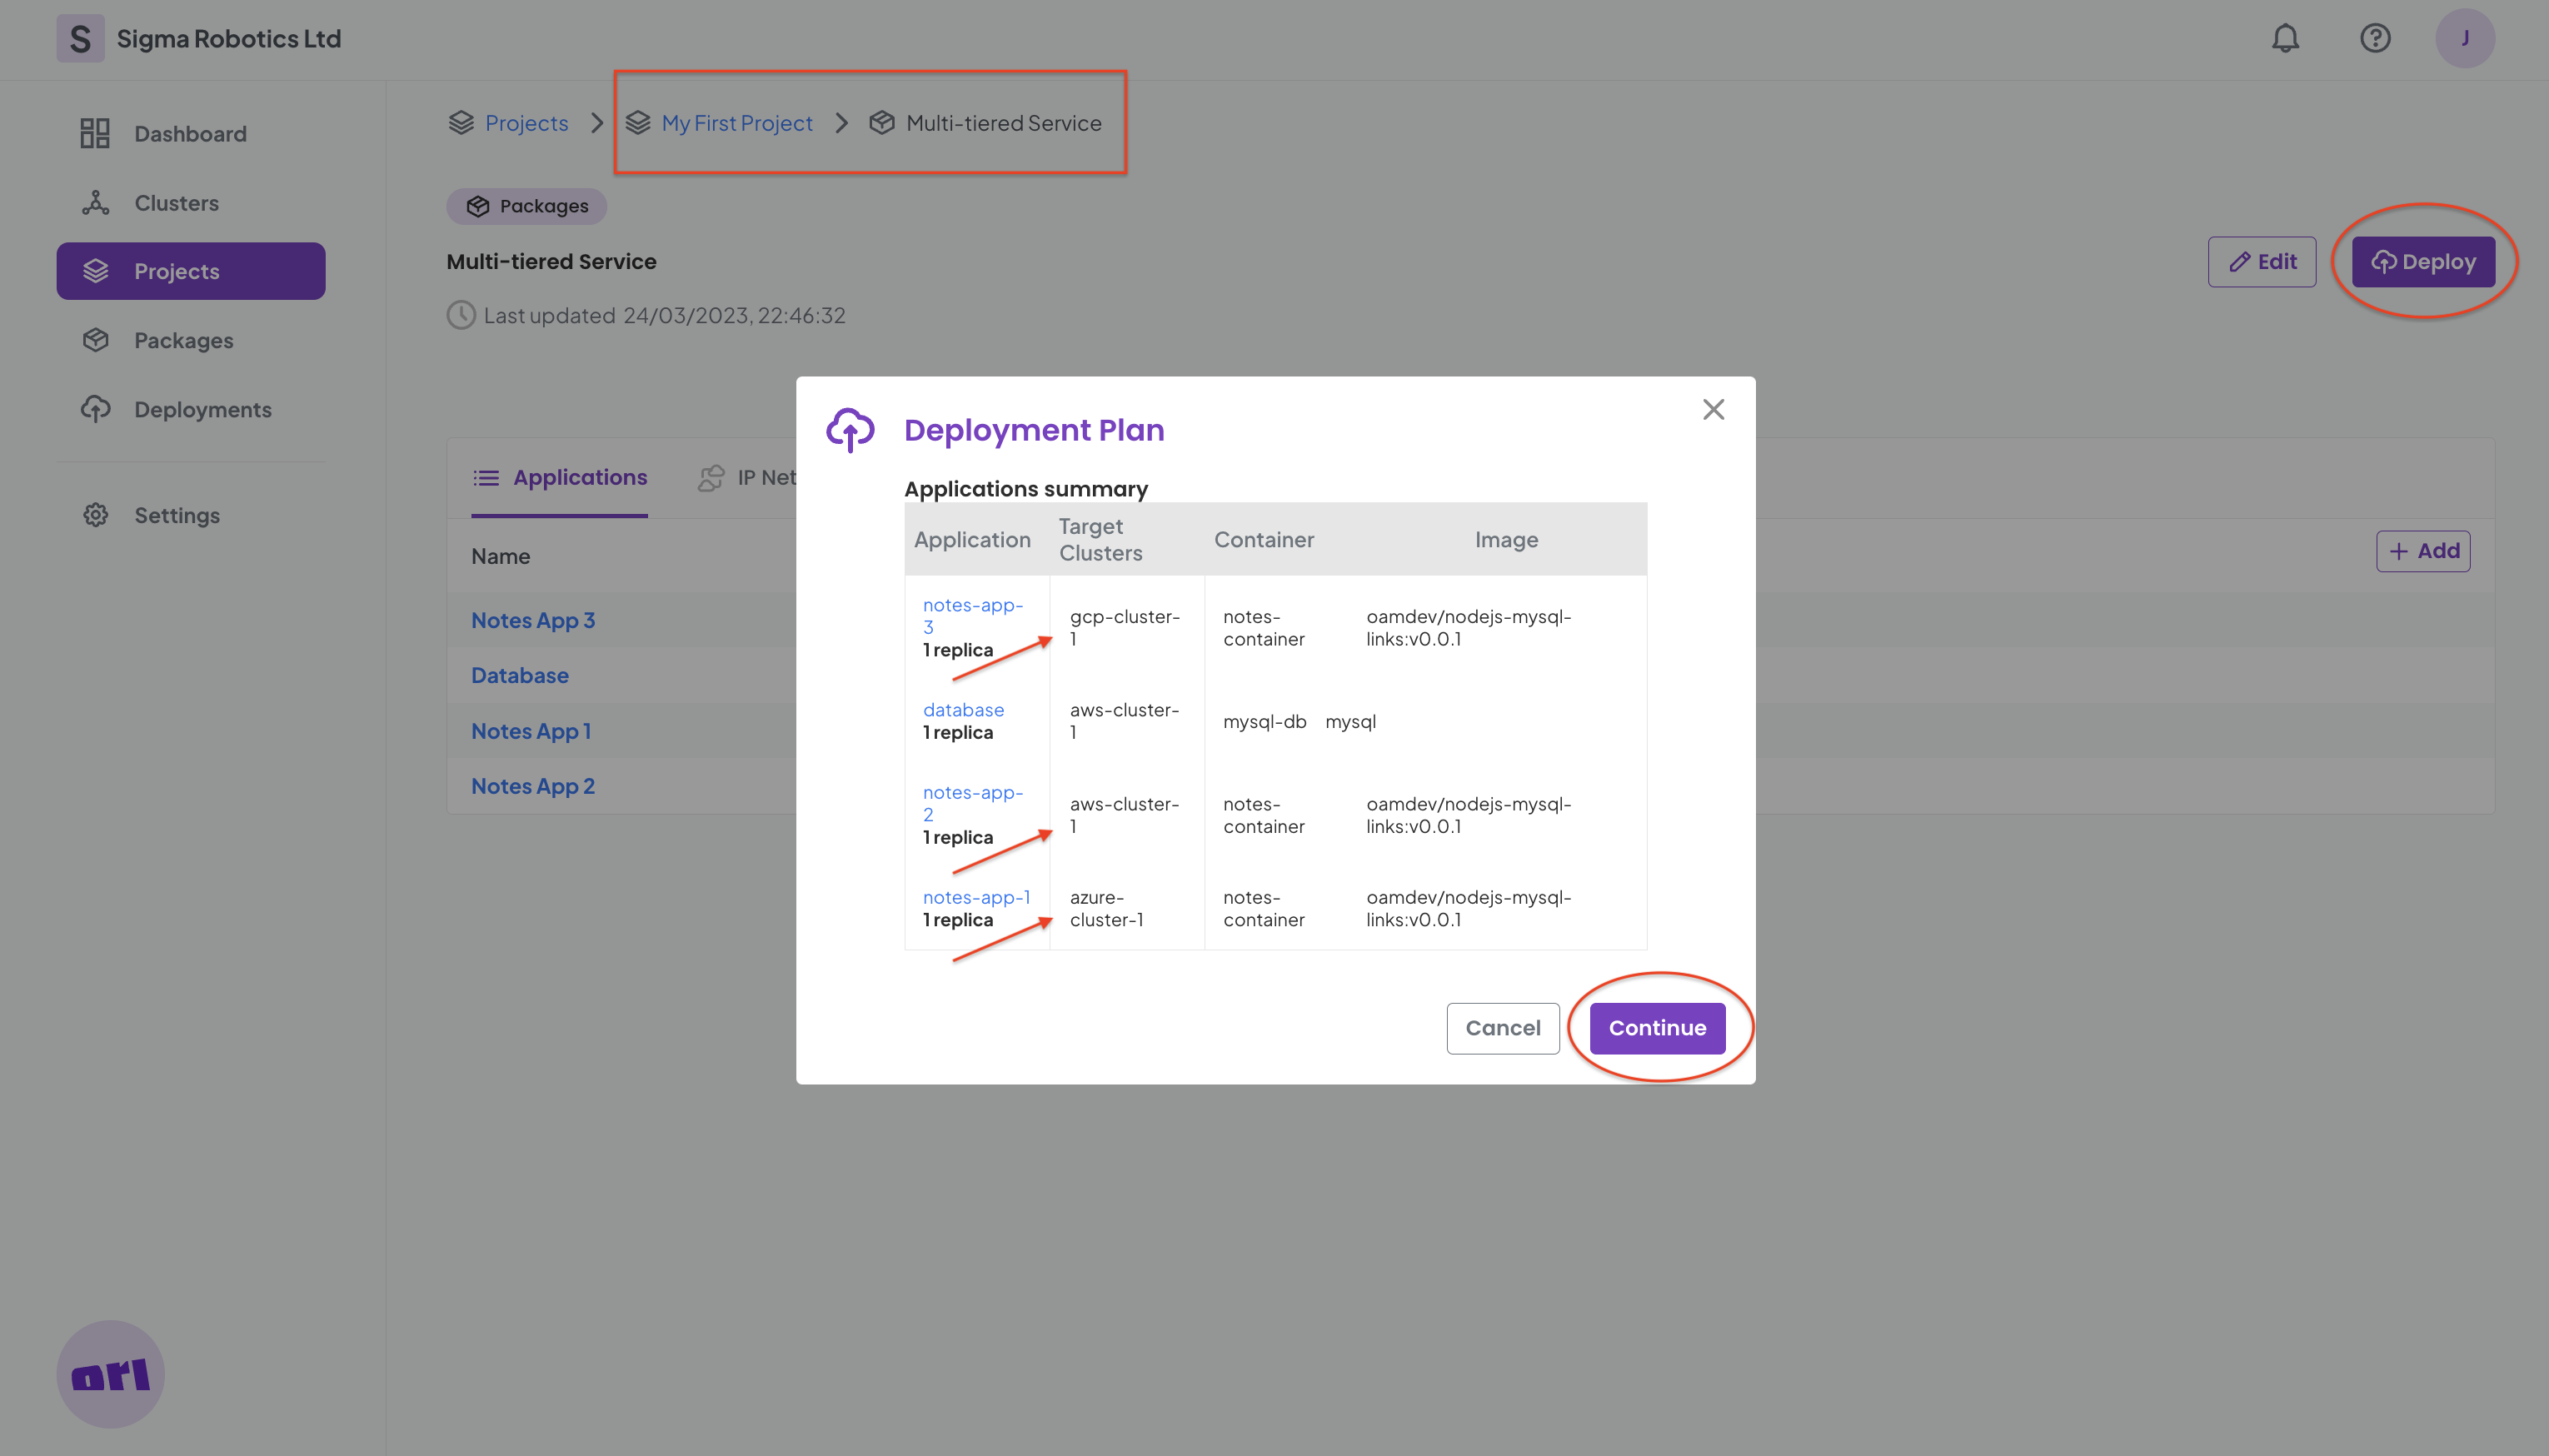
And finally we go back to the Package and select Deploy, and we see the new deployment plan pushing each of the Notes Apps into a different cluster in a different cloud:
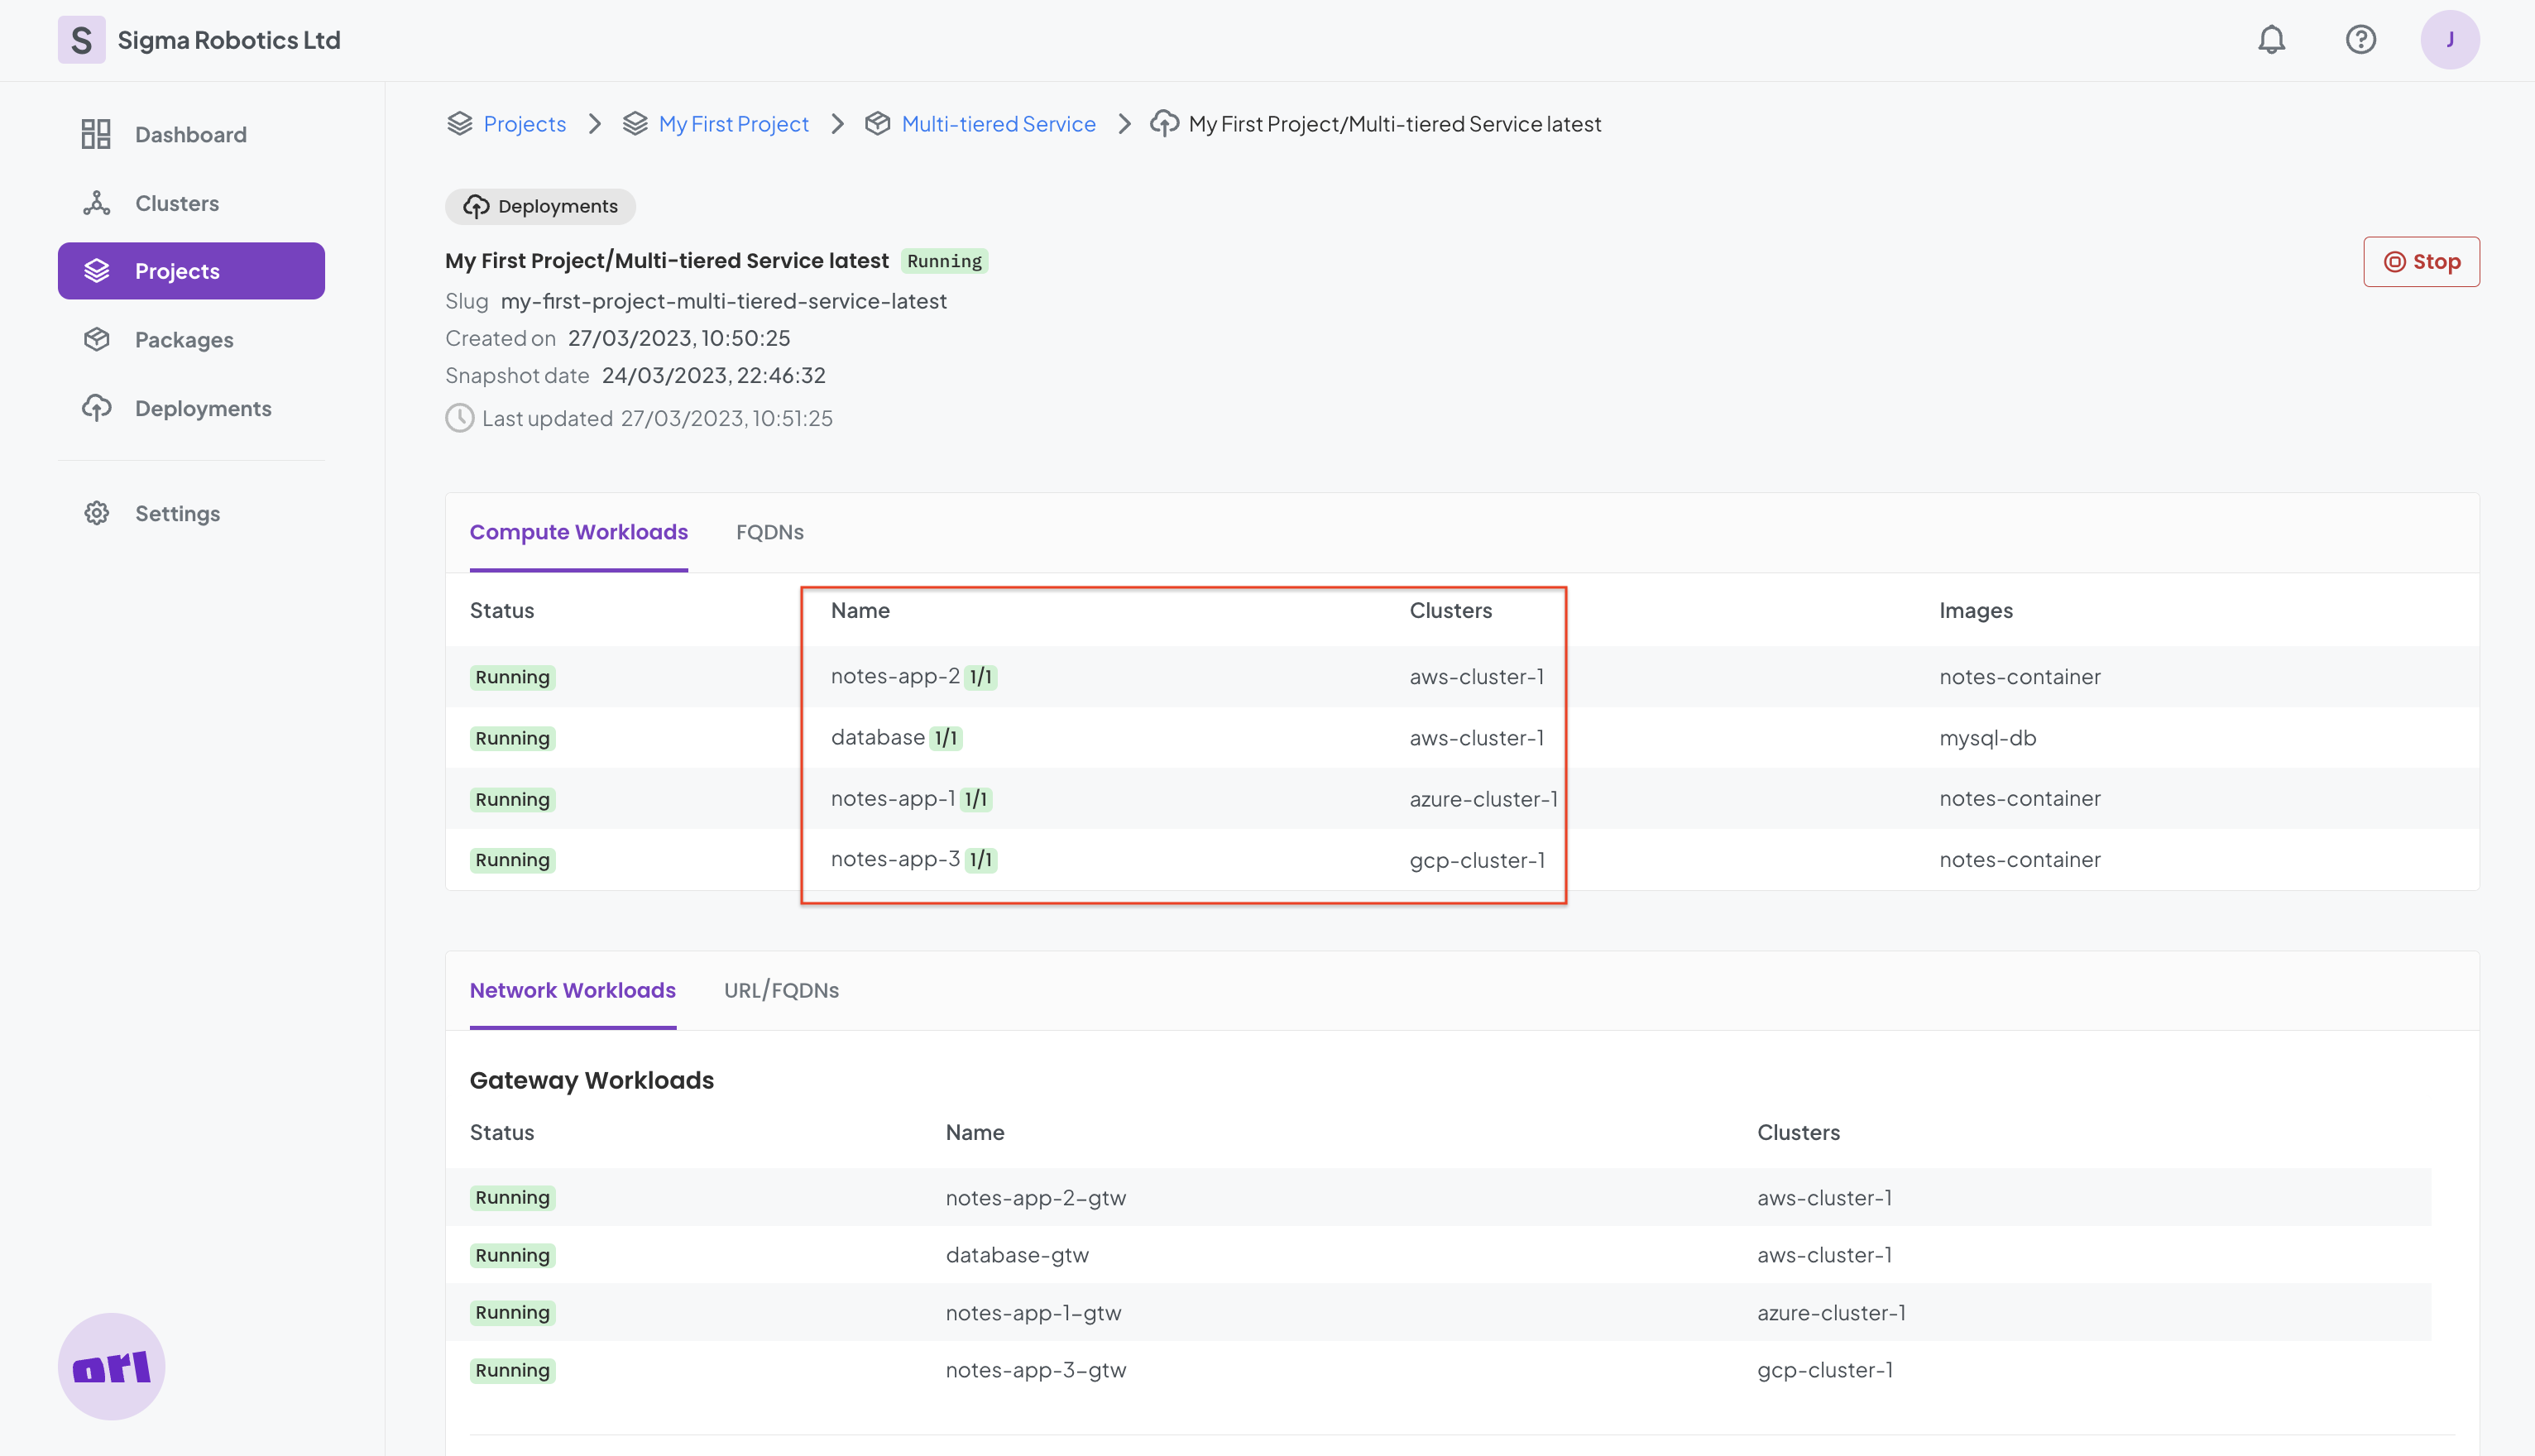
After a minute or so, all the workloads are running:
Navigating to the FQDNs tab that gives us the FQDNs to connect to the Notes Apps web services:
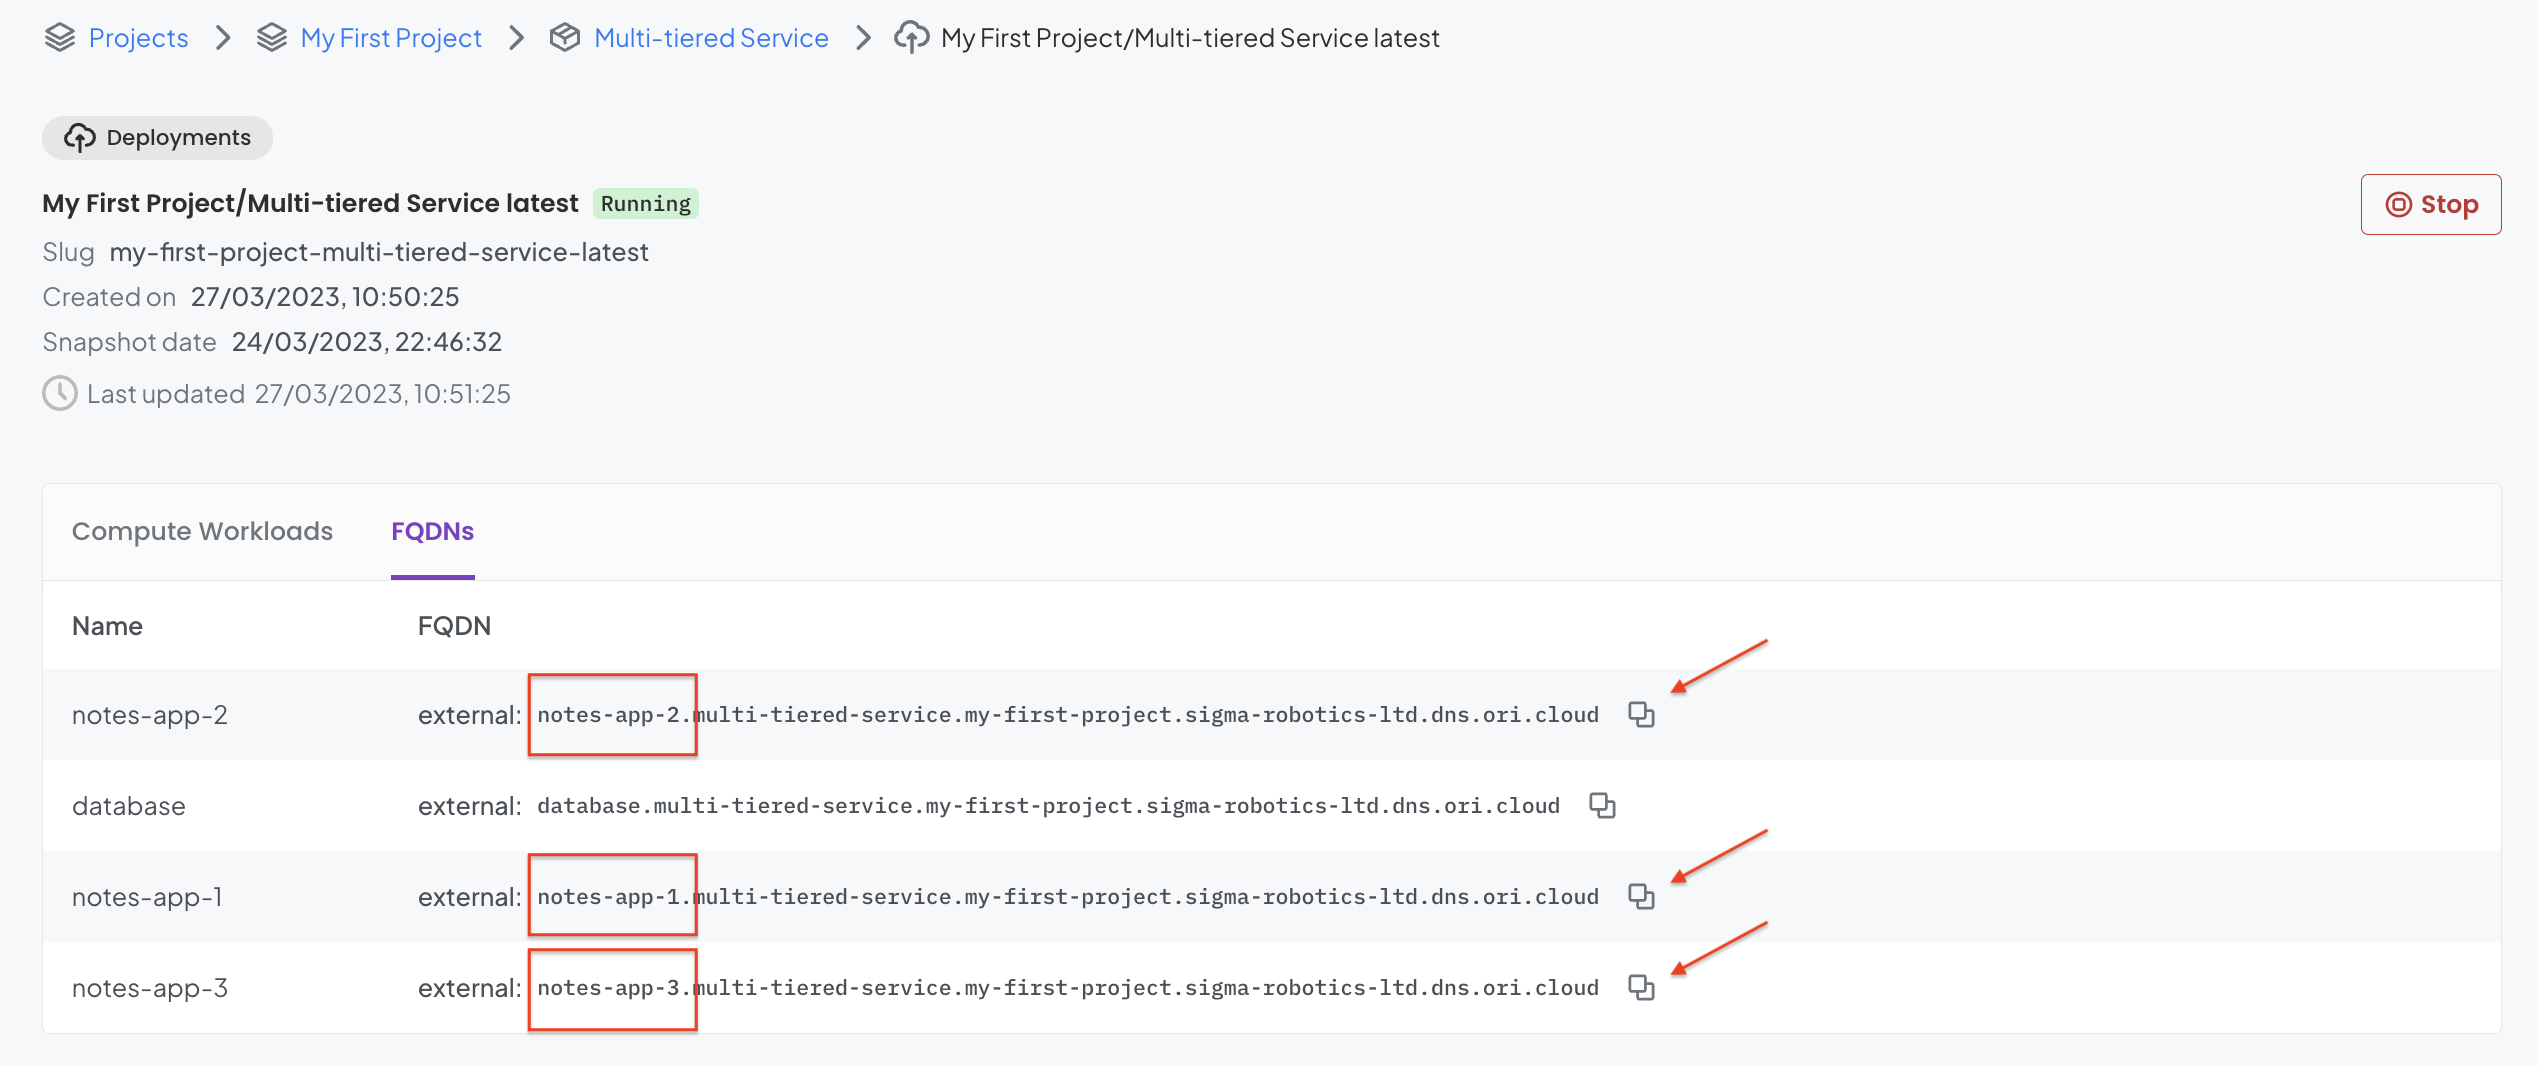
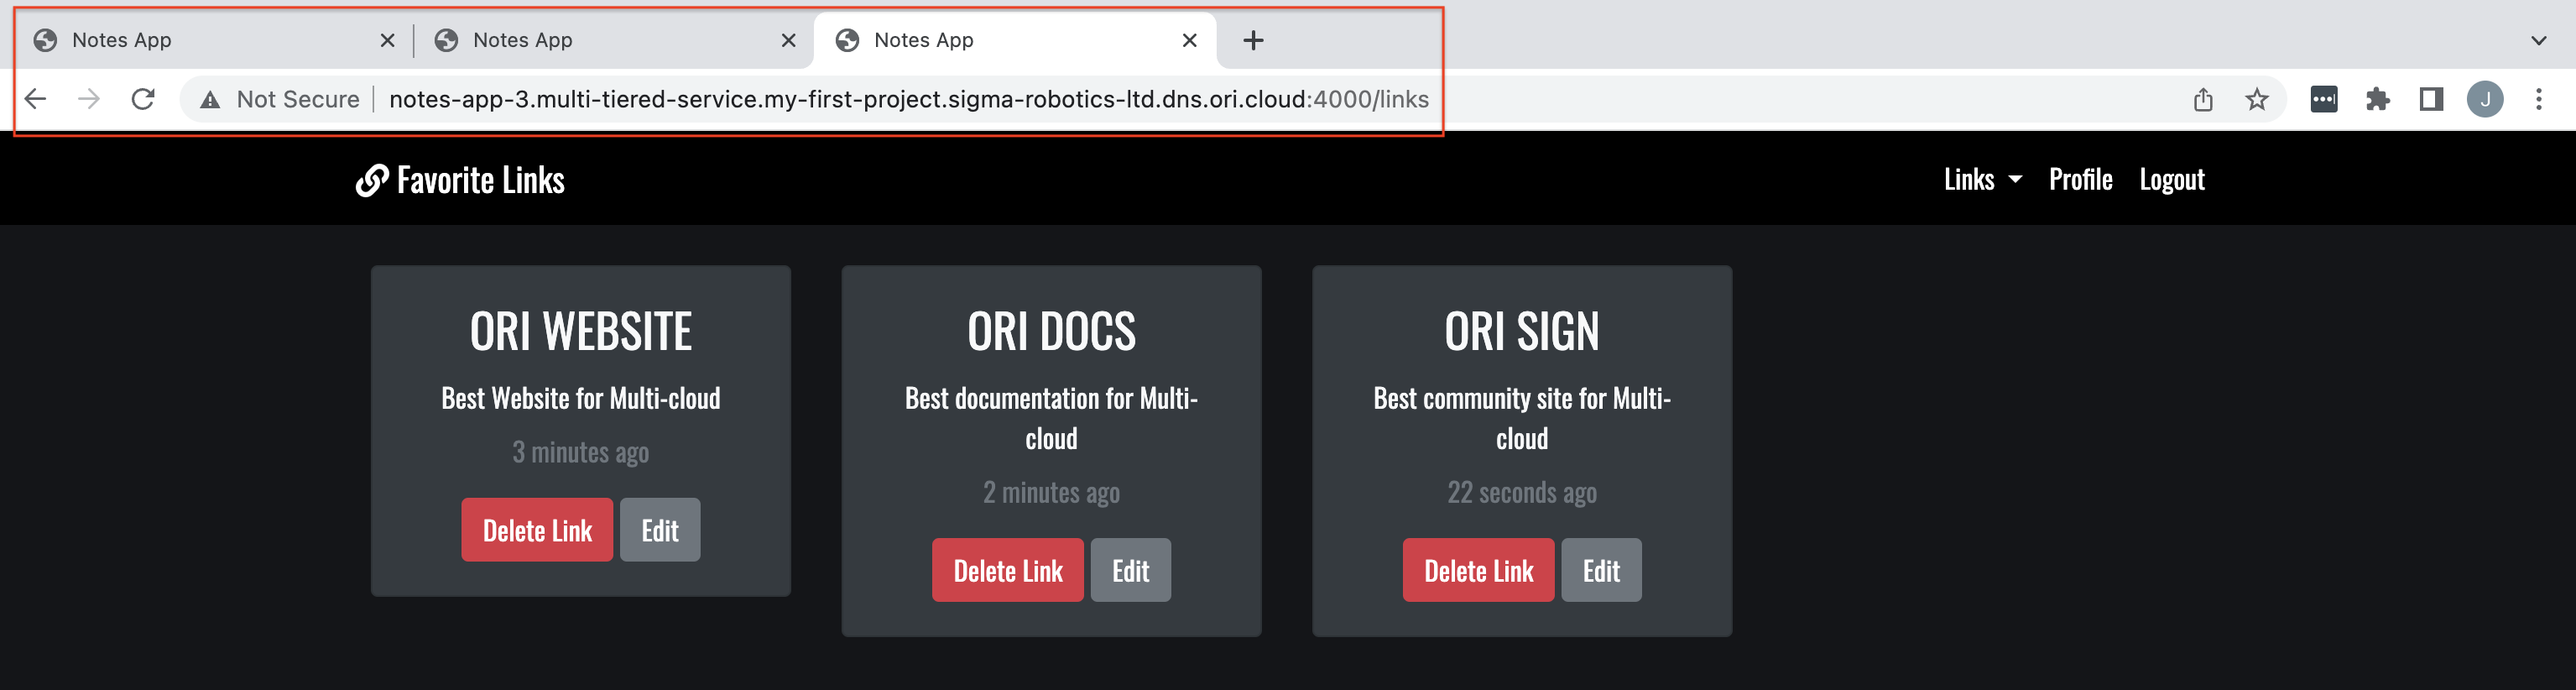
I have now opened the 3 different Notes Apps in three different Tabs on my browser:
And after signing-up, I have added a different note from each Notes App Service on the various clouds and we can see the that all of the Notes App Web services show the same information:
That was fun! With Ori Global Cloud it is easy to deploy applications on Multi-cloud without any major effort. This is done with hardly any code and through manipulating policies we can place our applications on any k8s cluster on any cloud, enabling any organisation to start deploying on Multi-cloud based on their desired outcomes.
Thank you for following this Guide and find more resources on our documentation.