Applications
Introduction
Applications represent a group of Containers that will be deployed together, and therefore share common policies. Application placement rules enable policies to be defined for a particular Application.
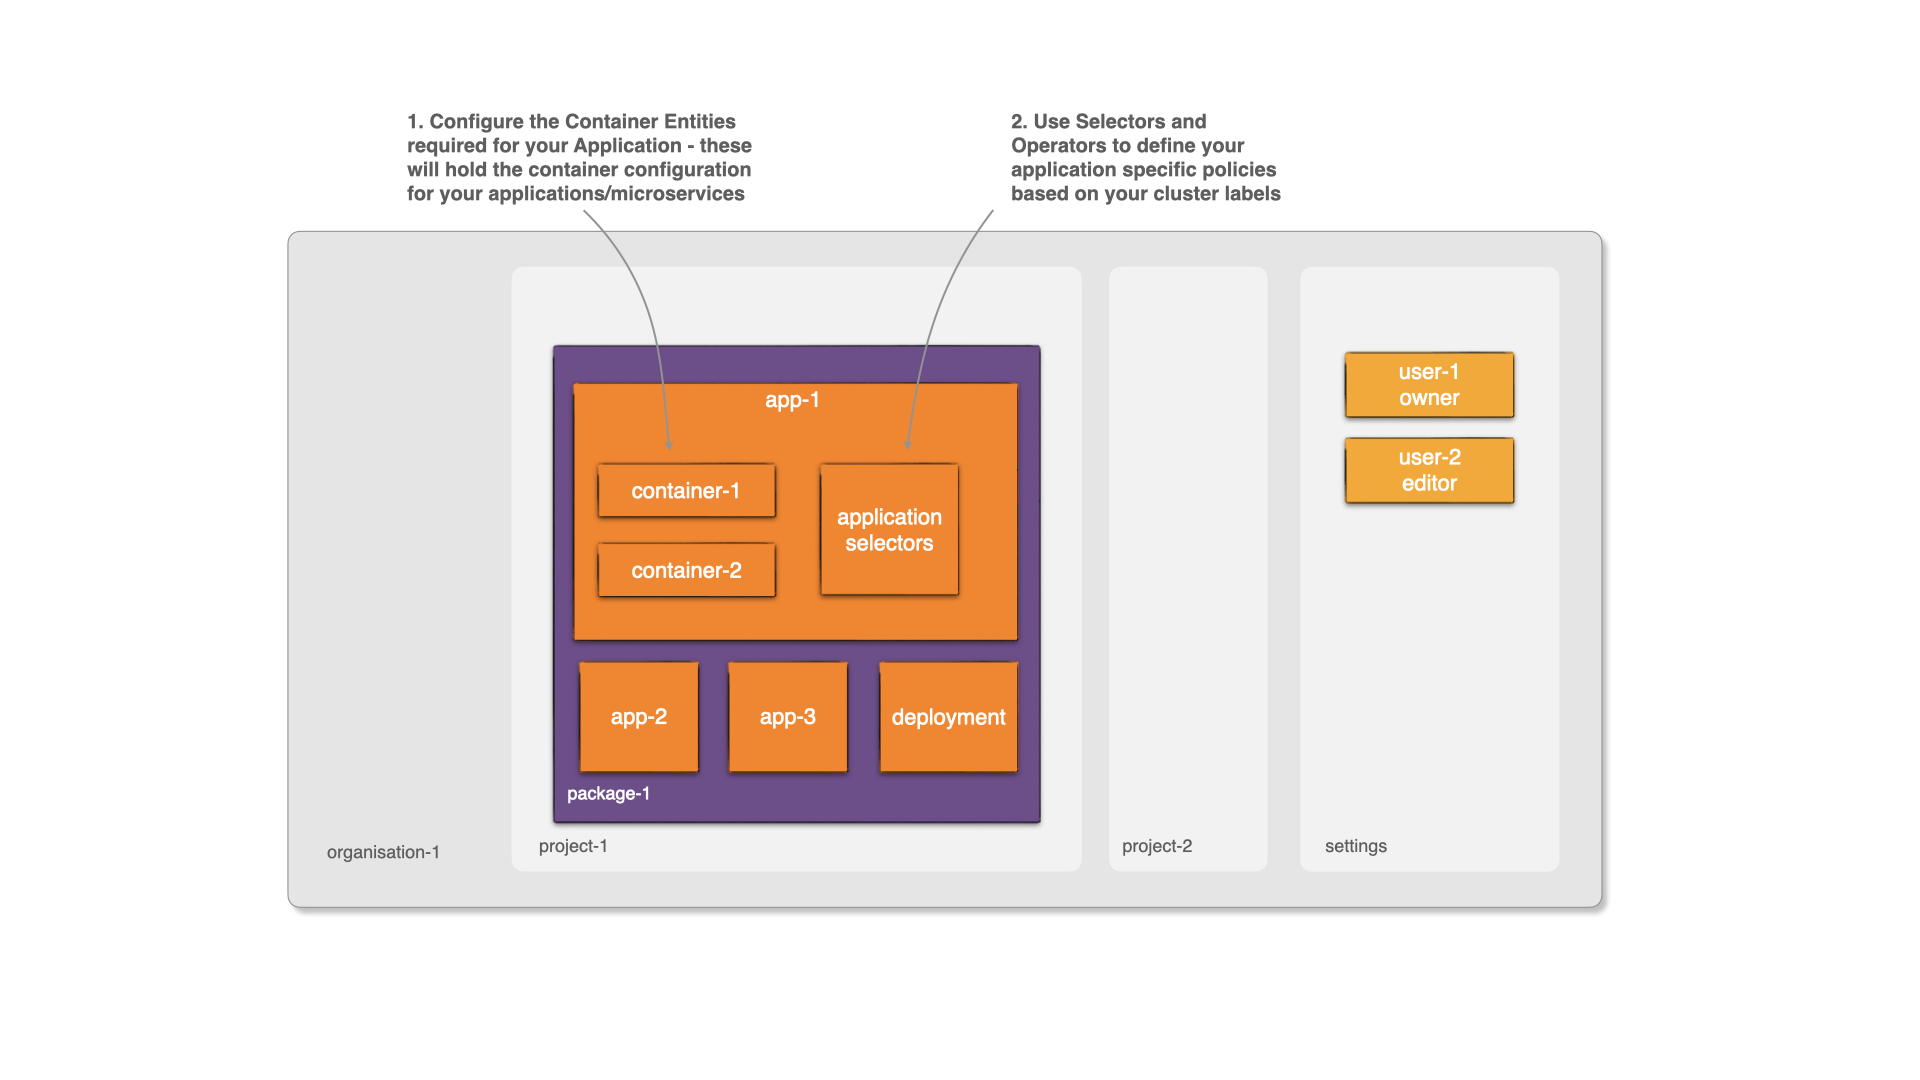
Start configuring your Package by adding Applications.
Add an Application
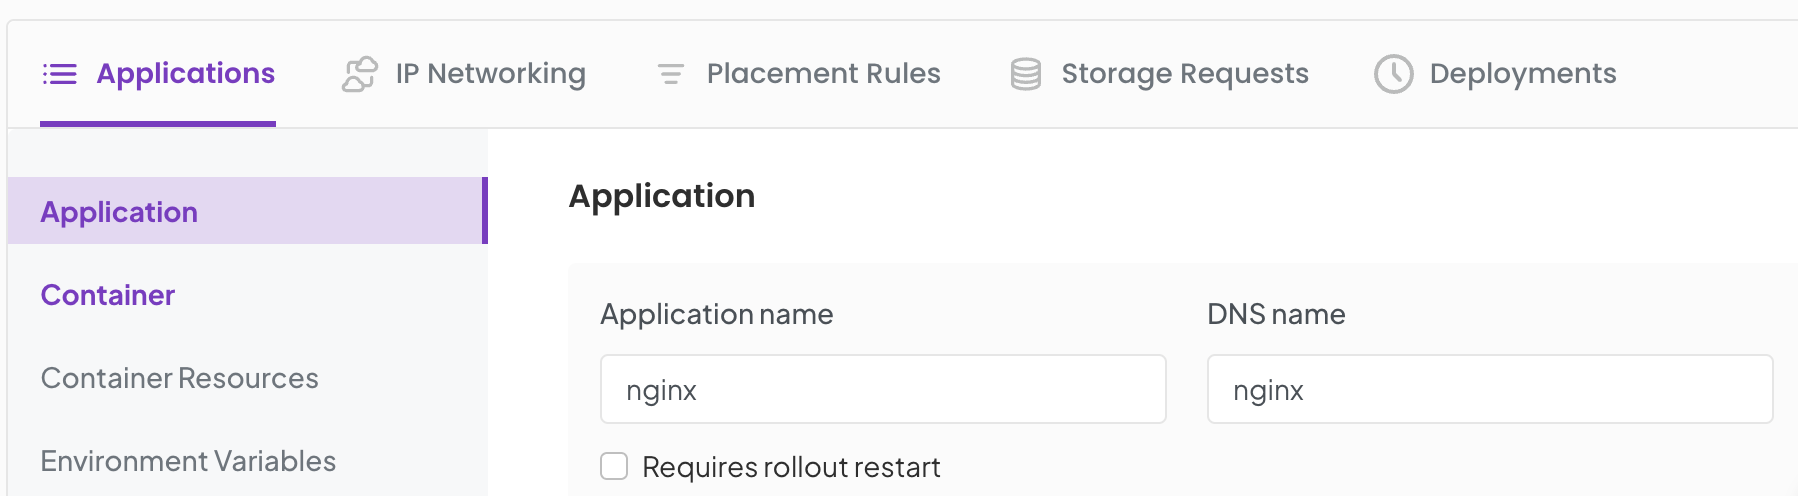
On Package details page, when adding your first application, a new application form with container fields is displayed, followed by optional sections on declaring the inbound and outbound network rules along with storage.
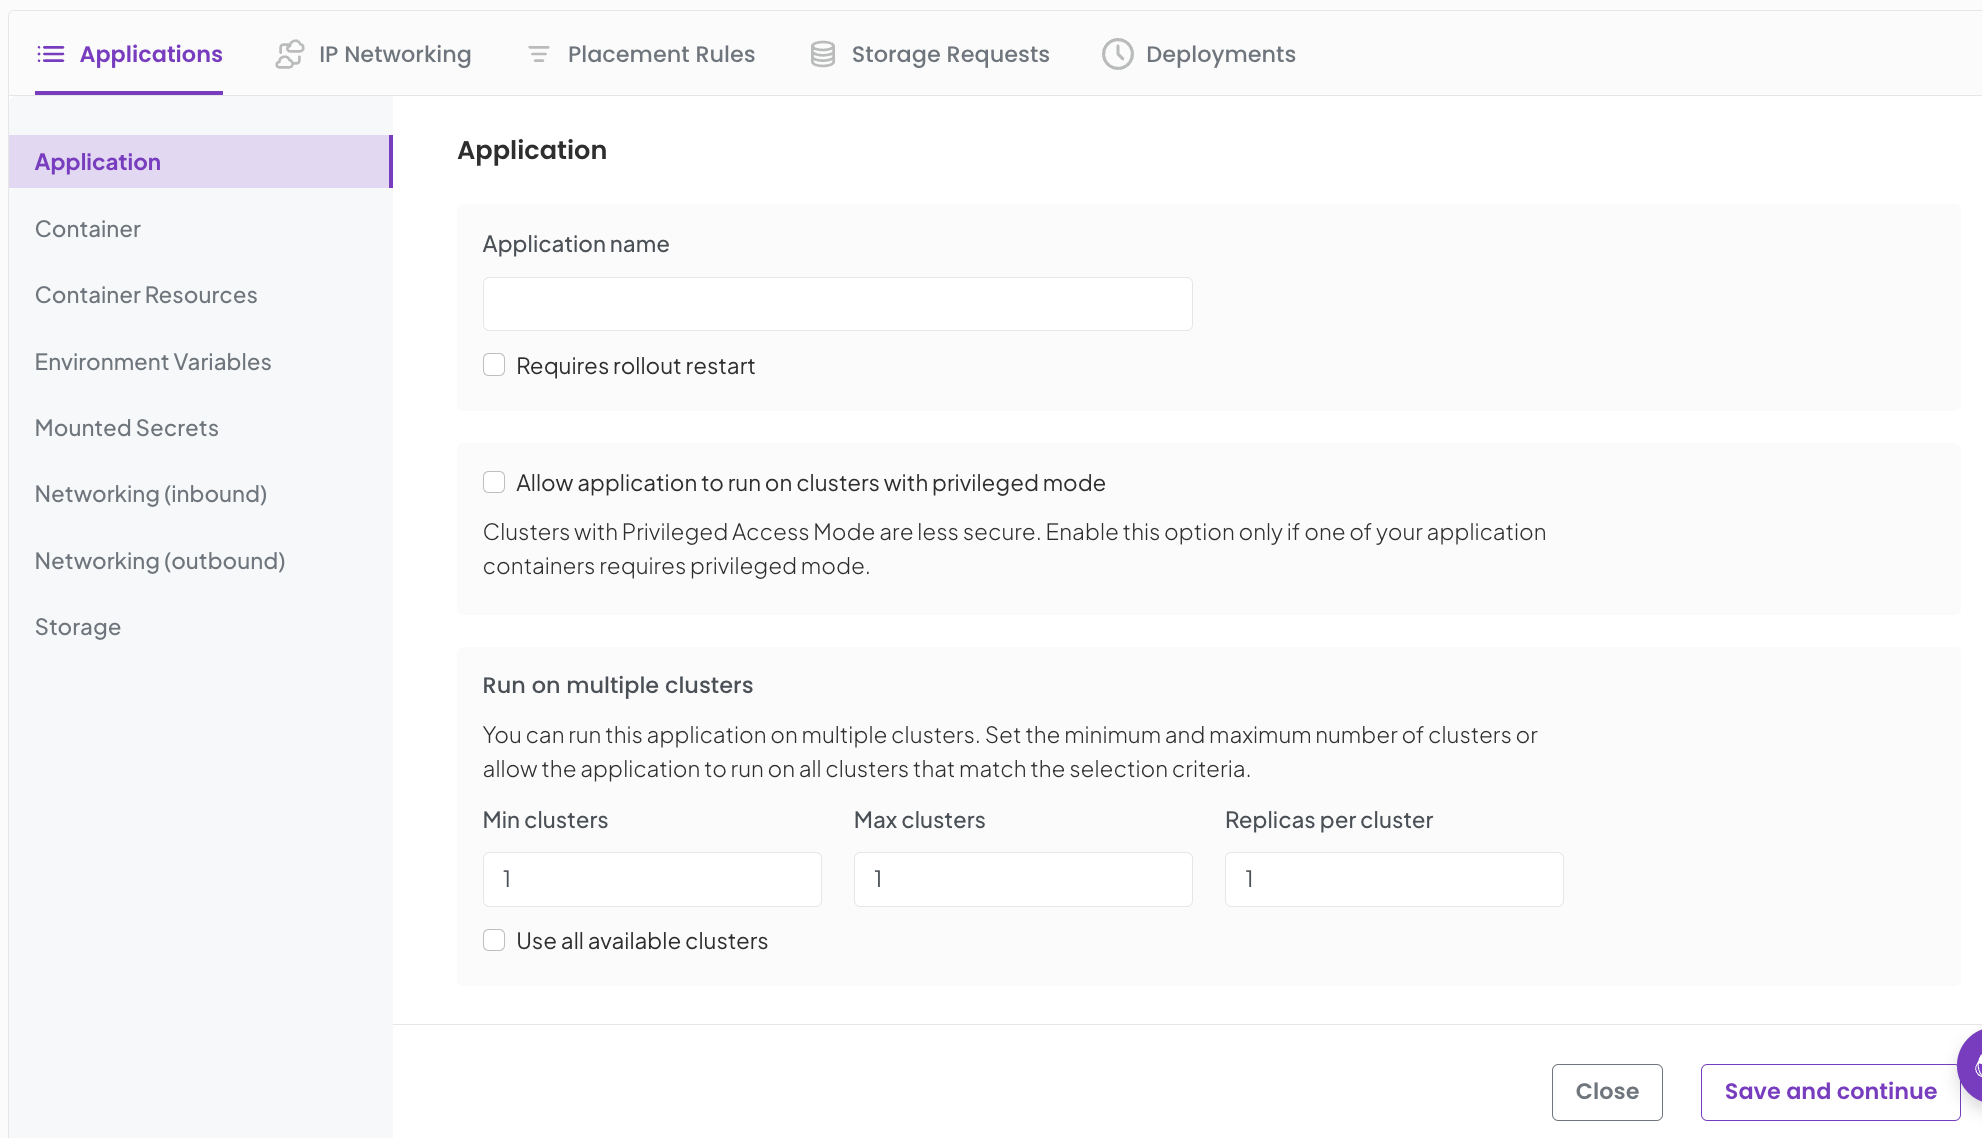
Provide the following information:
- Application name - The display name of your application
- Rollout restart - (Optional) By enabling 'Requires rollout restart', it triggers a restart of application pods during deployment. If a failure requires this Application to be moved and restarted, all other Applications in the Package will also be restarted to preserve overall package integrity.
- Run on clusters with privileged mode - (Optional) Once you click on 'Allow application to run on clusters with privileged mode', it allows the application containers, configured for privileged mode, to run on clusters that have privileged mode enabled.
- Run on multiple clusters - Deploy instances of Application to multiple clusters. This is typically needed when running large scale workloads in parallel, such as AI processing or a distributed range of POPs for web-accessible apps.
- Replica count per cluster - Choose the number of replicas of the Application to be deployed to a single cluster.
Once the above form fields are populated, click on Save & Continue.
Add Container
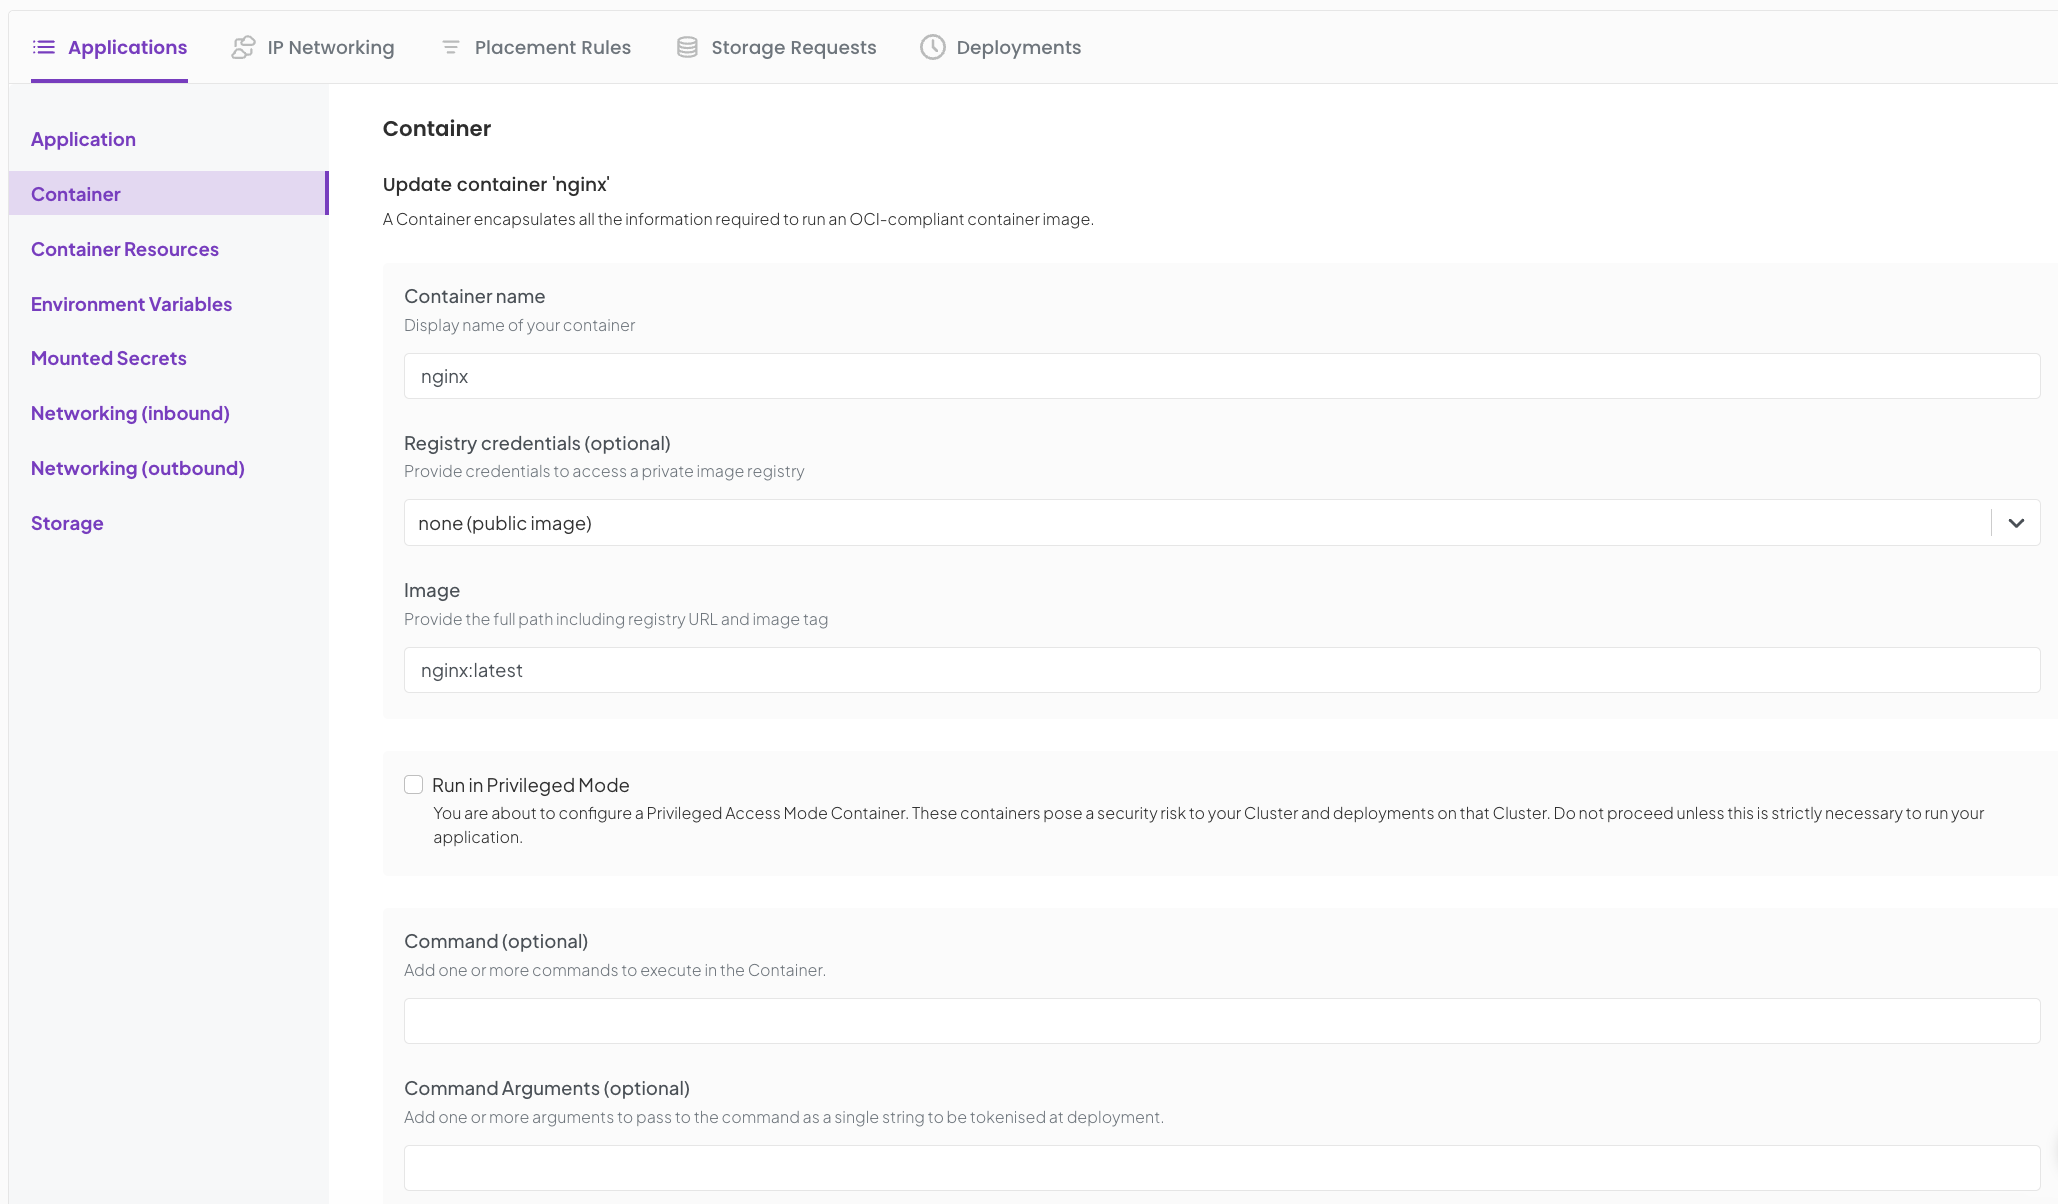
The next, you should see the container details form.
Provide the following information:
- Container name - The display name of your container. Note: If the Image Tag property of a Container is not set, then the tag of the image is assumed to be latest.
- Registry credentials - The registry defaults to docker.io, if you have a private registry choose from registries configured in your Project.
- Image - The container's working directory or filename. Note: It currently defaults to docker.io/, but the link can be replaced by other public repositories such as ghcr.io or quay.io
- Run in privileged Mode - (Optional) As you saw the option above for priviledge mode while defining the application specs. Corresponding to this, if the check is enabled at the application level, the option is available to be enabled when defining the container specs here. Note: You may add 1 or more containers to your application, where this check could be enabled.
- Command - (Optional) Add command(s) to be executed at container runtime.
- Command Arguments - (Optional) Define the arguments for the command.
Once the information is provided, click on Save
Next, declare the container resources. Setting resource requests and limits provide runtime constraints on how much CPU, and Memory a container can use. CPU and Memory requests are the minimum amount of these resources that must be available in order for the container to run properly, and limits dictate the maximum allowed usage at runtime. The reources are indentified as follows:
- CPU - The amount of CPU cycles, in 1/1000th of a 'core'.
- Memory - The amount of main system RAM, in megabytes.
You may also supply additional resources such as GPU by declaring the Vendor details such as nvidia.com/gpu with it request and limit. Note:: Its mandatory to define limits if not the request in this case.
Once the resources are saved, you may provide the Environment Variables (Optional) that can be passed as values or secrets at container runtime. These are a set of key:value pairs, where key is any string and the value could either be the
- value of the value property.
- value of a secret.
Moving from environment variables, you now need to define the network policies. One or more ports can be published to allow network traffic to flow to a Container within an Application.
You can start with the Inbound network (Optional), which are rules about the application and traffic sources as inbound connections. Add the port within your container to which traffic will be routed on arrival. These can be any port number from 1 to 65535.
You may proceed to Skip to continue to add remote endpoints as your Outbound network (Optional) to give your application access to external resources, if any. Its basically port you want to expose from your container. These again can be any port number from 1 to 65535.
To add more ports, click on the + Add.
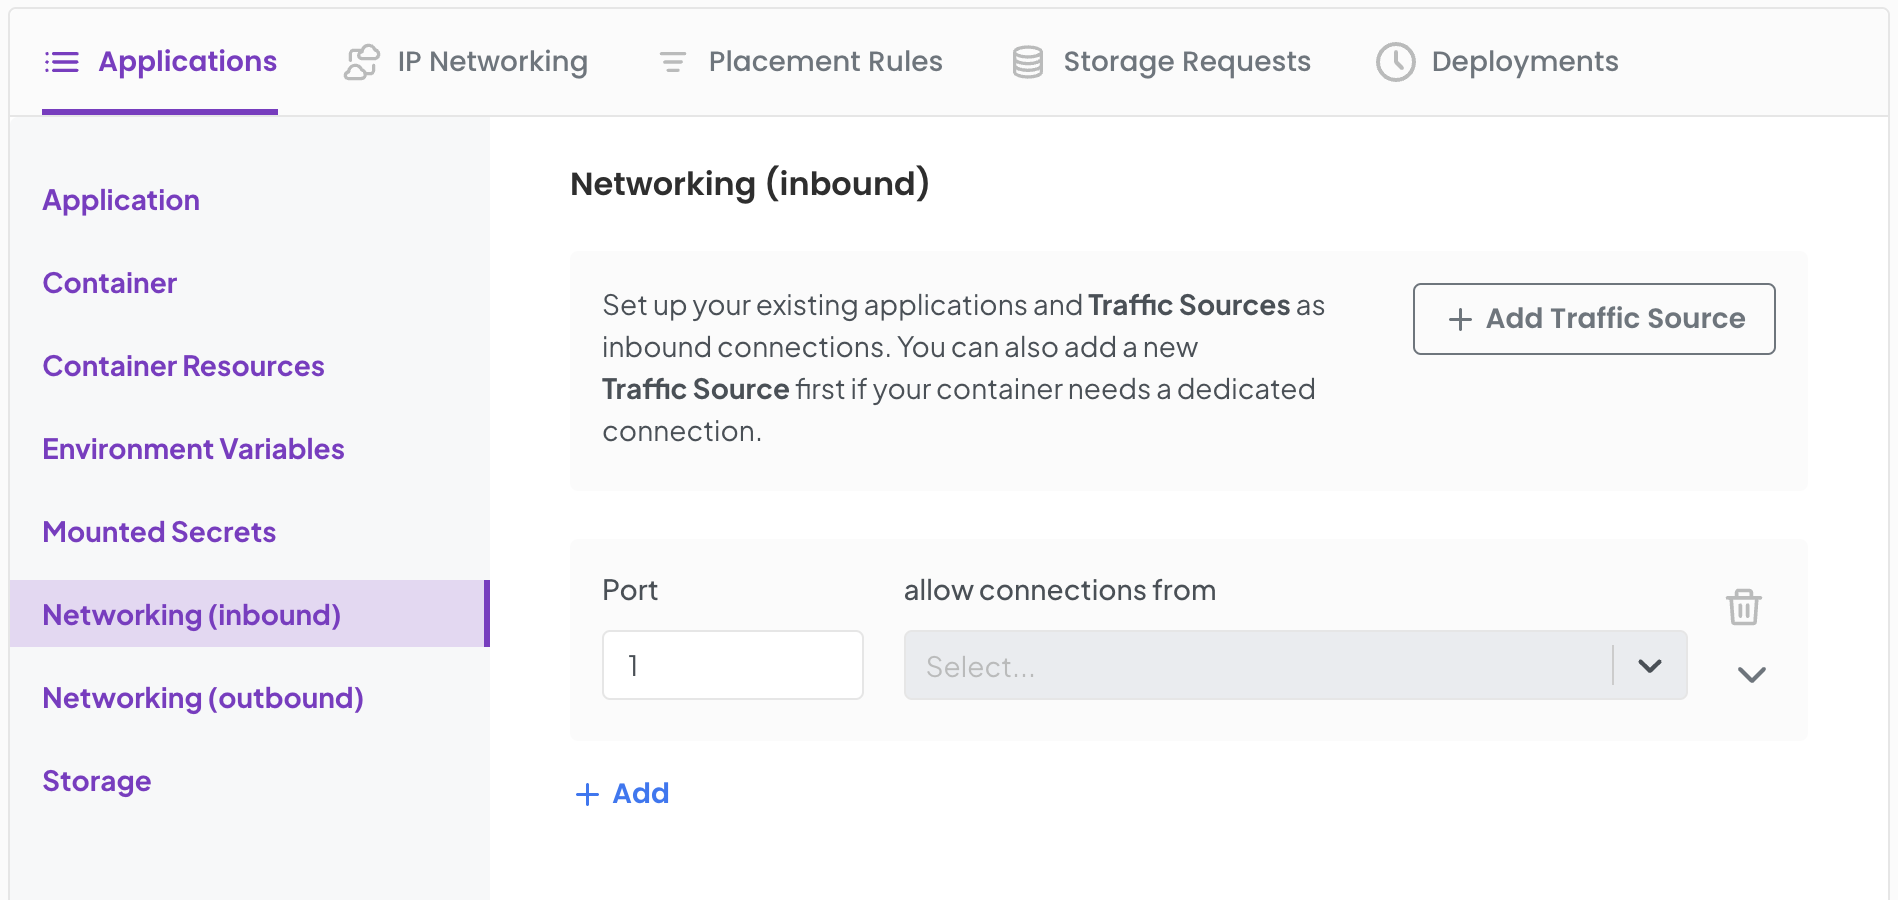
You may proceed to Skip the network policies and define them later after adding more applications to your package.
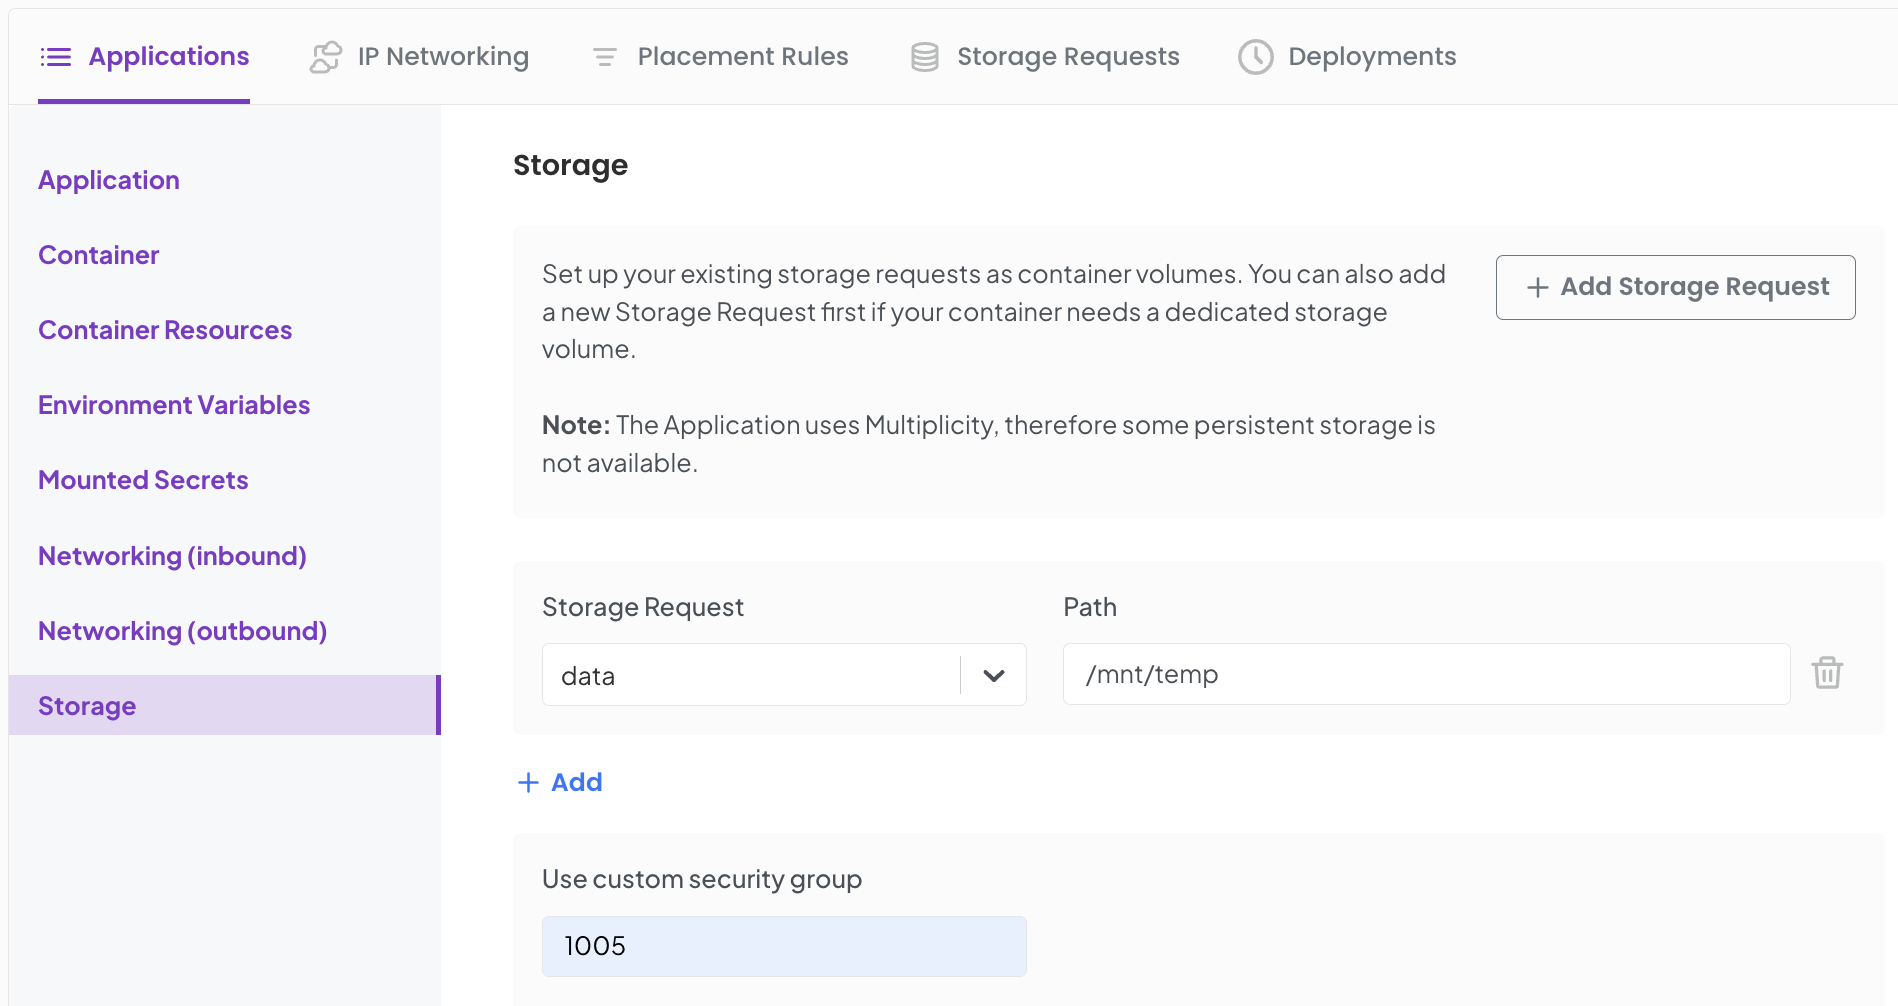
Once the network section completed or skipped, you can set up your storage by mapping the existing requests to container volumes.
When mapping storage, you can also Set fsGroup for an Application. These are the permissions on mounted storage for the associated containers that would enable write access. This is applicable to applications that utilise persistent storage.
After successfully saving the details, you will see the newly created Application and its Container details tabulated on the package page.

Edit an Application
When needed, you can update an application. On the application details page,
- Click on
Editto change the application details such as Application name, DNS name and/or the Replica count, etc. - Click on
Save.
Applications have a dnsName and a displayName property so that you can supply free text names, but also supply DNS formatted names (as required by K8s). The dnsName is used by the backend when deploying packages.
Delete an Application
You can also delete an application. On the application details page,
- Click on
Edit. - Then, click on
Delete.