K8s Clusters with GPUs and deploying Machine Learning Applications
- Time to run through this this Tutorial Guide: ~15-25 mins minutes per cloud.
- Pre-requisite: access credentials to your cloud account.
In this tutorial we will look at setting up clusters with GPUs on public clouds and adding them to OGC. We will then deploy a couple of Applications with OGC, making use of those GPUs for acceleration.
GPU K8s Clusters on Google Cloud Platform
Adding Clusters with GPUs on Google Cloud platform starts with logging into to your Google Cloud account and accessing GKE.
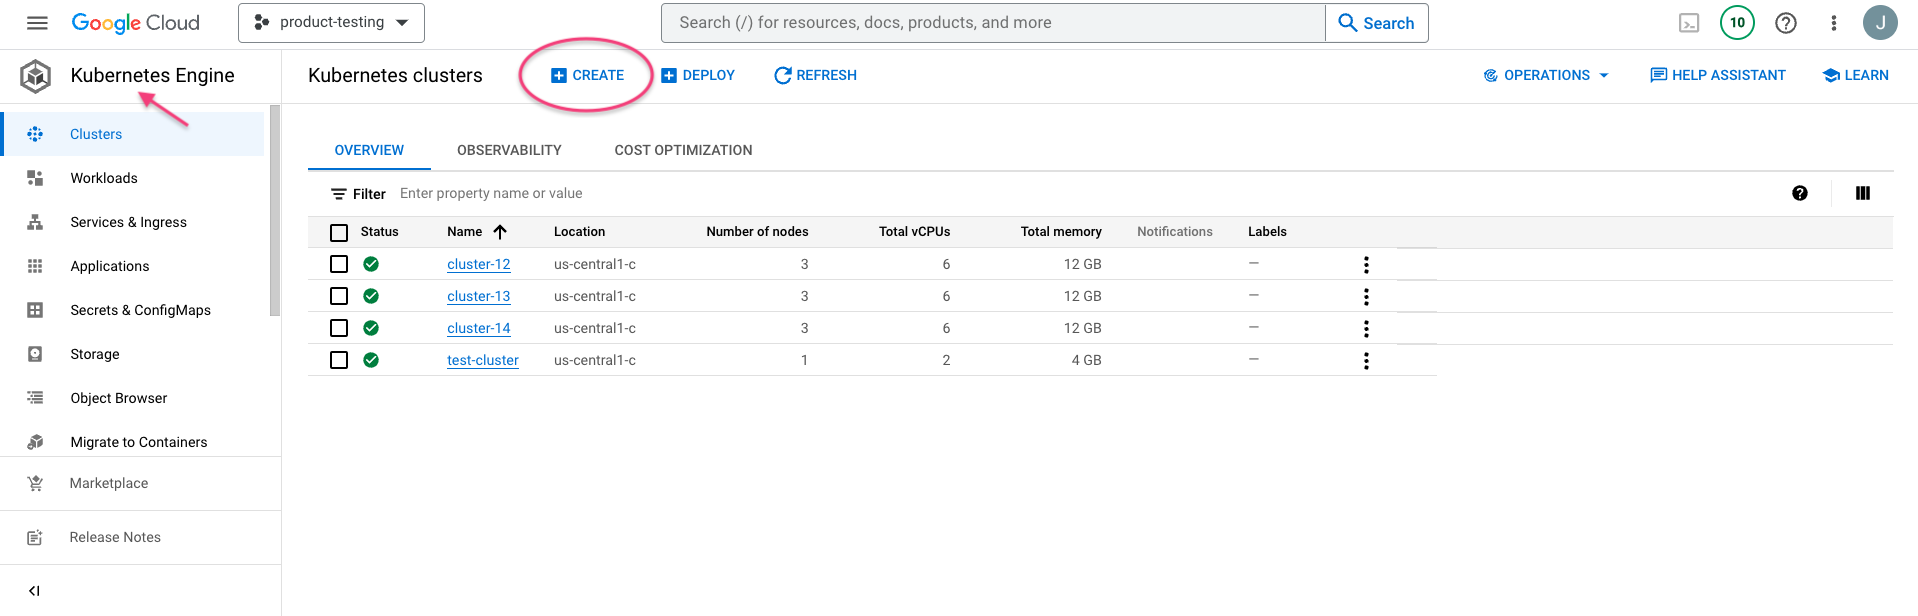
Select Create on the Kubernetes Engine page. In the pop up screen chose Standard: You manage your cluster Configure
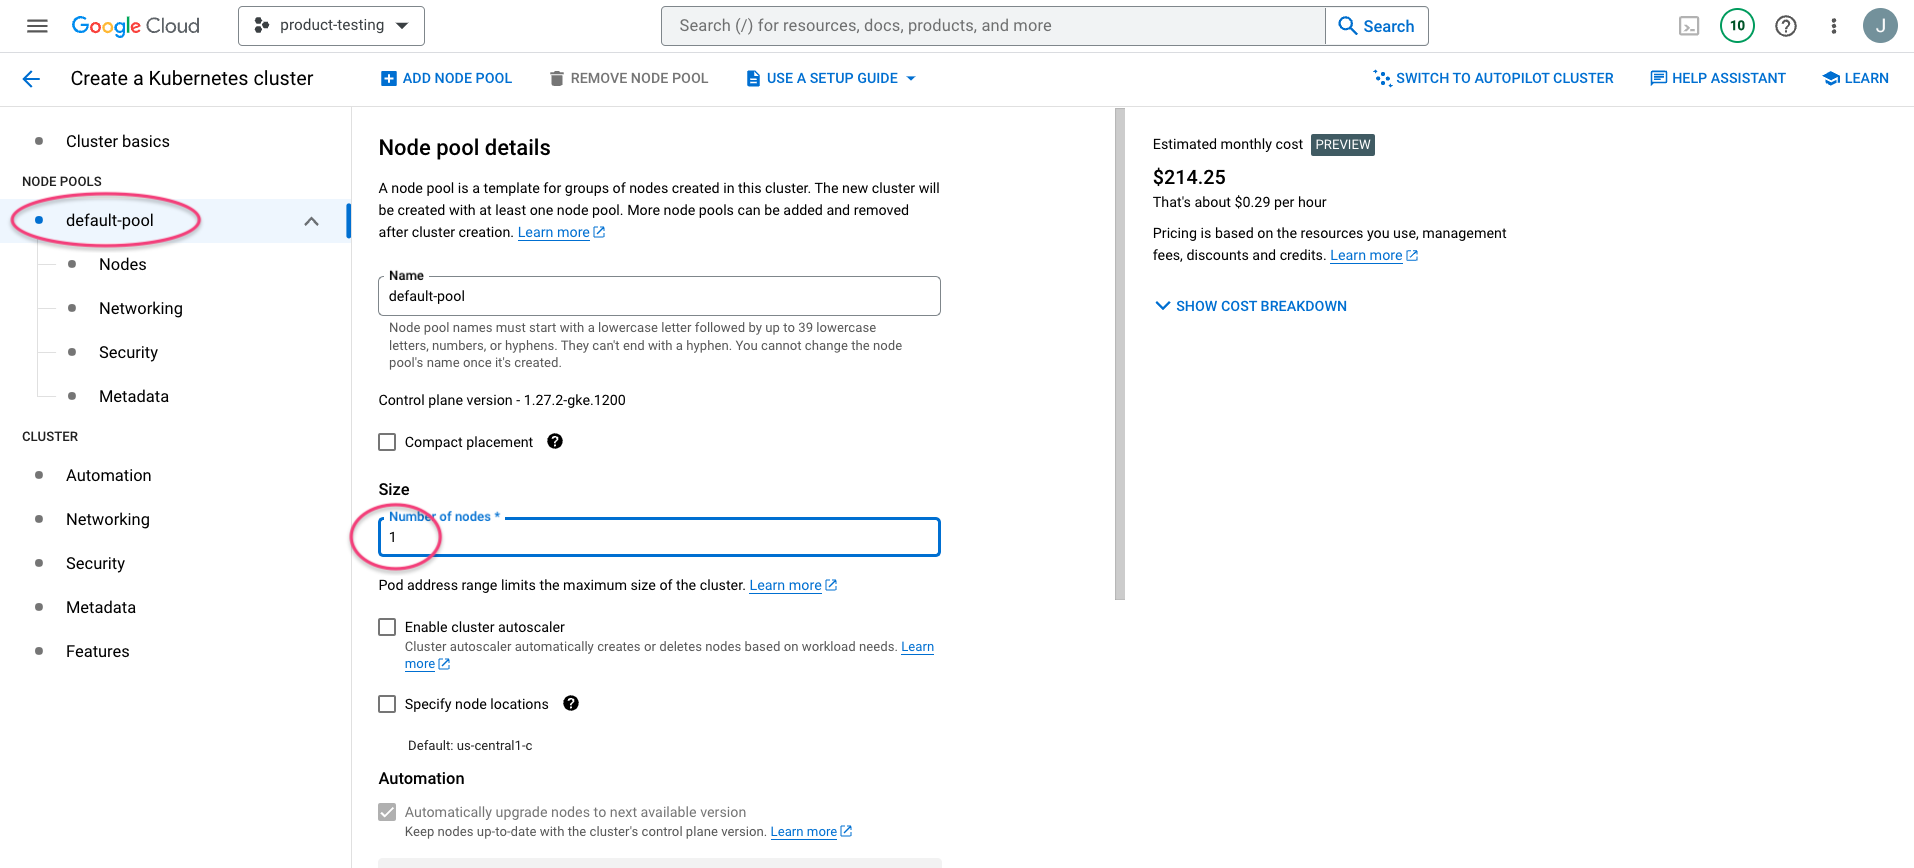
On the Cluster create form, provide an appropriate name or let the default provided, chose Nodepool and select 1 single node (or add more if you are testing a production like environment).
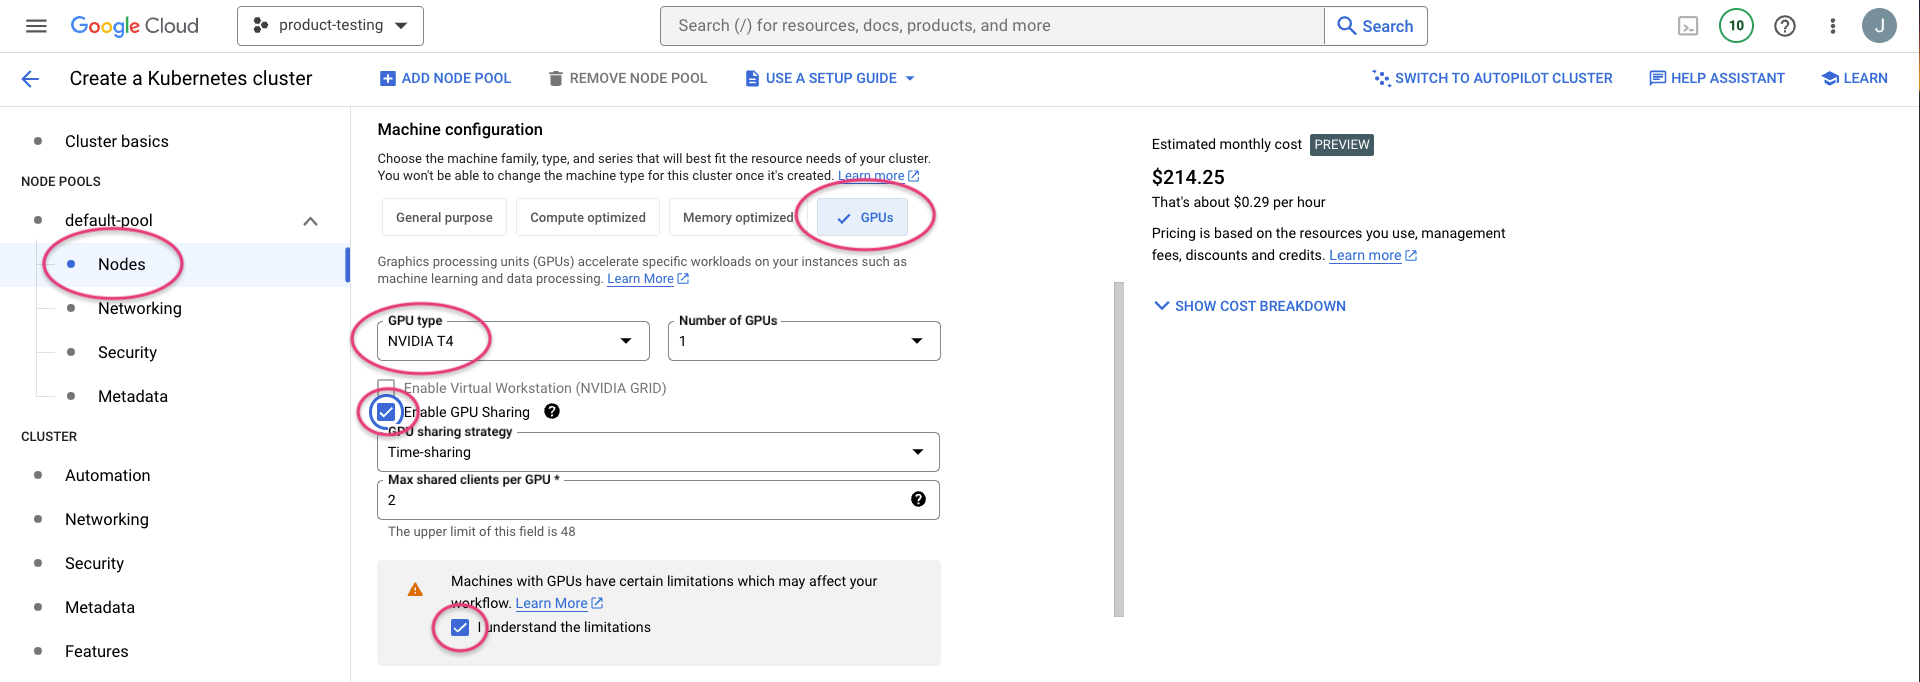
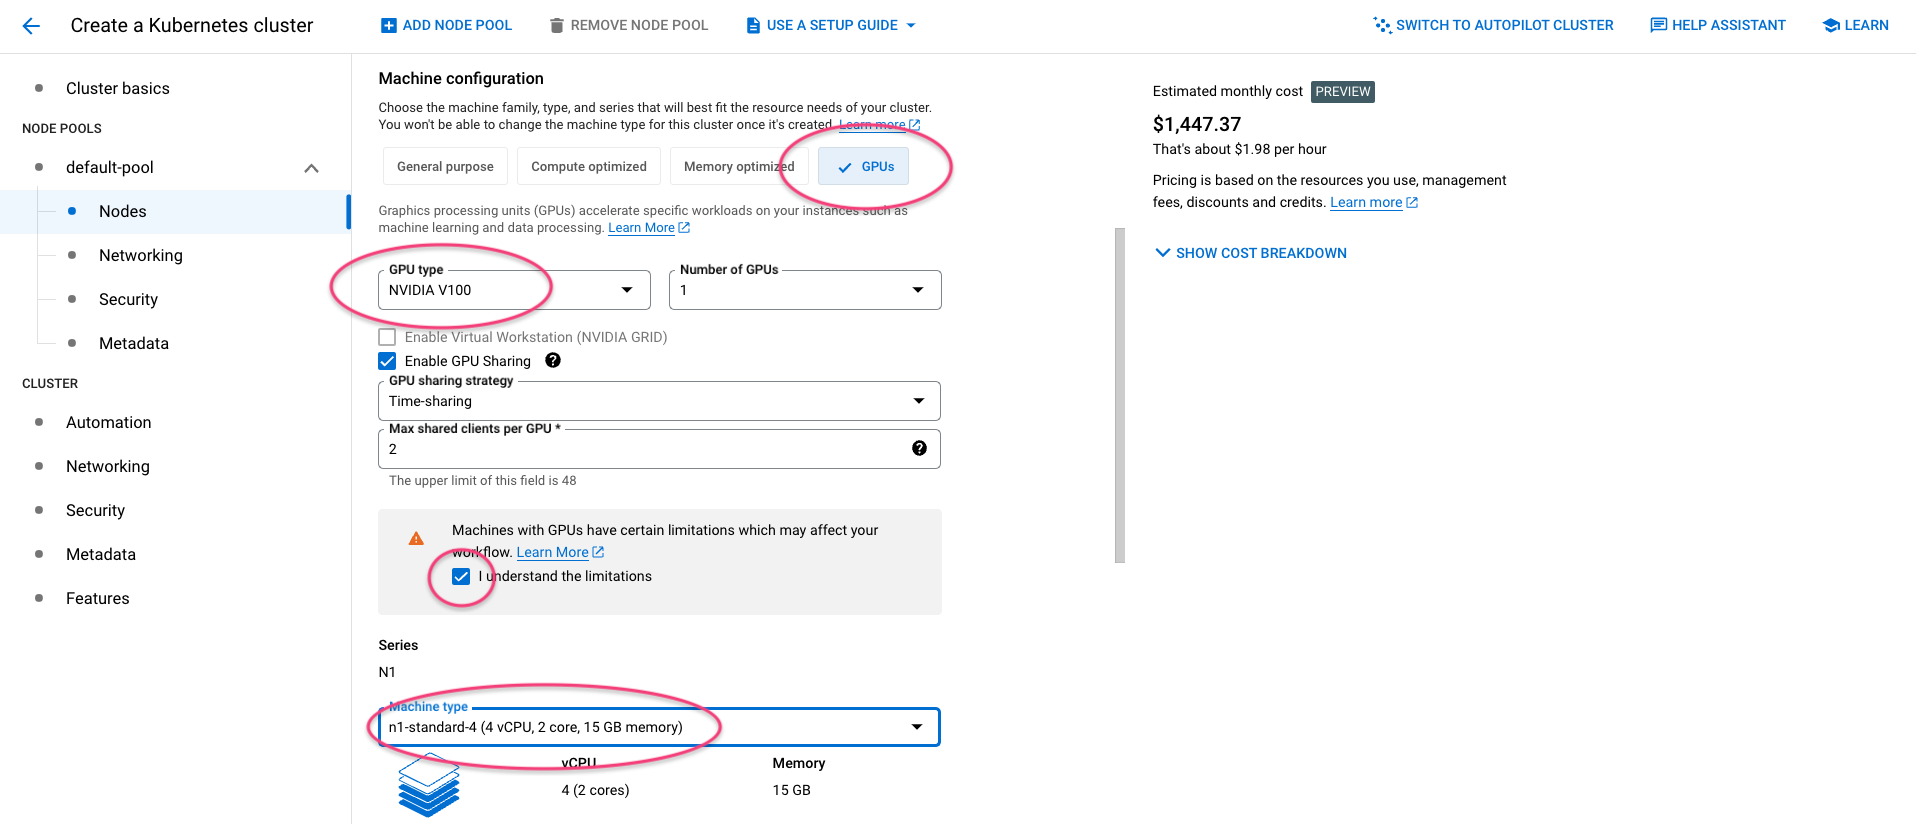
Chose 'Nodes' and select GPUs and then the appropriate GPU type for your use. Tick Enable GPU Sharing and tick I understand the limitations
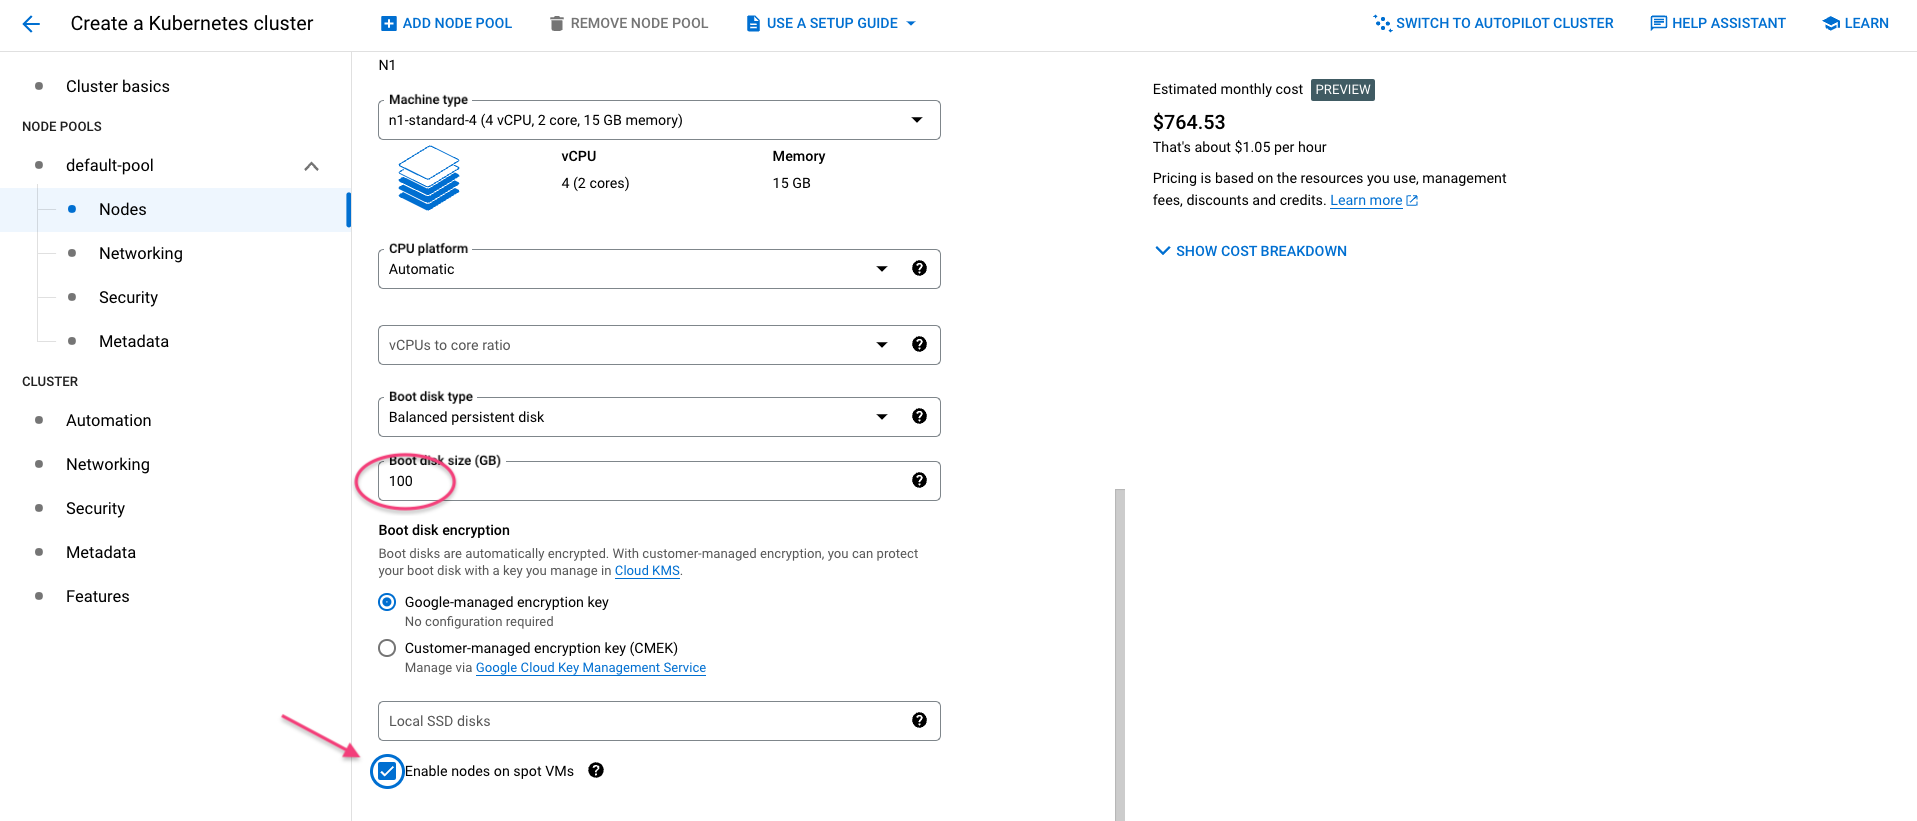
Now select 4vCPU and 15GB of memory for node size - this will depend on your use case, but ML applications usually need a lot of RAM! Below, select spot VMs instance to minimise the cost of your cluster.

Now click Create and then wait until the cluster is available (roughly 5-10 mins is enough). You will now have a cluster with GPUs ready to use.
Onboarding and preparing our GPU cluster
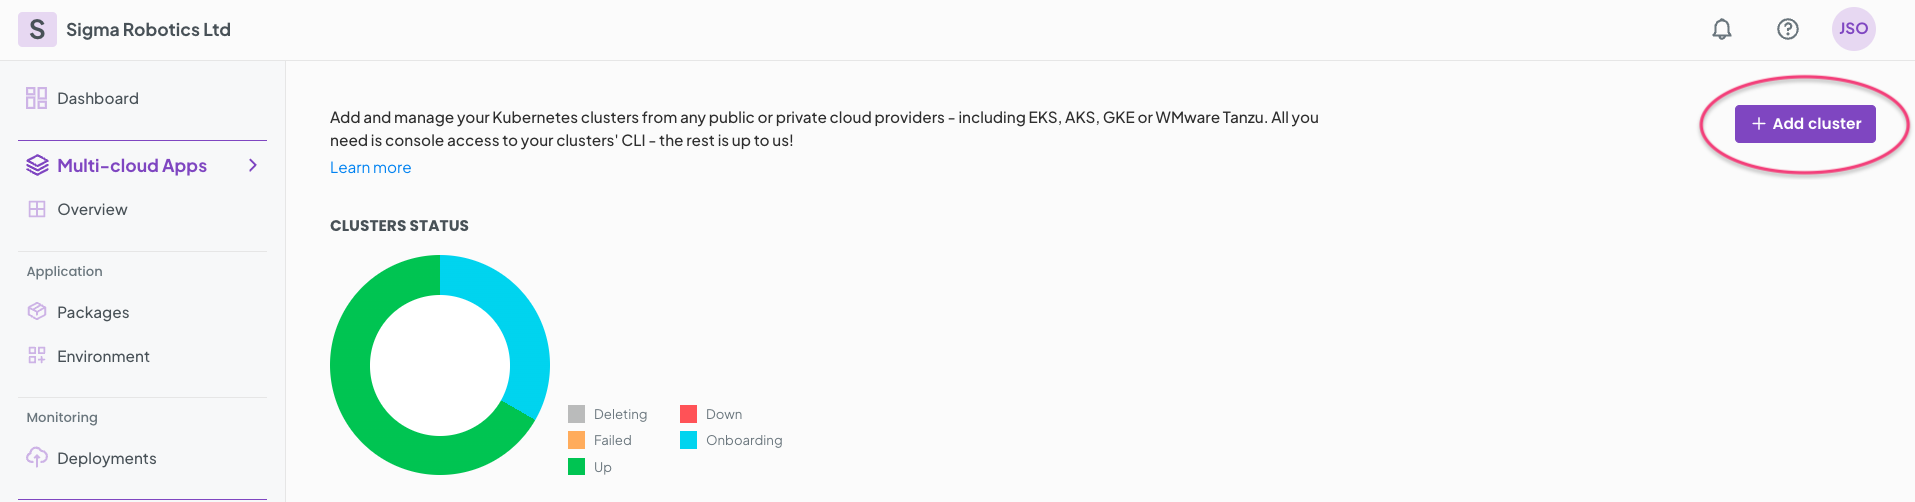
Log-on to your organisation, go to Clusters and select Clusters
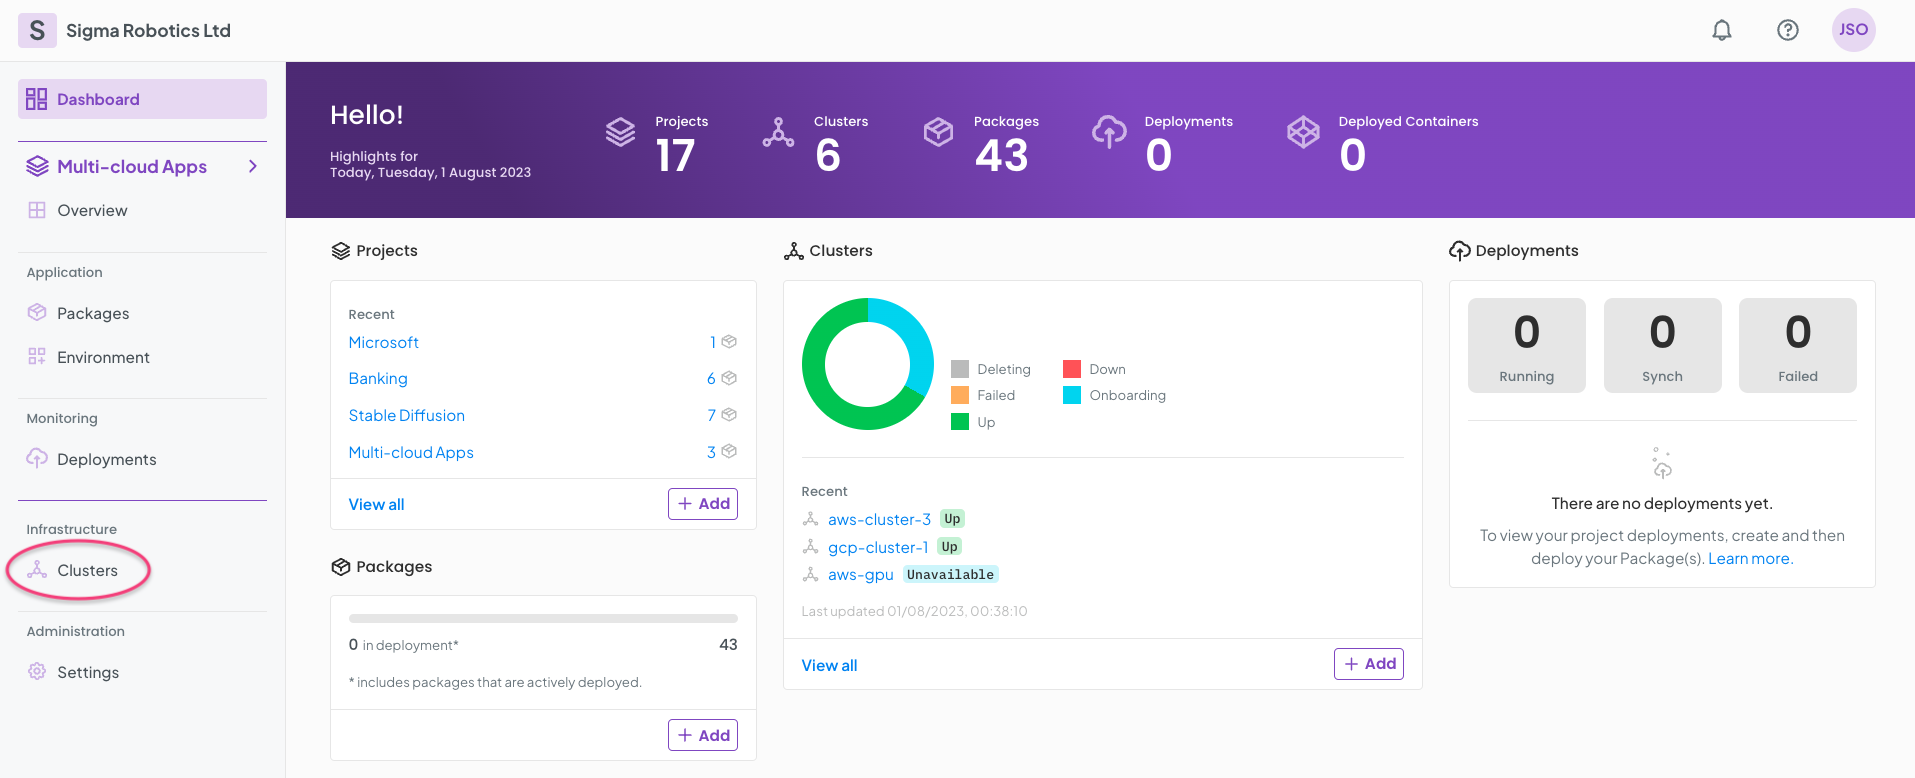
Select + Add cluster
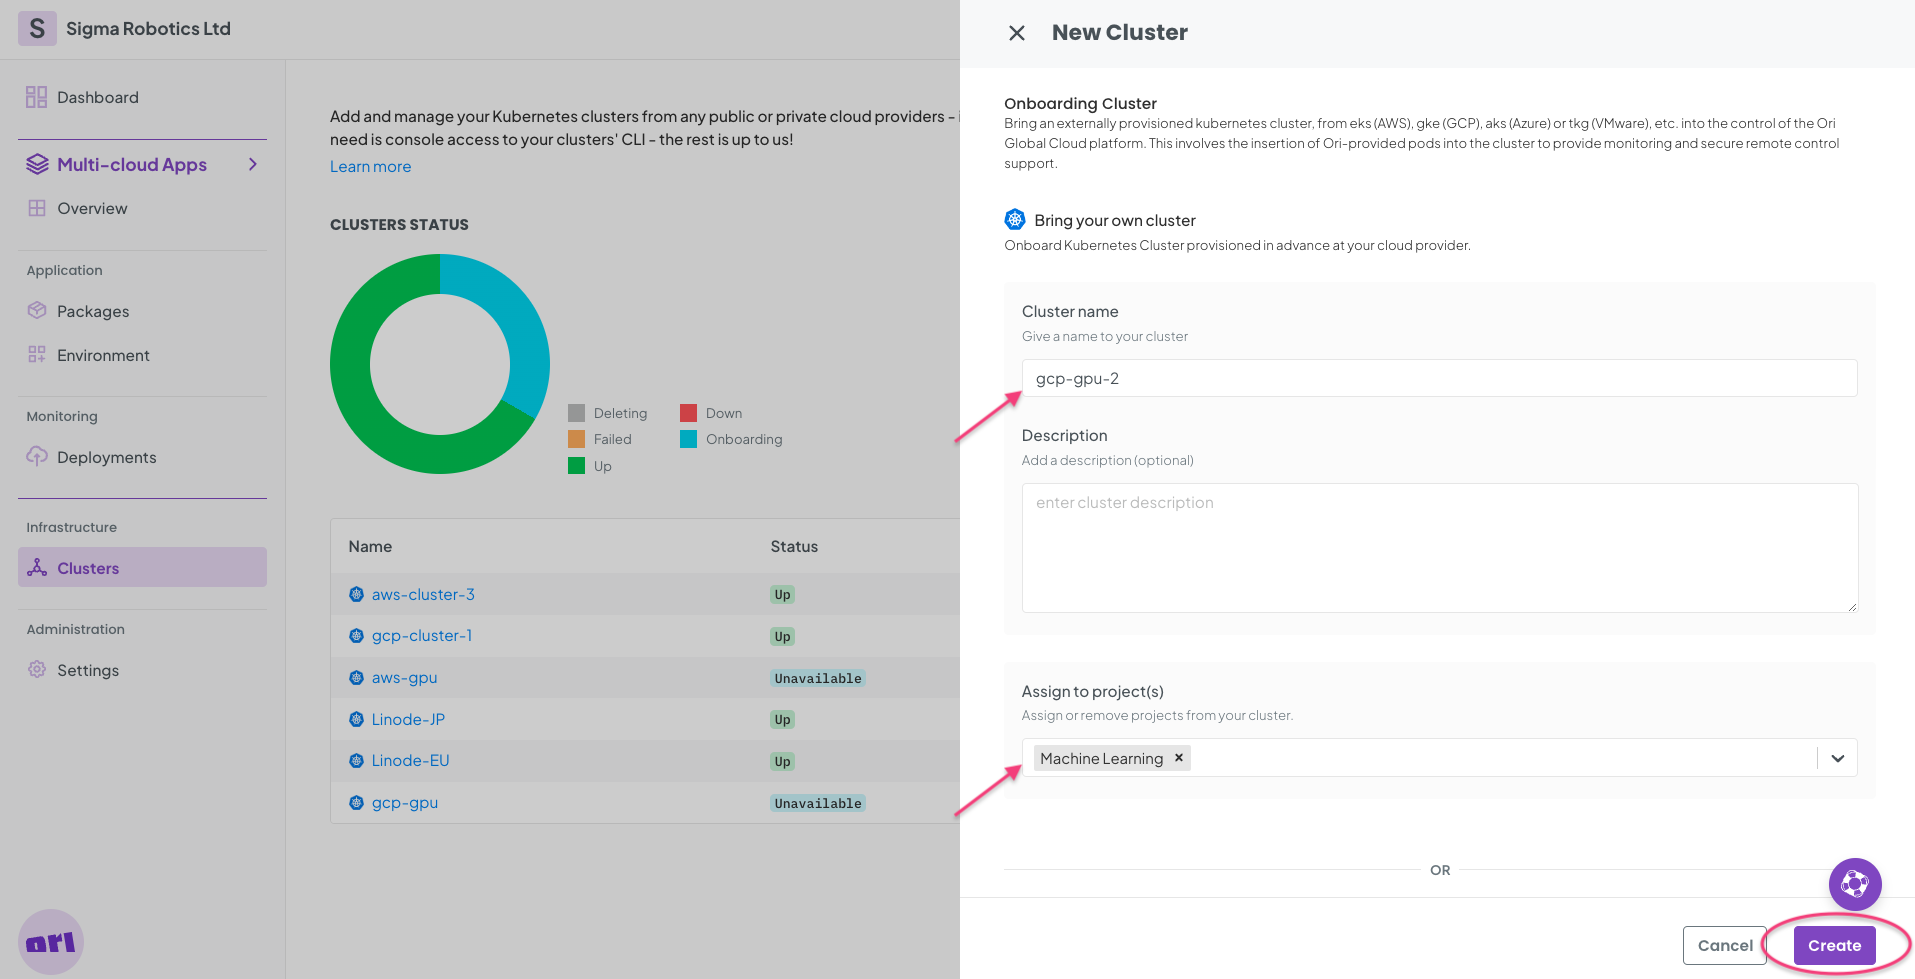
Fill in the form and click Create
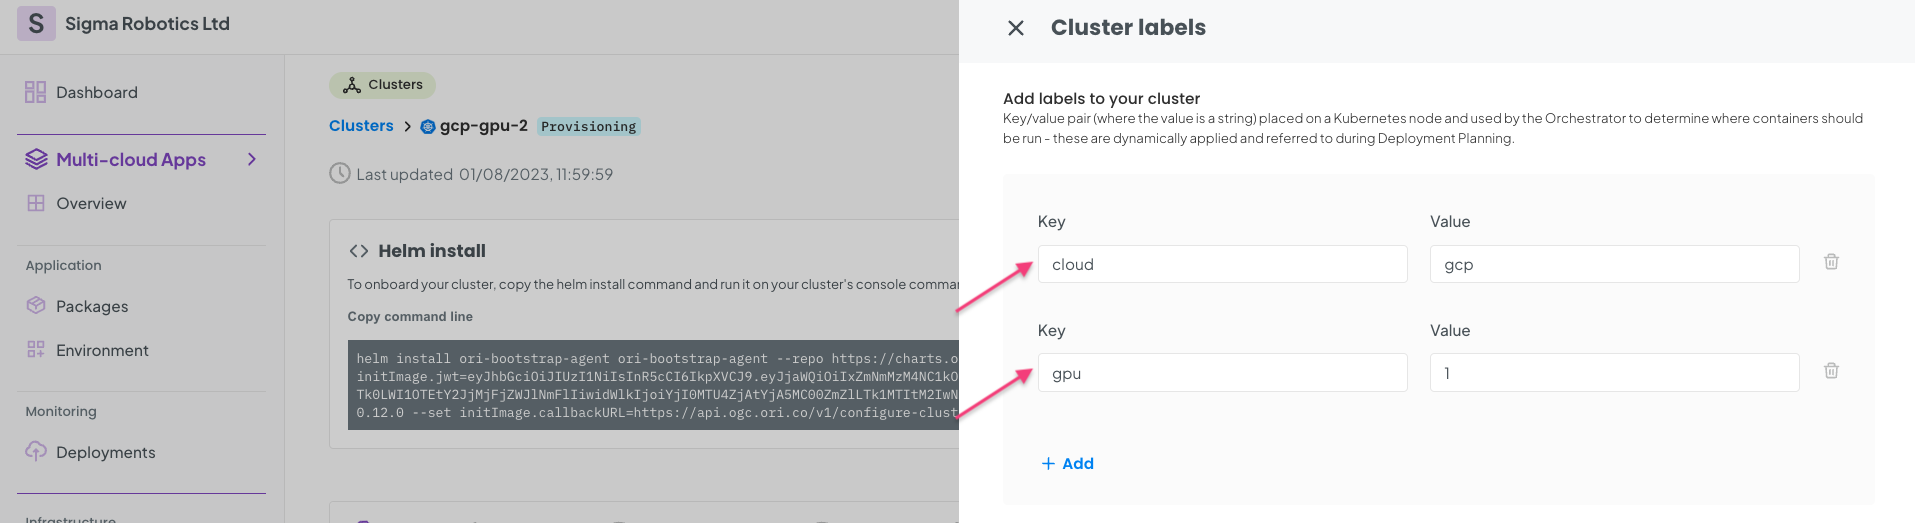
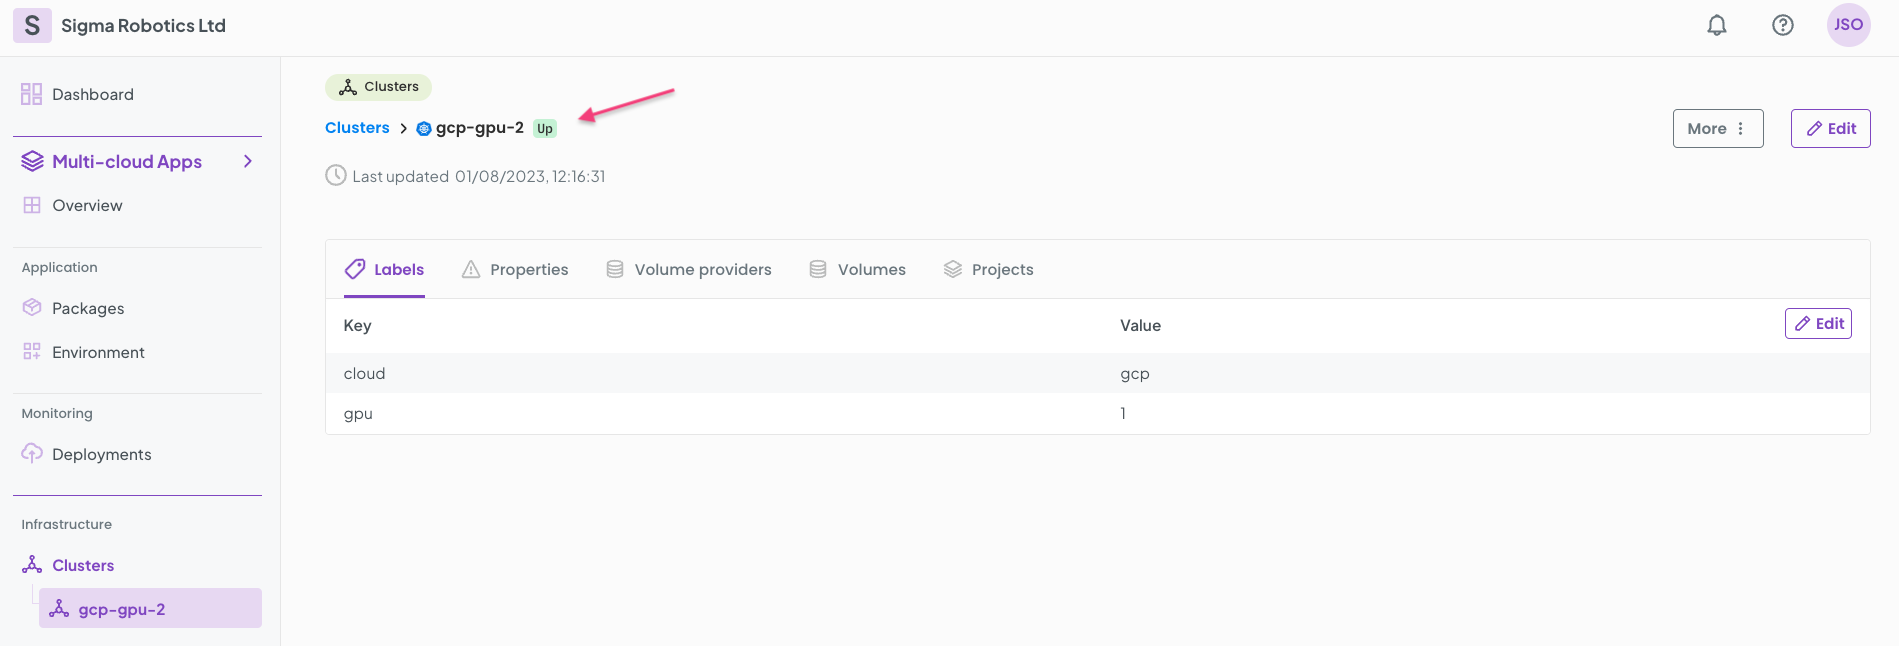
Now, + Add Labels to your Cluster.
Copy your Cluster Helm install command and run it on your K8s cluster CLI.
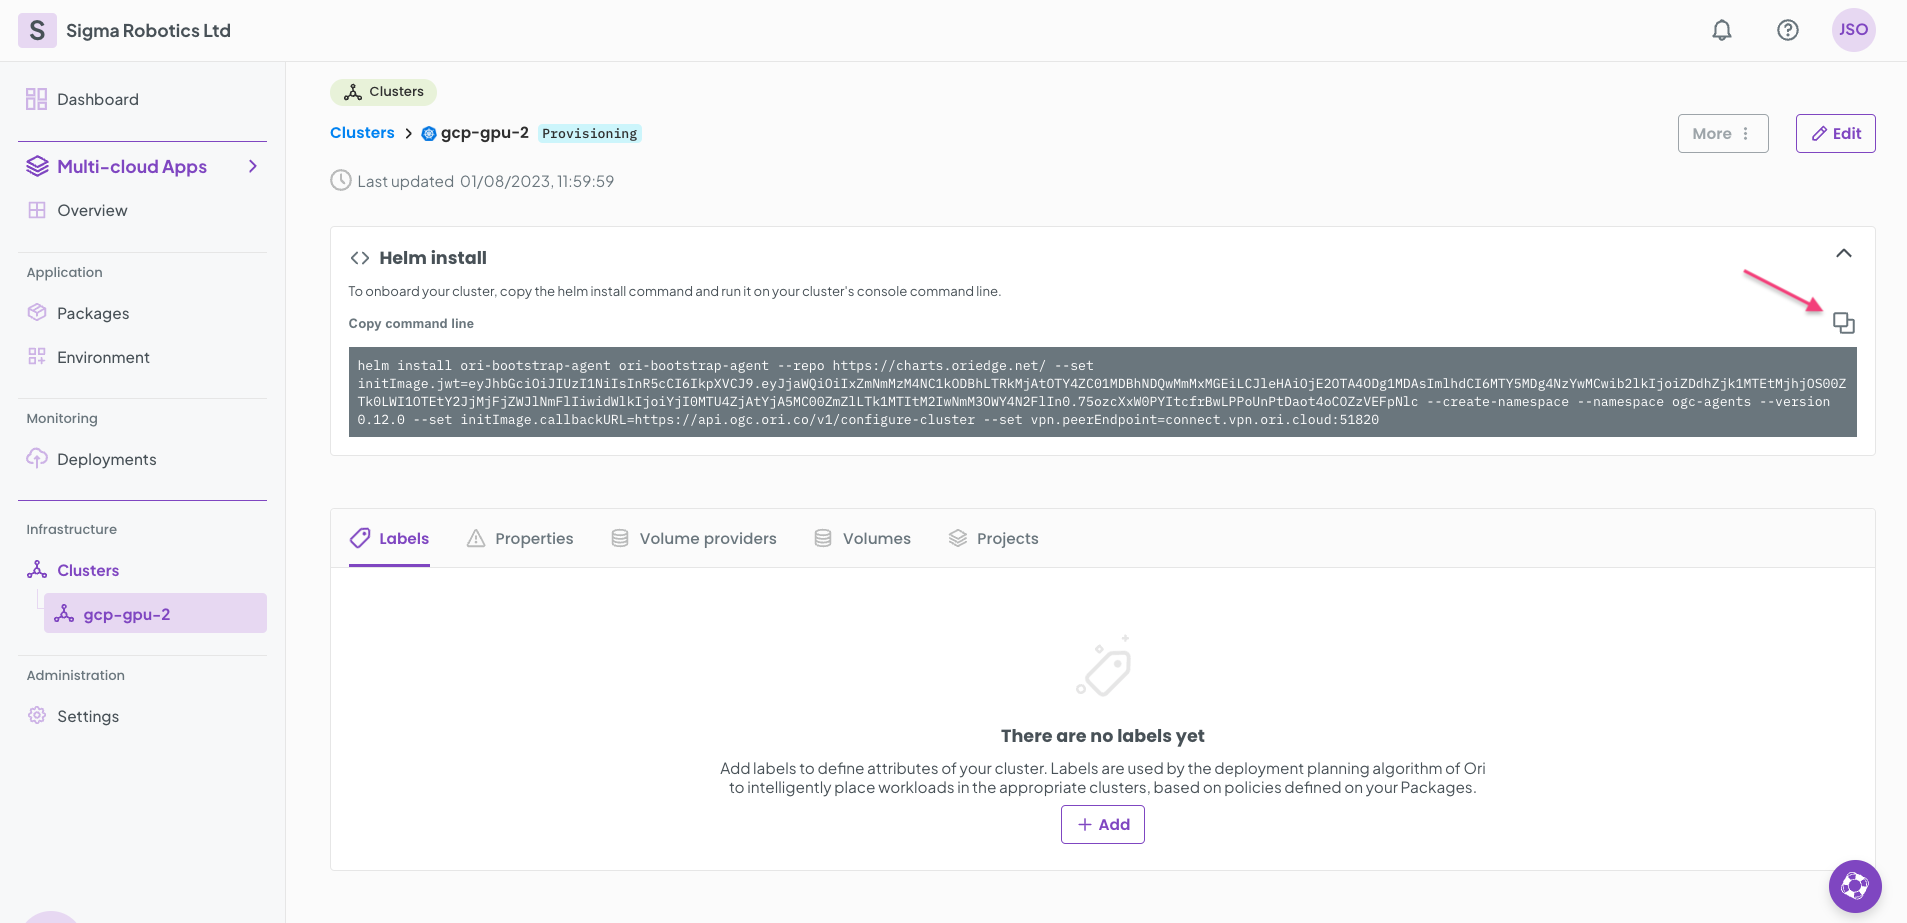
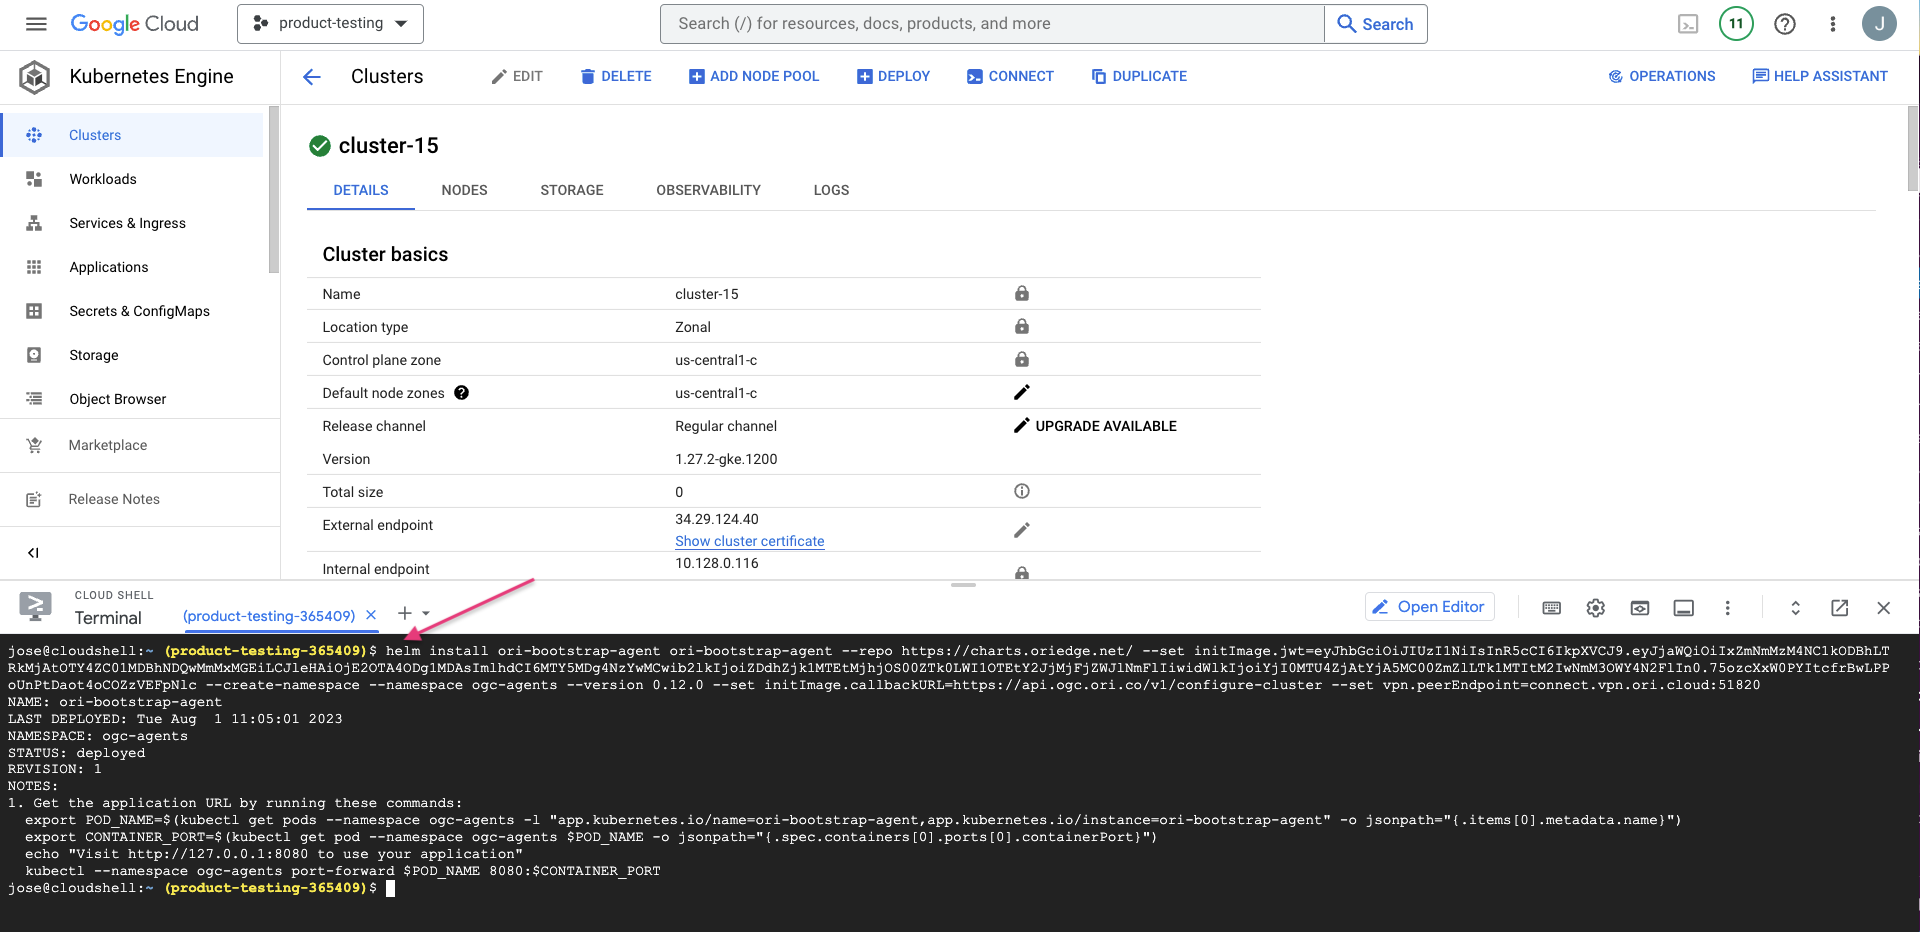
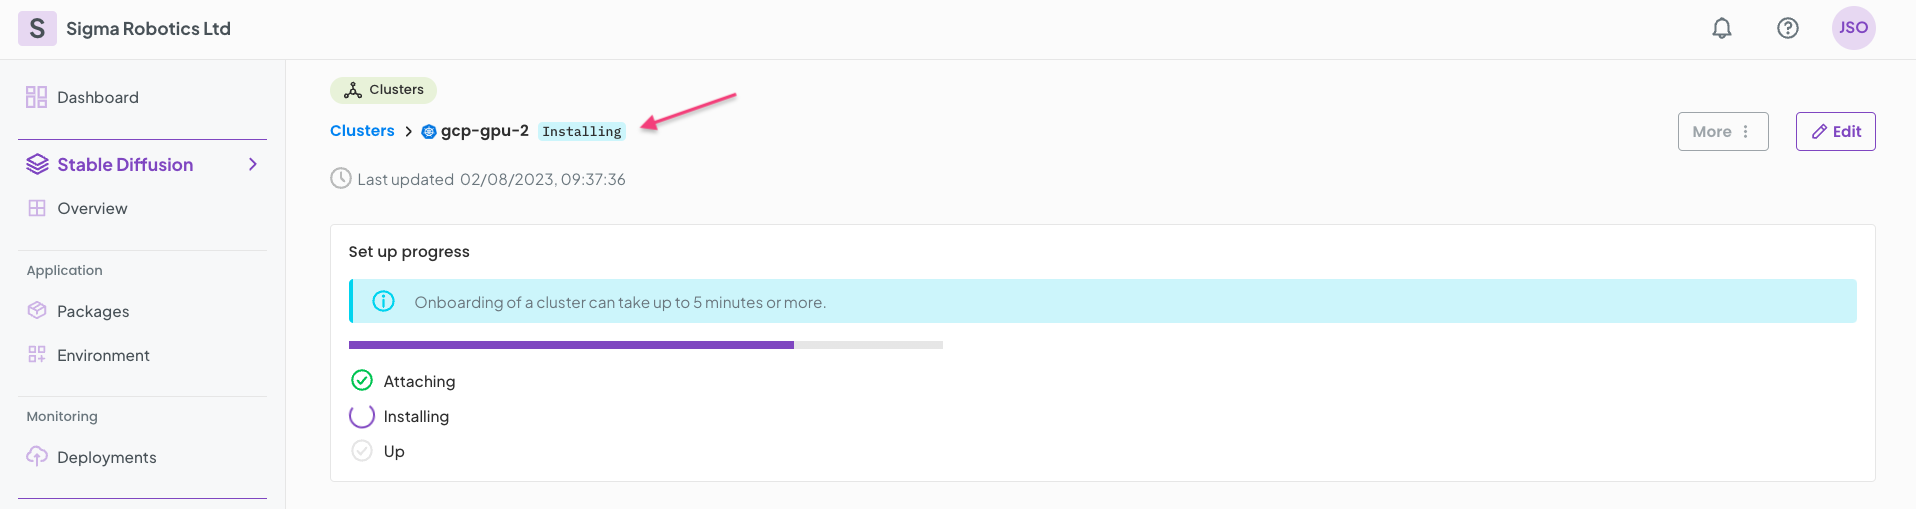
The cluster will start attaching to OGC. This will take 5 mins or so.
Meanwhile, install the NVIDIA Cuda driver on the K8s cluster CLI.
kubectl apply -f https://raw.githubusercontent.com/GoogleCloudPlatform/container-engine-accelerators/master/nvidia-driver-installer/cos/daemonset-preloaded-latest.yaml

Note the instructions on these pages for further information:
Finally your cluster should be ready for running your deployments.
Testing CUDA deployment
We are now going to test the GPU K8s cluster by running a Cuda test container.
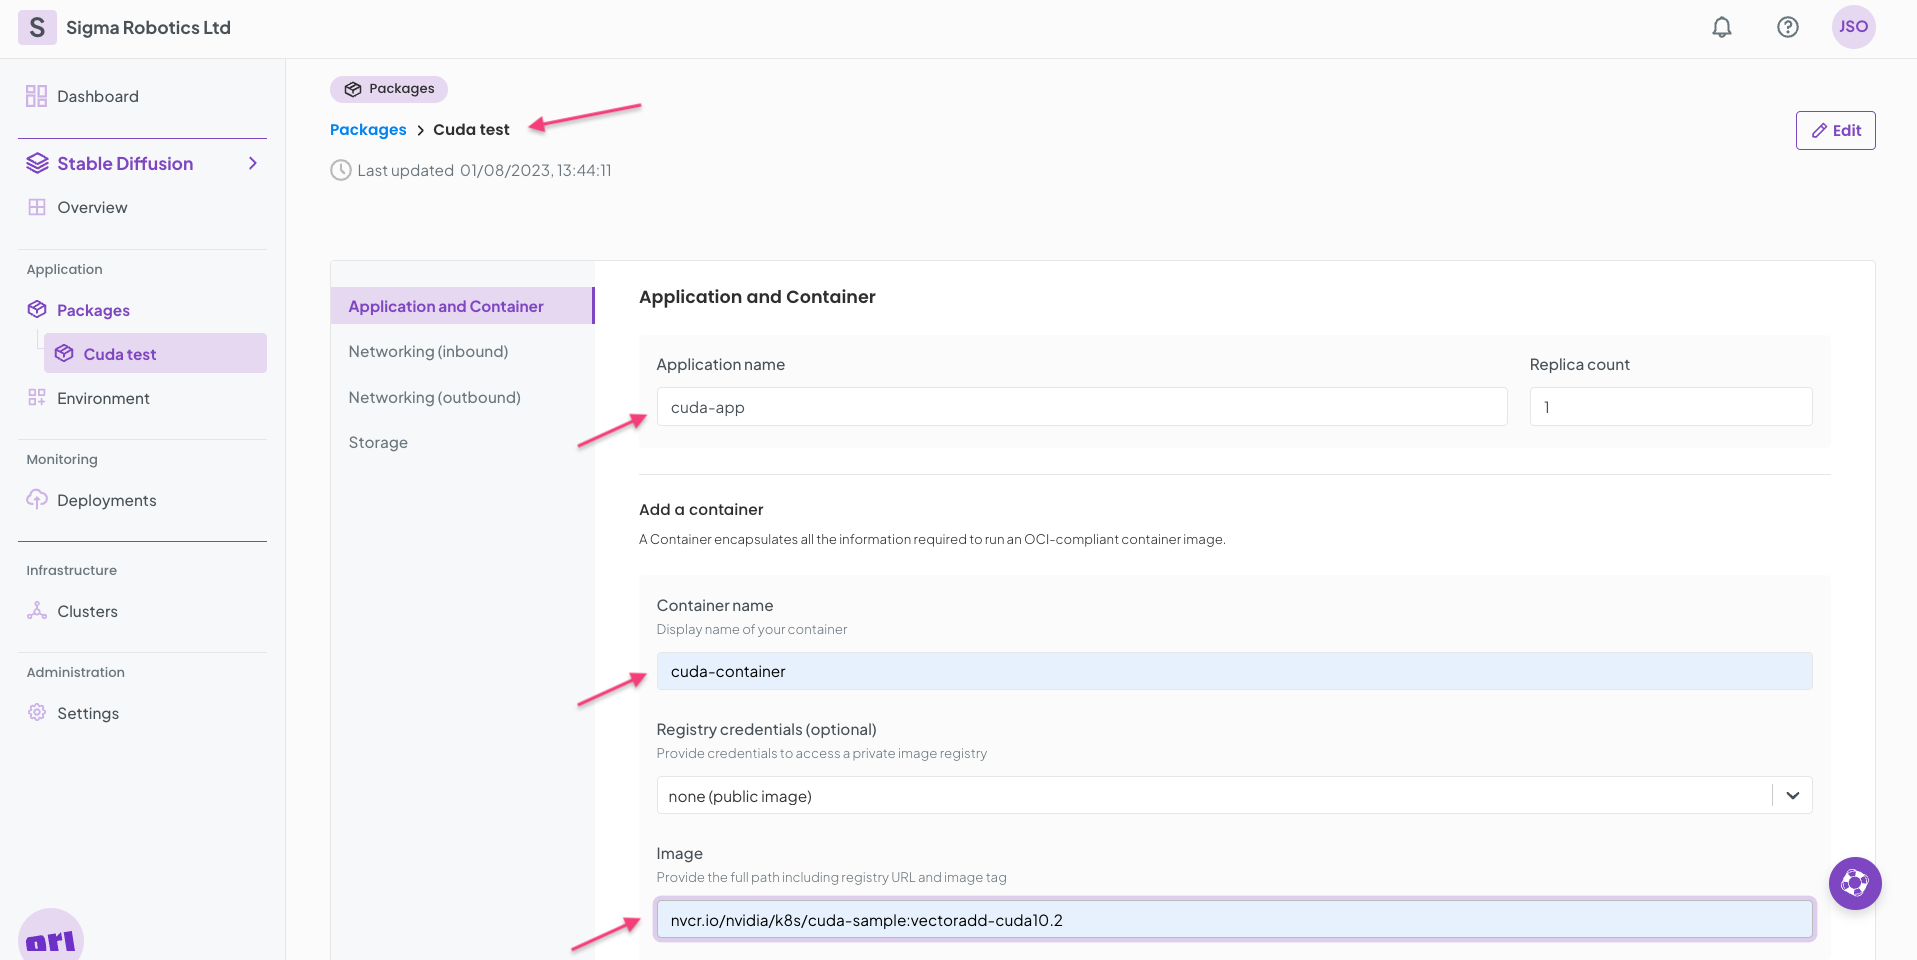
Start by creating a package called CUDA test. Fill in the Application form as per below:
Click Save and continue and then Skip the Networking and Storage form tabs.
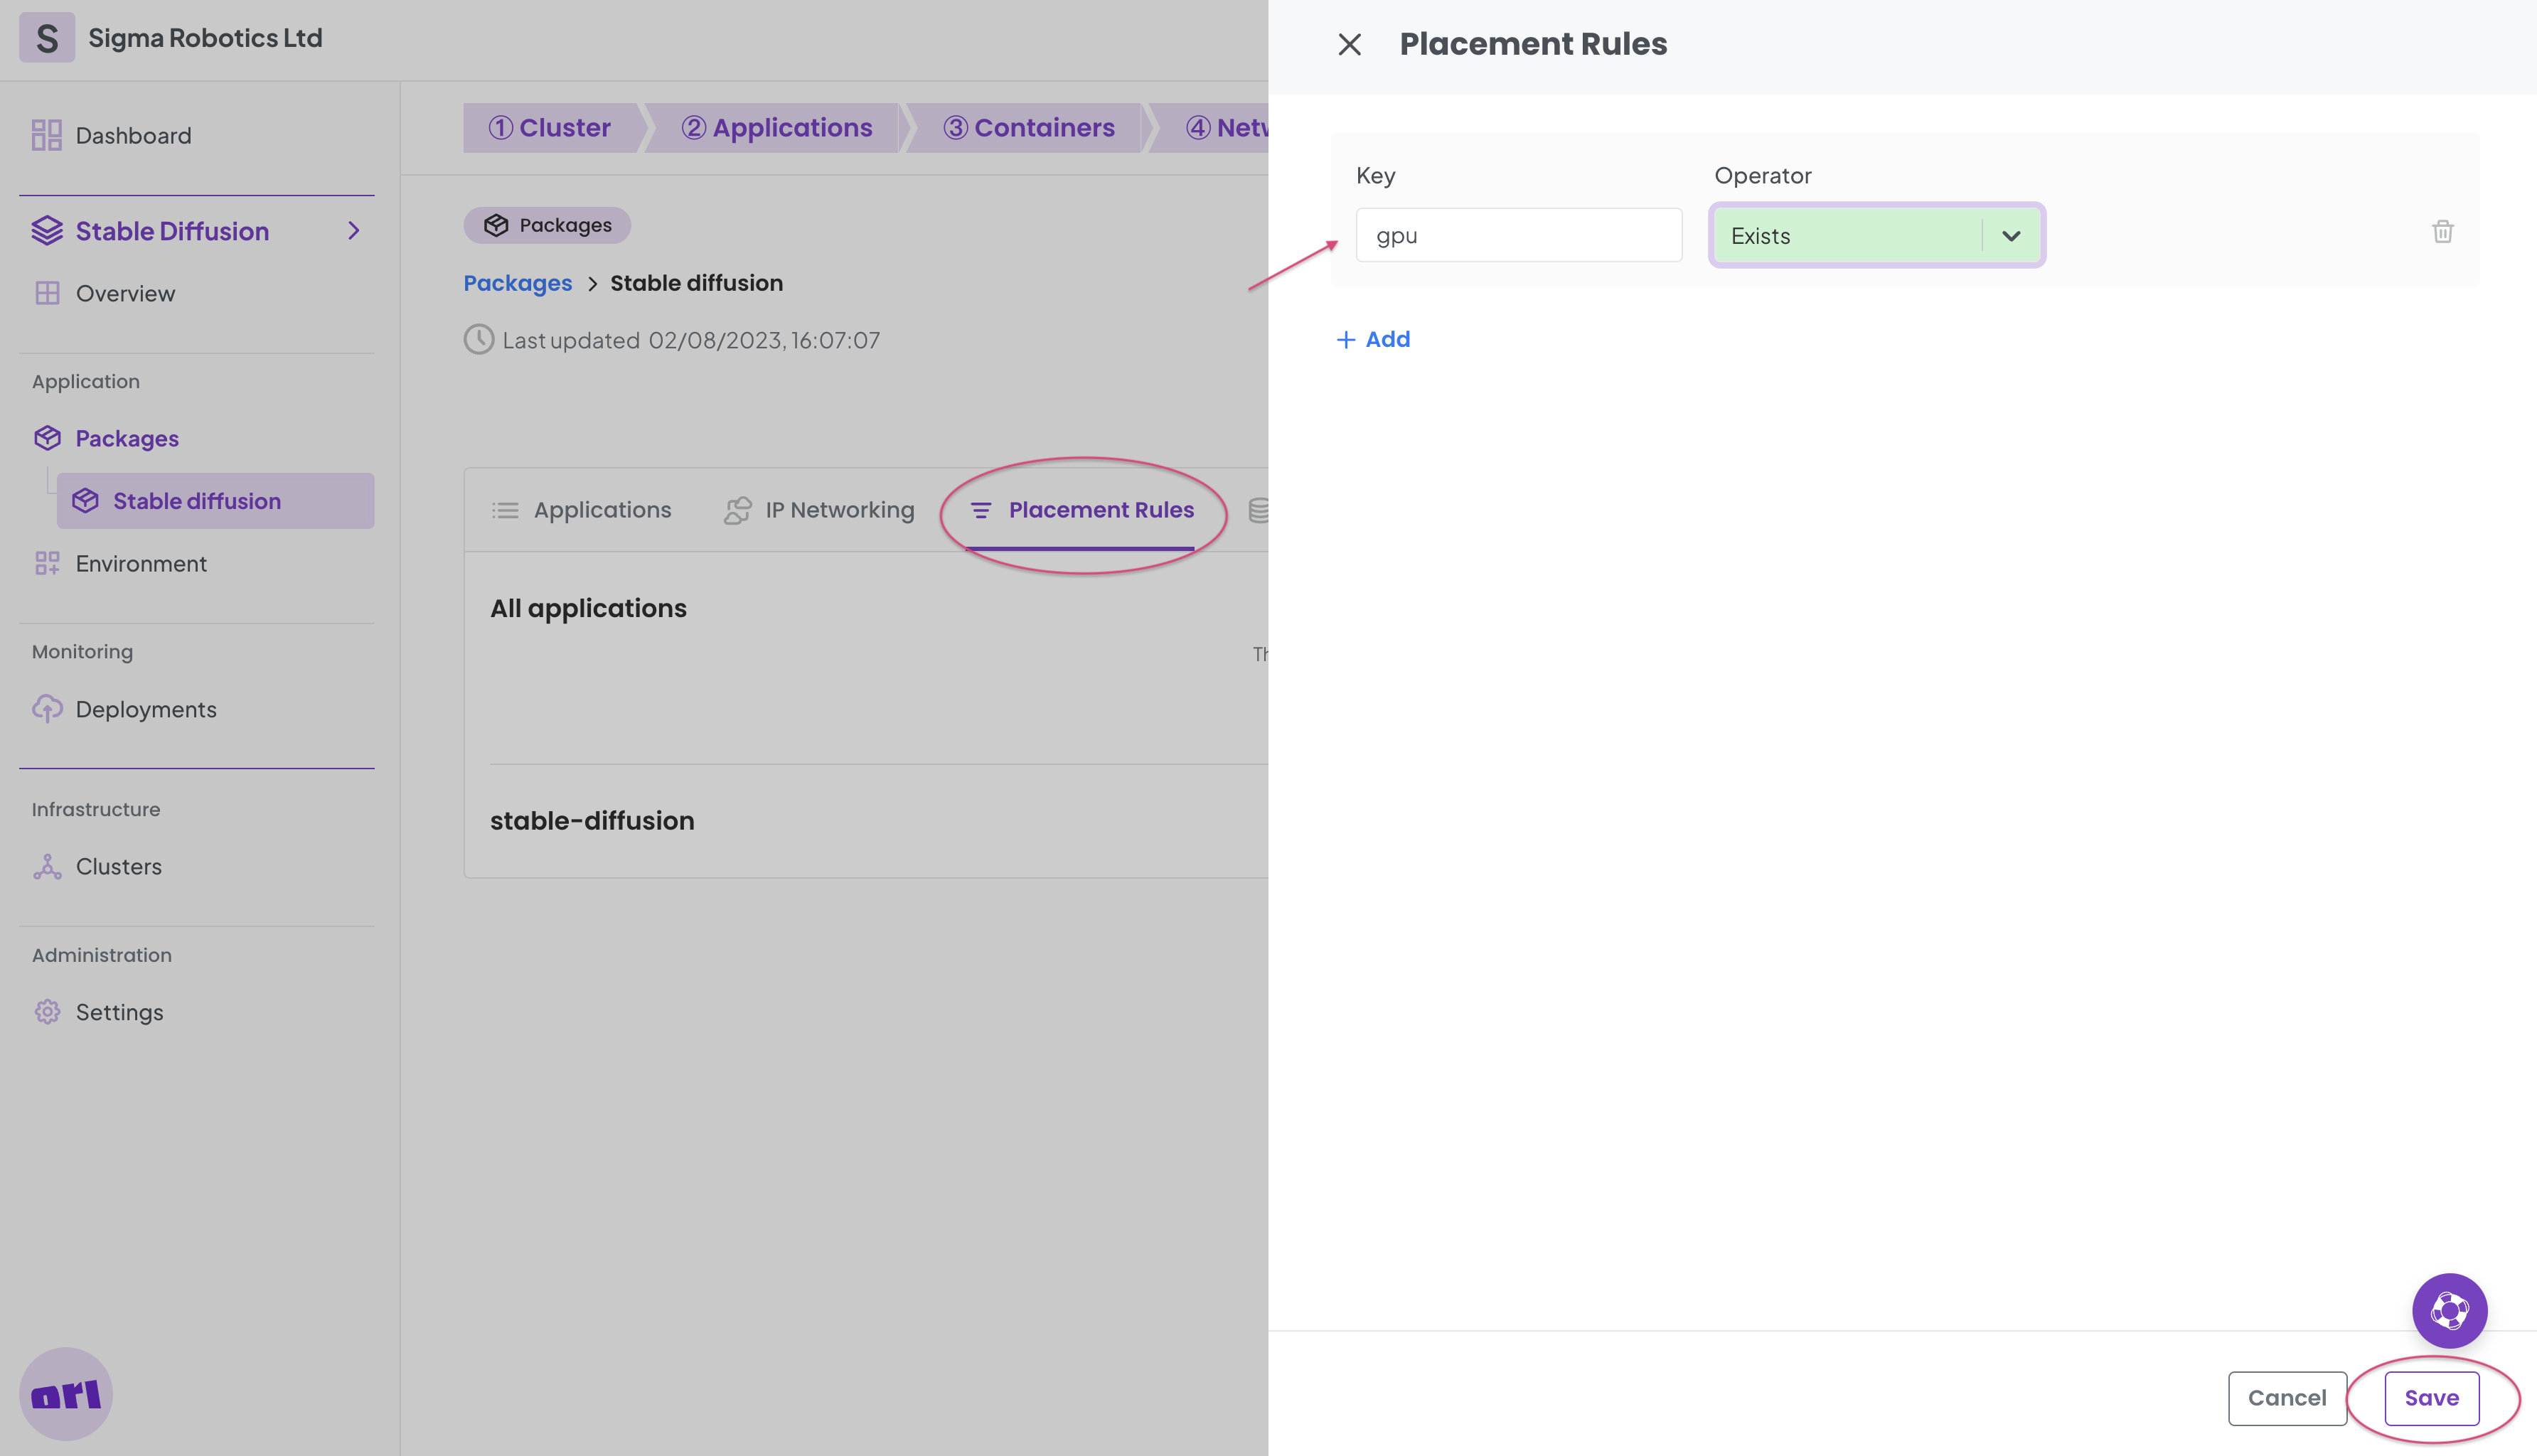
We now need a placement rule on our Cuda test package to ensure it only uses clusters with GPUs. Add the following placement rule to the package.
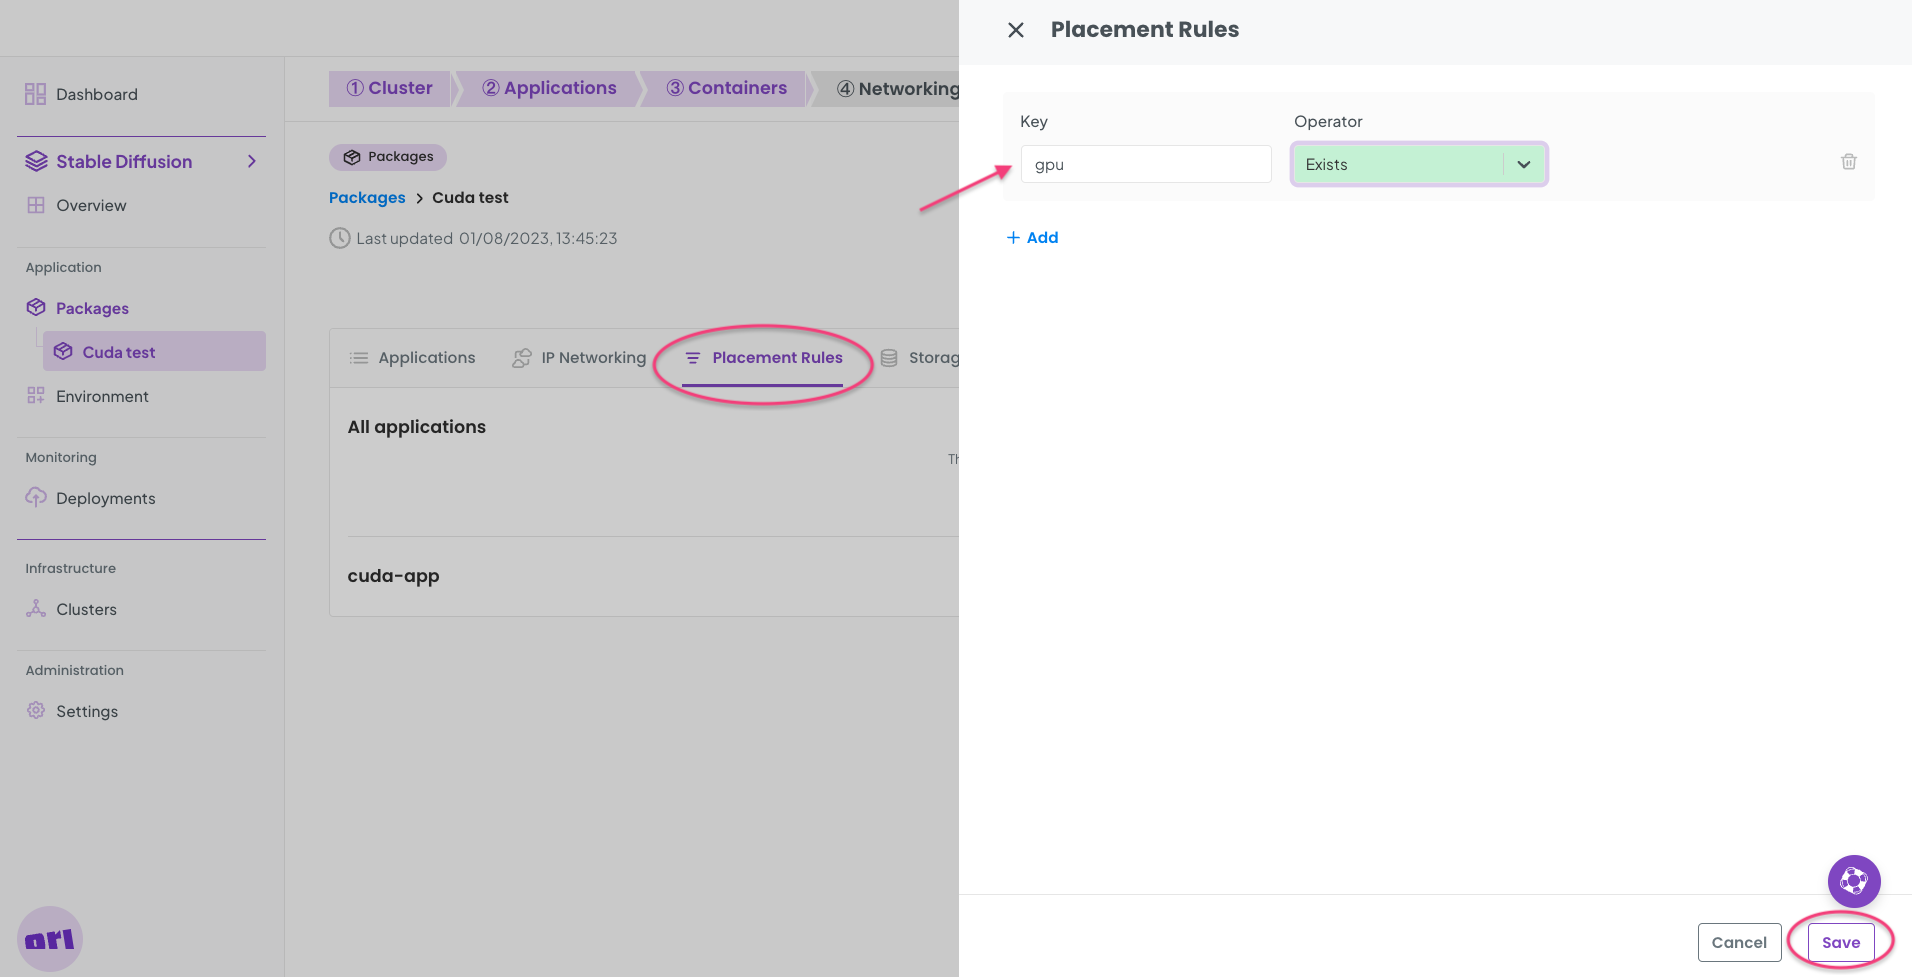
Now Save the new placement rule.
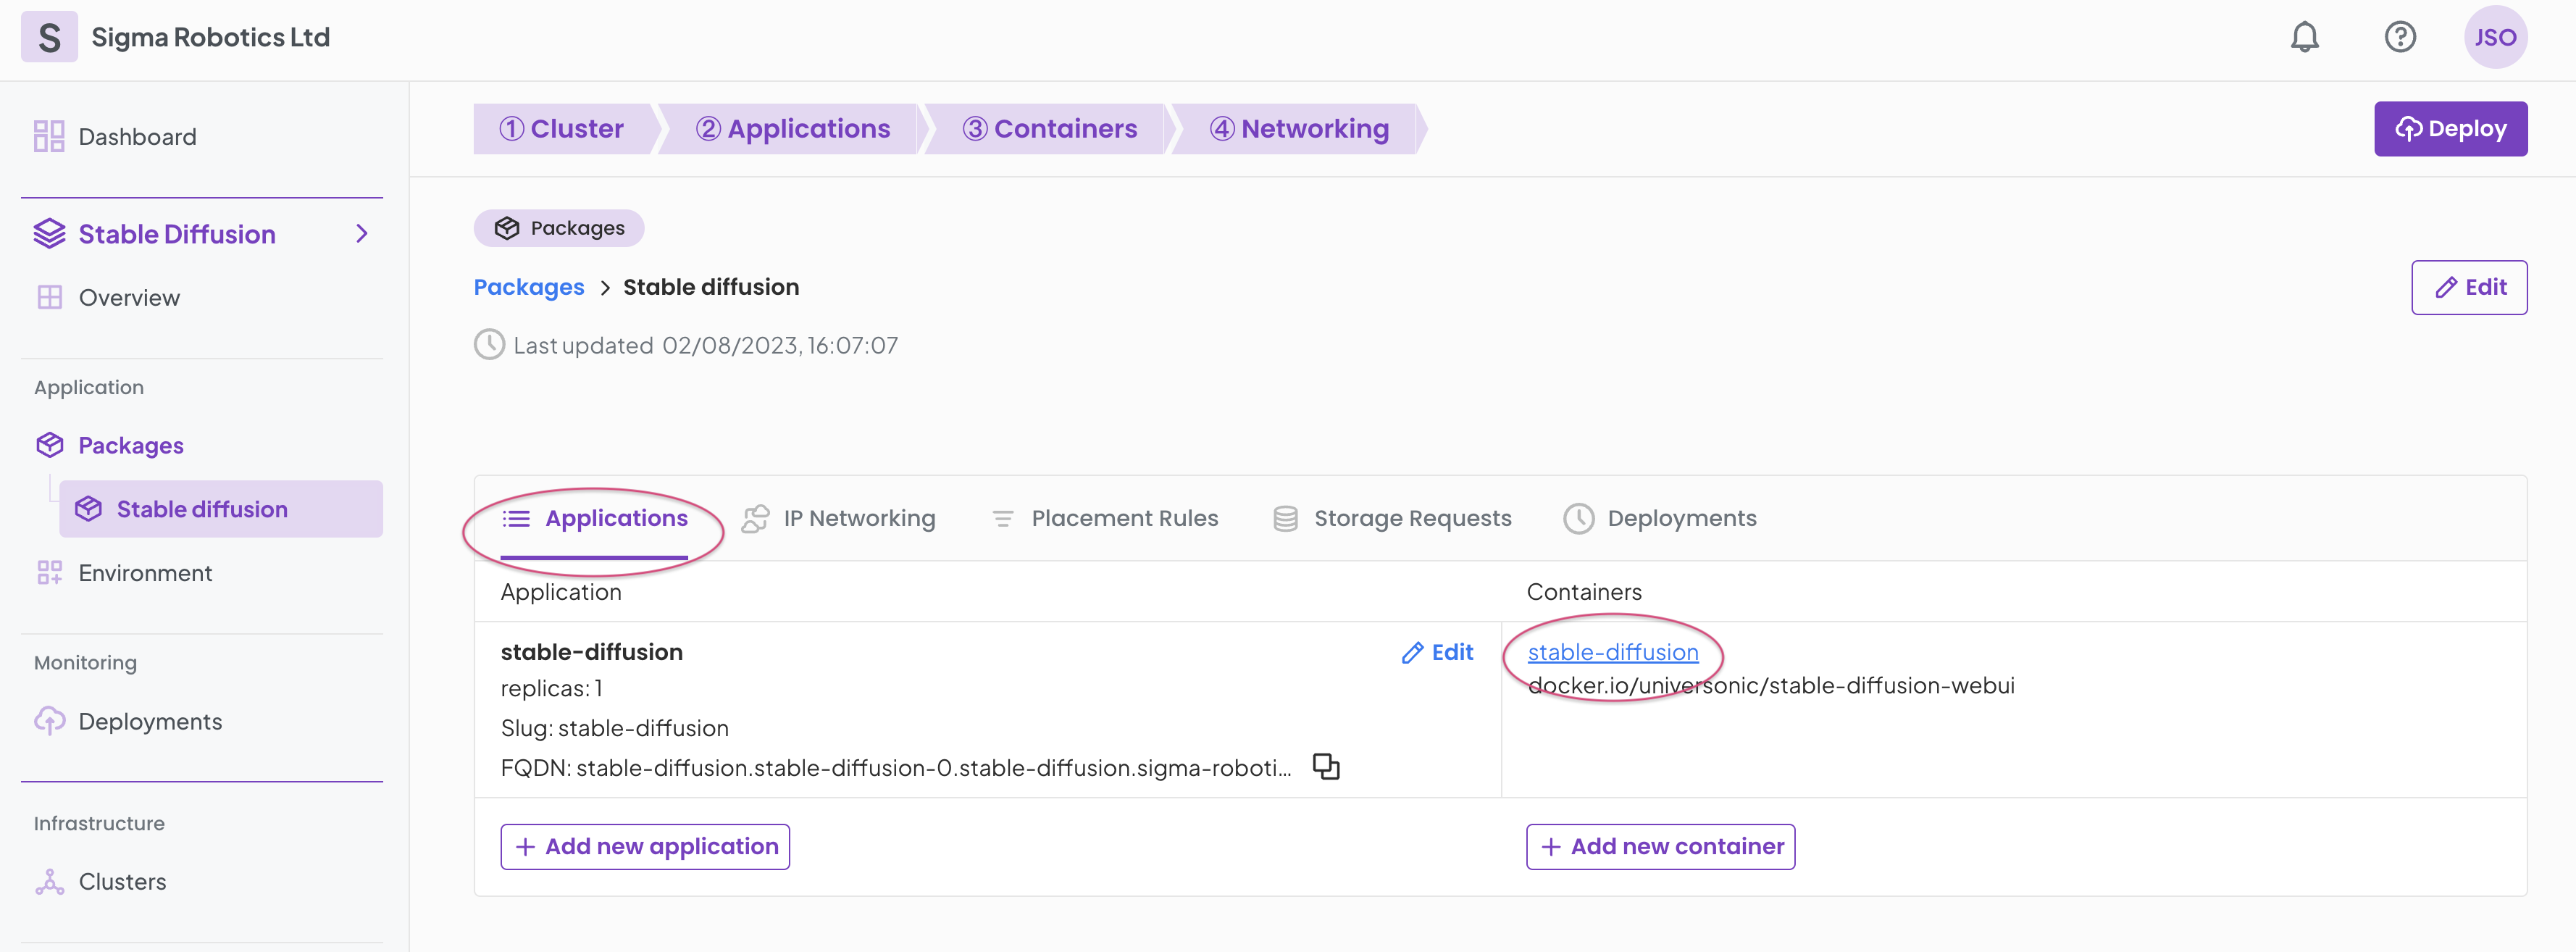
Also on the Cuda test package select the Applications tab and then the container.
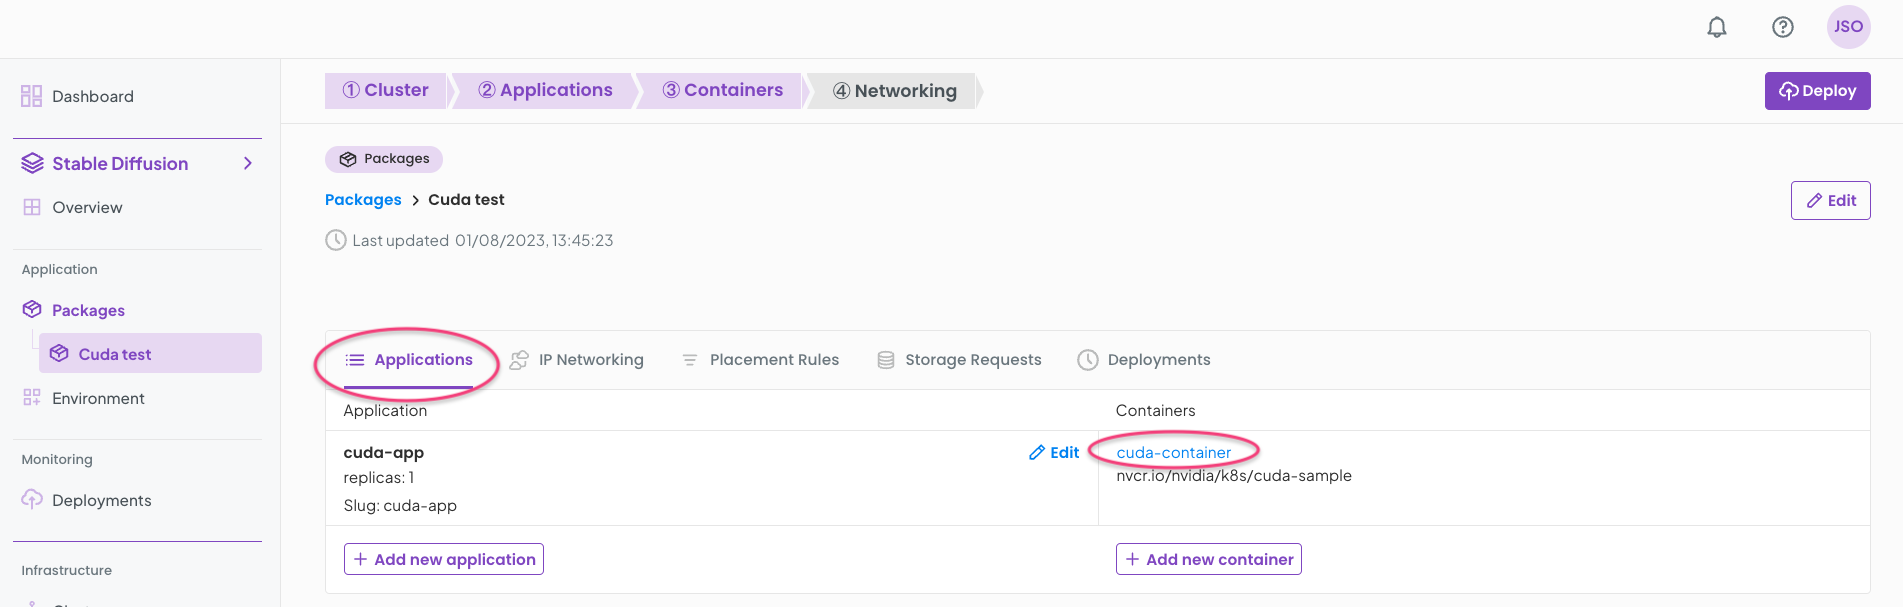
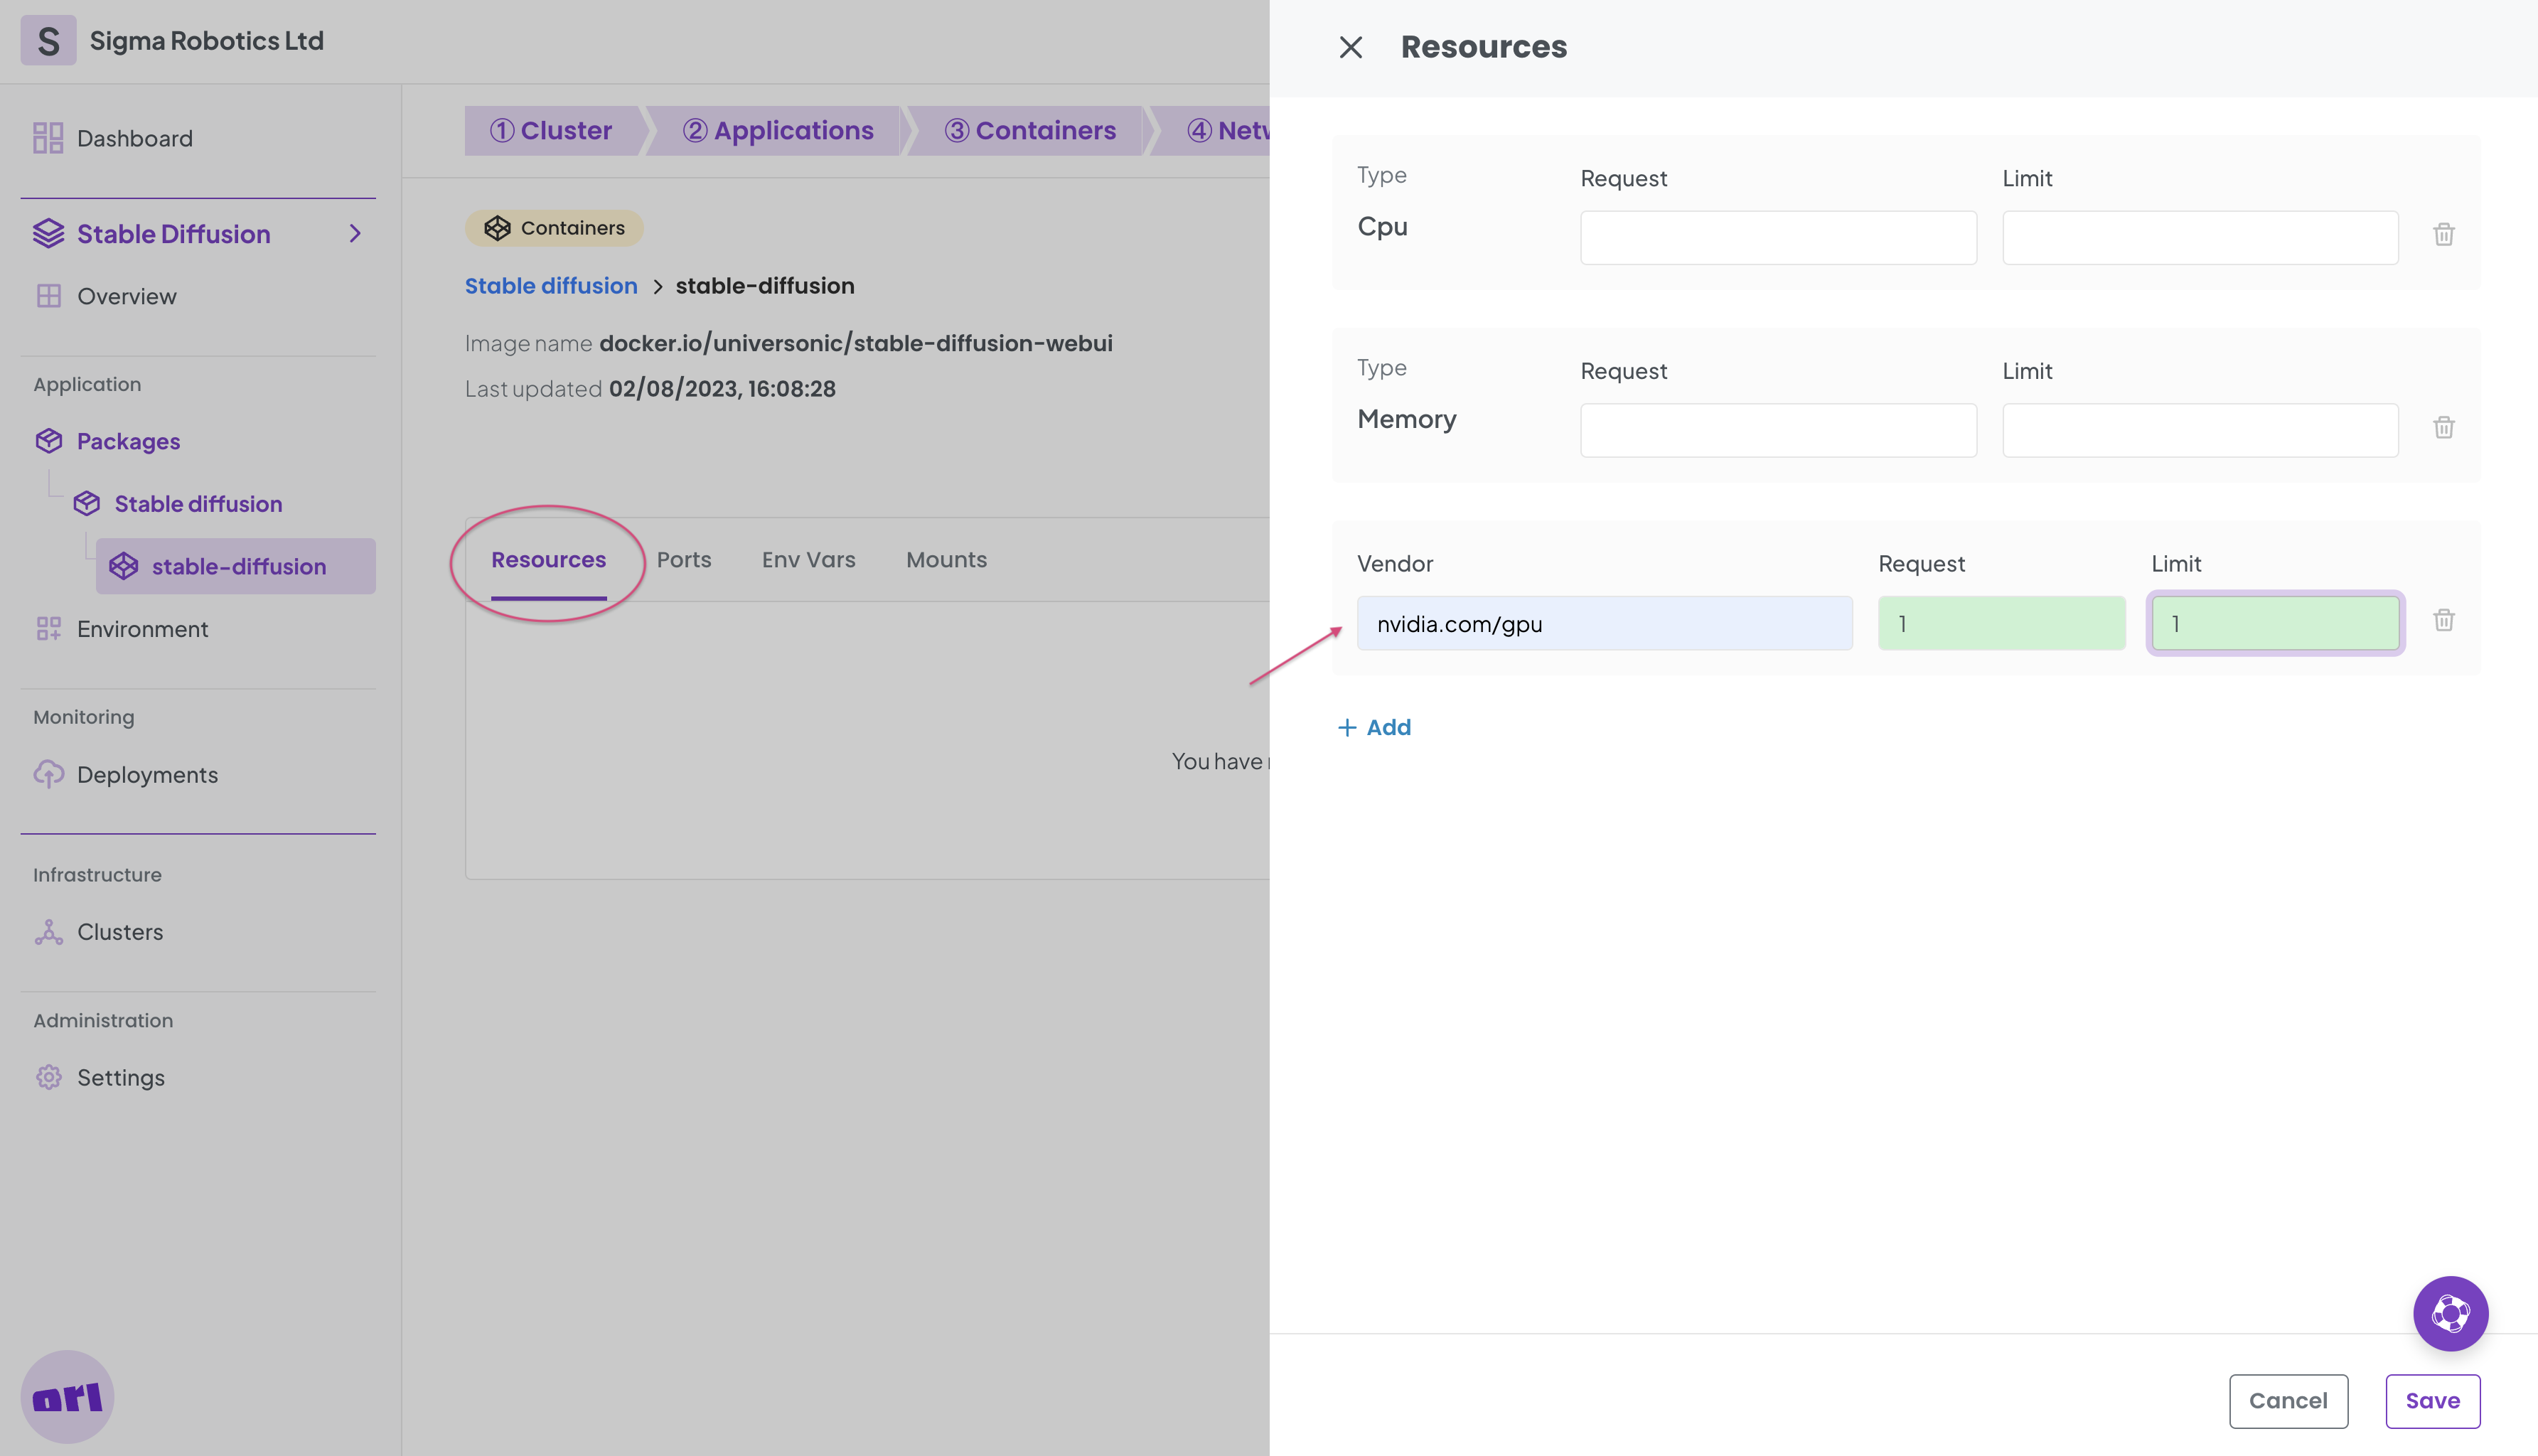
Click the Resources tab and in the form + Add a new resource as shown below. This will ensure the container has access to the nvidia/gpu resource.
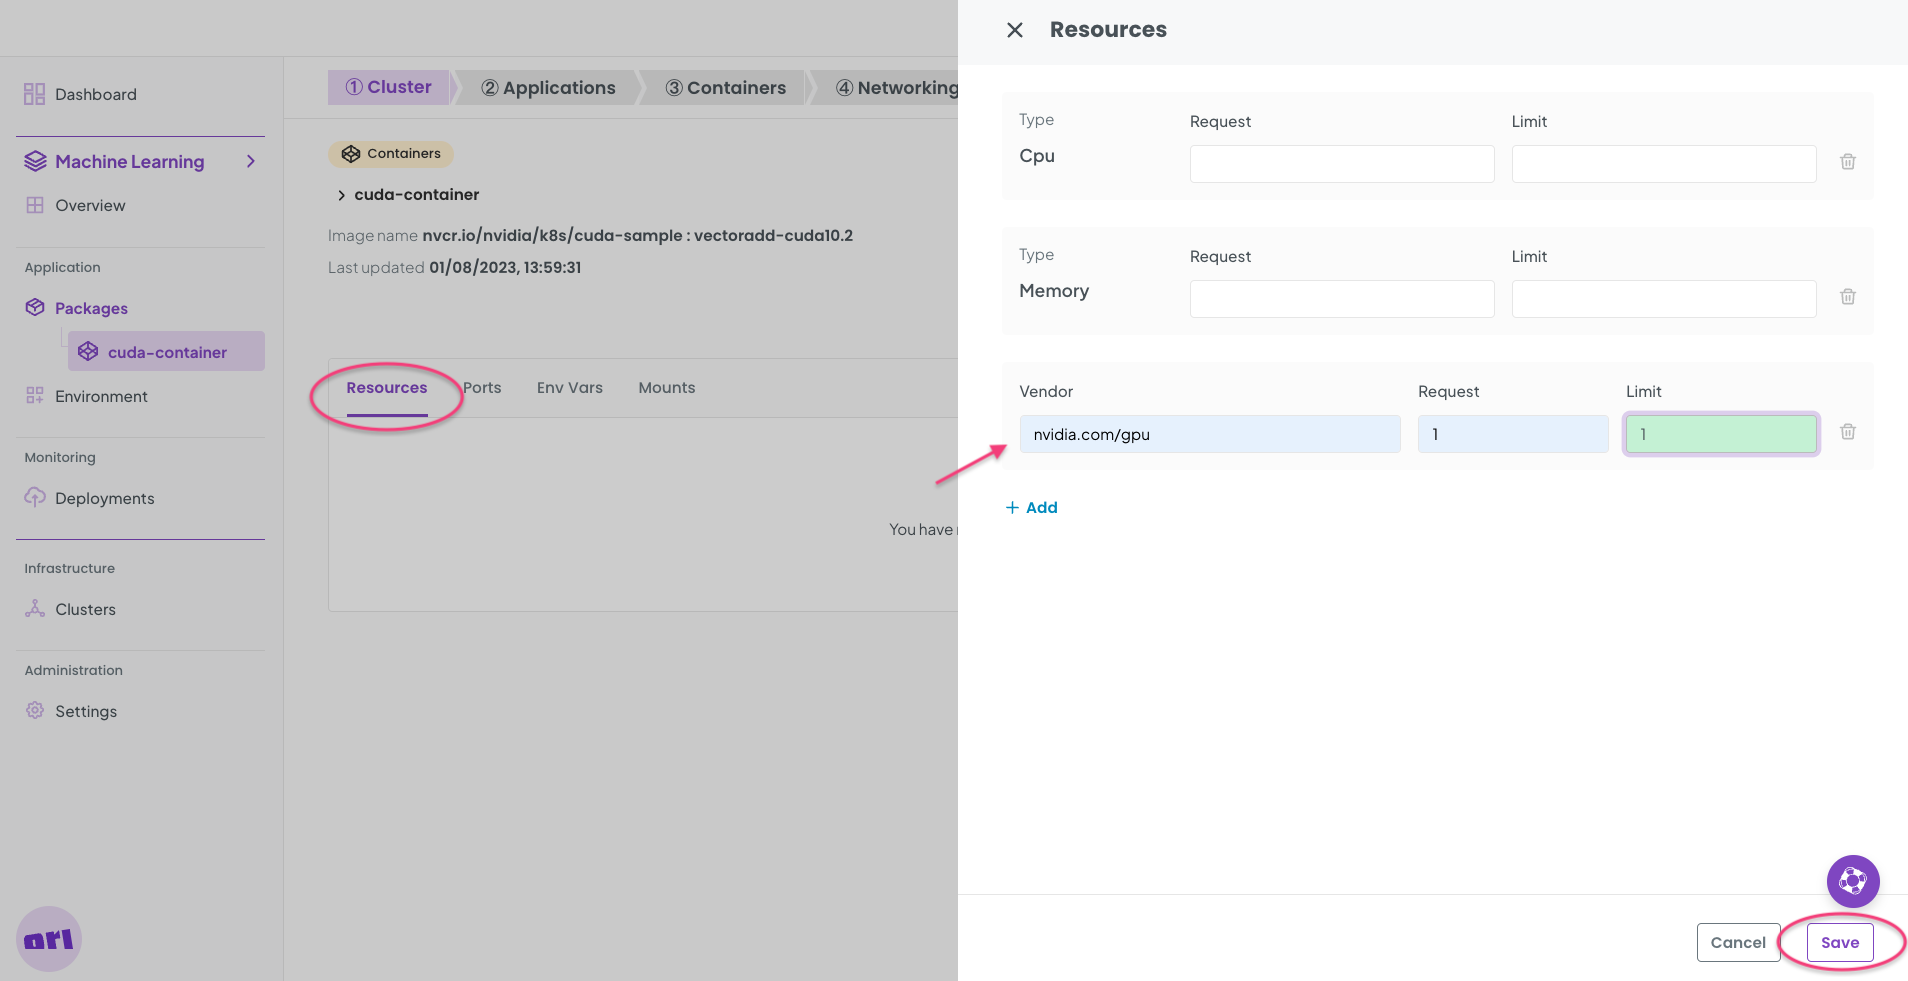
Finally Save the form.
We are now ready to deploy the Cuda test package! Click Deploy and then Continue.
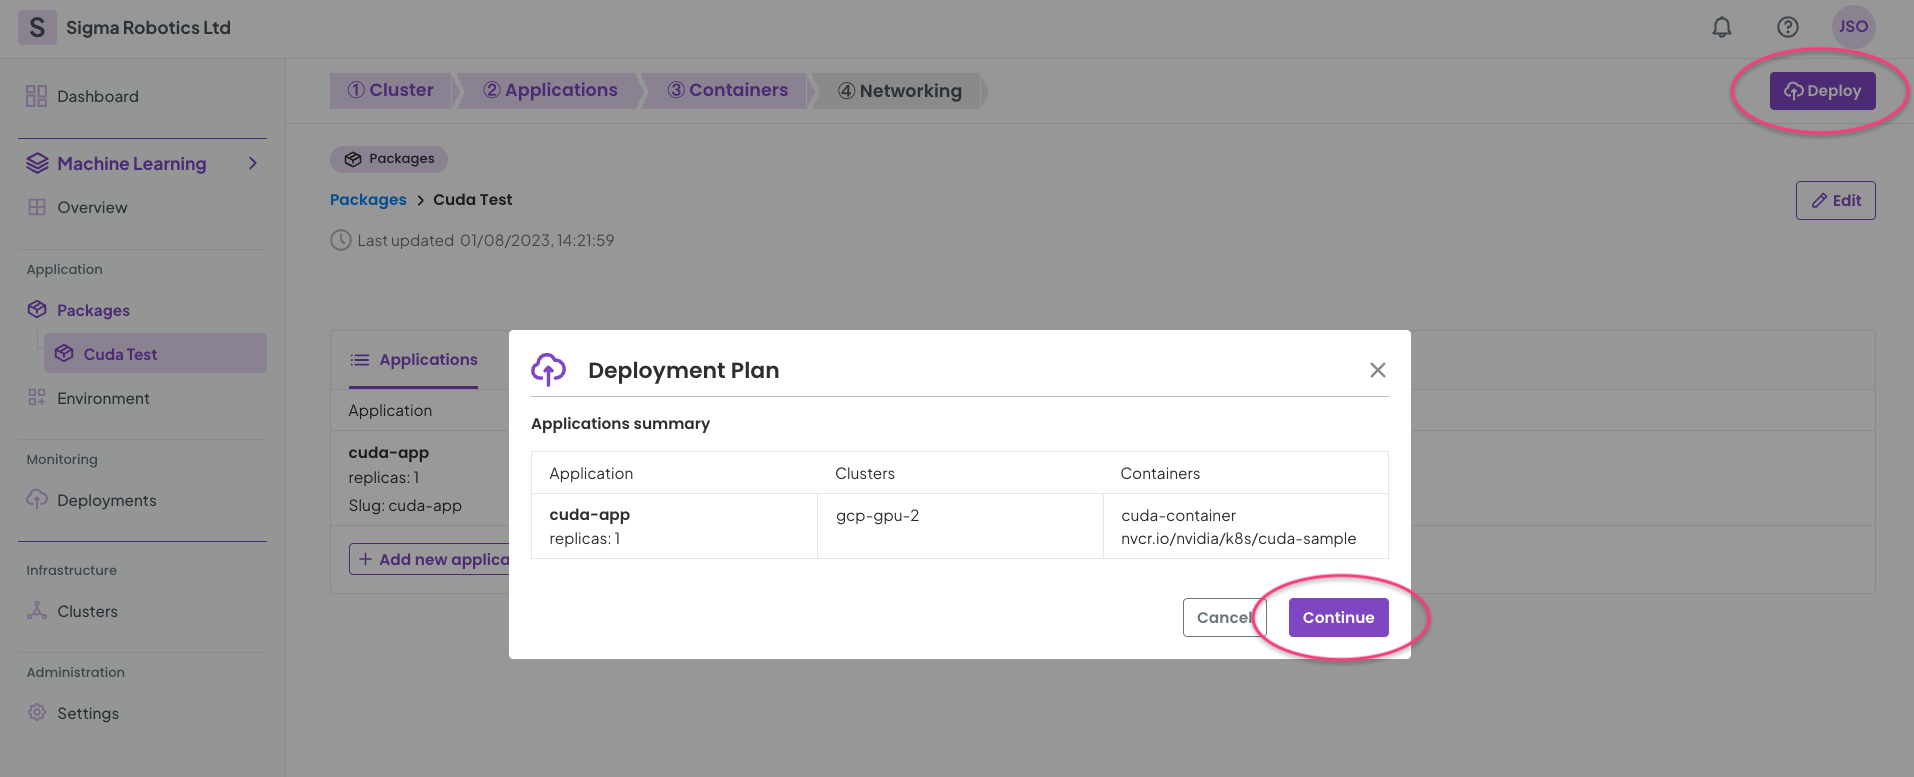
To verify this is running correctly you need to reach out to the cluster CLI again and check the logs of the pod. You should obtain the same output from your running container logs as shown below.
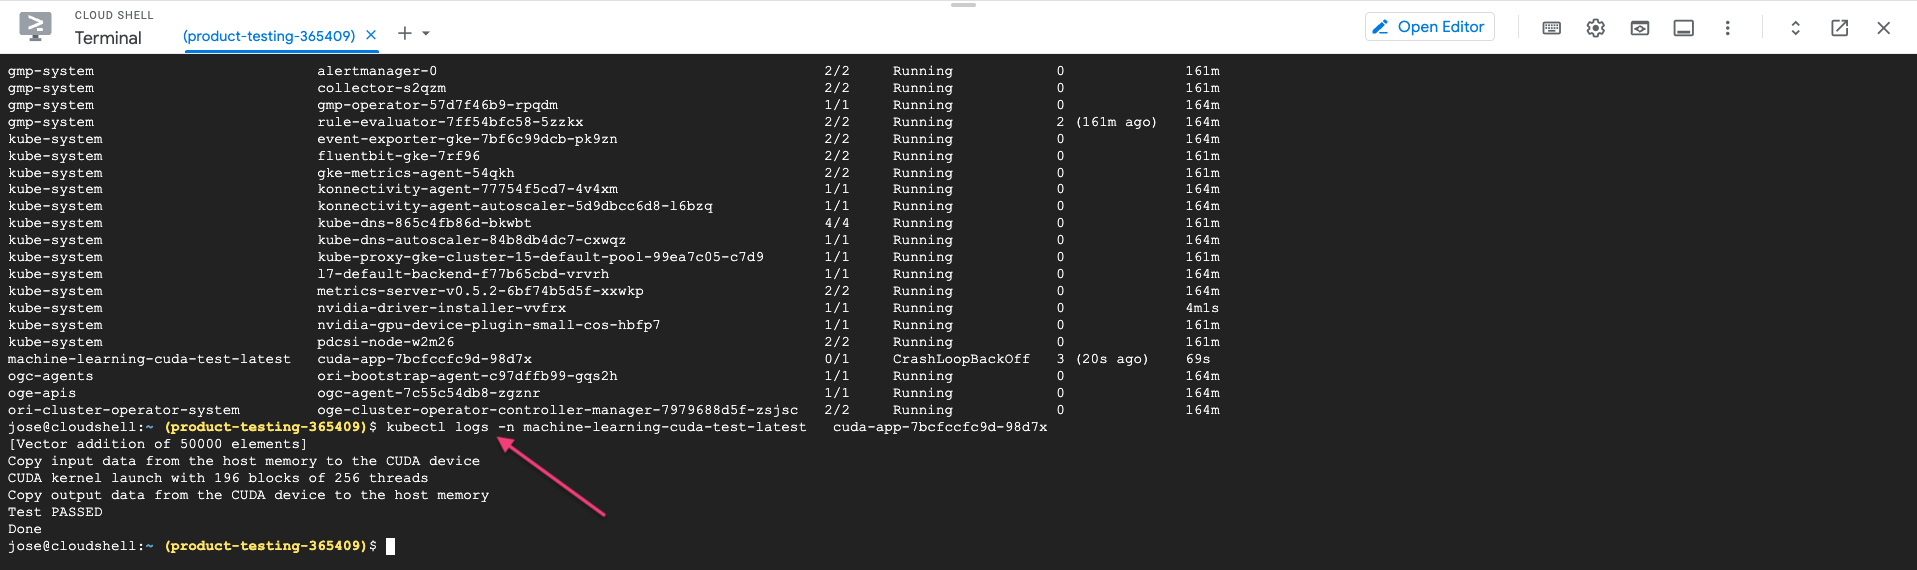
The Cuda test deployment will be either Synchronising or Running. You can Stop it now from the deployment details page or the package details page.
Testing Stable Diffusion Deployment
To test running a Stable Diffusion model follow the steps below.
You will need to create a K8s cluster as above, but with a compatible GPU. I suggest the following choice, but things are always evolving so other GPUs may also work. Dont forget to select Spot VMs to lower the cost.
Now we can build a Stable diffusion package to deploy it.
Start by selecting + Add package from the Packages menu.
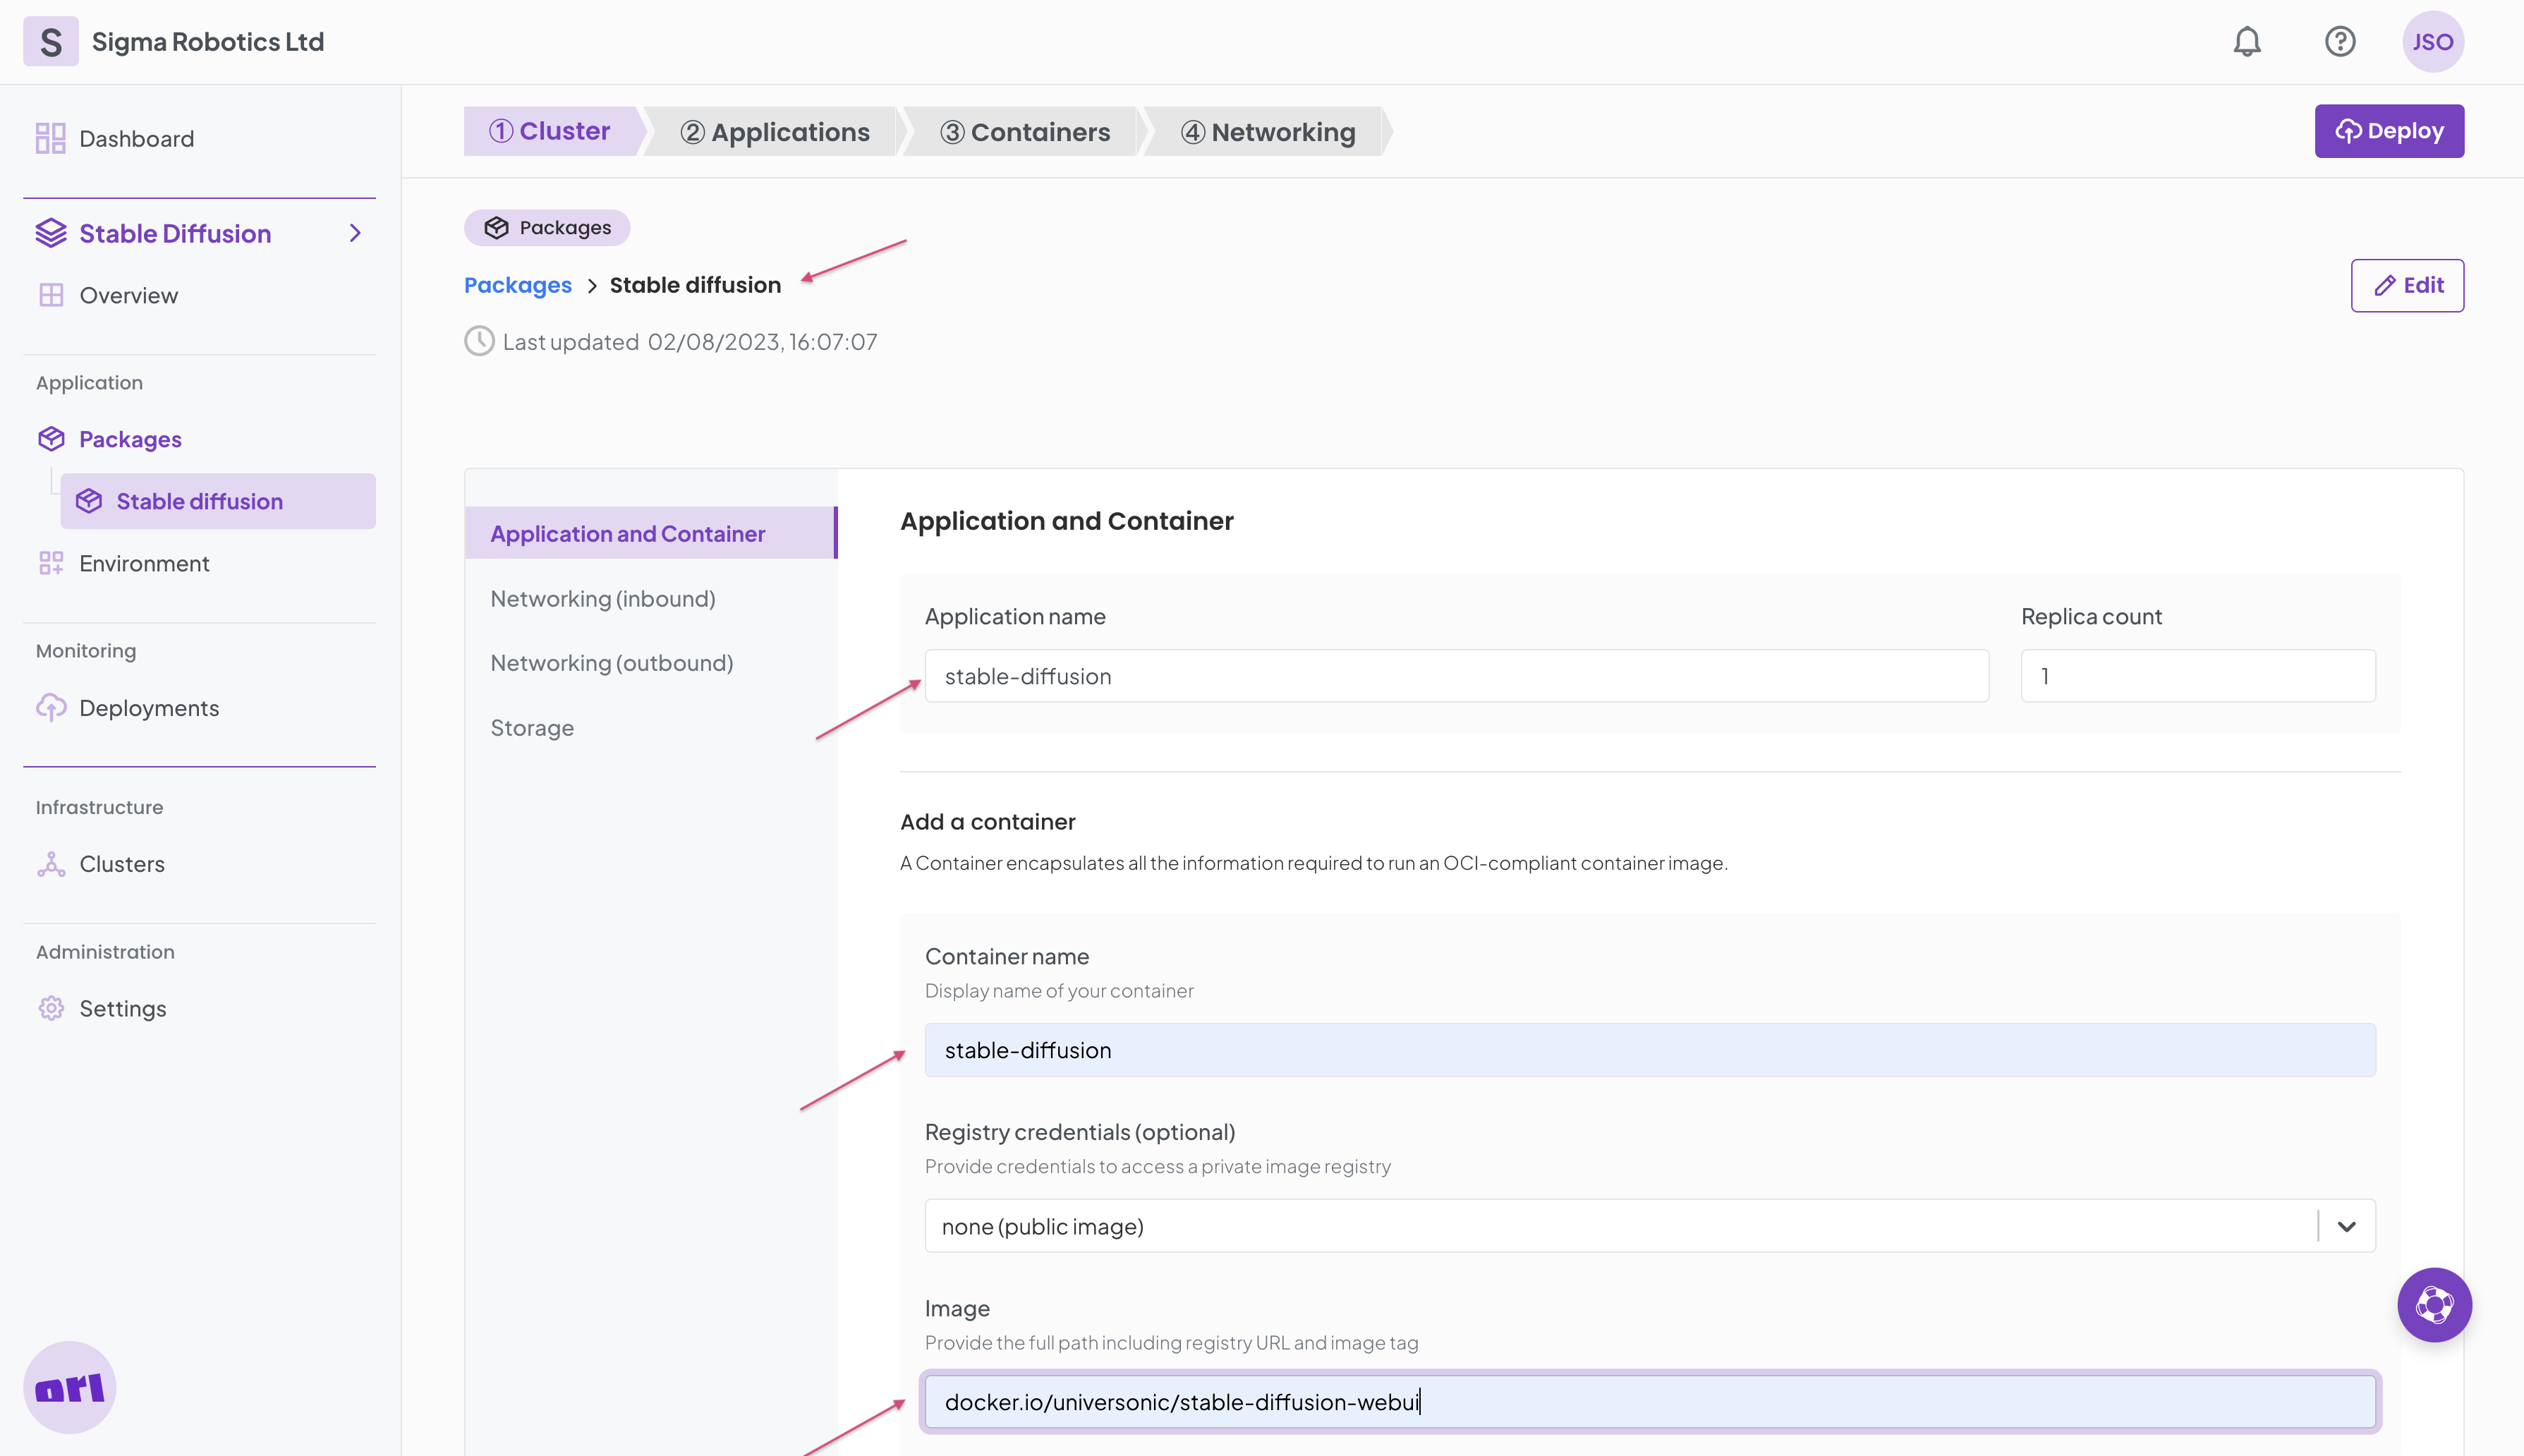
Name your package for example Stable diffusion and fill in the Application and Container form as per below.
In the Networking (inbound) form fill it in as per below.

Skip the outbound and storage tabs.
Now back on the Package details page, select Placement rules and add a rule as per below.
Now select the Applications tab again and select the container.
And as a last step add the the gpu resource.
Now deploy your package!
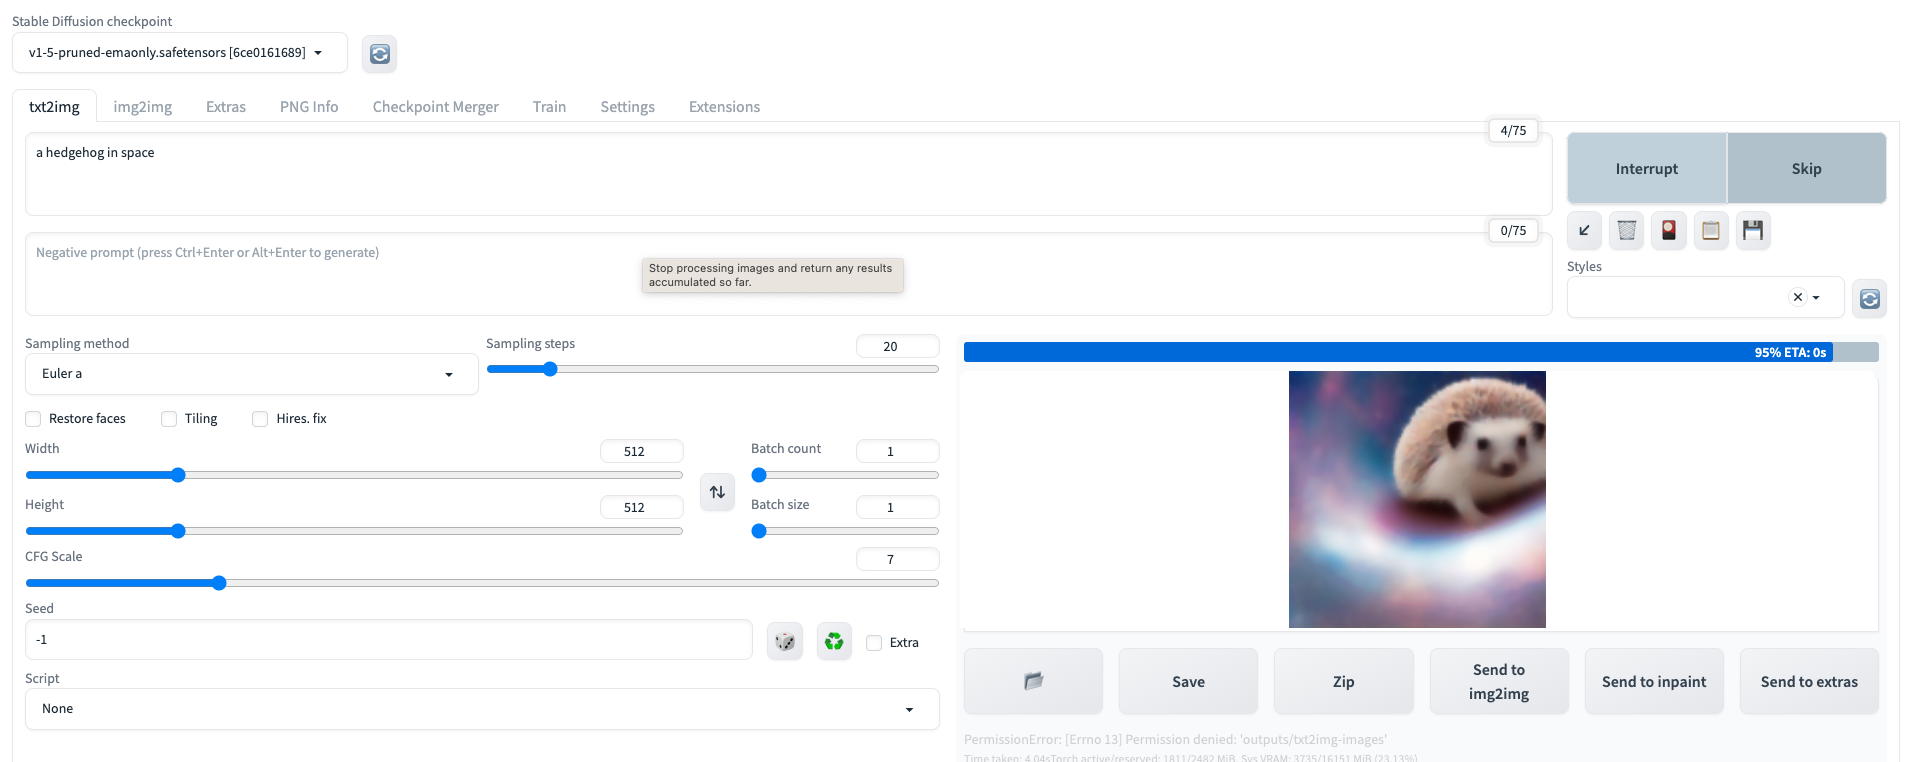
After a while (about 5 mins) you should be able to connect to the stable diffusion UI and you can try the text to image feature. Look for the FQDN on the Deployment details page, cut and paste to your browser and don't forget to add the port number 8080.
You can also use your cluster's CLI to look into the logs of the stable-diffusion pod. Eventually if all works it will finish with the following message logs.
