IP Networking
Understanding IP Networking
The IP Networking configuration tab of a Package enables users to provide three fundamental application networking capabilities on OGC:
- To connect external Clients (called Traffic Sources) to deployed Applications (Compute Workloads)
- To connect Applications to other Applications
- Finally to connect Applications to Remote Endpoints, such as web services or other deployed applications.
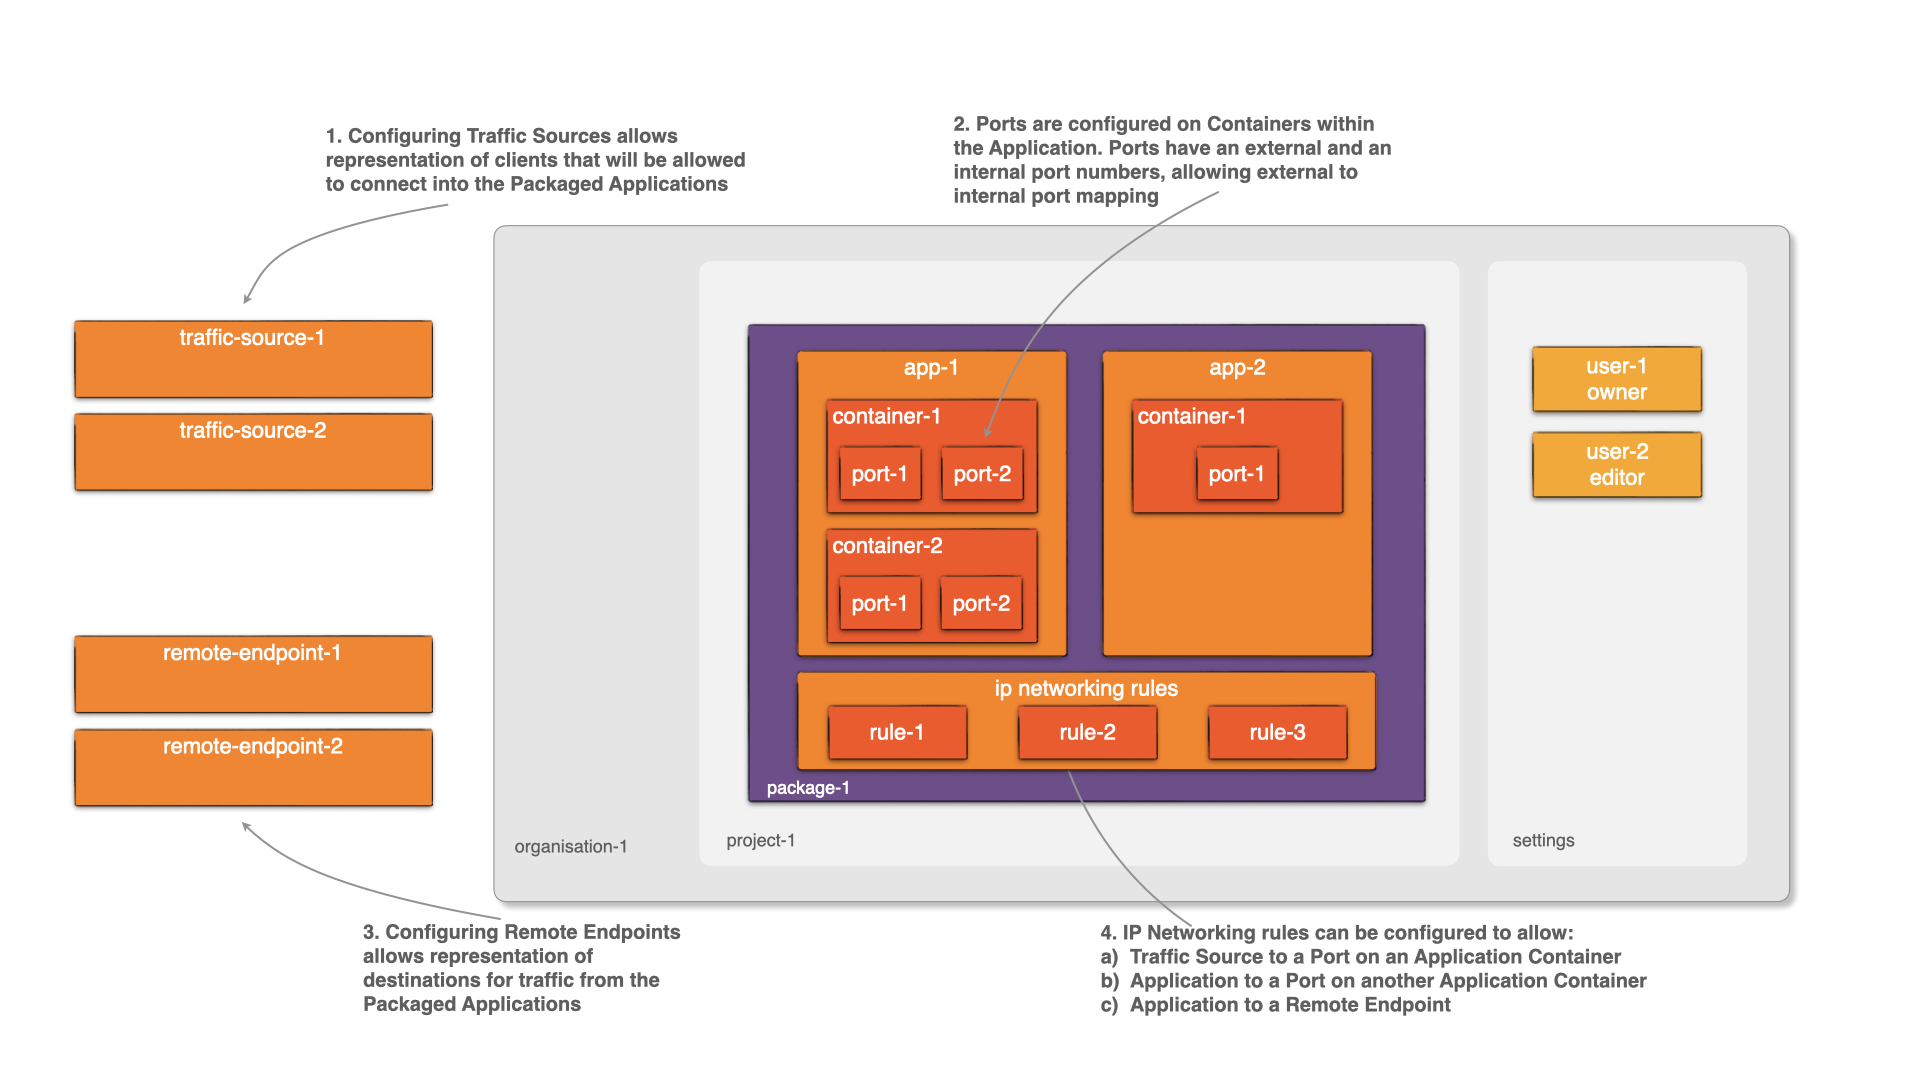
External Client connectivity to an Application
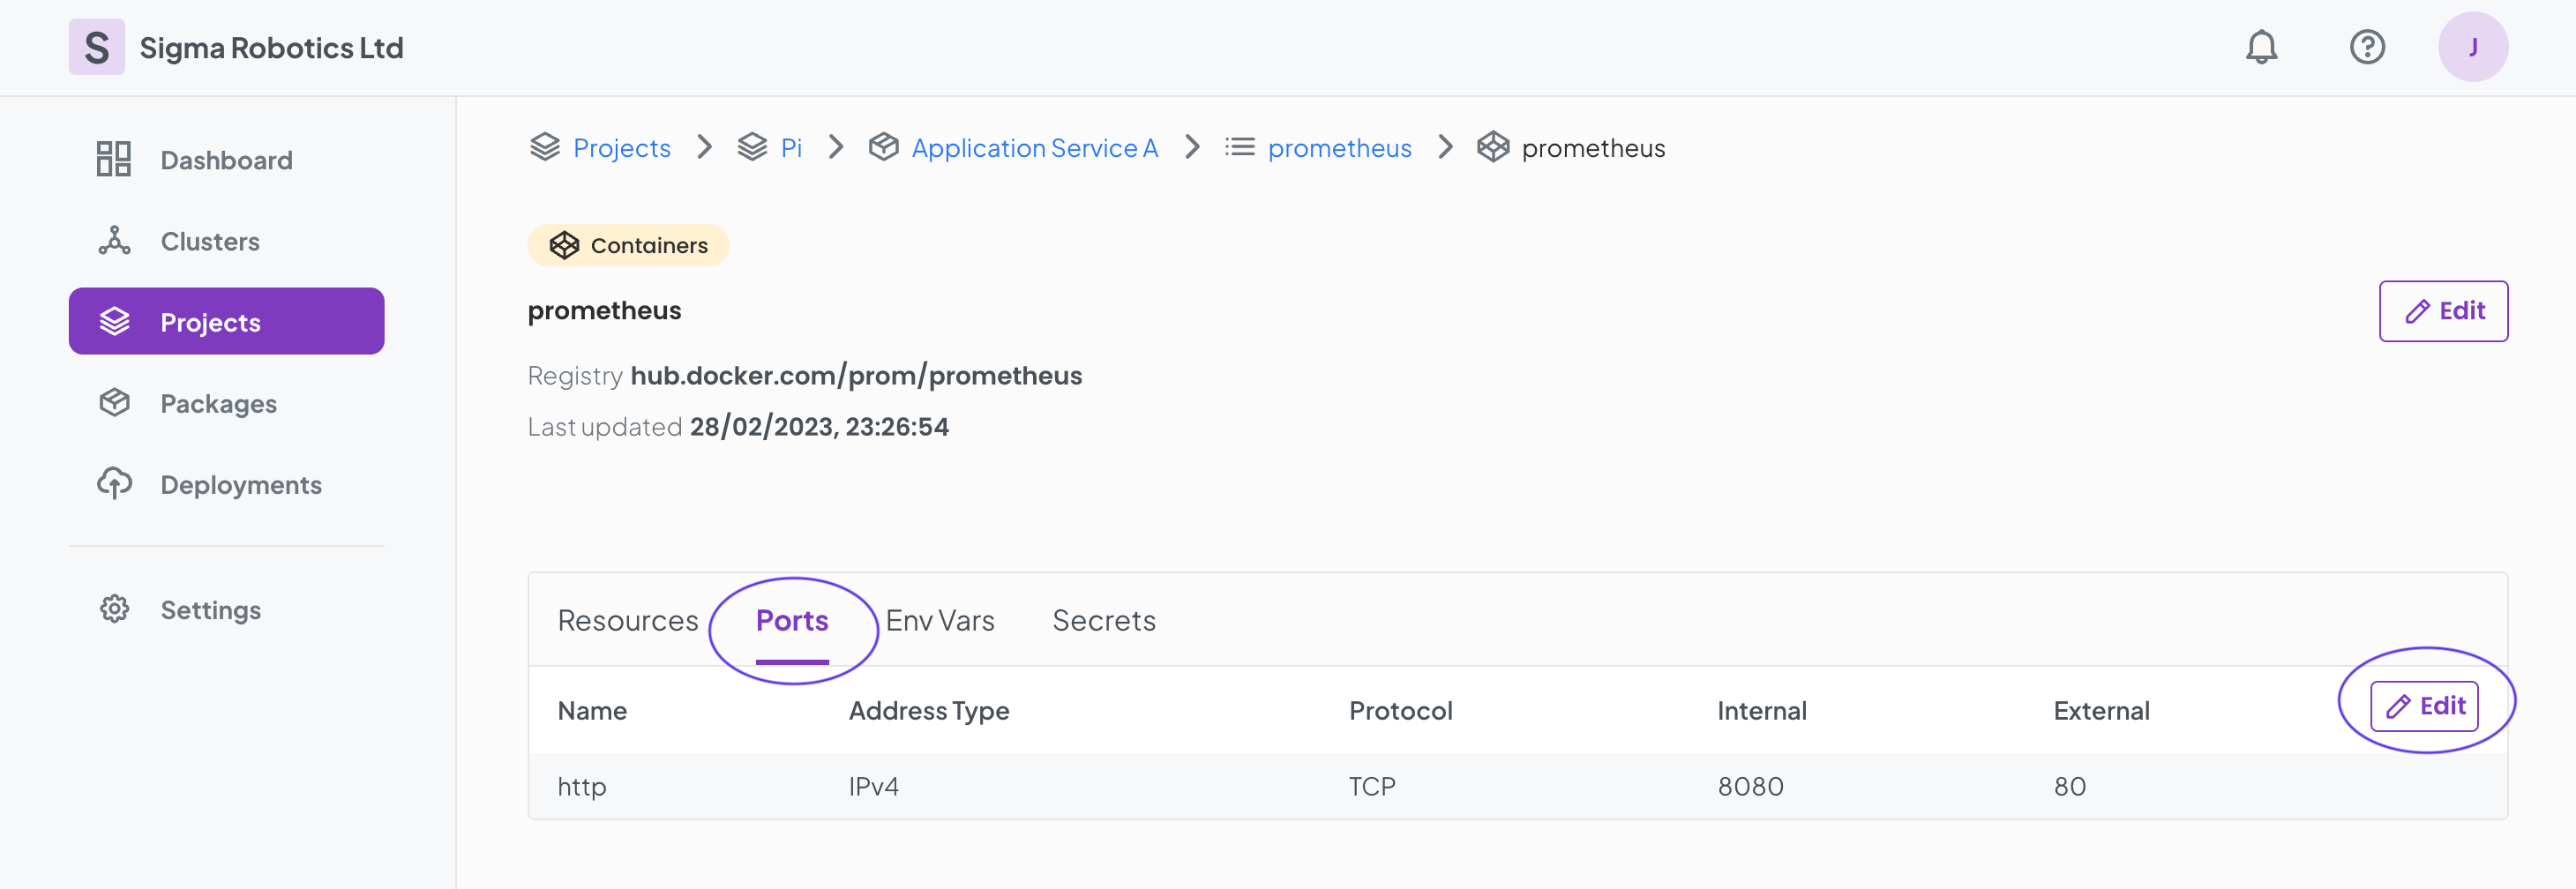
Configuring destination Container ports on Applications
Start by navigating to the Container Details Page.
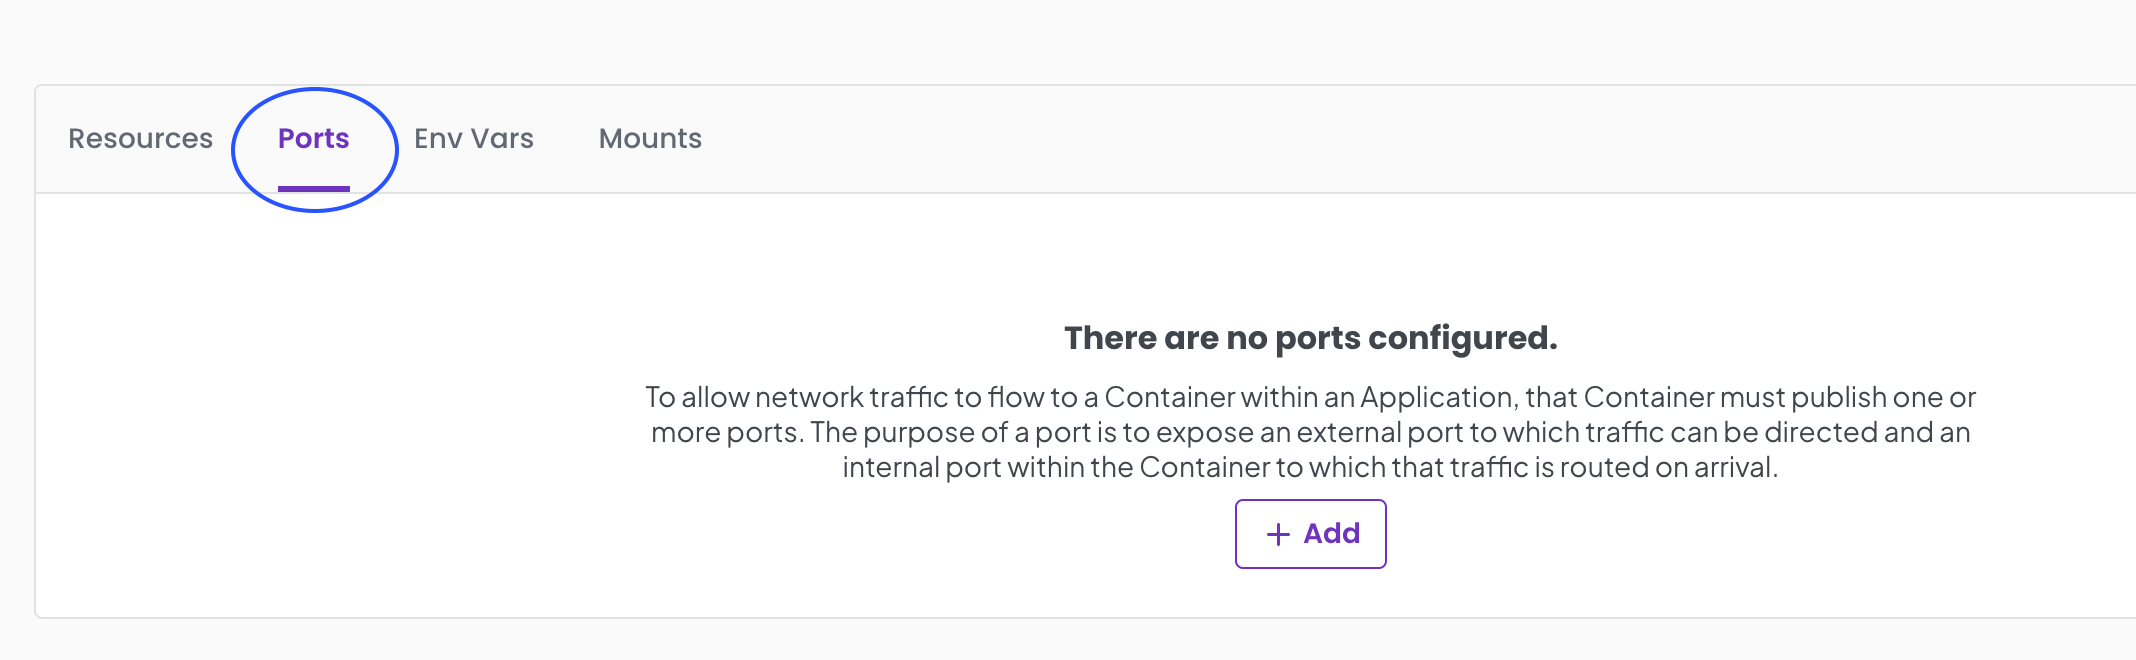
- Select the Ports Tab
- Select the
+ AddorEditif there are already configured ports. - In the modal form add the port configuration information. Provide a name for your port. The IPv6/IPv4 allows different protocols for the IP layer of your port. It is also necessary to specify the transmission protocol (TCP/UDP). You are able to specify an External port different from a configured Internal port on the container.
- Select
Save.
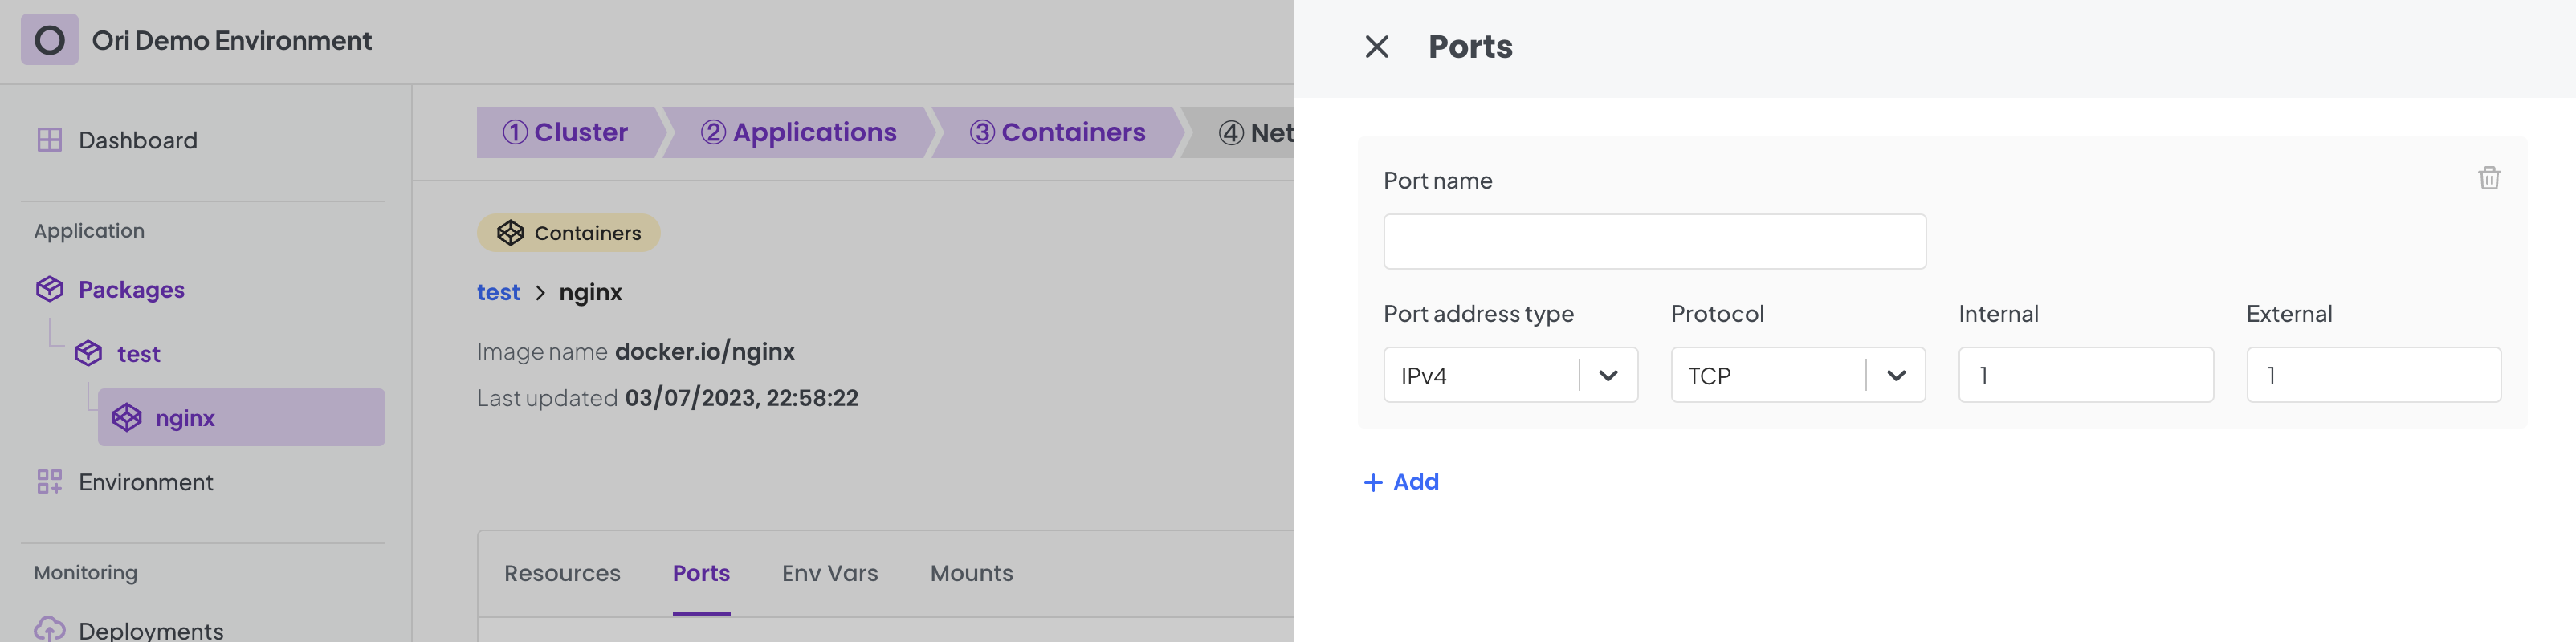
You can add further Ports as necessary.
Configuring Traffic Sources
Start by navigating to the Package Details page.
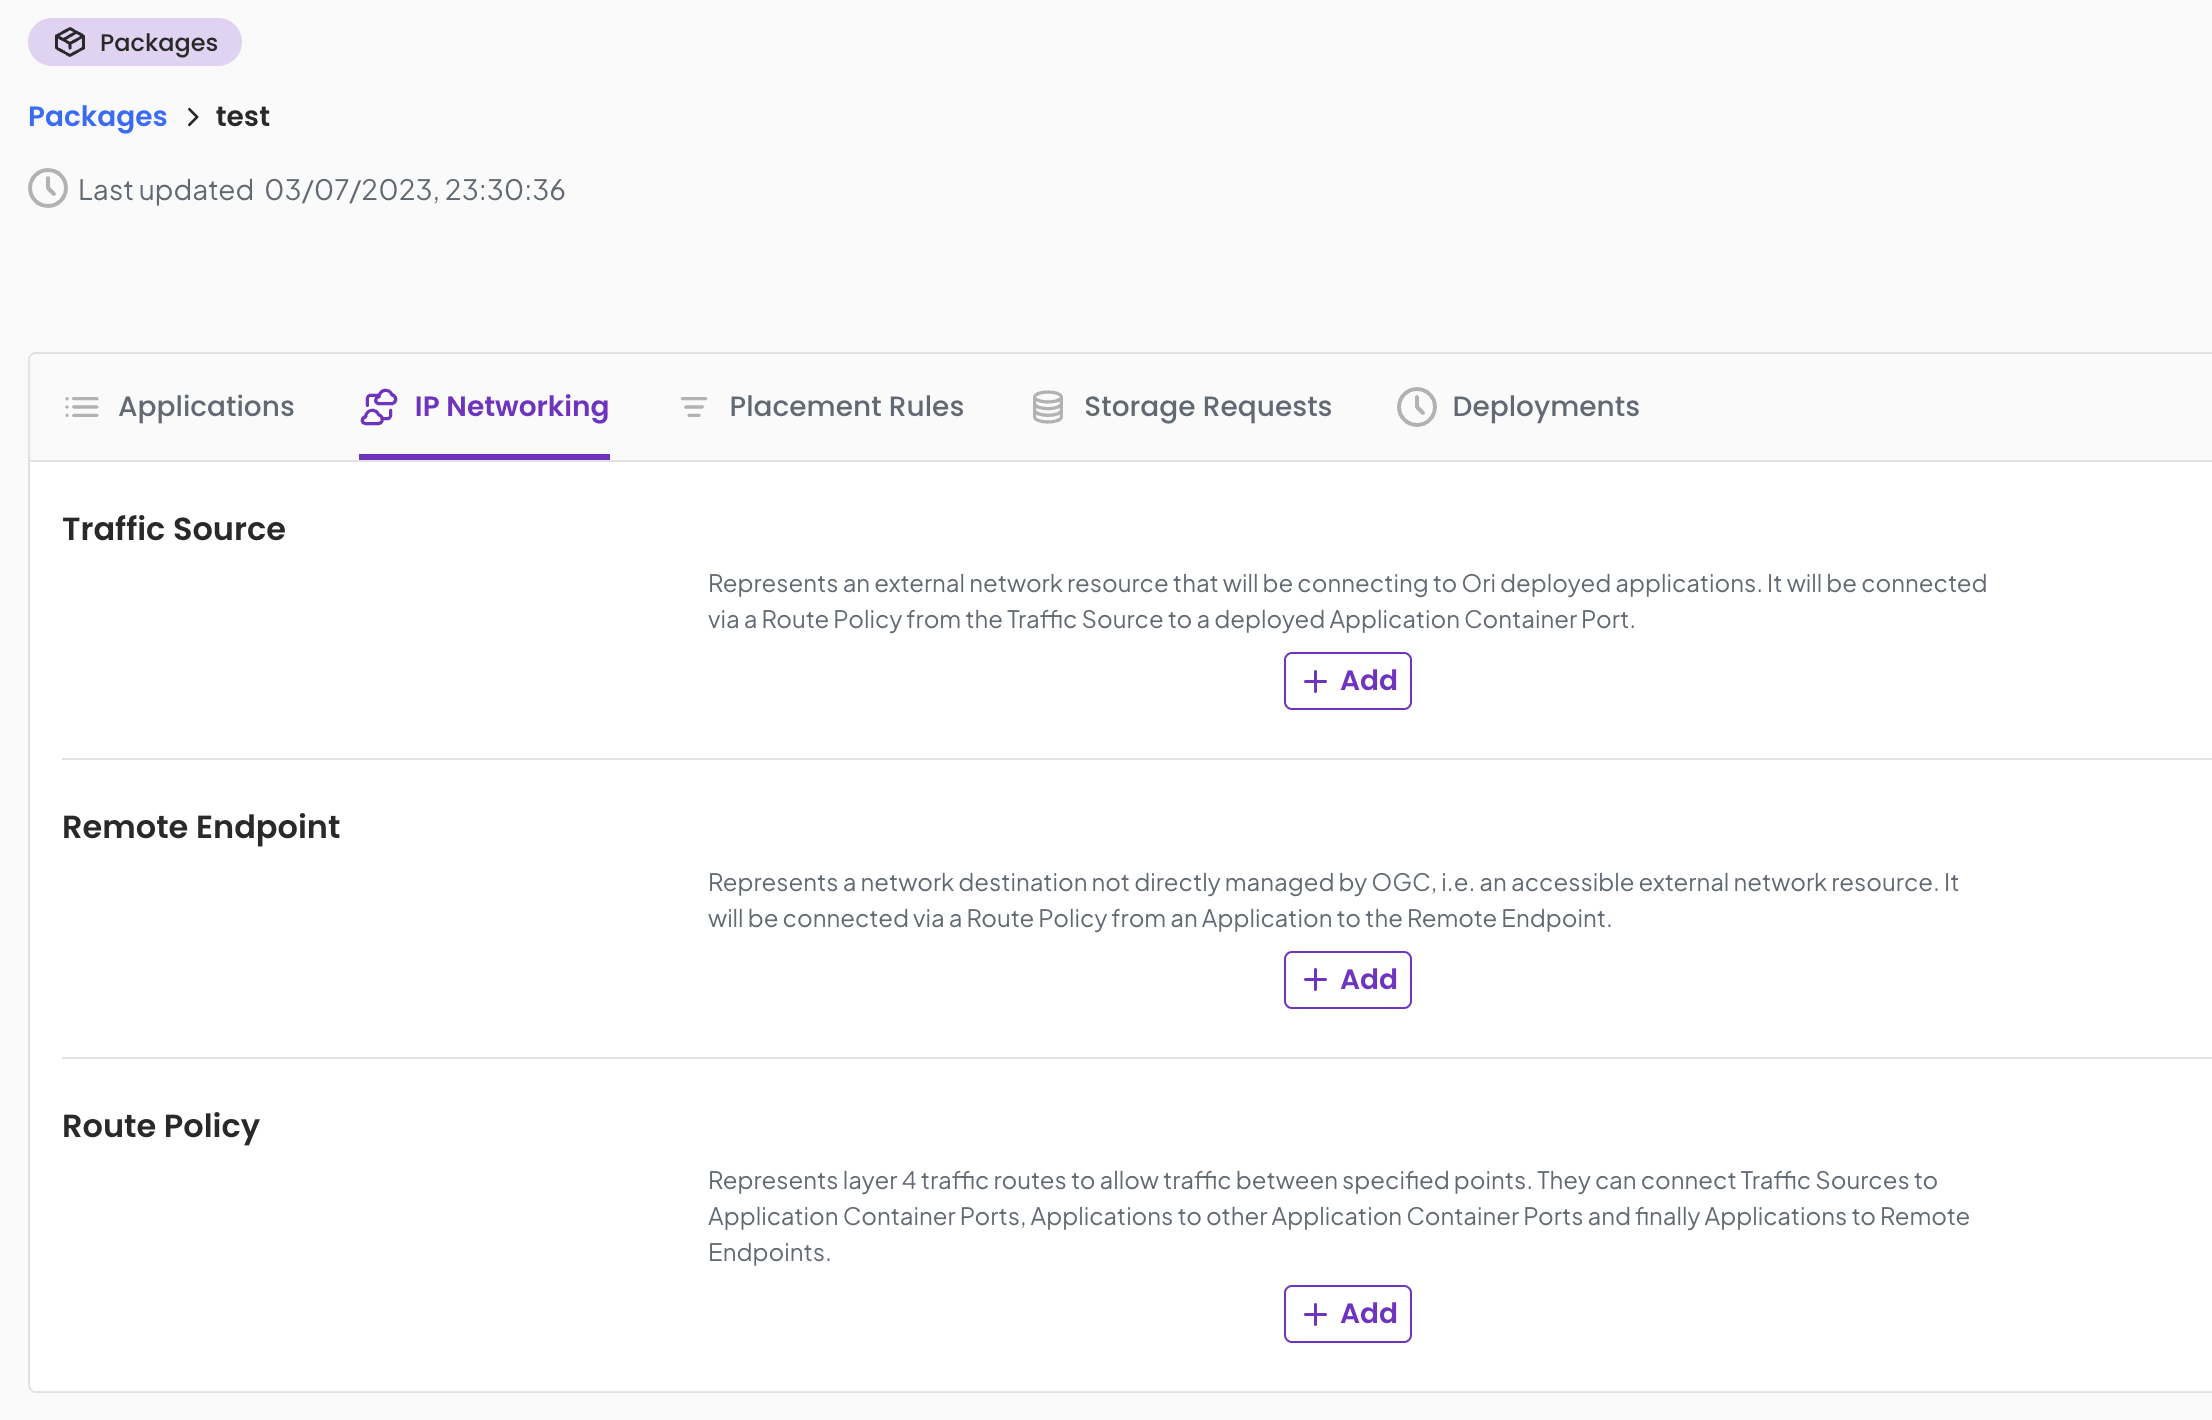
- Select IP Networking Tab on the Package details page
- Select Traffic sources
+ Addbutton - Add a suitable network range - IP Address with netmask in the format a.b.c.d/e
- Select
Save.
You can continue adding as many Traffic sources as per your needs.
Configuring Route Policies to connect Traffic Sources to Applications
- Select IP Networking Tab on the Package details page
- Select Route Policy
+ Addbutton - Choose the required Traffic Source
- Chose the required traffic destination Container port on the Application
- Select
Save.
You can add further Route Policies as necessary.
Application to Application connectivity
Configuring destination Container ports on Applications
Start by navigating to the Container Details Page
- Select the Ports Tab
- Select the
+ AddorEditif there are already configured ports. - In the modal form add the port configuration information. Provide a name for your port. The IPv6/IPv4 allows different protocols for the IP layer of your port. It is also necessary to specify the transmission protocol (TCP/UDP). You are able to specify an External port different from a configured Internal port on the container.
- Click
Saveto keep your changes.
You can add further Ports as necessary.
Configuring Route Policies to connect Applications to other Applications
- Select IP Networking Tab on the Package details page
- Select Route Policies
+ Addbutton - Choose the required Source Type (Application) and then the Application to be the source of traffic
- Chose the required destination Container port on the Destination Application
- Select
Save.

You can add further Route policies as necessary.
Application to Remote Endpoint connectivity
Configuring Remote Endpoints
Start by navigating to the IP Networking tab on the Package details page.
- Select the Remote Endpoints
+ Add - In the modal form add the port configuration information. Provide a name for the remote destination. Select the IP protocol version (IPv6/IPv4). Provide an address range in the format a.b.c.d/e or equivalent IPv6 range. It is also necessary to specify the transmission protocol (TCP/UDP). A port number is also required.

You can add further Remote Endpoints as necessary.
Configuring Route Policies to connect Applications to Remote Endpoints
- Select IP Networking Tab on the Package details page
- Select Route Policies
+ Addbutton - Choose the required Application to be the source of traffic
- Chose the required traffic destination Remote Endpoint name
- Select
Create.
You can add further route policies as necessary.